You’re not alone if you’ve heard of eSIM and iSIM but aren’t sure what the differences are. These two terms are frequently used while discussing new phones and devices, and their significance is growing by the day. So, what exactly is the difference between eSIM and iSIM? Let us get started.
What is eSIM?
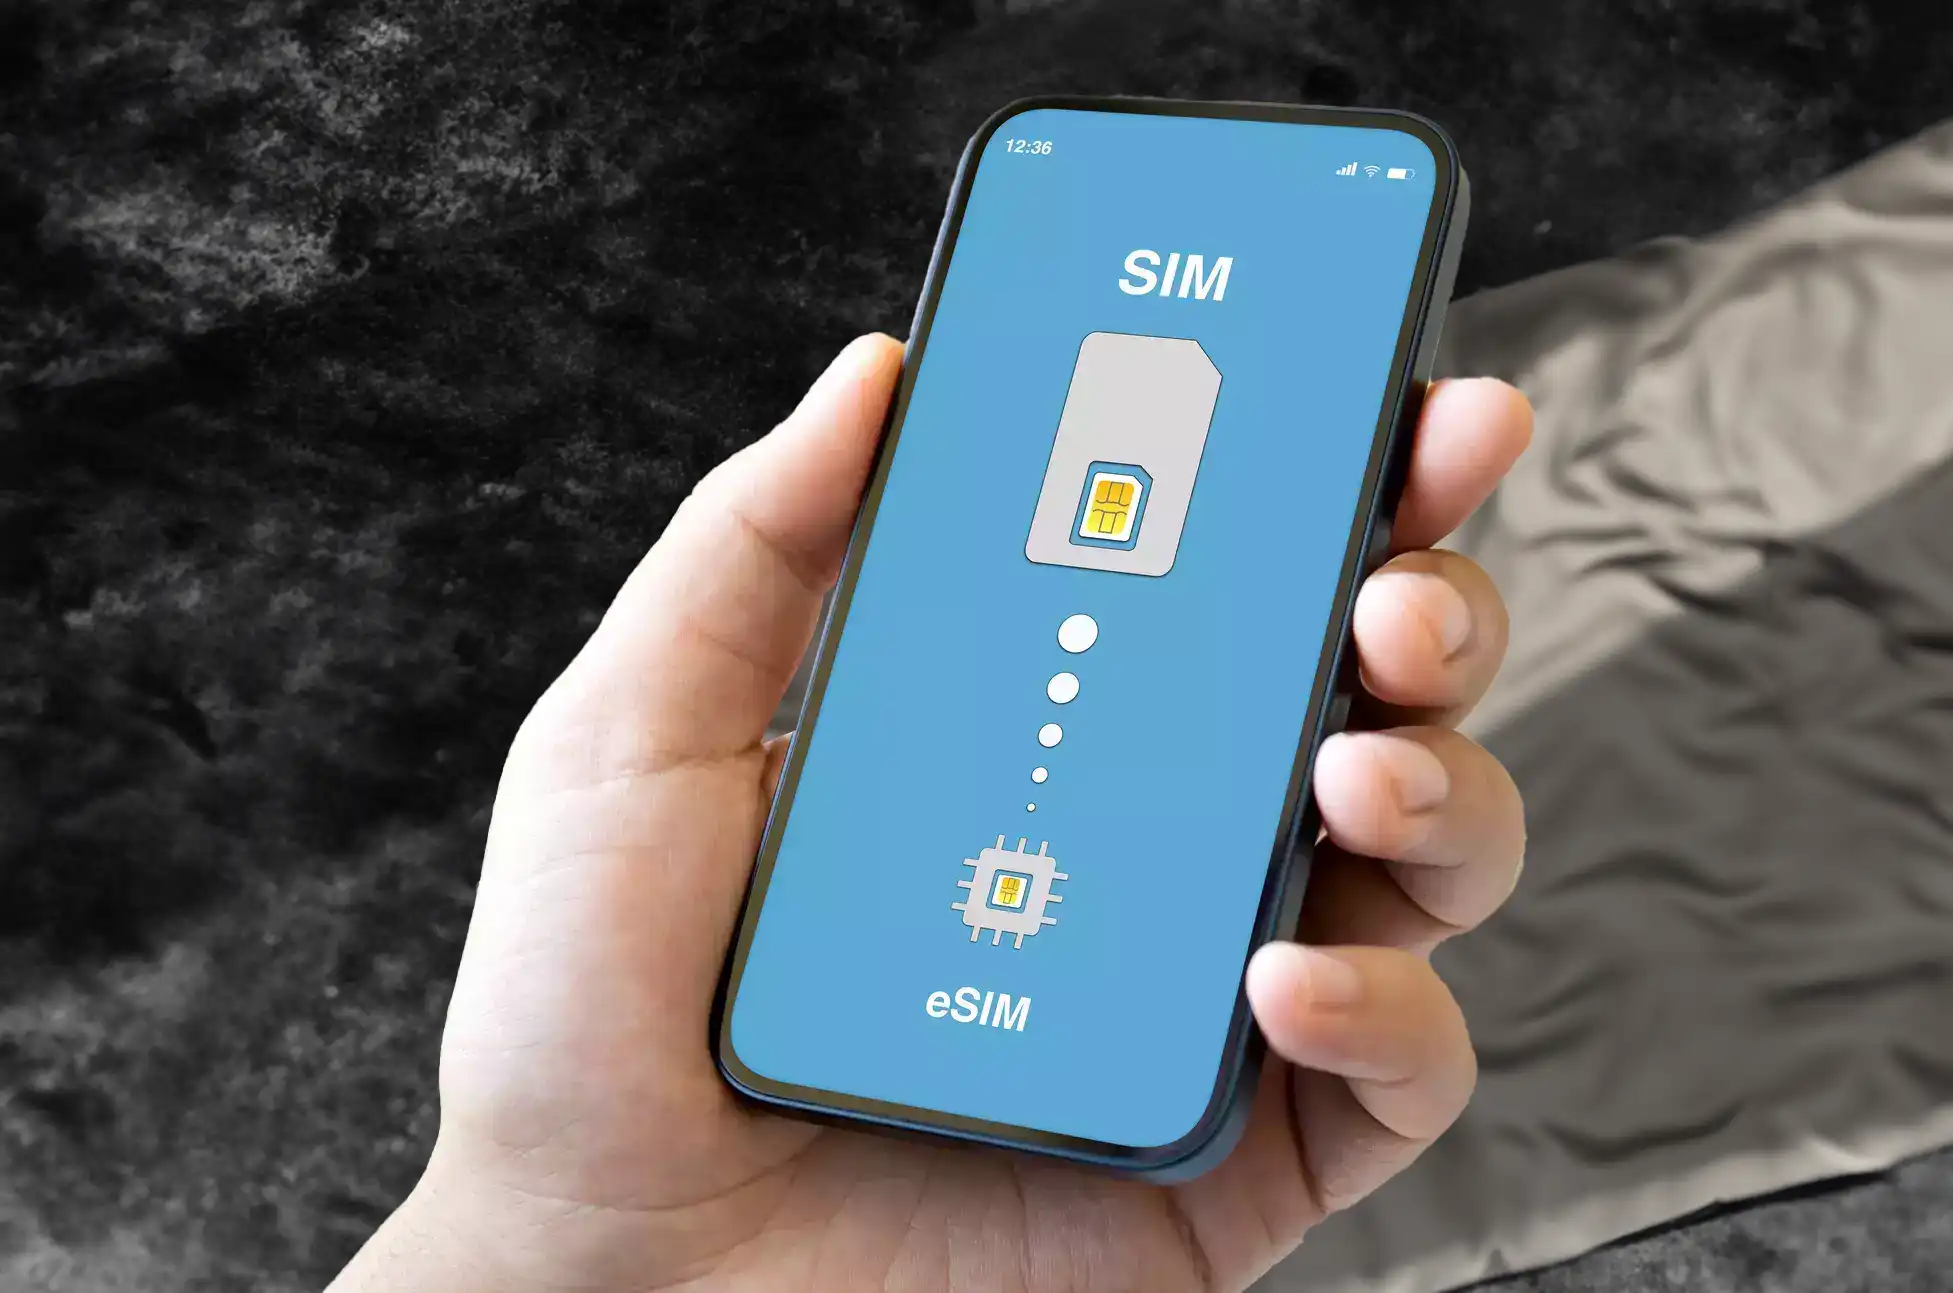
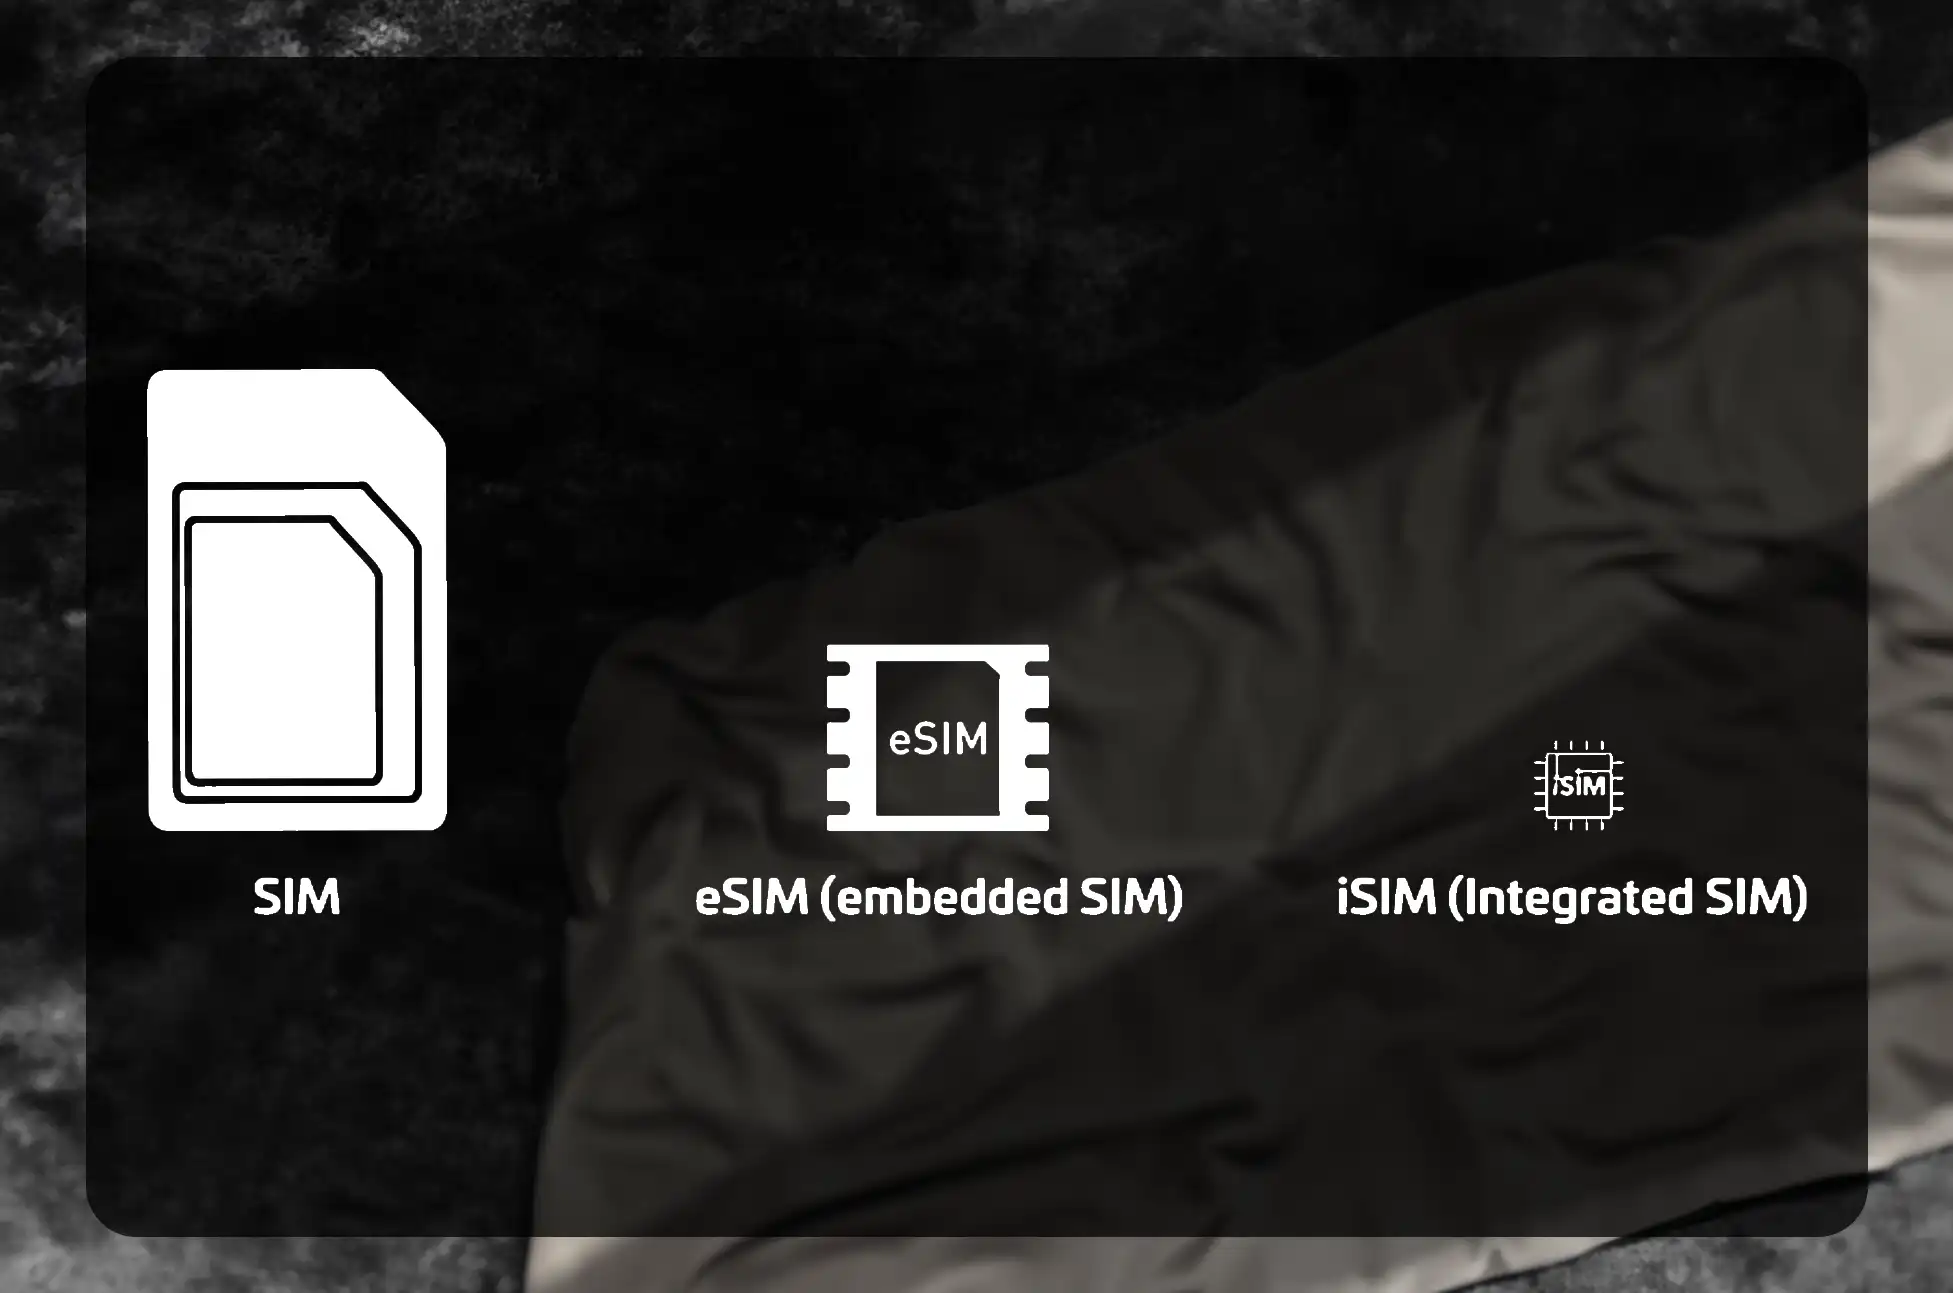
eSIM stands for “Embedded SIM,” and unlike the little card you may recall inserting into the side of your phone, an eSIM is embedded directly into the phone itself. Nothing needs to be added; it’s already there.
eSIM Highlights
Built-in: No more struggling with little cards.
Remote Switch: Do you want to switch services? No need for a new card if you do it online.
Multiple Plans: Store various subscriptions or phone numbers on the same device. Convenient for travel or business.
The best thing about eSIMs is how small they are. Even though Nano-SIMs are tiny, eSIMs are even tinier—three times smaller, in fact. This means your phone has extra space for stuff like a better camera or a larger battery. Plus, it’s one less place where water or dirt could get in.
With an eSIM, you can also keep your regular SIM card. This is great for having both your work and personal numbers on one phone. If you’re going on a trip, you can even add a local SIM to save on data costs. A lot of new phones let you use eSIM just for data, making it extra useful when you’re out of the country.
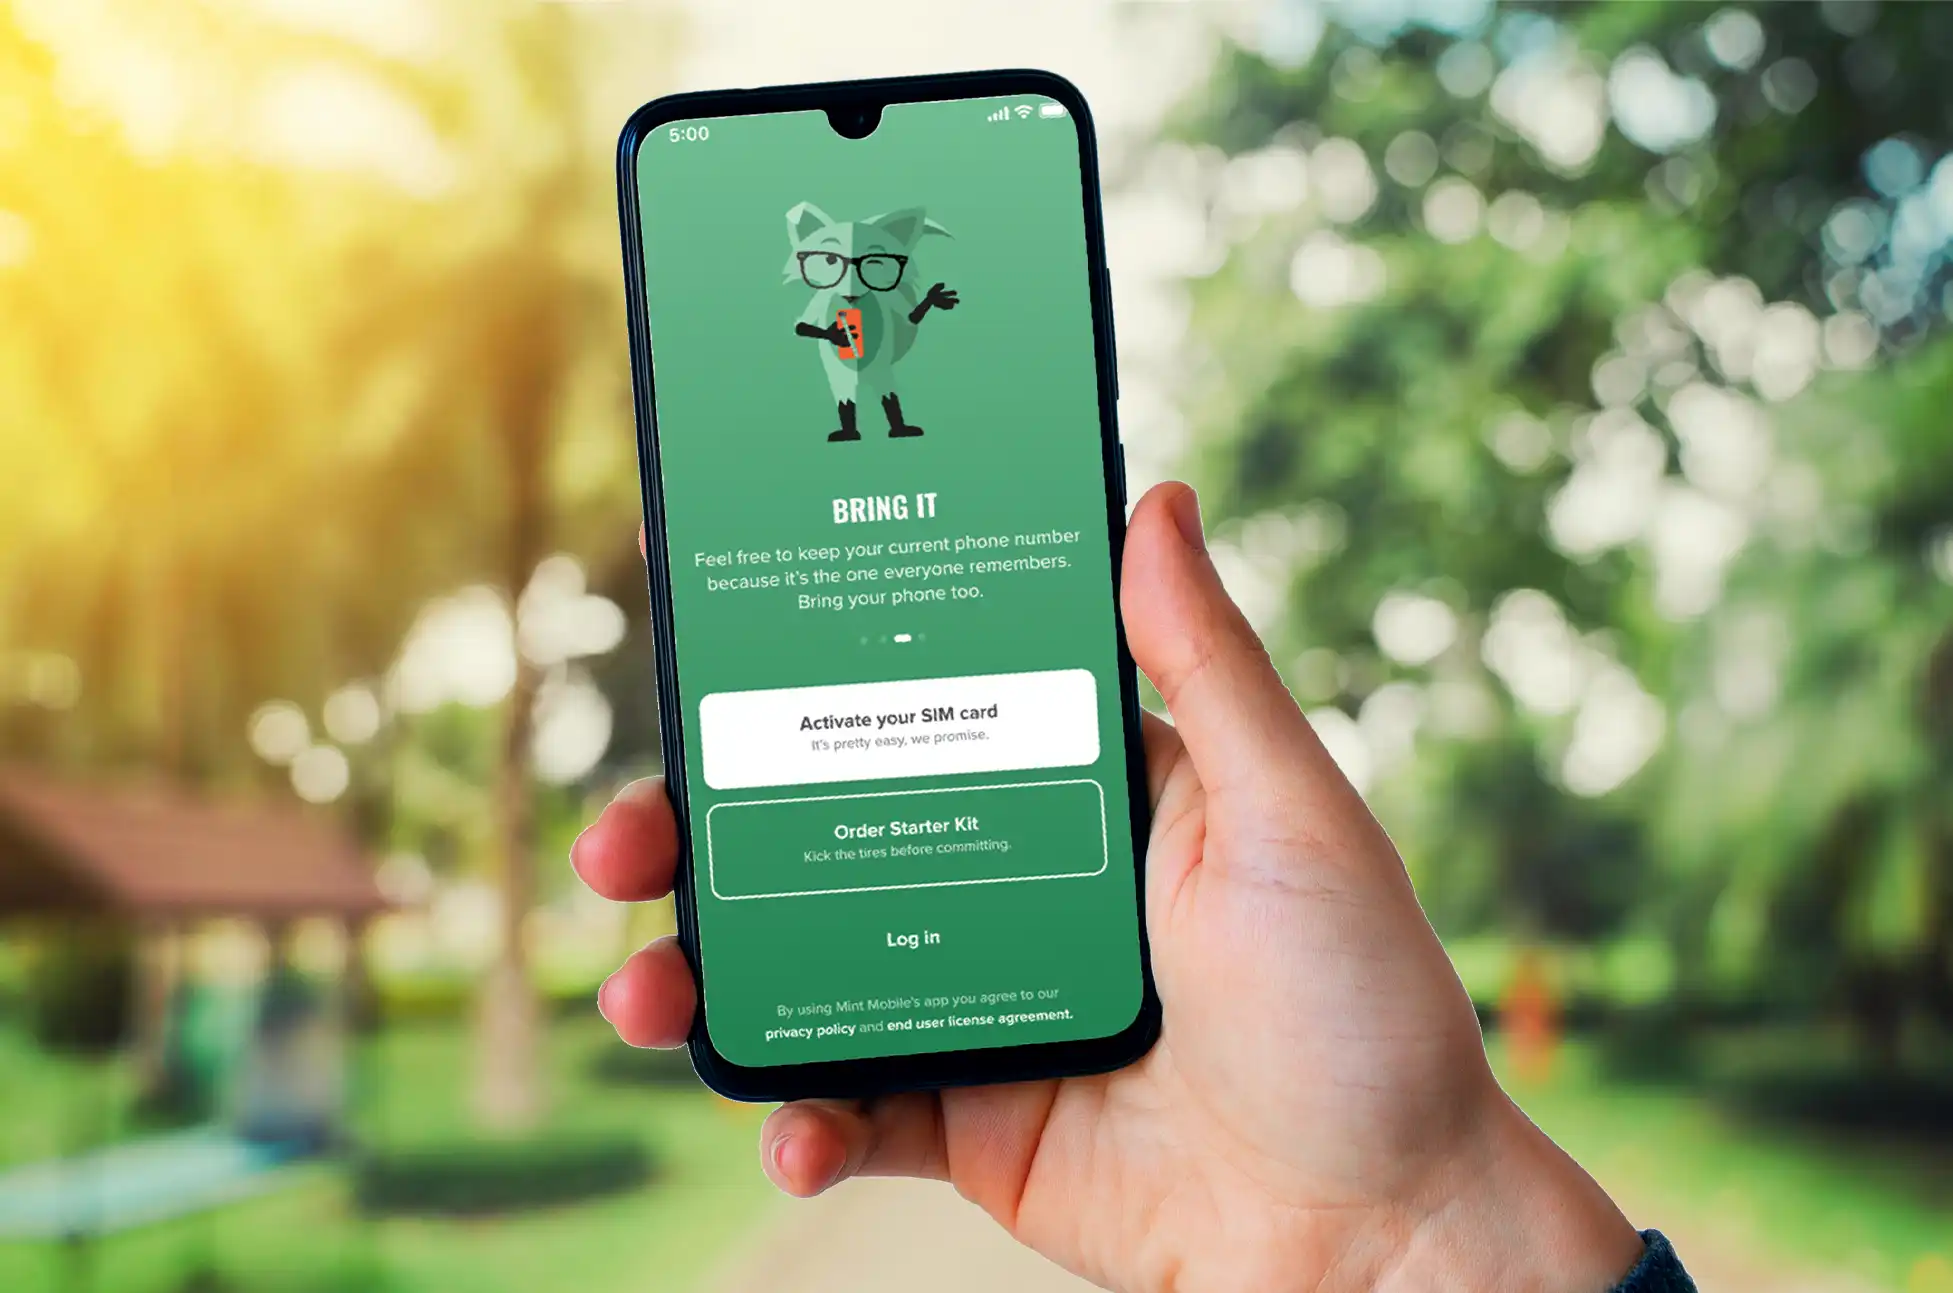
Getting an eSIM set up is different than a regular SIM. Each phone carrier has its own way to do it, so just make sure to follow the steps they give you.
Keep in mind, not every phone can use eSIMs. Most new, high-end phones can, including most Androids and all new iPhones. Before you decide to get an eSIM, double-check if your phone can use it. Also, make sure your phone plan supports eSIM, especially if you’re on a cheaper, prepaid plan. Some smaller carriers don’t offer eSIM support.
What is iSIM?
iSIM stands for “Integrated SIM,” and it expands on the concept of an eSIM. Instead of having its own slot in the phone, iSIM is integrated int\ the phone’s primary computer chip.
iSIM Highlights
Smaller: It takes up less space on your phone.
Cheaper: Lower costs result from fewer individual parts.
Extra Safe: Its built-in security measures make it an excellent choice for smart homes and other connected devices.
iSIM is the newest kind of SIM card, and it’s even more built into your phone. It’s so small because it doesn’t need any extra parts to work. It was made by a company called ARM mainly for smart gadgets around your home, like doorbells that connect to the internet.
You might think iSIMs are just like eSIMs, but they’re actually better in some ways. They’re safer, use less battery, and work with more networks.
Key Difference between eSIM and iSIM
When comparing eSIM and iSIM, several key aspects set them apart.
Size and Cost
eSIMs are already a leap forward as they’re built directly into your device, saving some space. However, iSIMs go even further by being part of the device’s main computer chip, offering the ultimate in space and cost savings.
Flexibility
With eSIMs, you have the luxury of switching carriers without the need for a physical SIM card, all done remotely. iSIMs offer similar flexibility, although they are not as widely used as eSIMs at this time.
Security
eSIMs offer a sturdy design that’s hard to mess with since they’re built into the device. iSIMs elevate this security by being integrated right into the main chip, providing the highest level of security among the two.
Conclusion
eSIM and iSIM are both present-day ways of connecting your devices without the hassle of a physical card. eSIM is more widespread and provides greater flexibility, whereas iSIM is emerging as a safe and cost-effective choice, particularly for connected devices in your home or business.
Knowing the distinction between eSIM and iSIM will help you make more informed decisions when purchasing your next phone or linked device.
All products, and company names, logos, and service marks (collectively the "Trademarks") displayed are registered® and/or unregistered
trademarks™ of their respective owners.
The authors of this web site are not sponsored by or affiliated with any of the third-party trade mark or third-party registered trade mark owners,
and make no representations about them, their owners, their products or services.
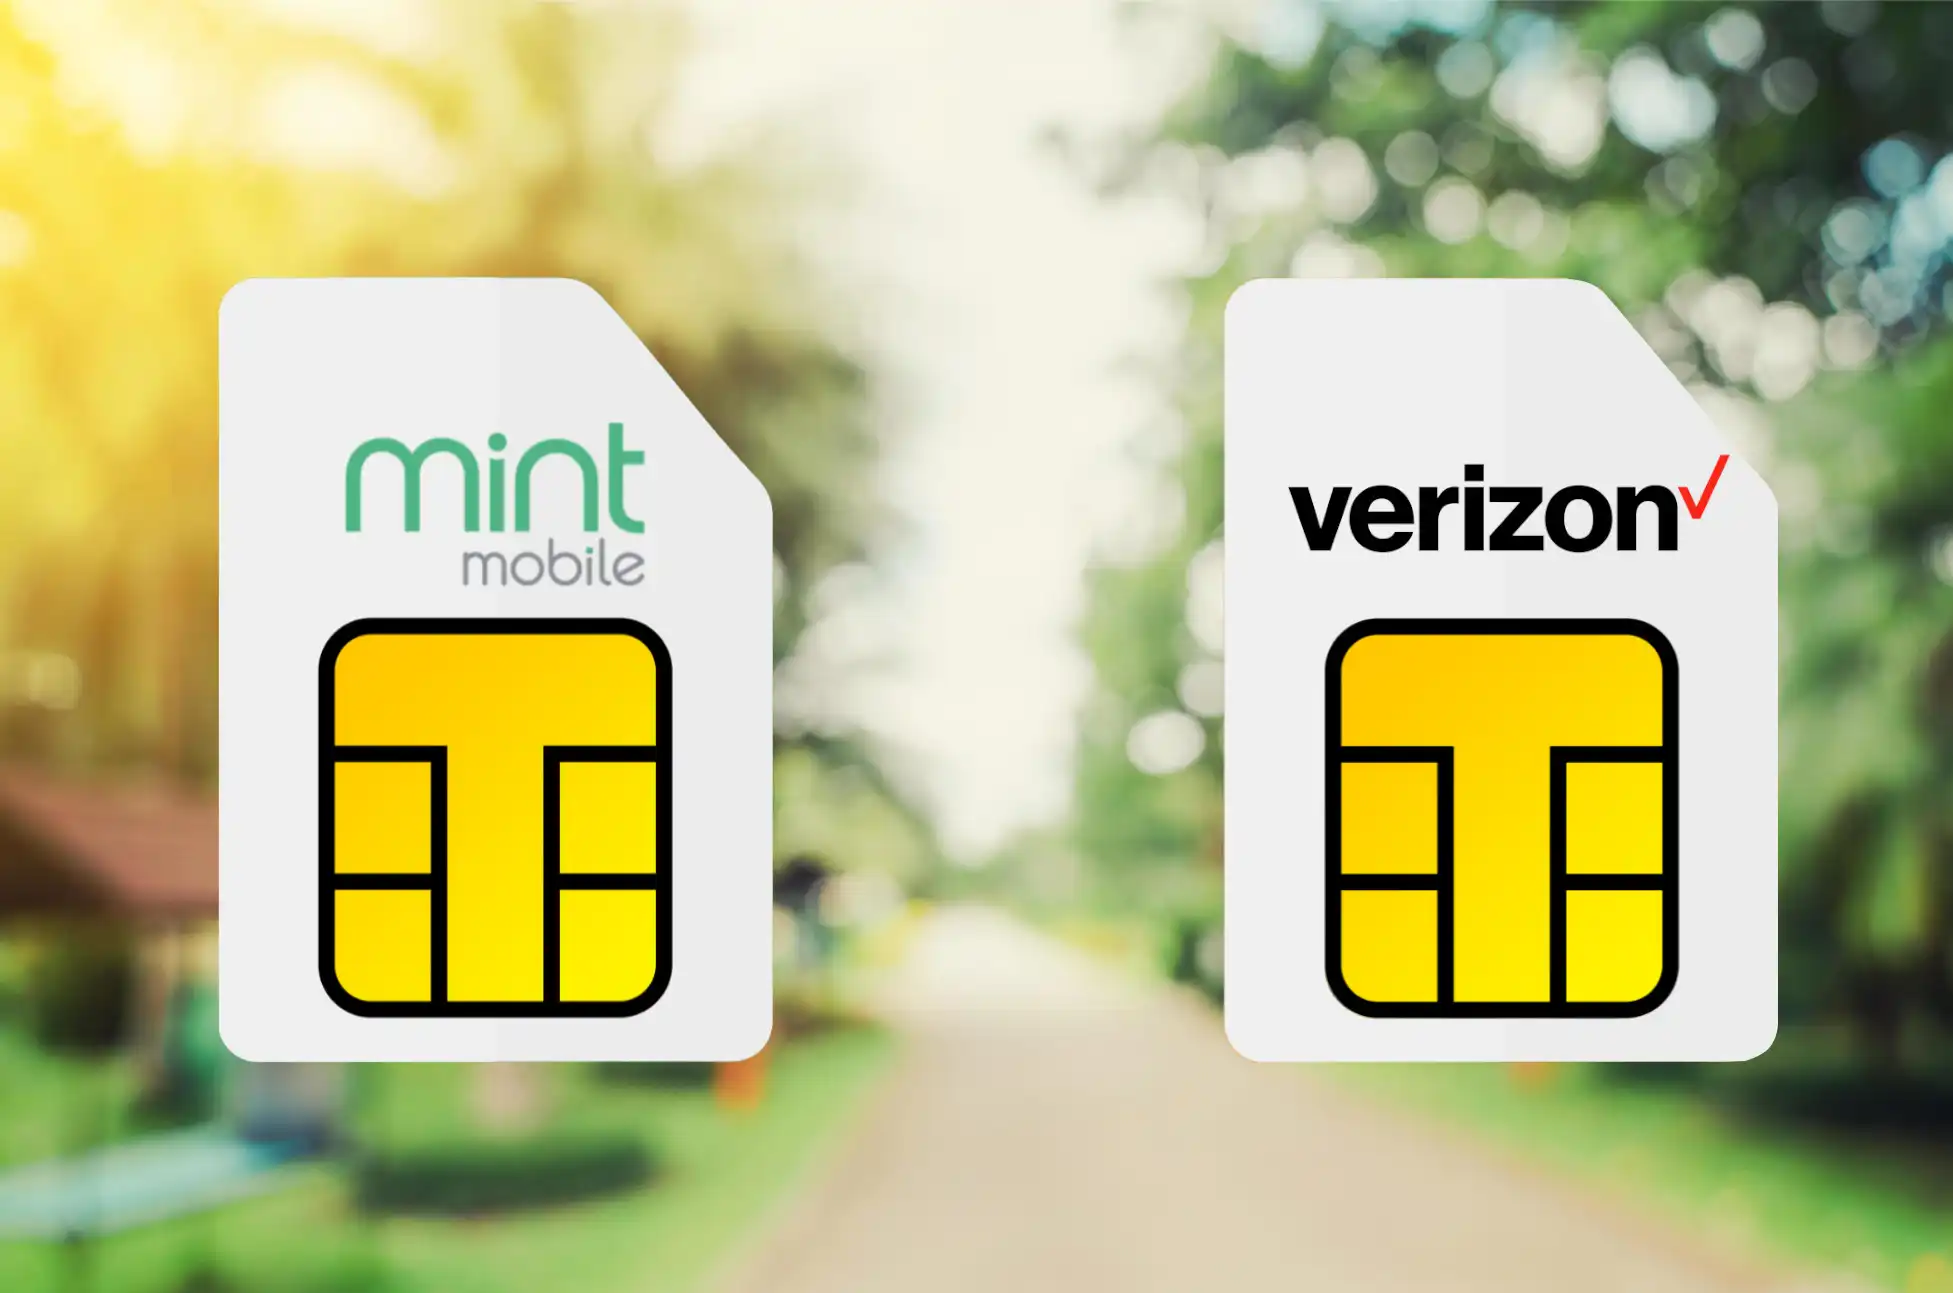
When it comes to phone plans, Verizon’s longstanding reputation for reliability might sway you. However, Mint Mobile, a prepaid carrier powered by T-Mobile’s swift 5G network, is shaking things up with budget-friendly plans that deliver exceptional value.
Verizon offers robust 3G and LTE coverage but comes with a higher price tag. In contrast, Mint Mobile focuses on affordability, high-speed data, and excellent urban and suburban coverage. It’s time to explore the Mint Mobile vs. Verizon battle for the best phone plan!
Mint Mobile vs. Verizon: Carrier features
Looking for a simple, affordable phone plan? Mint Mobile’s got you covered. Their plans include unlimited talk, text, high-speed data, and even free calls to Mexico and Canada. Plus, they use the dependable T-Mobile network with full 5G support and up to 40GB of high-speed data every month.
Here’s the deal: Mint keeps pricing straightforward. If you’re willing to pay upfront for multiple months, you get discounts that save you money. Right now, they’ve got a special promo offering plans at just $15 per month for your first three months, no matter which one you choose.
On the flip side, Verizon’s plans are packed with extras, from subscription services to home internet discounts. They’re all about keeping everything under one bill, which can be convenient, but it might lock you in if a better deal pops up elsewhere.
Verizon offers Nationwide 5G on all plans, but if you want Ultra Wideband 5G, including C-band, you’ll need one of their pricier options. They’ve simplified things with three unlimited postpaid plans and a focus on customizable add-ons. You get to pick and choose the extras you want, depending on your needs.
Mint Mobile
Verizon
Network
T-Mobile
Verizon
Discounts
Multi-month savings
Multi-line savings, Add-on discounts
Minimum term
3 months
1 month
Taxes and fees
Extra
Extra
eSIM activation
Supported
Supported
Mint Mobile vs. Verizon: Coverage and Reception
When it comes to coverage, Mint Mobile and Verizon have their own strengths:
Mint Mobile (T-Mobile Network):
Mint Mobile operates on T-Mobile’s network, which means access to the vast mid-band 5G network, known as Ultra Capacity 5G. It’s the biggest of its kind, with lightning-fast speeds. However, in rural areas, you might still encounter LTE or low-band 5G more often. For city and suburban dwellers, Mint Mobile’s 5G coverage is top-notch, ensuring you’re connected wherever you go.
Verizon:
Verizon is renowned for its network quality and reliability. While they had to wait for C-band spectrum to expand their mid-band 5G coverage, they’re a top pick for rural areas. If you live in the countryside or frequently travel through it, Verizon may offer the superior experience. Check Verizon’s coverage map to see how they fare in your specific area.
Mint Mobile vs. Verizon: Phone Compatibility
To use a phone with a carrier, it needs to match the carrier’s wireless bands. Good news: most top Android phones work well with both Verizon and Mint Mobile, offering flexibility. However, Mint Mobile stands out for unlocked and international models. Some popular unlocked phones, like the OnePlus Nord N30, excel on T-Mobile’s network but might not play as nicely with Verizon.
For a top-notch 5G experience on Mint Mobile, look for phones supporting bands n71 for nationwide 5G and n41 for mid-band 5G. On the other hand, the best Verizon phones support bands n2 and n5, along with C-band at band n77 for 5G. The more bands your phone supports, the better your speeds, especially as carriers increasingly use multiple bands together to boost performance.
In the Mint Mobile vs. Verizon phone compatibility and 5G competition, the bands your phone supports can impact your experience. Make sure to check your phone’s compatibility to get the most out of your chosen carrier.
Mint Mobile vs. Verizon: Mobile Plans
Before we dive into the plan details for Mint Mobile and Verizon, let’s talk about the difference between prepaid and postpaid plans. It’s important to understand these options:
Mint Mobile Plan
Mint Mobile keeps it simple with four plan options. You can choose from 5GB, 15GB, 20GB, or unlimited data, with terms of 3, 6, or 12 months. Paying upfront for a longer term means lower monthly costs.
All Mint plans include unlimited talk and text, even for calls to Mexico and Canada. Need more data? Add 1GB for $10 or 3GB for $20 (for data plans). The unlimited “Unliminted” plan packs 40GB of high-speed data and 10GB for your hotspot.
Mint Family lets you bring up to five lines, offering Mint’s best rates on a renewable three-month basis. Not sure which plan? No problem. You can upgrade mid-cycle, and Mint offers any plan at $15 per month for the first three months, giving you time to find your data sweet spot before committing to a full year.
5GB
15GB
20GB
Unlimited
Pricing
3 months: $75
3 months: $105
3 months: $135
3 months: $120
6 months: $120
6 months: $150
6 months: $210
6 months: $210
12 months: $180
12 months: $240
12 months: $300
12 months: $360
Talk and text
Unlimited
Unlimited
Unlimited
Unlimited
Data
5GB
15GB
20GB
40GB
Hotspot
Shared
Shared
Shared
10GB
Verizon Plan
When it comes to Verizon, their latest plans offer excellent value. Here’s a quick rundown:
Unlimited Welcome:
This is your basic unlimited data plan without Ultra Wideband 5G access. You’ll mainly use nationwide 5G or LTE for coverage, which works well for most folks.
Unlimited Plus:
Upgrade to Unlimited Plus for Ultra Wideband 5G coverage and premium data performance. Premium data gets priority, so it’s great in congested areas. You’ll also enjoy 30GB of hotspot data, HD video streaming on LTE and nationwide 5G, and no streaming video quality limit or hotspot data cap when connected to Ultra Wideband. Plus, you can snag a 50% discount on a connected device plan, like a tablet.
Unlimited Ultimate:
Verizon’s latest gem, Unlimited Ultimate, builds on Unlimited Plus. You get 60GB of hotspot data, along with 1080p streaming on LTE and 5G. And the perks don’t stop there – you can score 50% off two connected device plans. Plus, you get talk, text, and data in 210+ countries.
Unlimited Ultimate
Unlimited Plus
Unlimited Welcome
Price (per month)
1 line: $90
1 line: $80
1 line: $65
4 lines: $55
4 lines: $45
4 lines: $30
5G
Ultra Wideband 5G
Ultra Wideband 5G
Nationwide 5G
Talk and text
Unlimited
Unlimited
Unlimited
Data
Unlimited premium
Unlimited premium
Unlimited
Hotspot
60GB high-speed
30GB high-speed
None
Streaming quality (LTE and nationwide 5G)
1080p
720p
480p
Verizon offers some nifty ways to save:
1. Autopay and Paperless Billing:
For Verizon’s best prices, use Autopay and paperless billing. If you don’t, you’ll pay $10 extra per line.
2. Bring More Lines for Savings:
You save more with Verizon when you bring multiple lines. All Verizon postpaid plans cost less per line when you have more than one.
3. Bring Your Own Phone, Get Credits:
Bringing your own phone to Verizon? Great! You can get credits, up to $180 with Unlimited Welcome or up to $540 with larger plans. Upgrading your phone with larger plans also means more savings.
4. Bundle Home Internet:
Verizon offers Fios and 5G Home internet. Bundle with your wireless plan for discounts. Unlimited Welcome users can get internet for $40, while Unlimited Plus and Ultimate subscribers can get it for $25.
In the Mint Mobile vs. Verizon savings contest, Verizon has some smart money-saving moves.
Mint Mobile vs. Verizon: Comparison
Mint Mobile: Multi-month Discounts
Verizon: Incredible Coverage Area
Mint Mobile is a budget-friendly prepaid carrier that operates on the T-Mobile network. They provide affordable wireless service with generous high-speed data allowances, offering up to 40GB per month. One of the perks of Mint Mobile is its compatibility with a wide range of phones, so you can use nearly any unlocked device. Moreover, all Mint Mobile plans come with access to T-Mobile’s excellent 5G coverage, including support for mid-band frequencies.
Verizon Wireless is among the top three major carriers, and they handle their own network infrastructure. They boast an extensive LTE network and are expanding their 5G coverage, which means faster speeds for users. If you’re willing to pay a bit more for top-notch coverage on one of the largest networks in the country, Verizon could be the right choice for you.
PROS:Cheaper service with multi-month discountsComplete access to T-Mobile’s enormous 5G networkMint Family makes multi-line accounts more affordable.
PROS:The vast Verizon network provides tremendous coverage.Better rural coverage with roaming supportThere are multi-line savings available.
CONS:Only 40GB of high-speed data on the unlimited planMust purchase at least three monthsPoorer rural coverage than Verizon
CONS:Can be quite costlyMid-band 5G coverage falls short of T-Mobile’s.Support for unlocked phones is deteriorating.
Want to Switch Carriers to Mint or Verizon, but Your Phone is Carrier Locked?
Are you eager to make the move to a new carrier like Mint Mobile or Verizon but find yourself stuck with a carrier-locked phone? Don’t fret! Unlockbase got you covered! Unlock your phone here: https://www.unlockbase.com/unlock-phone/
Conclusion
We hope this comparison helps you choose between Mint Mobile vs Verizon. If you have any queries or wish to share your mobile experiences with either provider, please leave a comment below. Your experiences can serve as a beacon for others!
Are you ready to learn more about Mint Mobile vs Verizon? Visit their websites to begin your mobile adventure right away!
All products, and company names, logos, and service marks (collectively the "Trademarks") displayed are registered® and/or unregistered
trademarks™ of their respective owners.
The authors of this web site are not sponsored by or affiliated with any of the third-party trade mark or third-party registered trade mark owners,
and make no representations about them, their owners, their products or services.
The game is on to swiftly update and take use of new features with each iOS release. This time, iOS 17 elevates your iPhone experience with interactive widgets, intelligent text prediction, the Check-In feature in Messages, and other features. However, before you hit the download button, follow our step-by-step instructions to ensure a smooth transition to update to iOS 17.
How to Update to iOS 17: Things to Preparing for the Update
There are a few things to keep in mind before you upgrade to iOS 17. We’ve laid them out for you so you can get started right away when you upgrade.
Check Compatibility
Before beginning the update process, make sure your device is compatible with iOS 17. Not all older devices can run the most recent software. To check compatibility, go to Apple’s official website and make sure your device is on the list.
iPhone 15
iPhone 13
iPhone 11
iPhone 15 Plus
iPhone 13 mini
iPhone 11 Pro
iPhone 15 Pro
iPhone 13 Pro
iPhone 11 Pro Max
iPhone 15 Pro Max
iPhone 13 Pro Max
iPhone XS
iPhone 14
iPhone 12
iPhone XS Max
iPhone 14 Plus
iPhone 12 mini
iPhone XR
iPhone 14 Pro
iPhone 12 Pro
iPhone SE (2nd generation or later)
iPhone 14 Pro Max
iPhone 12 Pro Max
The list of supported devices with iPadOS 17 is likewise amazing, spanning numerous device generations:
iPad Pro 12.9-inch (2nd generation and later)
iPad Air (3rd generation and later)
iPad Pro 10.5-inch
iPad (6th generation and later)
iPad Pro 11-inch (1st generation and later)
iPad mini (5th generation and later)
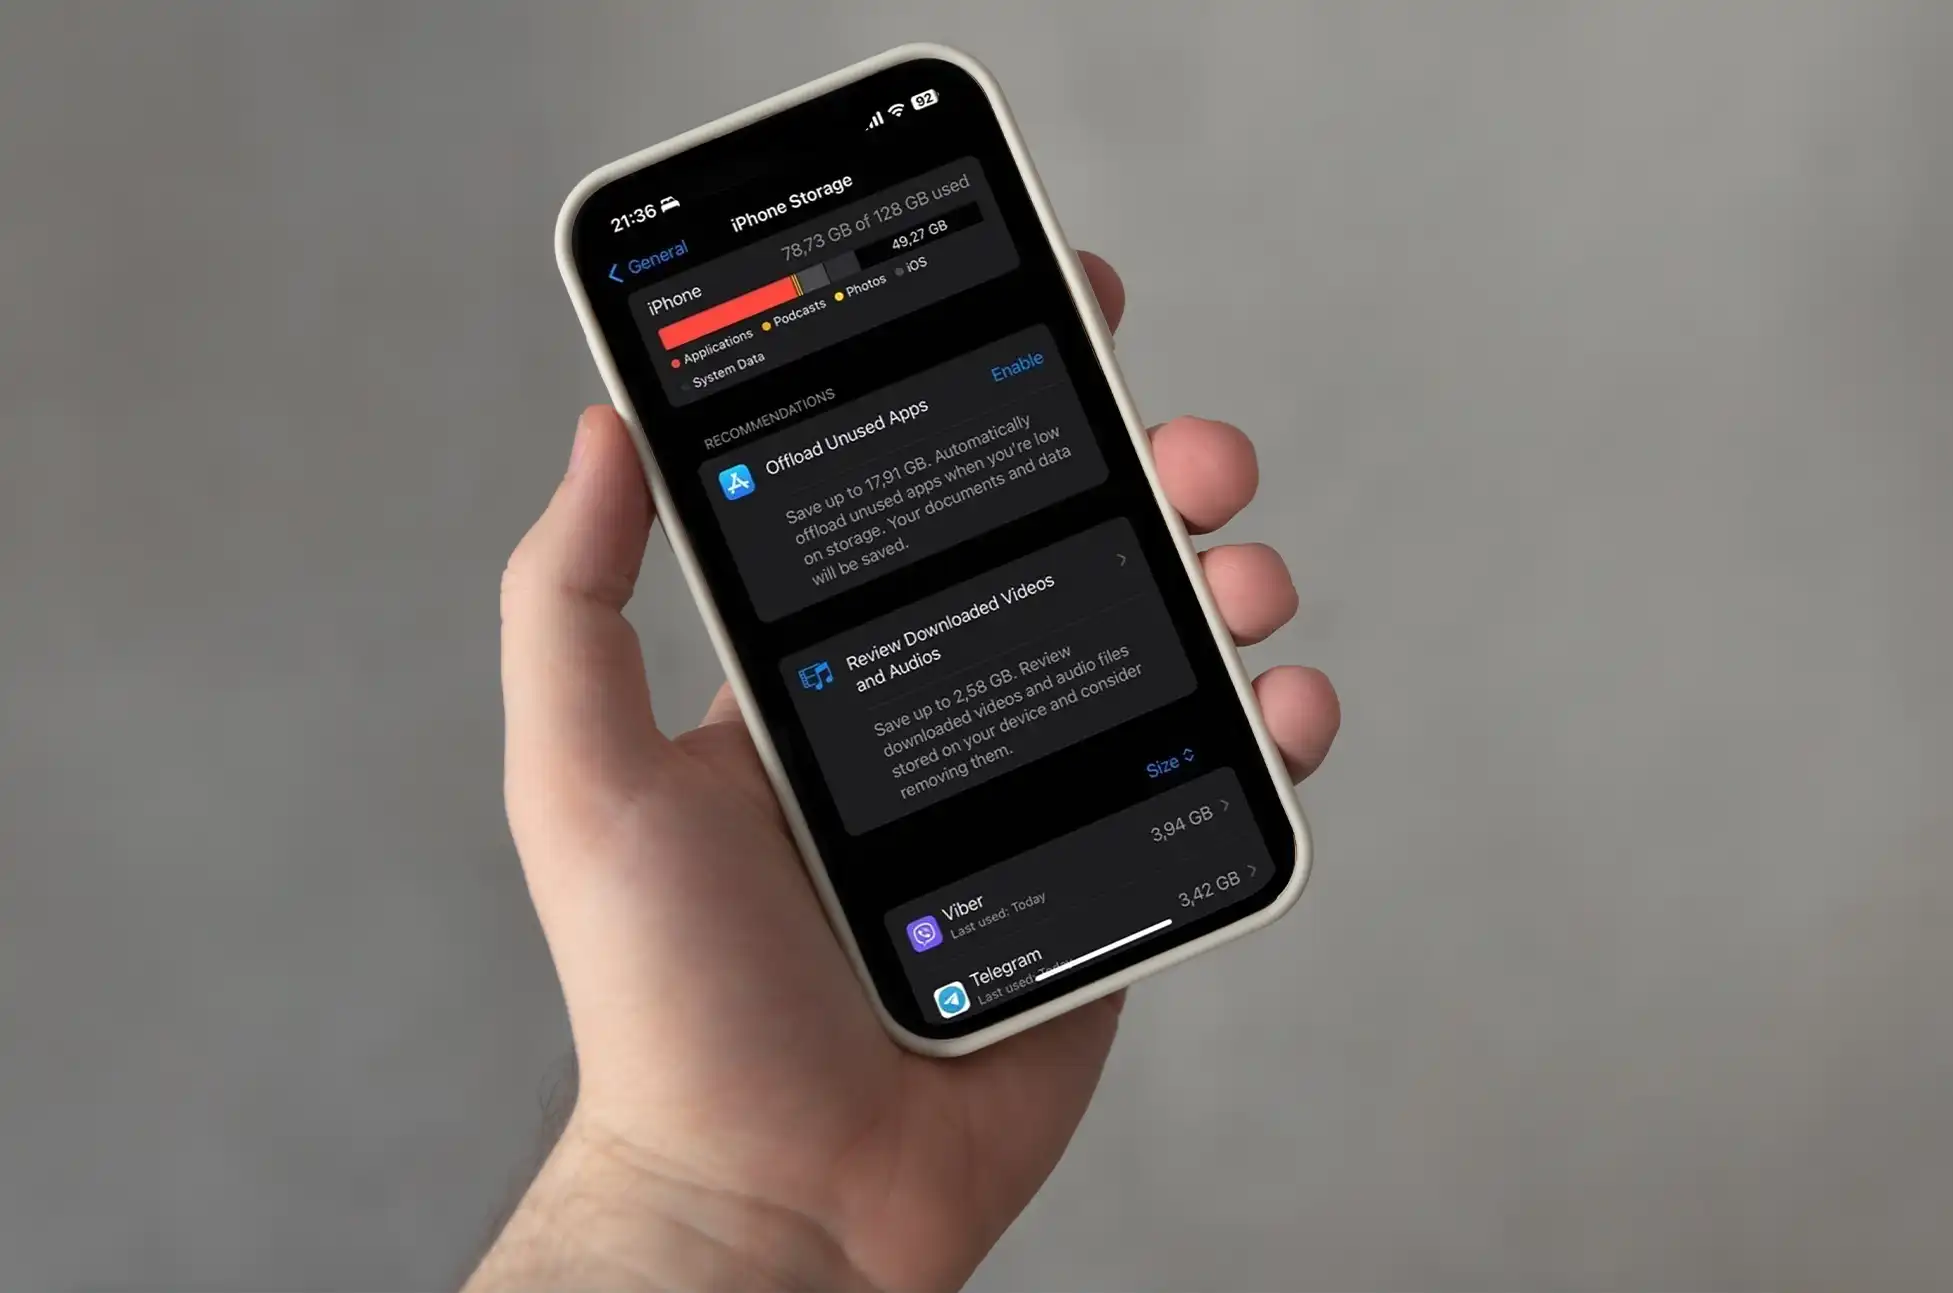
Clear Out your Storage Space
Knowing that you know your device is eligible for the update, it’s time to purge unused apps and free up some space on your device. Open “Settings -> General -> iPhone Storage” to see how much free space you have. Swipe right to delete any app you no longer use.
The iOS/iPadOS 17 update requires approximately 8GB of free space.To free up more storage space, delete outdated mails and clear browser caches. You may also go through the photos and delete old pictures and videos that are taking up space. Backup these to iCloud, Dropbox, or Google Photos before deleting them from your iPhone or iPad.
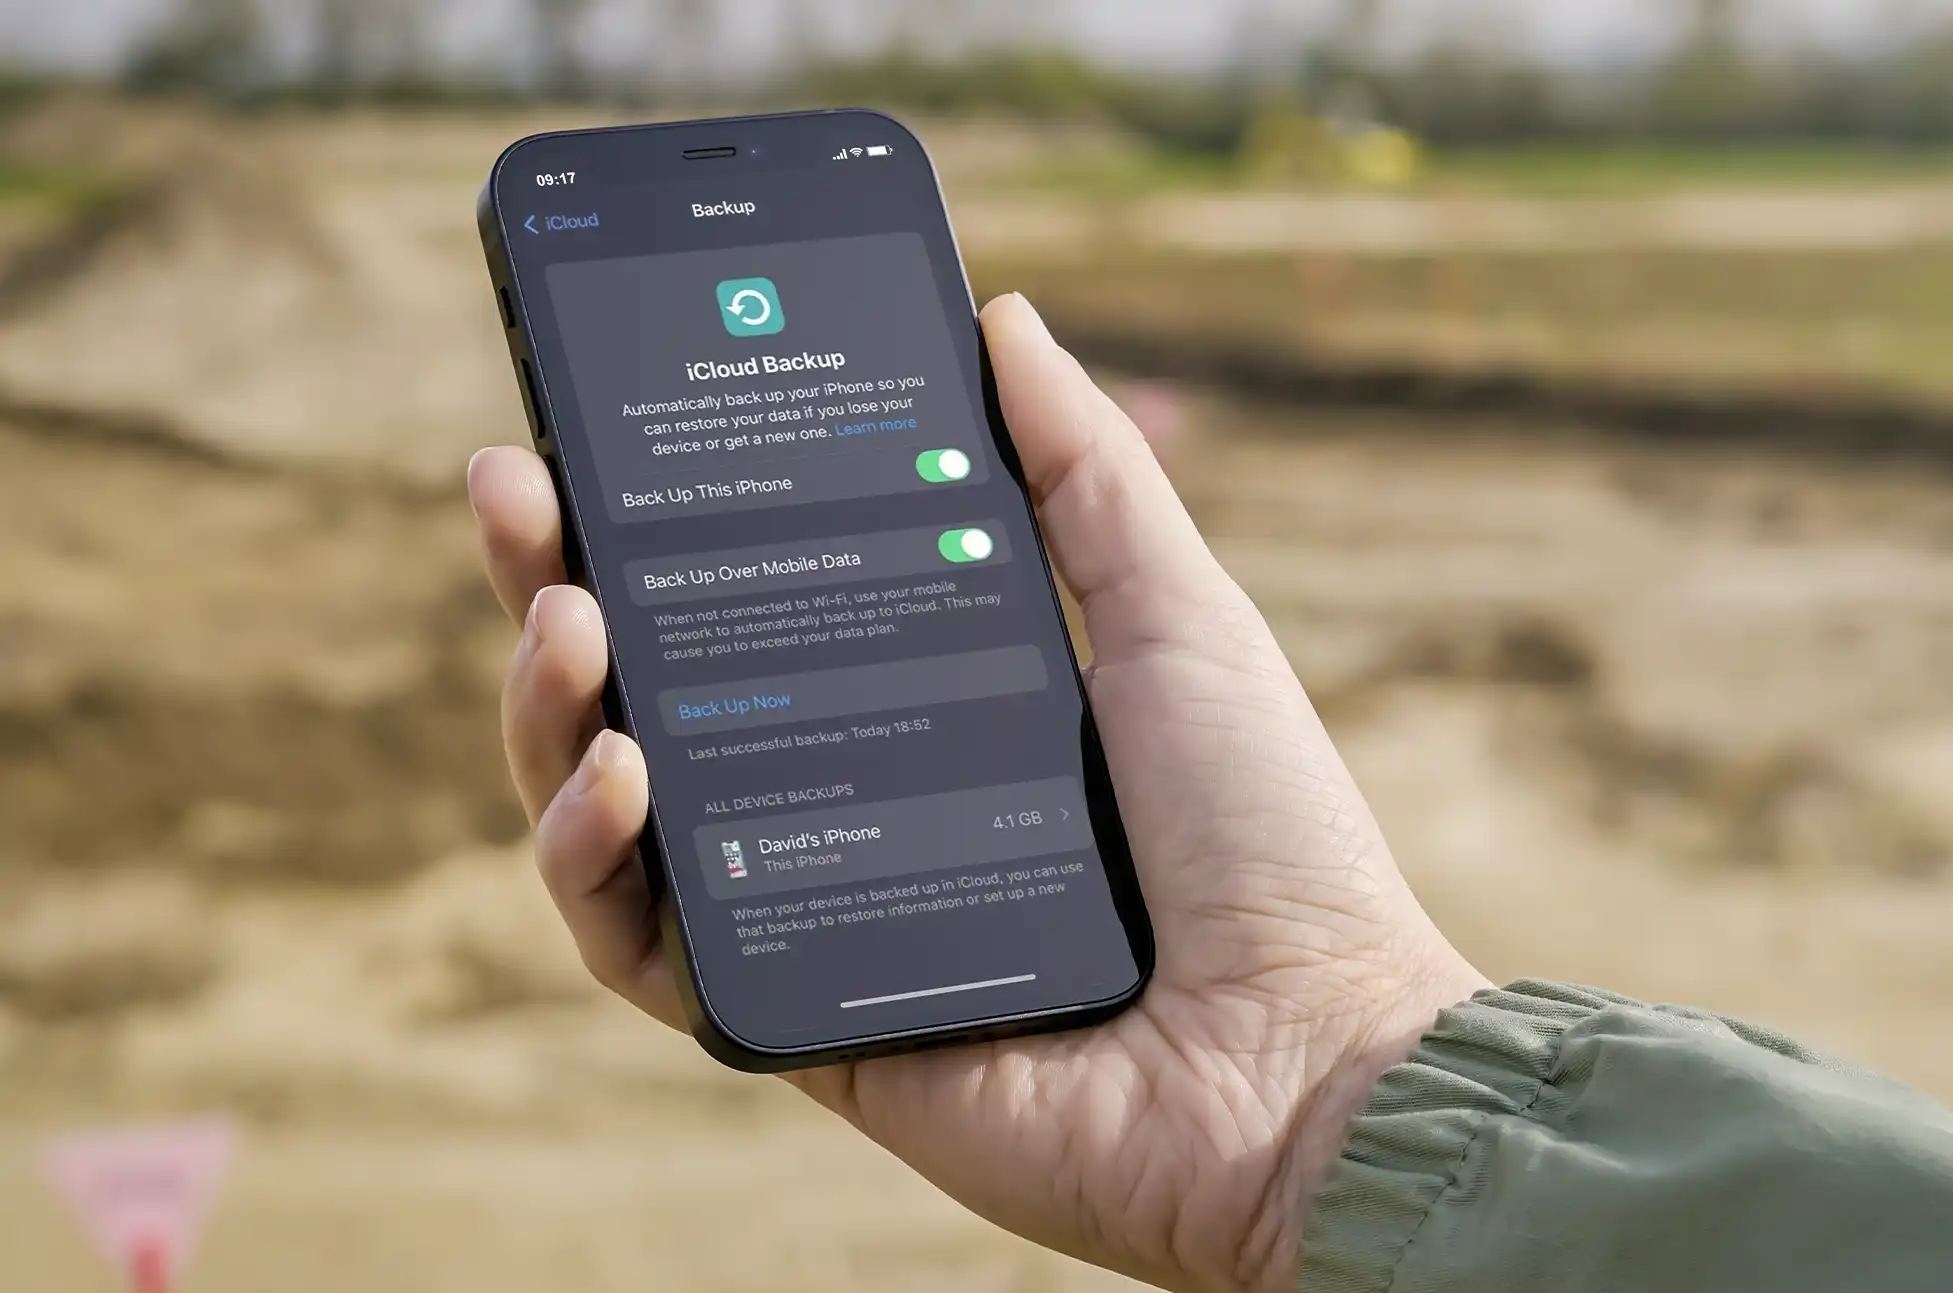
Backup your Data
The update procedure can occasionally result in unanticipated data loss. Backing up your device is important for securing your treasured pictures, contacts, and apps. You have a choice between using iCloud or iTunes. Here’s how to go about it:
iCloud Backup
Connect your device to Wi-Fi.
Go to Settings > [Your Name] > iCloud > iCloud Backup.
Tap “Back Up Now.”
iTunes Backup
Connect your device to your computer and open iTunes (or Finder if you’re using macOS Catalina or later).
Select your device.
Click “Back Up Now.”
How to Update to iOS 17: Easy Steps
Before getting into how to update to iOS 17, make sure you followed the steps mentioned above to avoid update errors, and that your device is connected to WiFi and has enough battery power during the update.
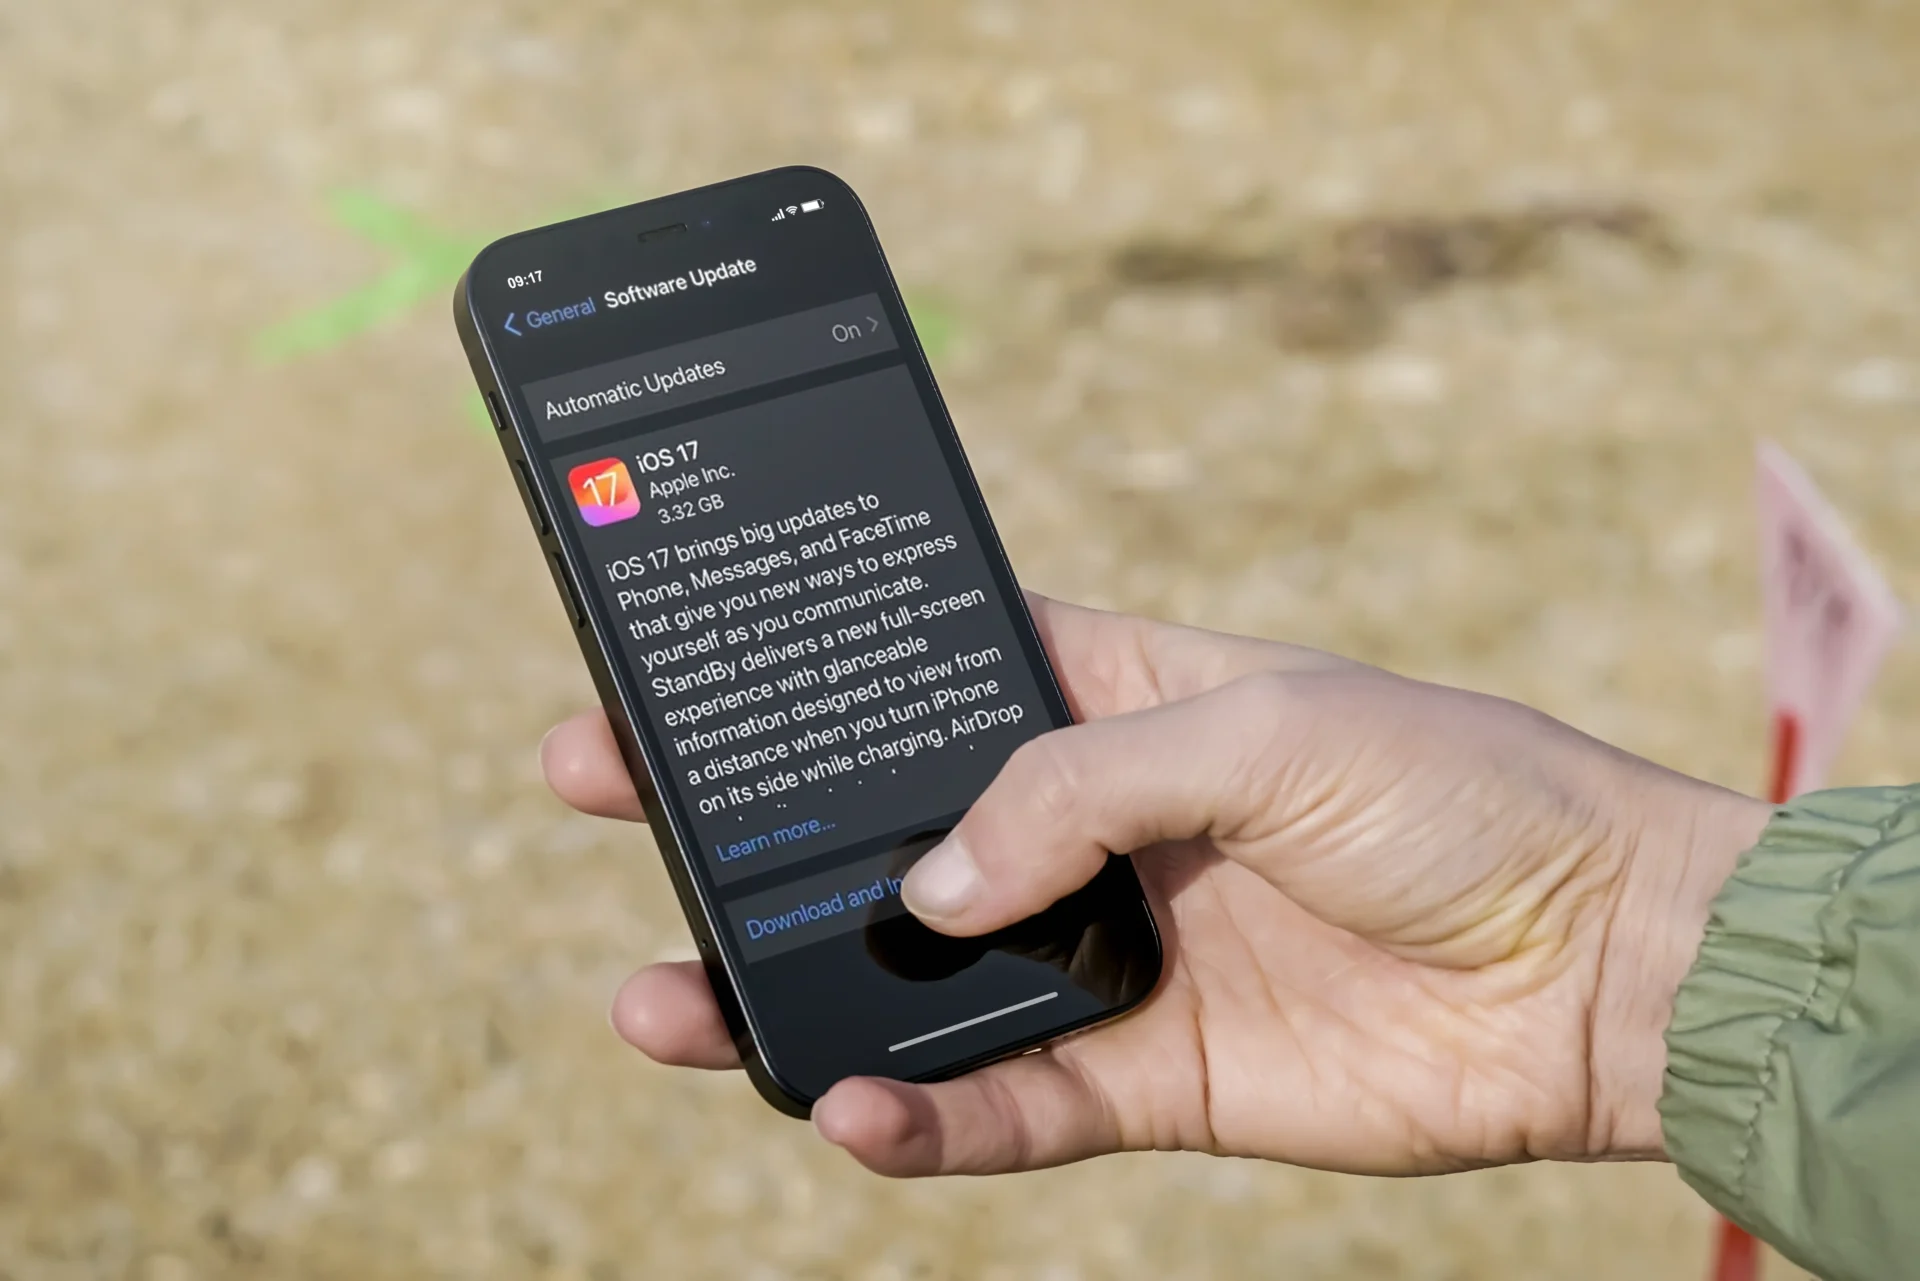
Update via Settings
The most basic option is to update using the device’s settings:
Go to Settings > General > Software Update.
If iOS 17 is available, tap “Download and Install.”
Follow the on-screen instructions to complete the update.
Update via iTunes/Finder
If you prefer to update your device using a computer, proceed as follows:
Connect your device to your computer.
Open iTunes (or Finder on macOS Catalina or later).
Select your device.
Click “Check for Update.”
If iOS 17 is available, click “Download and Update.”
How to Update to iOS 17: Common Update Problems
Not Enough Storage
While iOS updates are usually smooth, you may encounter common issues, such as insufficient storage. Here’s how to address them:
Delete unnecessary apps or files to free up space.
Consider updating via iTunes/Finder if you don’t have enough space on your device.
Error 14, Error 9, etc.
Don’t be alarmed if you see error messages throughout the upgrade. Common errors frequently have simple solutions:
Restart your device and try the update again.
Update iTunes (or Finder) to the latest version.
If the problem persists, contact Apple Support.
Conclusion
Updating your iOS device to iOS 17 is a simple process that keeps you up to speed on the latest features and improvements. You can confidently manage the upgrade procedure if you follow this step-by-step guide. Remember to back up your data, solve frequent issues, and discover the exciting new features in iOS 17.
Now, enjoy the improved experience that iOS 17 has to offer!
All products, and company names, logos, and service marks (collectively the "Trademarks") displayed are registered® and/or unregistered
trademarks™ of their respective owners.
The authors of this web site are not sponsored by or affiliated with any of the third-party trade mark or third-party registered trade mark owners,
and make no representations about them, their owners, their products or services.
Best phone carriers in 2023? In today’s hyper-connected world, choosing the right phone carrier is crucial. With the evolution of technology and the ever-growing demand for reliable mobile service, selecting a carrier that aligns with your needs and preferences can make a significant difference in your mobile experience.
This 2023, the competition among phone carriers has never been fiercer, resulting in better coverage, faster speeds, and more enticing plans for consumers. In this blog, we’ll explore the best phone carriers in 2023, helping you make an informed choice for your mobile communication needs.
Here are some of the Best phone carriers 2023
1. T-Mobile
T-Mobile stands out as the leading 5G provider and one of the Best phone carriers in 2023, offering extensive coverage through its mid-band Ultra Capacity 5G network that serves the majority of the American population. You have the option to begin with a simple Essentials plan or advance to Go5G Plus, which allows for a phone upgrade every two years, or Go5G Next, where you can get a new phone annually.
Advantages:
Extensive 5G network coverage.
Multi-line discounts, including the benefit of a third line at no additional cost.
Go5G plans come with taxes and fees included.
Disadvantages:
Device upgrade perks are restricted to the more expensive plans.
Rural coverage doesn’t match up to Verizon and AT&T.
2. Verizon
Verizon has been actively extending its Ultra Wideband 5G network, narrowing the distance to T-Mobile but not quite catching up yet. Verizon’s recent offerings emphasize flexibility, letting customers customize their bundles by adding $10 features and subscription services to their plans.
Advantages:
Extensive coverage for both LTE and 5G.
Flexibility to personalize plans with myPlan.
Savings available through multi-line discounts.
Disadvantages:
Additional taxes and fees apply.
Plans can be costly for individual lines.
3. AT&T
AT&T boasts robust LTE coverage and an expanding 5G+ presence in numerous cities nationwide. Their plans are straightforward, featuring unlimited data and 5G access across all tiers. AT&T offers a variety of discounts, including the Signature Program and essential worker discounts.
Advantages:
Strong LTE and 5G coverage.
Attractive multi-line discounts.
Numerous discount options available.
Disadvantages:
Plans can be costly for individual lines.
Streaming quality is limited to SD on all plans except the top-tier one.
4. Visible
Visible is all about unlimited data without high-speed data cap, it also includes unlimited hotspot data with both of its plans, so you can keep your laptop or tablet online in a pinch. If you get Visible+, you even get fast 5G access with 50GB of premium data.
Advantages:
Totally unlimited data on both plans
Taxes and fees are included
Unlimited hotspot data
Disadvantages:
Lower priority data than Verizon
No multi-line savings
5. Mint Mobile
Mint Mobile operates as a prepaid carrier, specializing in offering discounts to customers who commit to several months of service at once. While the most significant savings come with an annual payment, you can also enjoy Mint’s favorable rates for the initial three months to test the service.
Advantages:
Full access to T-Mobile’s 5G network.
Substantial savings when purchasing a year of service.
Smaller, budget-friendly payments available with Mint Family plans.
Disadvantages:
Minimum purchase of at least three months required.
The unlimited plan is effectively capped at 40GB.
Weaker rural coverage compared to Verizon or AT&T.
6. US Mobile
US Mobile provides customers with the flexibility to choose between Verizon or T-Mobile coverage and even tailor their own custom plans. However, many users opt for the unlimited plans, which offer premium data and discounts for multiple lines.
Advantages:
Option to select either Verizon or T-Mobile coverage.
Taxes and fees are now included in the plans.
Both Verizon and T-Mobile SIMs provide the same amount of high-speed data.
Disadvantages:
US Mobile does not yet support all international features.
A frustrating 1Mbps speed limit is imposed after exhausting high-speed data.
7. Metro by T-Mobile
Best Prepaid Unlimited Plans
Advantages:
Strong 5G coverage on the T-Mobile network
Taxes and fees are included
No high-speed data cap
Disadvantages:
First month costs more on most plans
Rural coverage is weaker than Verizon or AT&T
8. Google Fi
Google Fi is a prepaid mobile carrier tailored for Android users, offering extensive coverage and features. It distinguishes itself with outstanding international roaming capabilities and competitive pricing for multi-line users. Google Fi harnesses multiple cell networks to provide robust 5G and Wi-Fi coverage in urban and rural settings.
Advantages:
Exceptional 5G coverage through the T-Mobile network.
Multi-line discounts available across all plans.
Free international roaming included in Flexible and Unlimited Plus plans.
Disadvantages:
Data costs are relatively high on the Flexible plan.
Additional setup is required for iPhone users.
Rural coverage is not as strong as Verizon or AT&T.
9. Boost Infinite
Boost Infinite is a postpaid mobile service owned by Dish, featuring two unlimited plans and various add-ons. The base Infinite plan starts at just $15 per month and provides 30GB of high-speed data on the AT&T and Dish Wireless networks.
Advantages:
Remarkably affordable for a postpaid plan.
Premium plan includes an iPhone 14 as part of the bundle.
International add-ons are available at budget-friendly prices.
Extensive coverage, backed by AT&T infrastructure.
Disadvantages:
5G coverage lags behind T-Mobile.
No priority data is offered.
Hotspot add-on shares data usage.
Best phone carriers 2023: Ready to Switch Carriers?
Are you considering switching carriers but find yourself locked into a contract with your current provider? We’ve got you covered! Visit UnlockBase.com, select your phone’s model number, and unlock your device today. By doing so, you can explore a wide range of promotions and offers from various carriers, giving you the freedom to choose the plan that suits you best.
Unlocking your phone on UnlockBase is a straightforward and secure process. We understand that everyone’s needs are unique, and that’s why we offer this service, ensuring that you have the flexibility to make the switch hassle-free.
Unlock your phone now and unlock a world of carrier options that cater to your preferences. Say goodbye to carrier restrictions and hello to choice!
Conclusion
Choosing the best phone carrier in 2023 depends on your specific needs, location, and budget. Each carrier mentioned here has its strengths and caters to different types of users. It’s essential to consider factors like coverage, data speeds, plan options, and additional perks when making your decision. By researching and comparing these carriers, you can find the one that best suits your mobile communication requirements, ensuring a seamless and satisfying experience in the year ahead.
All products, and company names, logos, and service marks (collectively the "Trademarks") displayed are registered® and/or unregistered
trademarks™ of their respective owners.
The authors of this web site are not sponsored by or affiliated with any of the third-party trade mark or third-party registered trade mark owners,
and make no representations about them, their owners, their products or services.
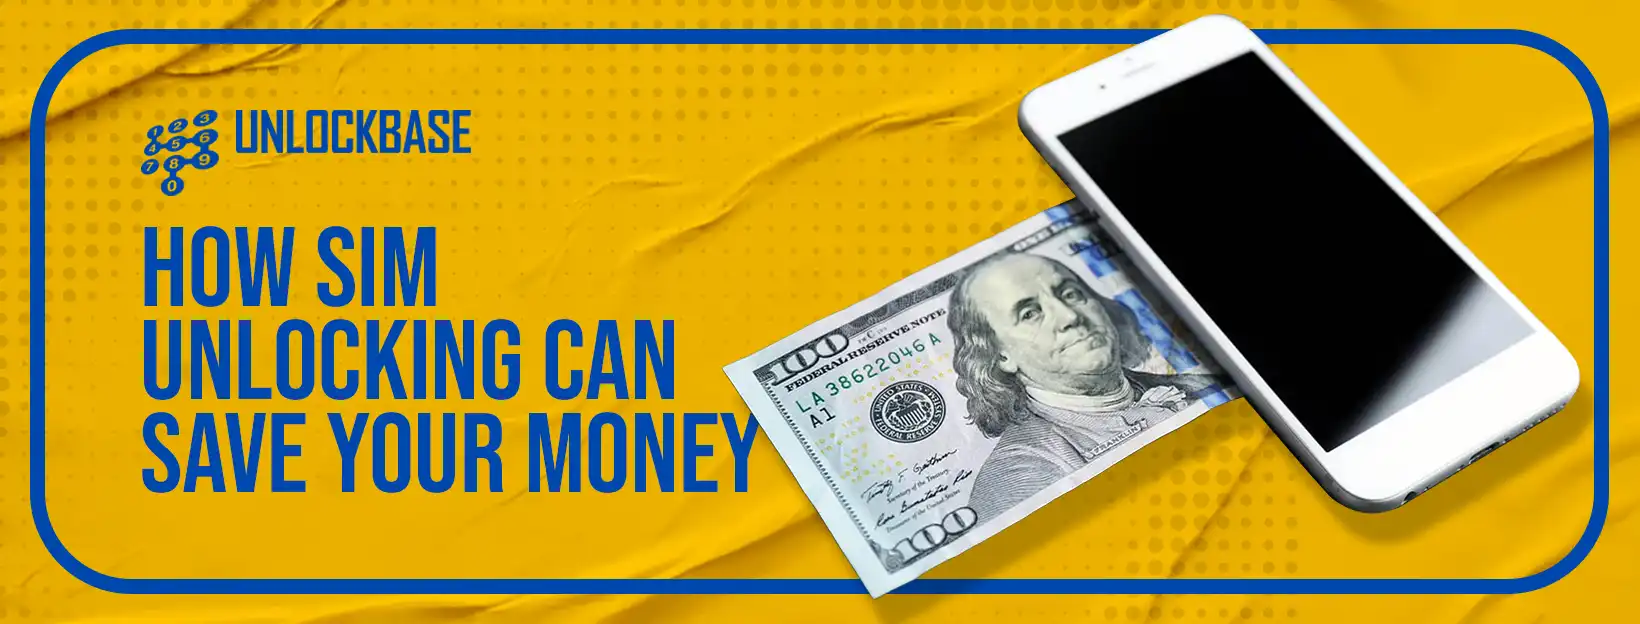
Hello there, thrifty spenders who are also avid users of smartphones! If you’re like the majority of us, your phone seems like an extension of your hand. However, did you know that it can also be your top-secret weapon for cutting your expenses and saving you a ton of money? You did hear it correctly, that’s for sure. We are going to delve into the subject of SIM unlocking and explain how you save money with an unlocked phone. A simple hack like this can help you put more money back into your pocket.
What’s the Buzz About SIM Unlocking?
Many new smartphones sold by carriers are restricted to use on that carrier’s network. This means you’re bound by their terms, including their pricing and plan structures. However, here’s where things get interesting: SIM unlocking releases you from this confinement, do you save money with an unlocked phone? Absolutely, it also gives you access to a whole new world of mobile freedom.
What do you get when you Unlock your Phone?
You know how when you buy a phone from a carrier, it seems to be locked into using only their service? SIM unlocking is the hero that comes to the rescue in these situations. It’s like finally being able to leave an unhealthy relationship and move on to something better. With an unlocked sim, you can enjoy these benefits:
Put an End to Expensive Plans – Do you save money with an unlocked phone? A SIM-unlocked phone frees you from being tied to a single network’s exorbitant rates. It’s as if all the tempting offers suddenly appeared before you on a menu. Choose the plan that best accommodates your preferences and financial constraints, be it more data or fewer texts. This means you can keep more of your hard-earned money each month. Cha-ching!
Cheaper Vacations – Do you remember the initial shock of your travel-related roaming fees? So, let’s say you’re visiting a new place and you decide to pick up a local SIM card. Simply insert it into your unlocked phone and enjoy low, flat prices with no hidden fees. Do you save money with an unlocked phone? Of course, you may finally enjoy your holiday without worrying about your phone bill.
Higher Resale Value – The ability to resell your phone for a higher price than similarly equipped locked sim phones is yet another advantage of owning a SIM-unlocked phone. Obviously, nobody wants to buy a phone that’s tied to a service plan they don’t want.
How to SIM Unlock your Phone?
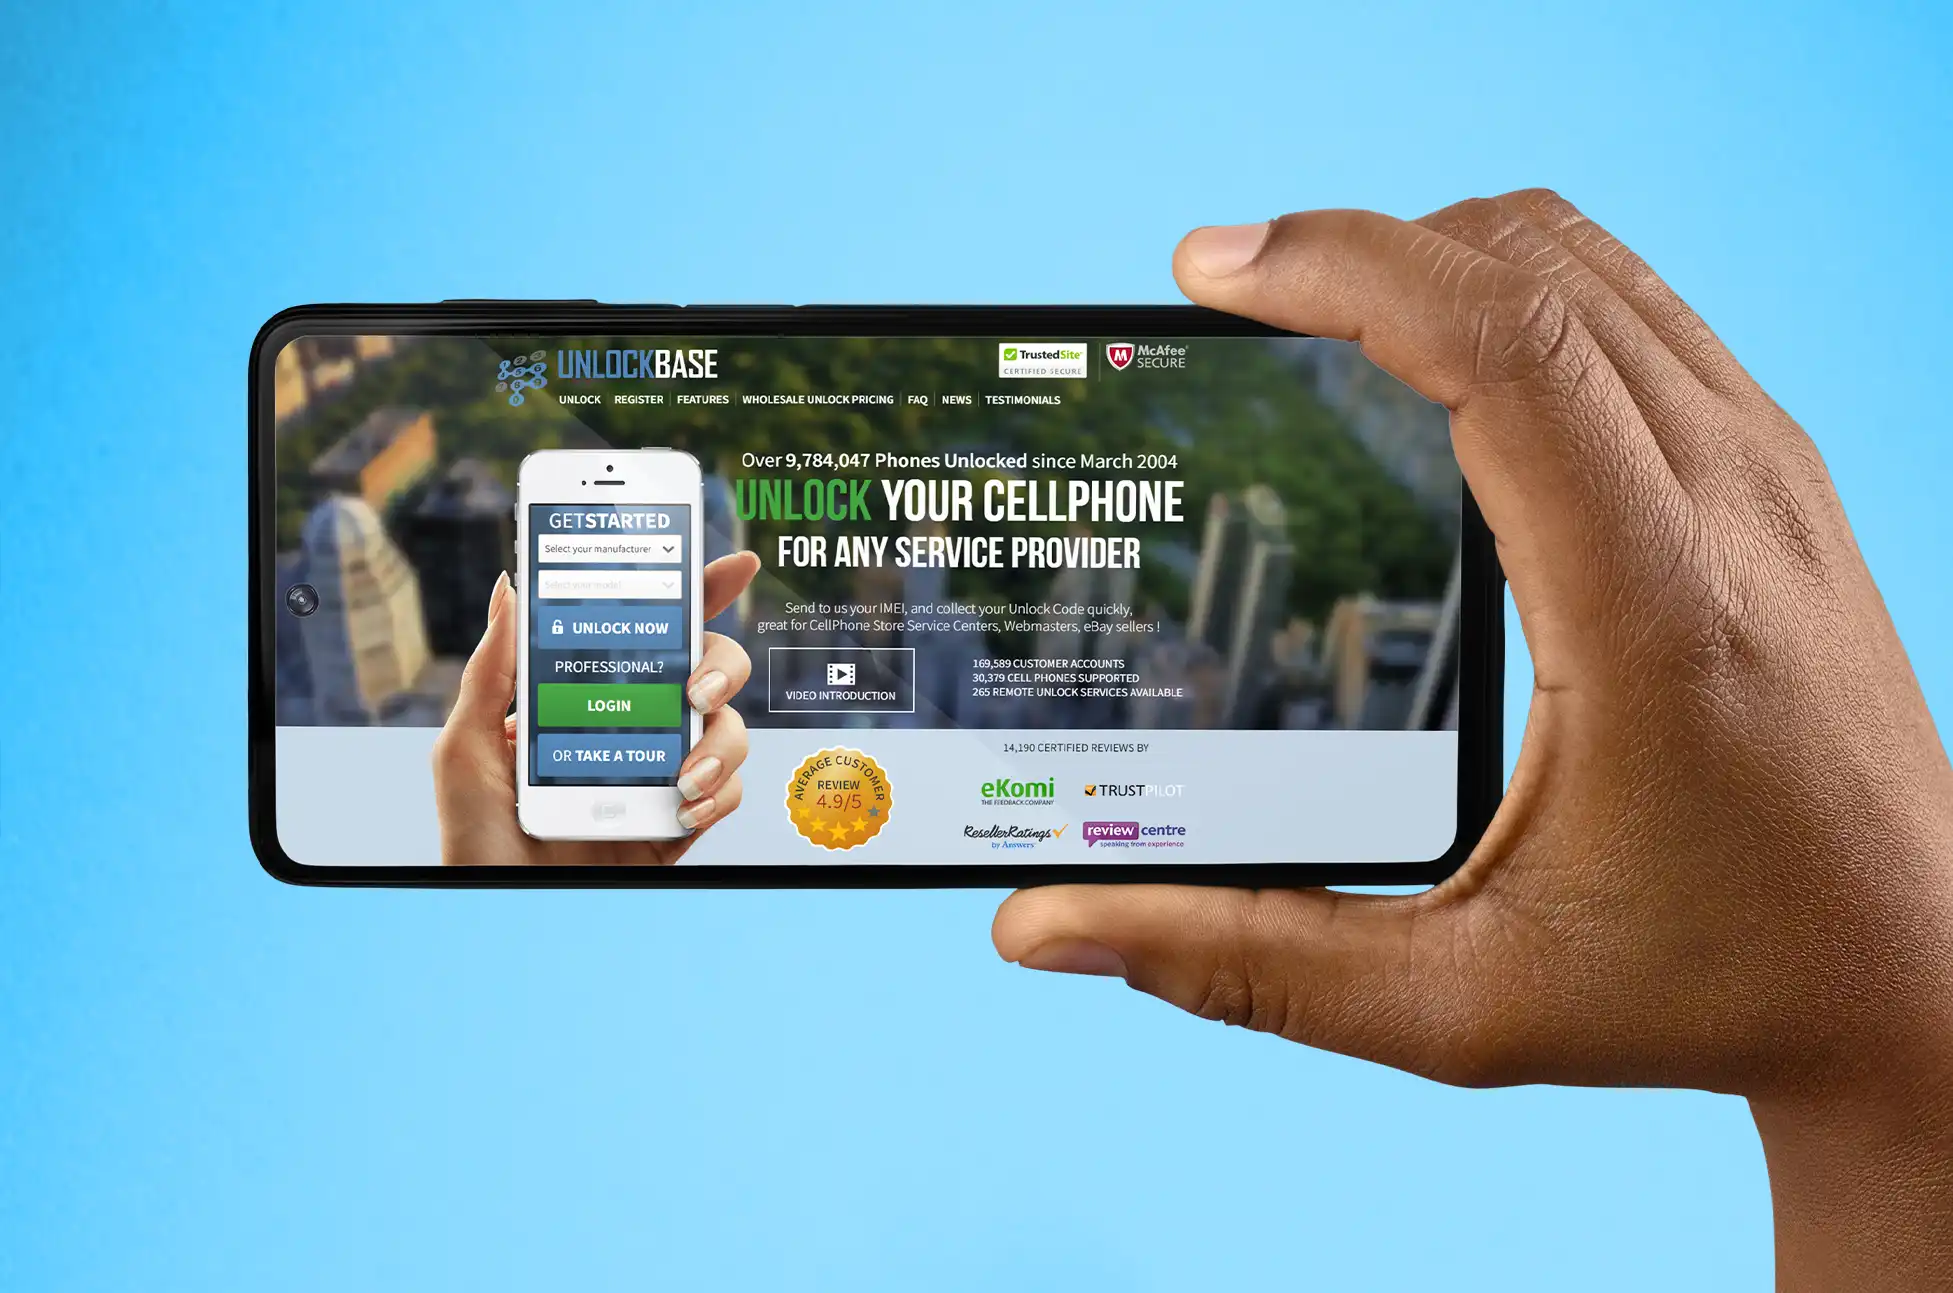
The UnlockBase Service is a reliable tool for unlocking your phone. The instrument is very outstanding and exceptional because of how easy it is to operate in comparison to other instruments on the market right now. It’s legal, safe, and easy to do on your own if you follow a detailed tutorial. Furthermore, it is a permanent answer on how do you save money with an unlocked phone.
Confirm your payment and wait for an email confirmation.
Insert an unauthorized Sim Card and turn ON your phone.
When the device asks for the code, enter the code which is provided by unlockbase
Enter Unlock Code.
Conclusion
With an unlocked phone, you can switch carriers and save money without sacrificing service. Finding this is like discovering a passage to low-cost and trouble-free transit choices that had previously been locked. Having more of your own money to keep is only right. Once you’ve unlocked your phone, the time to start saving money is now.
Make preparations to unveil a brighter, more economical day. Consider the potential payoff; taking the chance could result in a nice windfall. Savers of intelligence, I wish you the best of luck. 📱💸
All products, and company names, logos, and service marks (collectively the "Trademarks") displayed are registered® and/or unregistered
trademarks™ of their respective owners.
The authors of this web site are not sponsored by or affiliated with any of the third-party trade mark or third-party registered trade mark owners,
and make no representations about them, their owners, their products or services.
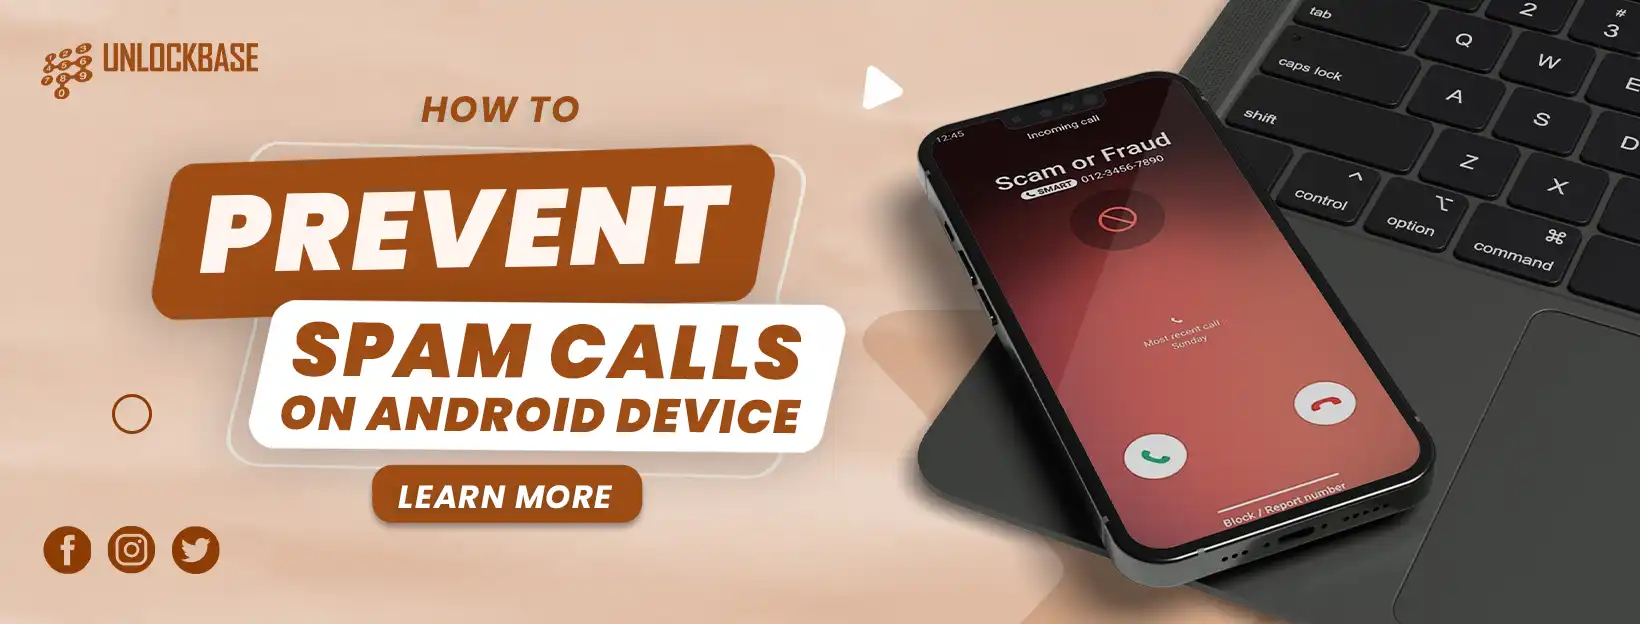
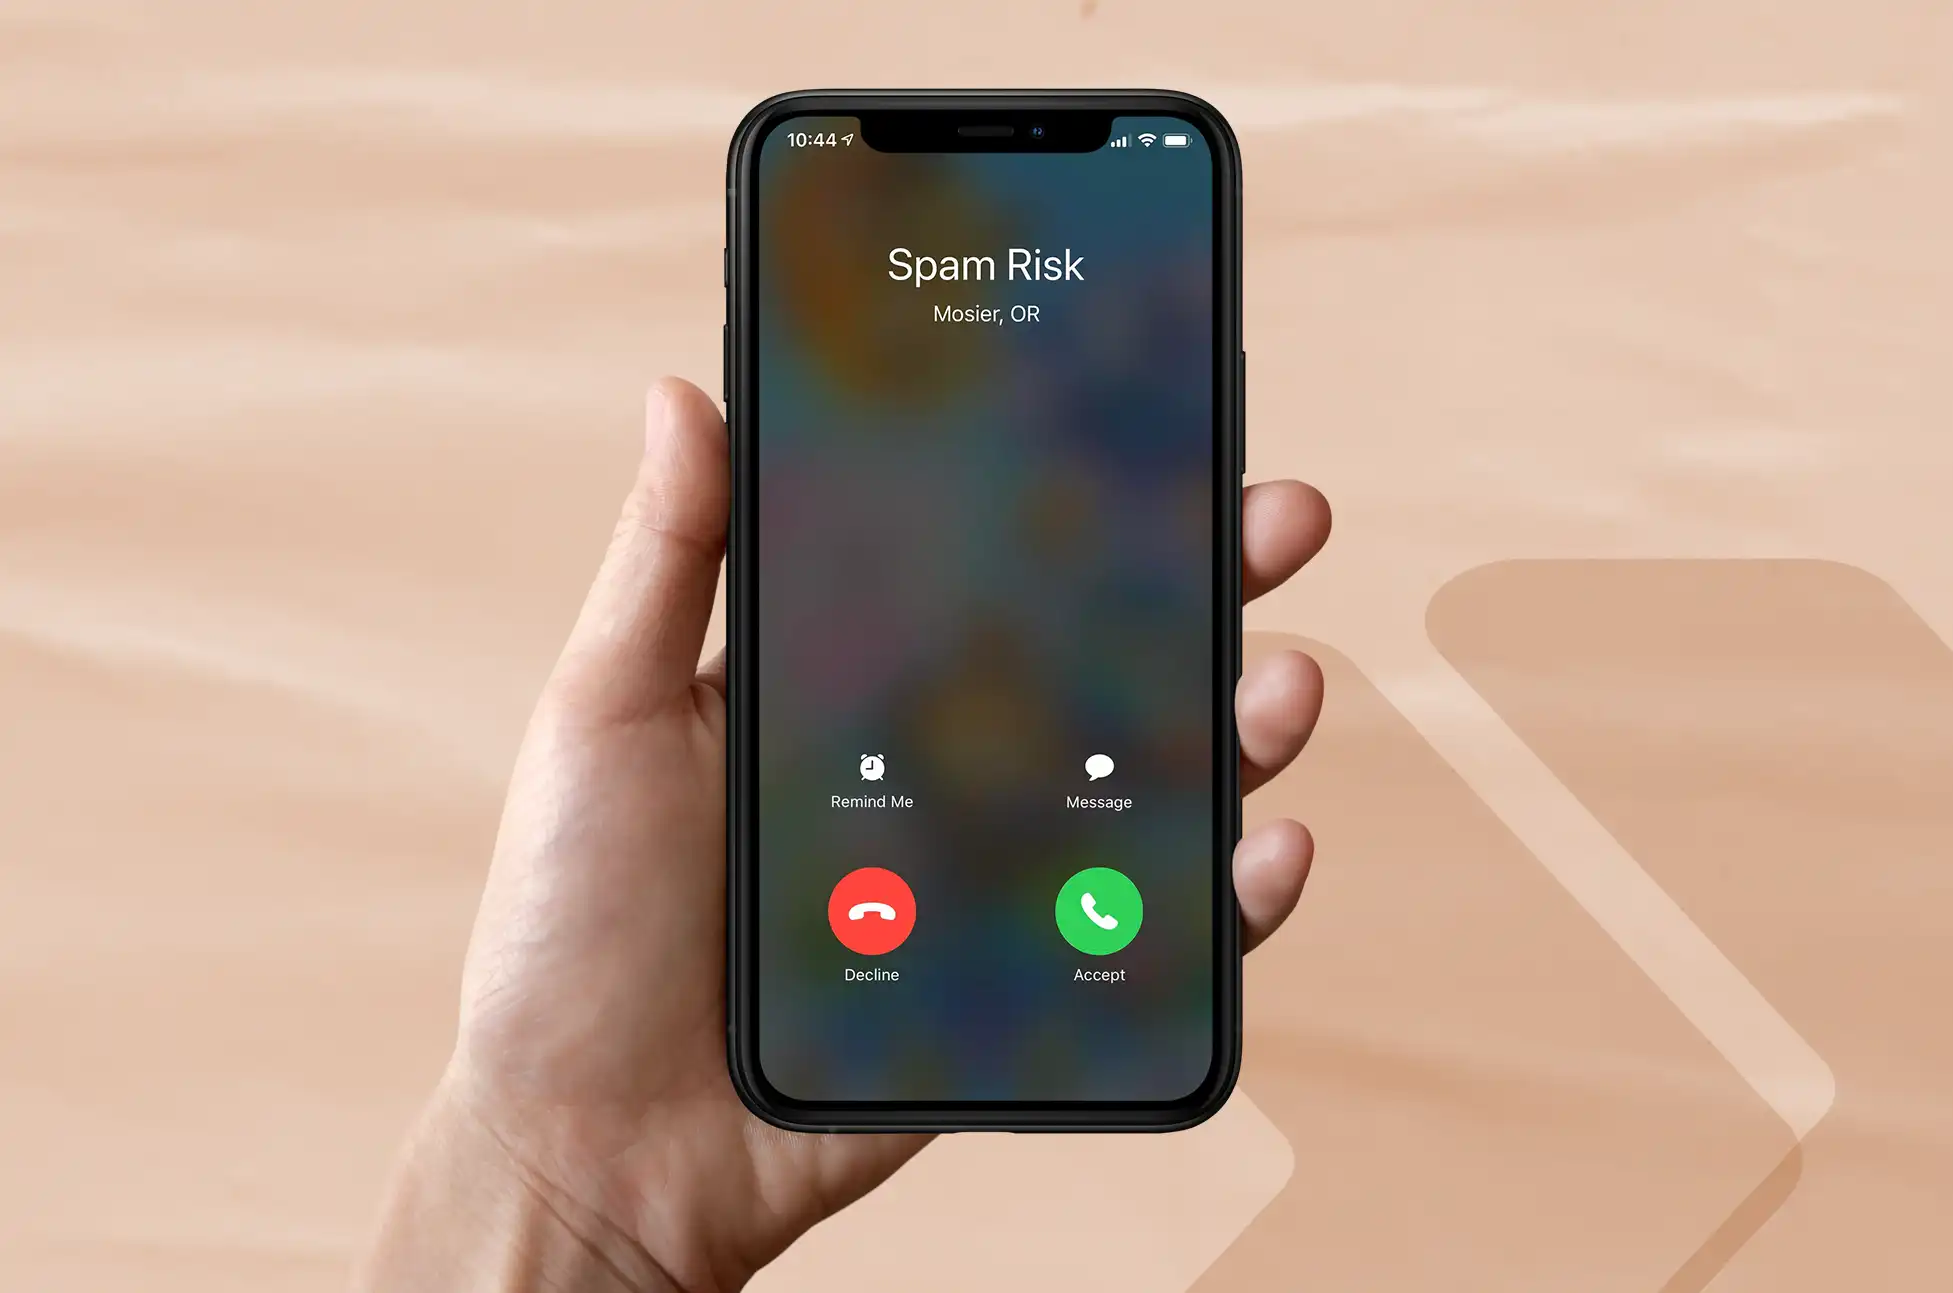
Spam calls can be incredibly frustrating and intrusive. They waste our time, invade our privacy, and can even lead to scams or identity theft.
Fortunately, there are several effective measures you can take to protect yourself from spam calls on your Android device. In this blog post, we will explore some practical steps you can follow to prevent spam calls and enjoy a more peaceful mobile experience.
Prevent Spam Calls by Switching on the spam filter
Using Android’s built-in spam filter is the simplest approach to block spam calls. Although the procedure varies slightly depending on the phone and carrier, your phone’s dialer program should have a spam filter by default. For some Android phones with the built-in Phone by Google app, follow these instructions.
Open your Phone app.
In the top-right corner, tap the three dots symbol.
Select “Settings.”
Click “Caller ID & spam”
Activate “Filter spam calls.” If you discover that you’re missing important calls, you can activate “See call and spam ID”. If the program just offers the “See call and spam ID” option, then just turn that on if that’s the case.
Prevent Spam Calls using Manually Block Spam
On Android, blocking a certain number might be less complicated if you’re fortunate and only sometimes receive spam calls. Depending on your phone model and carrier, the procedure will once more differ slightly. Manually blocking a number can be done in two ways that are most frequently used:
To display recent calls, open the Phone dialer app and select “Recent”.
Long-press the phone number, then select “Block.”
If you long-press a number and don’t see “Block” appear, tap the number you wish to block. Just tap the number; don’t tap the phone icon.
Choose “Block number” from the three dots in the top right corner of the screen.
This obviously only blocks one number. In order to avoid being permanently blocked by you, spammers frequently alter their phone numbers.
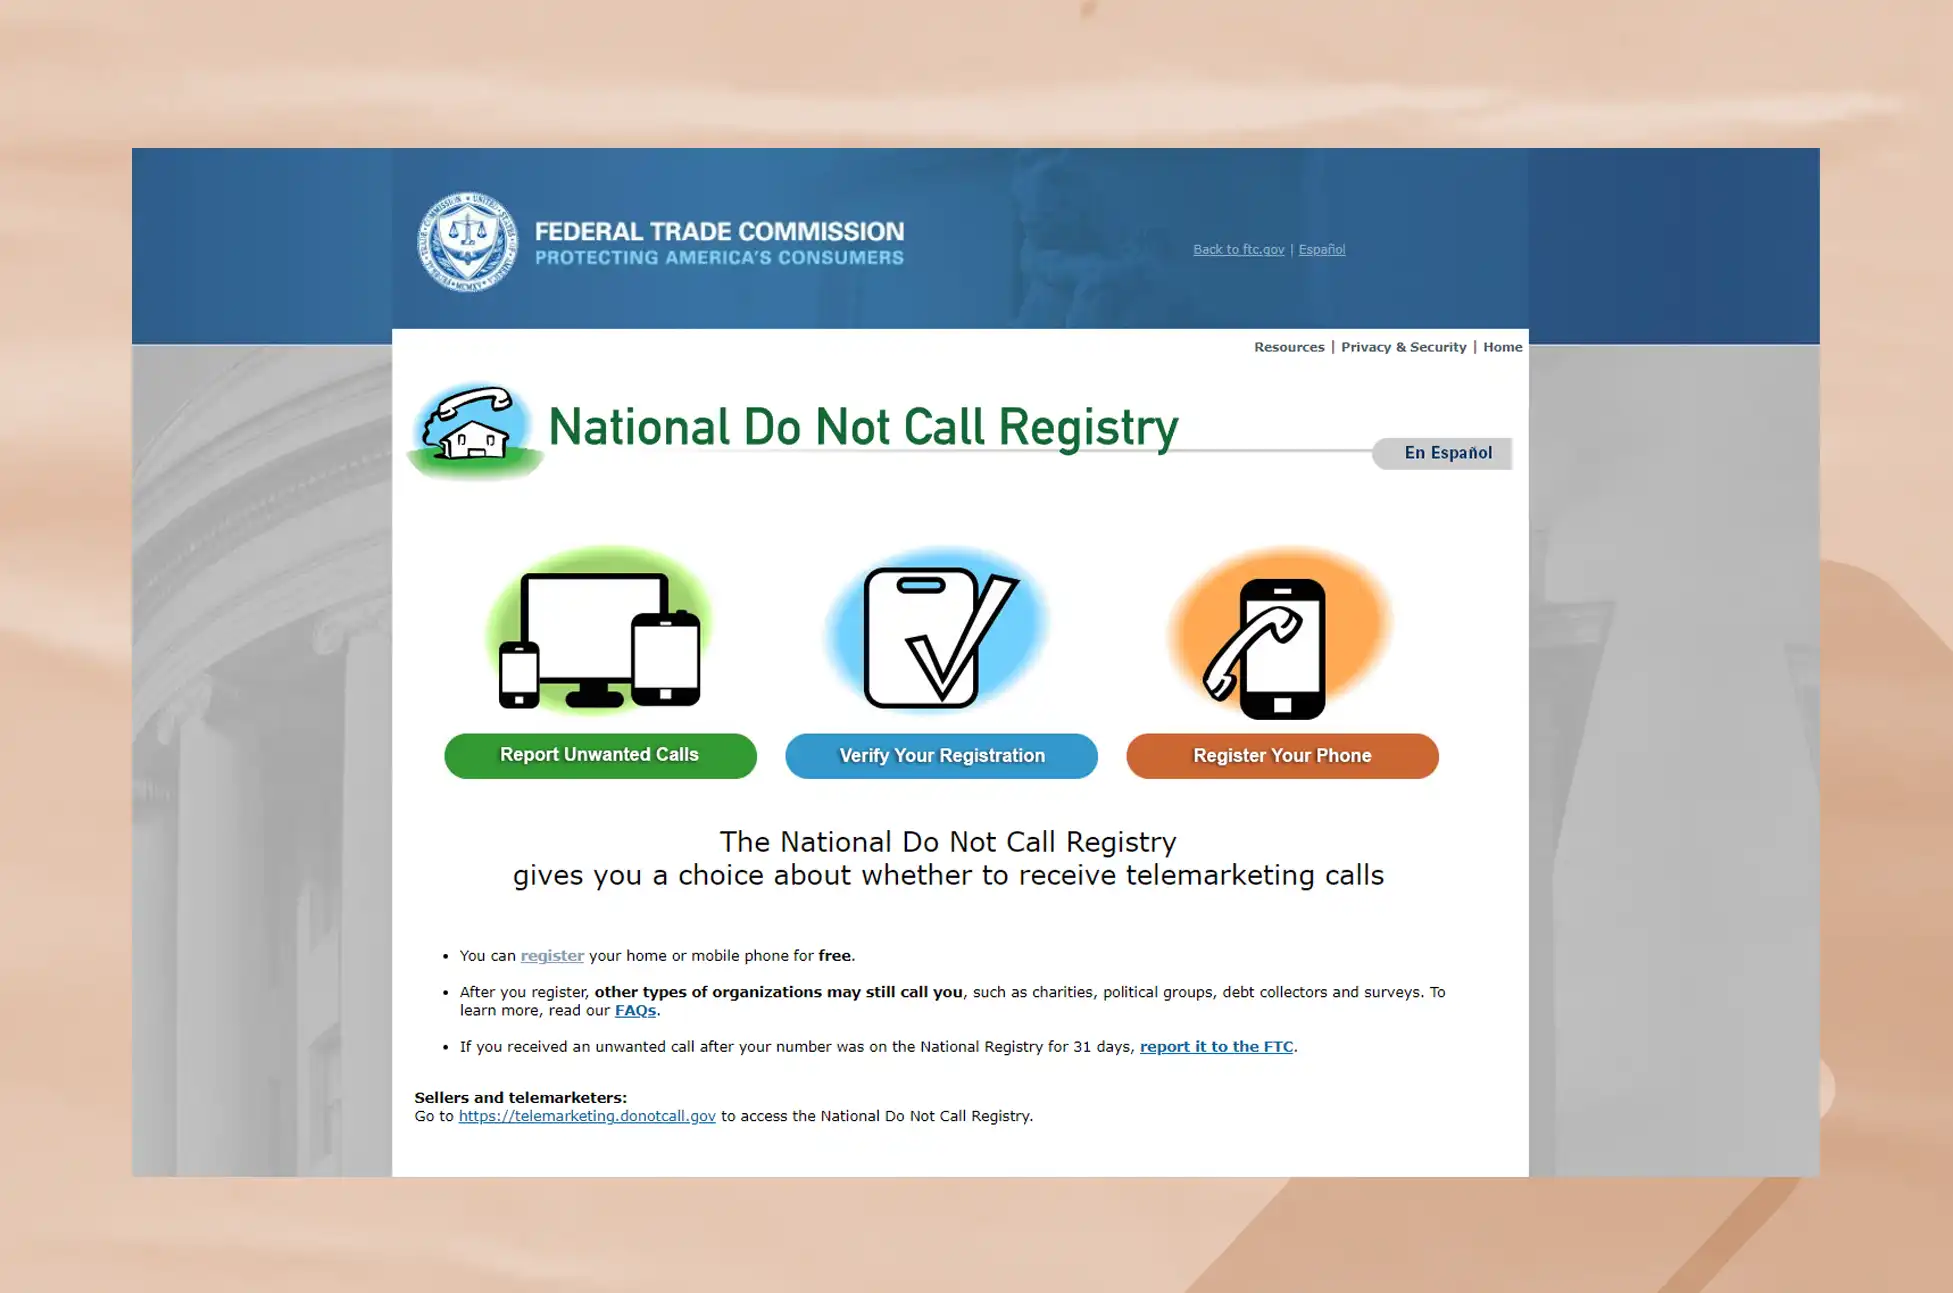
Register your number on the Do Not Call List
Adding your phone number to the national Do Not Call List is another action you can do to stop spam calls. This registry aids in reducing telemarketing calls that aren’t necessary. In order to register your phone number and decrease the number of legitimate marketing calls you receive, go to the Do Not Call official website or dial the toll-free number.
Install a call-blocking app
Numerous call-blocking apps are readily available on the Google Play Store and offer advanced spam call prevention in addition to the built-in functions. These apps automatically detect and reject spam calls using crowdsourcing databases and artificial intelligence. Truecaller, Hiya, and RoboKiller are a few well-known call-blocking applications. Install one of these programs, then adjust the parameters to your taste.
Be cautious with sharing your number
Refrain from giving it to unreliable websites or online platforms, especially those that seem suspect. Spammers frequently gain phone numbers through website scraping or data breaches. When completing online forms, doing surveys, or signing up for services, use caution. If you want to reduce the likelihood of getting spam calls, think hard before disclosing your phone number.
Avoid responding to or engaging with unknown callers
It’s preferable to let a call from an unknown number go to voicemail if you receive one. Answering or conversing with obtrusive callers can reveal that your number is live and bring on other spam calls. A voicemail will probably be left if it’s an important call from a reliable source. If you choose to return the call, use your discretion.
Report spam calls
Be proactive in the fight against spam calls by filing a report on them. The call log or Caller ID screen on Android devices frequently allows you to report spam calls directly. Informing authorities and service providers about spam calls enables them to take action against spammers and enhance call-blocking technology.
Conclusion
You may drastically cut down on the number of spam calls that your Android device receives by taking these proactive measures. Always be on the lookout for spam calls, and report any you receive. You can have a more tranquil and trouble-free mobile experience with these preventive measures in place.
All products, and company names, logos, and service marks (collectively the "Trademarks") displayed are registered® and/or unregistered
trademarks™ of their respective owners.
The authors of this web site are not sponsored by or affiliated with any of the third-party trade mark or third-party registered trade mark owners,
and make no representations about them, their owners, their products or services.
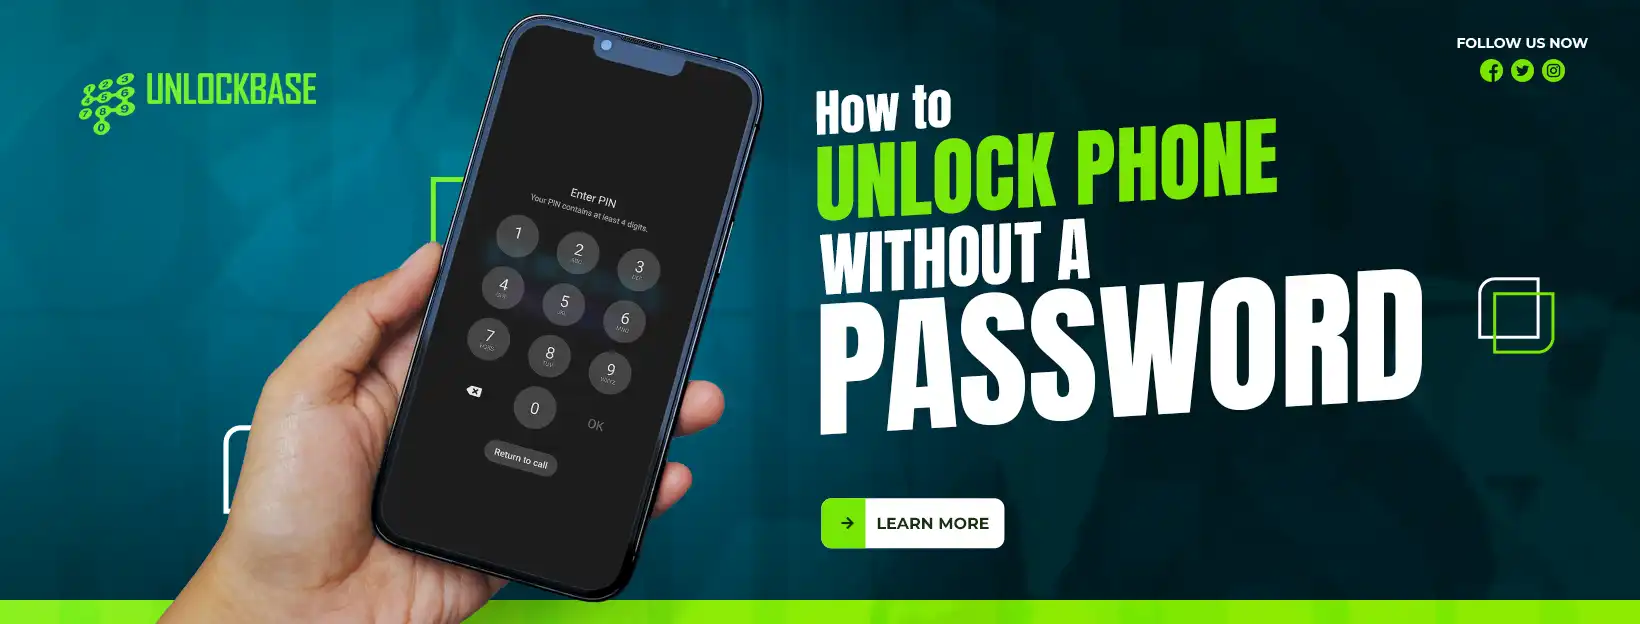
How to unlock phone without password? Smartphones have become indispensable in the modern world, where we must perform several tasks quickly and frequently. The password or pattern we choose to keep our gadget secure is easily forgotten, though. Don’t worry if you accidentally lock yourself out of your phone. In this guide, we will go over a number of options for bypassing a locked phone that you can try. Before we go any further, it’s important to remember that these techniques should only be used on devices that you own.
How to unlock phone without password
No longer do we need to remember tedious passwords and patterns to access our beloved smartphones! If you’ve ever been shut out of your phone, don’t worry, because we have the perfect guide to help you unlock it without breaking a sweat.
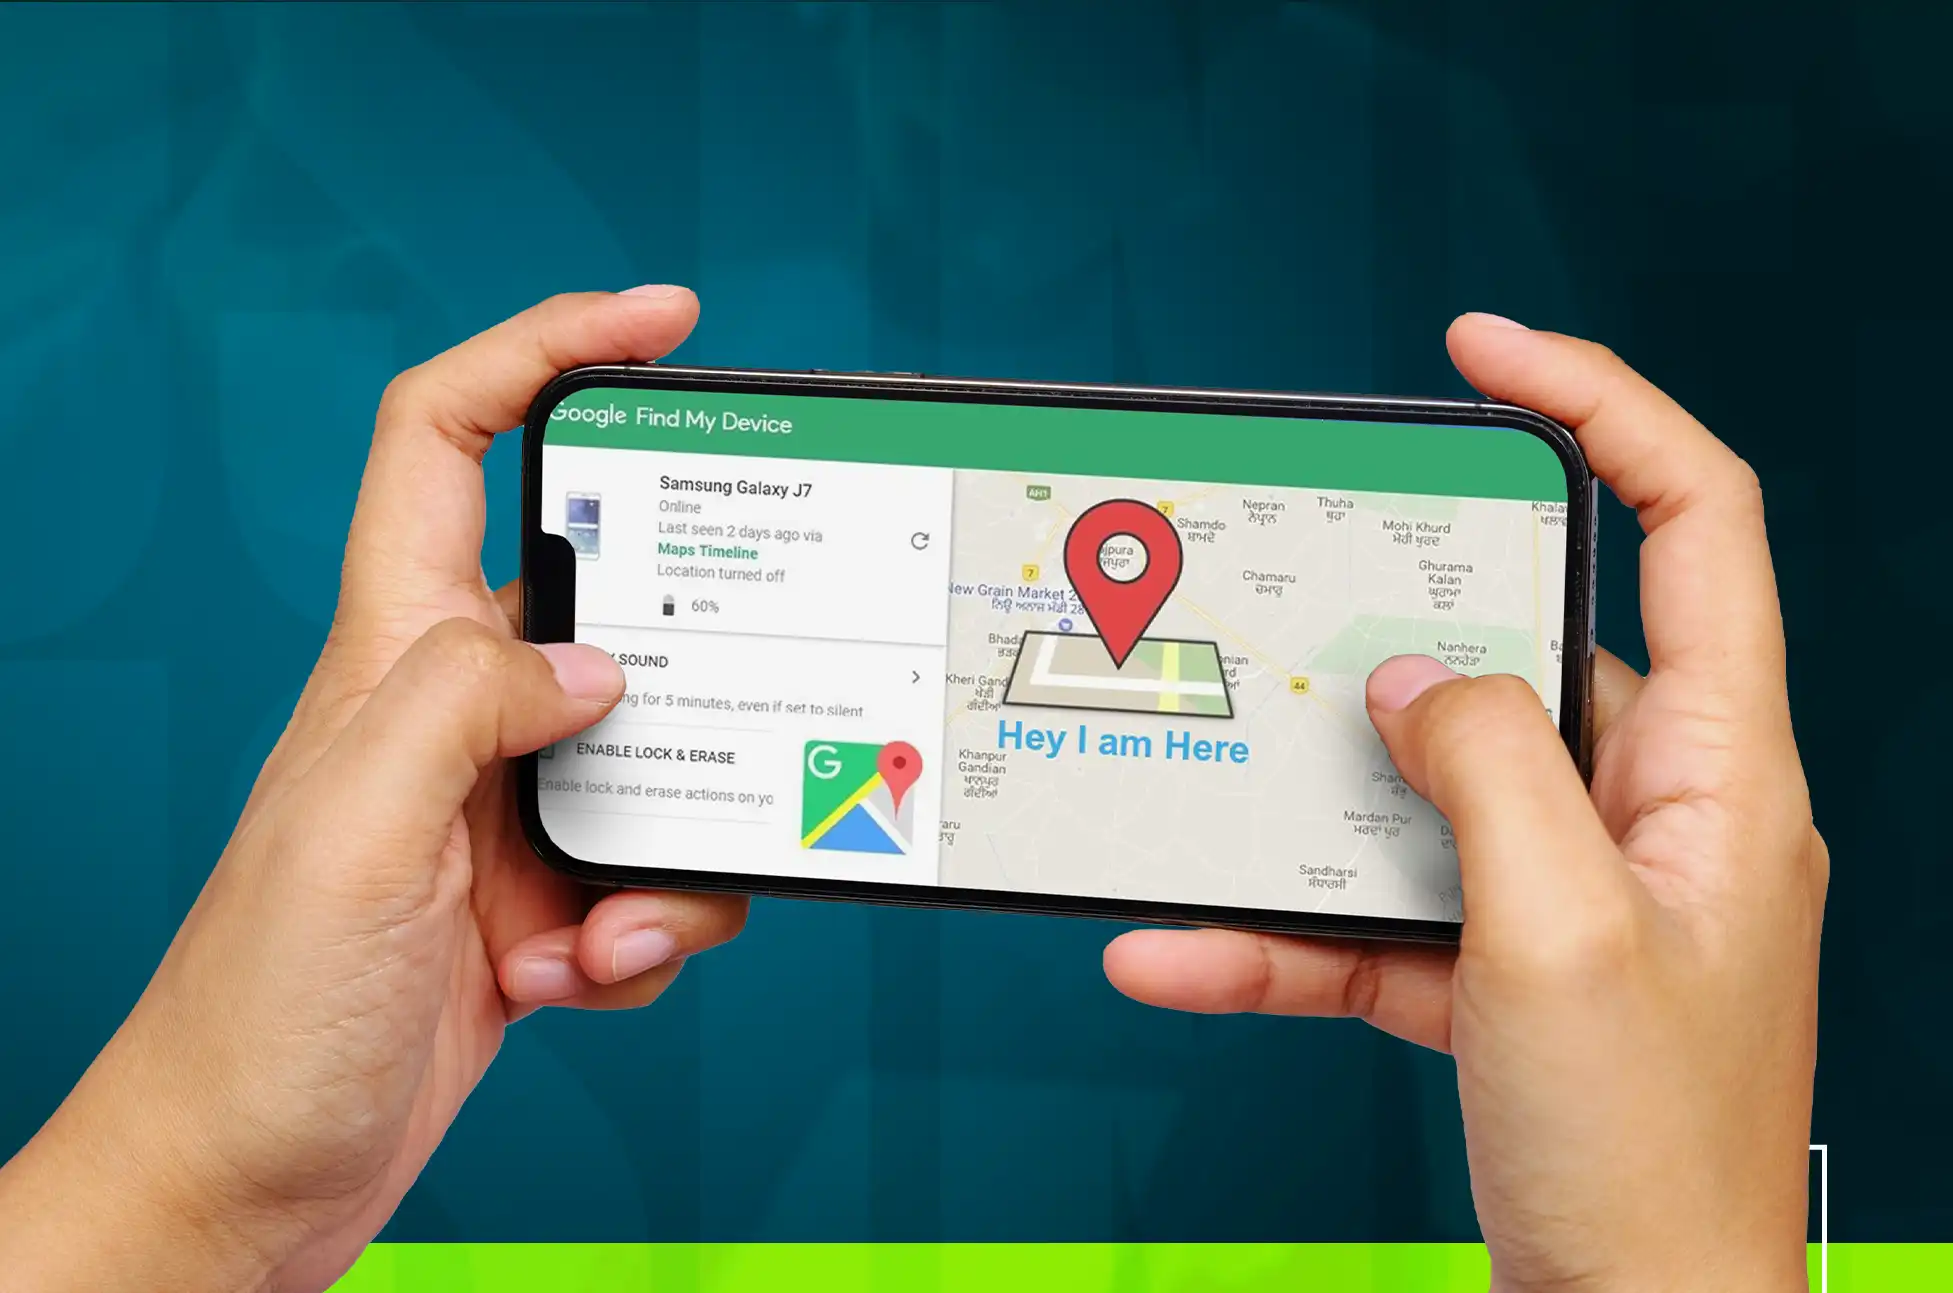
Google Find My Device
Phone go missing? Don’t fret! Both the Android and iOS versions of Find My Device (developed by Google) and Find My iPhone (developed by Apple) have your back. Log in to your account through a web browser on your computer, and then use the phone locator feature. You can release your tension by unlocking your phone from afar. It’s like having a personal angel watch over your mobile device.
Select Secure Device from the menu. Select Erase Device once you have successfully locked the phone. Your phone will be untraceable when you wipe it, but you can protect it with a new passcode. Once you’ve signed into your Google account again, you can restore your applications and photos.
Android Smart Lock
Sometimes all it takes to get your phone unlocked is to put it in your pocket or bring it indoors. Because a feature called Smart Lock has been standard on Android devices ever roughly version 5. The lock screen’s proximity condition allows the phone to remain unlocked in one of the following circumstances:
On your person (such as in your pocket or hand), for example.
At the location that you specify
In close proximity to another Android device that you specify
Smart Lock has a single flaw, which you’ve undoubtedly guessed: it cannot be activated after the phone has been locked. You must put it up in advance. Open the Settings app on your Android device and select Security & lock screen, followed by Smart Lock, if you wish to implement this feature. If a screen lock is not enabled, this control will not be displayed.
Factory Reset: The Last Resort:
Android phones can be reset from a locked state by simultaneously tapping and holding the power button and volume down button. Make sure your phone is connected to a charger during this procedure, as it requires a lot of power.
A menu should appear following the Android logo. Press the power button again after using the volume controls to navigate down to Recovery. You’ve reached the reset menu. Press the power button after using the volume controls to navigate to the Wipe data/factory reset option. You will be prompted to validate the reset; press the power button once more to do so. Resetting will begin. The phone should be turned off when the task is complete. Turn the phone back on and reinstall your apps or download your backup from Google, if you have one.
Some mobile devices have a tangible home button. Press the home button in addition to the power and volume up buttons at the outset of the process if your phone has this configuration.
How to unlock phone without password ( Samsung )
About 25% of all mobile phones sold today are Samsung products. You can see that Samsung has placed its own stamp on certain parts of Android if you own a Samsung phone and compare it to the pure Android experience offered by the Pixel. Because of this, you may find some duplicate software or slightly altered settings menus. Samsung’s SmartThings Find is similar to Google’s Find My Device.
To access the site, you must first sign in with your Samsung account. When you do, a map and list of all of your Samsung devices that are on, connected to Wi-Fi or cellular, and have Remote Unlock enabled will be displayed on the left. When you click on the locked device, a menu will appear on the right. The Unlock option is available. Just click it and say yes when prompted. In just a few seconds, your phone will be free of its lock. Remote Unlock, like Android Smart Lock, requires setup before it can be used.
Conclusion
There has never been a time when bypassing the need for a password on a mobile device was simpler or more fun. The options are practically limitless, ranging from the charmingly futuristic appeal of the personalized ease of Smart Lock to the powerful remote capabilities of Find My Device or Find My iPhone. Always put the safety and confidentiality of your phone first when using these methods, and don’t forget to act properly.
All products, and company names, logos, and service marks (collectively the "Trademarks") displayed are registered® and/or unregistered
trademarks™ of their respective owners.
The authors of this web site are not sponsored by or affiliated with any of the third-party trade mark or third-party registered trade mark owners,
and make no representations about them, their owners, their products or services.
how to remove virus on android ? In a world when our cellphones have become extensions of our own beings, keeping them in top condition is important. Imagine this: you’re attempting to master the latest mobile game, watch your favorite shows, or simply keep connected with loved ones, but your Android device is infected with viruses, impeding its functionality. Fear not, for we are here to reveal the methods to eradicating those annoying intruders from your Android, allowing it to reach its full potential! Buckle up, my friends, as we go on a journey for peak performance!
How to remove virus on android : Understanding the Enemy Within
Android users now confront the painful reality of dealing with malware in this technological age. They sneak onto our devices and damage performance, introduce bugs, and even compromise security.
Phones and malware
The vulnerability of phones to viruses depends on the operating system (OS) they use. Popular OSes with security vulnerabilities are targeted by malware. For instance, Android phones, which have an open-source OS, can obtain apps from third-party sources if enabled. This poses risks but can be done with caution. On the other hand, Apple’s closed ecosystem prevents running third-party apps, making it less susceptible to viruses.
Types of malware
Mobile devices can be infected with various malicious software, including Trojan horses, spyware, and worms. These differ from viruses in their behavior and propagation methods. Viruses attach to files and spread when those files are opened, while worms can cause harm without user interaction. Trojan horses do not replicate but serve as gateways for data theft. Just as you should be cautious when playing on a wheel of fortune online casino, it’s important to stay vigilant about mobile security to avoid falling victim to these threats.
Mobile malware examples
Though rare, instances of mobile malware exist. Cabir was the first mobile worm, discovered in 2004, but it wasn’t dangerous. Android/Filecoder.C is ransomware that locks files until a payment is made. Loki Bot spyware steals login credentials, while OpFake is a Trojan horse that sends hidden text messages and requests administrative access.
Common signs that your phone has virus
Battery drain: Infected apps running in the background can rapidly drain your battery.
Unknown apps: New apps appear on your phone without your knowledge or recollection of installing them.
App crashes: If multiple apps crash frequently or behave unexpectedly, malware may be the cause.
Overheating: Infected background apps can overload your device’s RAM, leading to overheating.
Increased data usage: Infected apps using data in the background can result in higher data consumption.
Ad flooding and browser hijacking: Adware may take control of your browser, redirecting you to different websites and bombarding you with ads.
Google account sign-out: Google may sign you out of your accounts and display an alert if malware is detected, providing instructions for account restoration.
Unusual spam texts: Malware can send links to your contacts via emails or text messages, potentially leading to unauthorized purchases or unusual transactions.
Remember to stay vigilant and take appropriate action if you suspect malware on your phone.
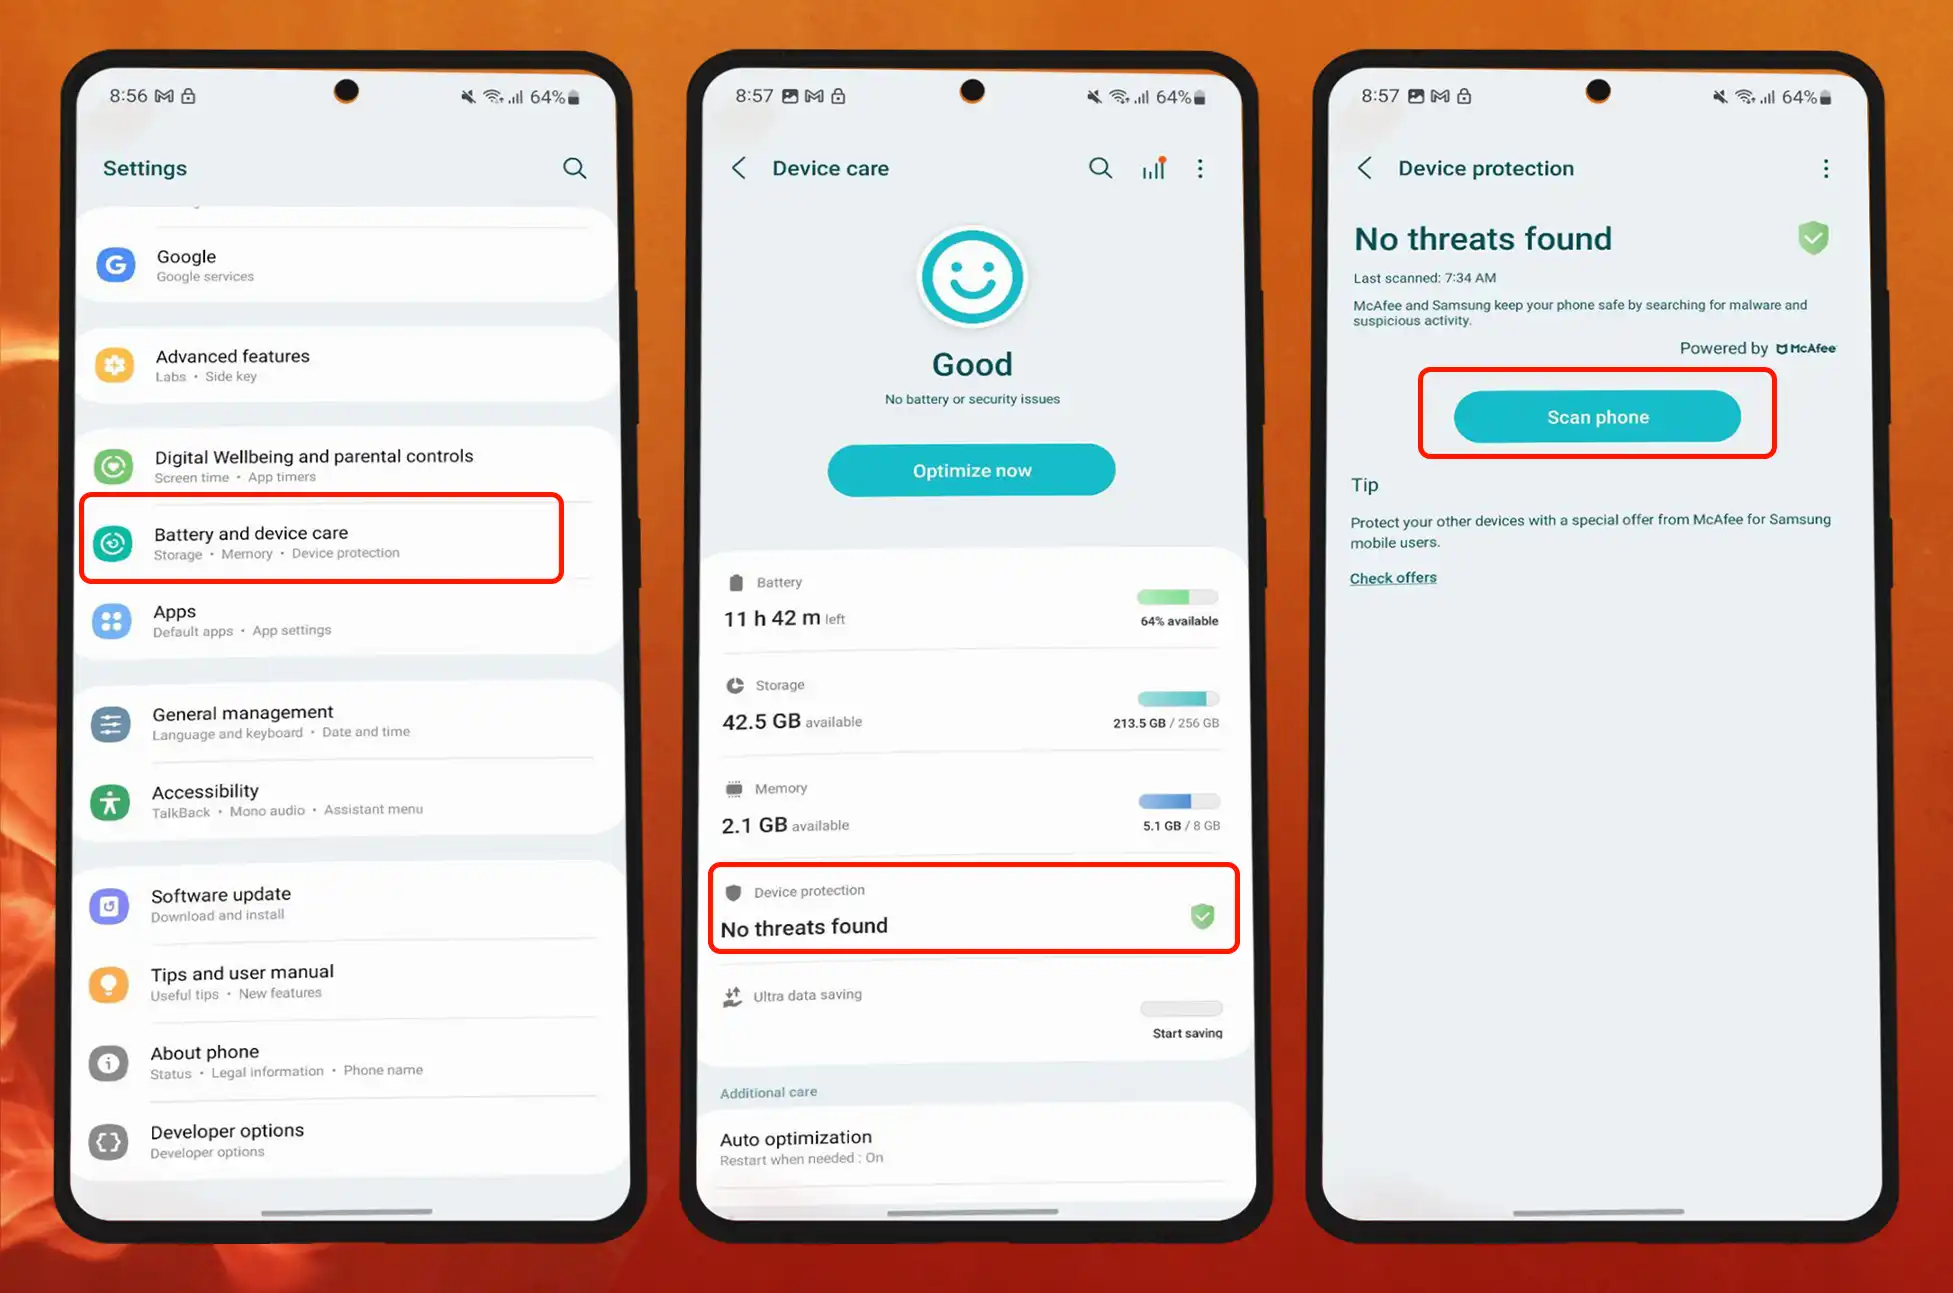
How to remove virus on android
How to remove virus on android ? The latest Samsung smartphones are powered by McAfee protection, and you can check for viruses using the built-in scan application. Google Play Protect is also available for other smartphones. Later in this essay, we’ll go through how to use it. You may also get free scanners and antivirus software from the Google Play Store. While “free” may be appealing, they provide less security features than commercial versions and can report false positives when checking for malware.
As an alternative, you can start your phone in Safe mode. Safe mode boots your phone into a version that only runs system apps. This manner, you can utilize it as if it were a factory reset to see if the problem is caused by the device or by the apps you recently installed. After you’ve made a diagnosis, delete the programs and exit Safe mode. The methods to launch it may differ based on the model and operating system of your device.
Scan and remove viruses from Samsung phones
Go to Settings > Battery and device care
Choose Device protection
Tap Scan device. McAfee scans all apps for hazards. If discovered, follow the removal instructions.
How to remove virus on Android Safe Mode
Hold the phone’s power or lock button on the side. Alternatively, swipe down with two fingertips on your phone’s display. Tap the power icon then.
Press and hold Power off. Tap Safe mode then. Your device will restart
Observe your device. If it functions ordinarily, delete the suspect applications. Press and hold their gray icons, then select Uninstall
Drag down from the top of the display. Then tap Safe mode is on to disable it, and restore your phone to return to normal operation.
Remove infected applications
In addition to safe mode, you can uninstall applications normally to eliminate malware. This procedure deletes all data associated with the application, including caches and stored login credentials. For optimal results, delete applications one by one and restart your device after each deletion. Thus, you can determine which app caused the malfunction and avoid uninstalling unnecessary apps.
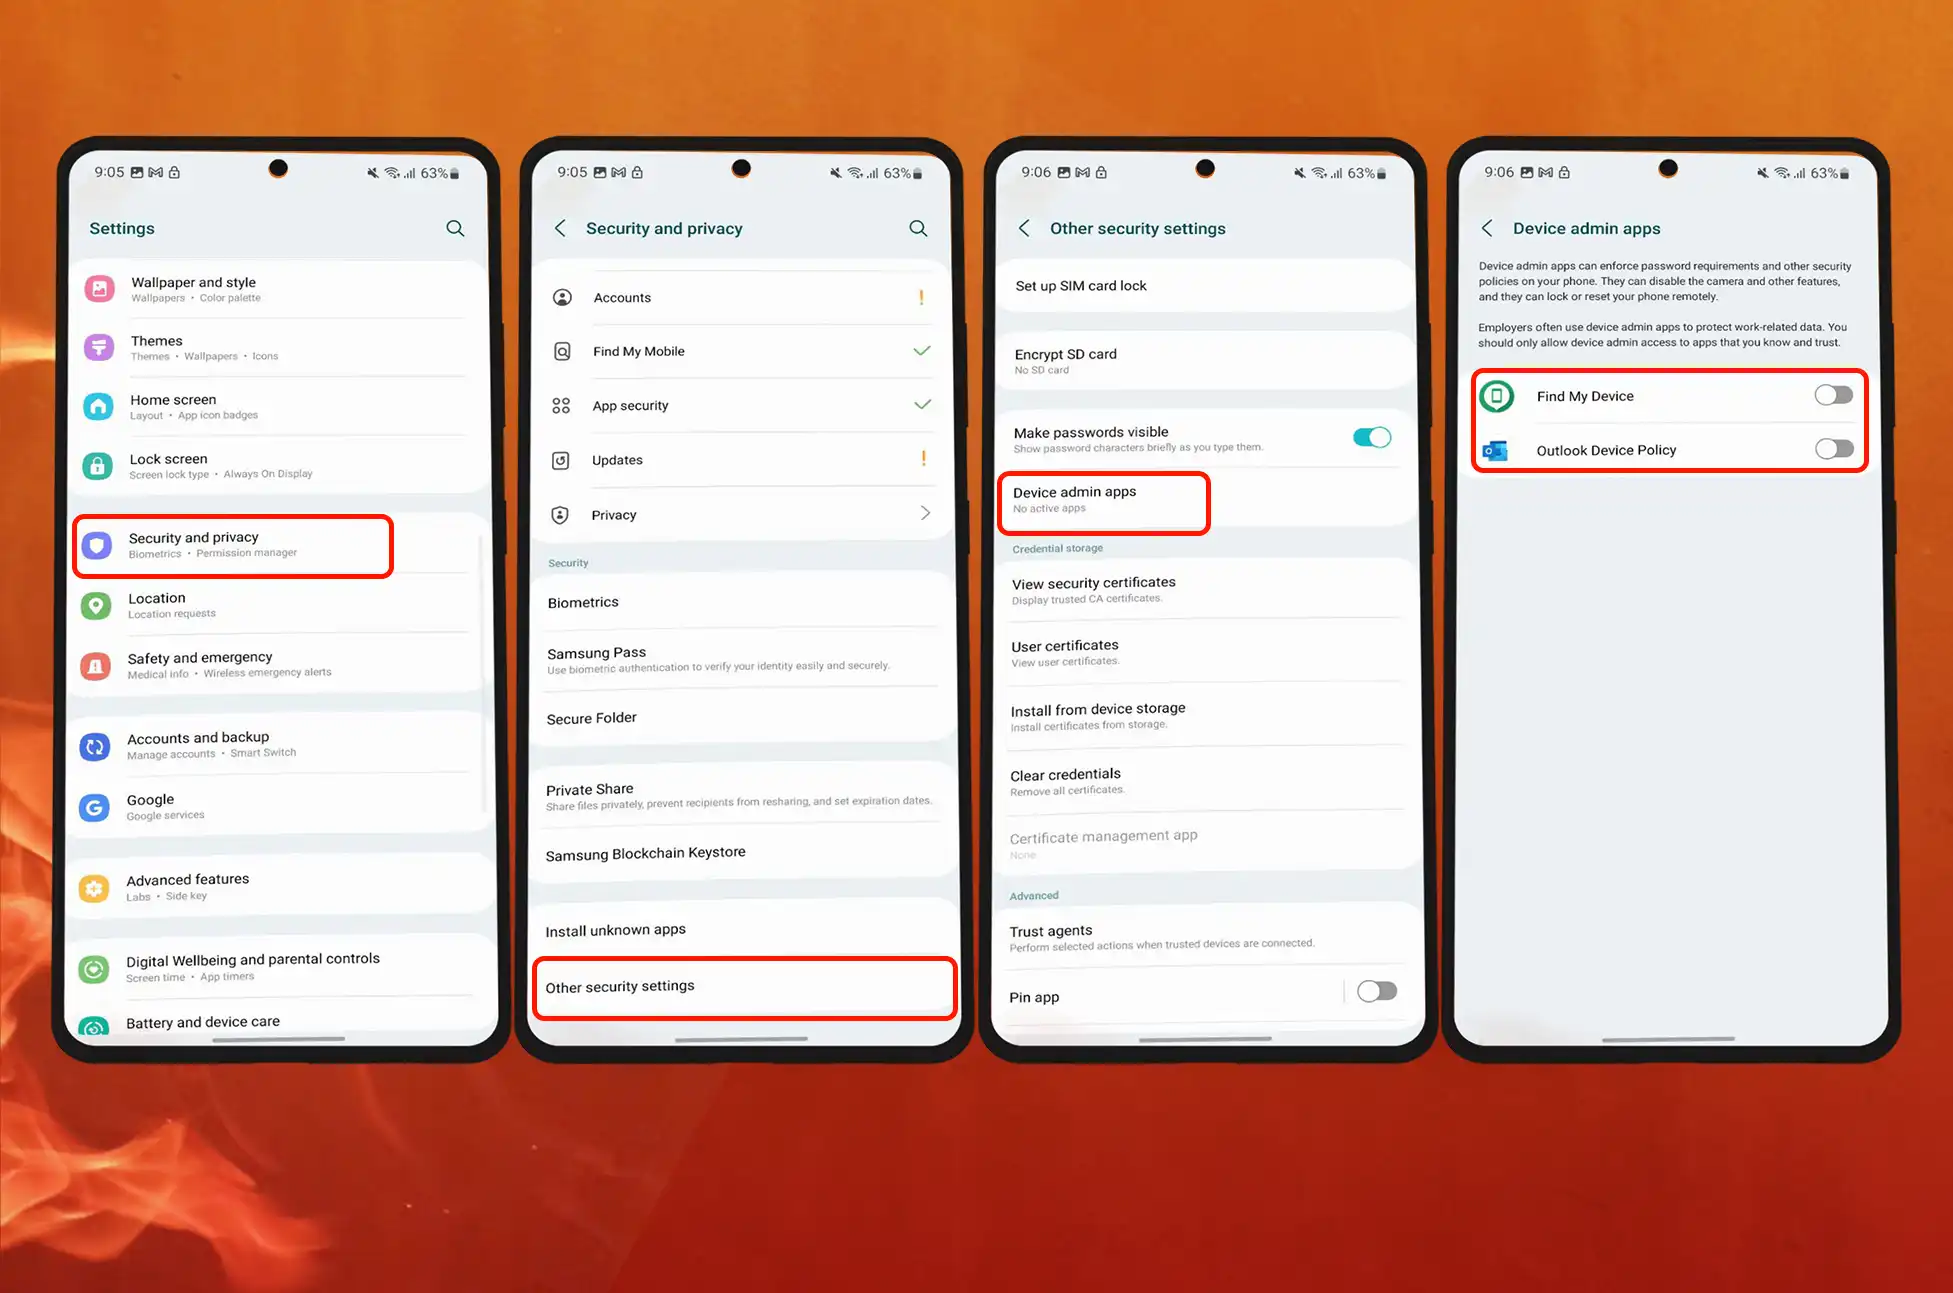
It may be challenging to deactivate certain infected applications. When you attempt to install the application, your phone notifies you that it is a device administrator. Admin apps can, among other things, delete data, lock the device, and alter the lock type. Not all applications have this permission setting, but you should verify that you haven’t enabled one by accident. Follow the instructions below to permanently uninstall device administrators.
Remove programs as Administrator
Go to Settings > Privacy and security
Select Other security settings
Select Device admin apps
Tap an app. Then choose Deactivate.
Uninstall an application once its admin privileges have been removed.
Uninstall apps on Android phones
Long-pressing an application from the home screen or program menu
Choose Uninstall
To confirmthe action, tap OK
Restart your device\
Clear Browser’s Cache and Data
Applications store website caches so that they appear faster on subsequent visits. Clearing them has no effect on existing problems, but it is a good idea after removing a virus. You must ensure that all links between your phone and malicious websites have been eliminated. Either the program cache or cached data within the app can be cleared. Do both precautionary measures.
After that, clear your browser’s cache. If you agree, websites will store cookies on your device in order to track your online activity and remember information such as your login credentials. If you do not delete them, hackers may use them to access your account as you and pilfer sensitive information. Delete the browser app’s storage data for a more severe solution. This option deletes caches and cookies concurrently, but it also deletes your browsing history, download history, and shortcuts.
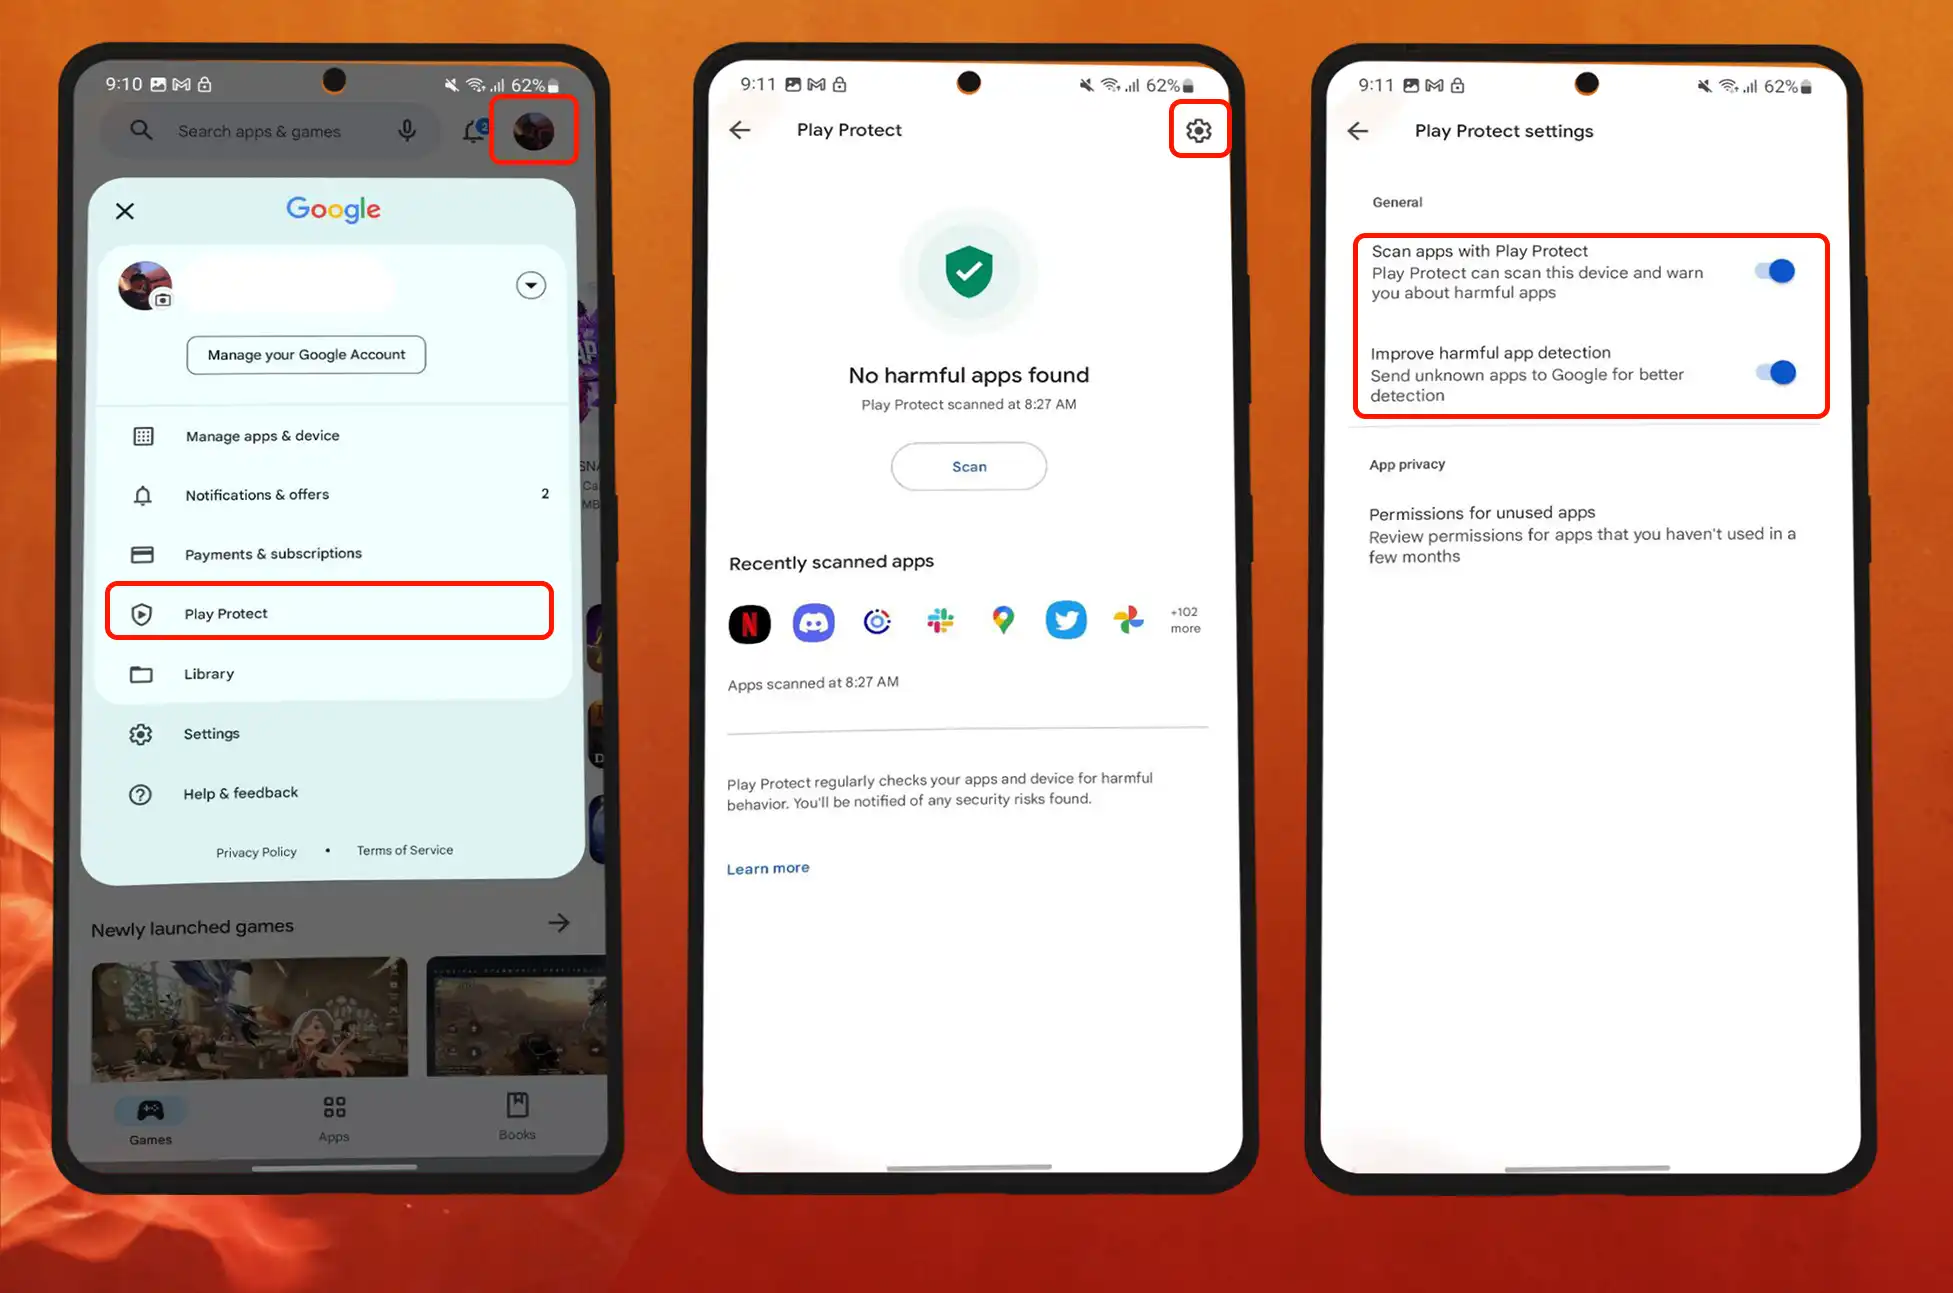
Enable Google Play Protect
Google Play Protect scans every app you install, independent of the source from which it was downloaded. It also performs periodic security tests on your phone. Play Protect either notifies you to uninstall malicious applications or removes them automatically, informing you afterwards. To activate the function, please follow the steps below:
Open the Play Store
Tap the profile icon in the upper-right quadrant.
Choose Play Protect from the available menu options
Tap Turn on to activate the function and initiate a scan.
Update your phone’s OS
Updating your phone’s operating system to the most recent version enhances its compatibility with apps and other devices. Additionally, you’ll fix bugs that cause it to malfunction and acquire new features. You may void your warranty and lose access to future updates and security features if you root your device. According to Google’s support page, you can recover them by reinstalling the device’s original Android operating system.
Normally, you will be notified when an update is available. Check for software updates in the settings menu if you do not.
Perform a Factory Reset
Remember that a factory reset will erase all of your device’s data, so be sure to back up any essential files.
Access the device’s Settings menu.
Select System or General Management
Choose either Reset or “Reset Options
Select Factory Data Reset or Erase All Data
Follow the instructions on-screen to conduct a factory reset.
Protect your mobile device with the finest antivirus measures.
Eliminating a virus from your phone permanently is a success. If you continue to engage in harmful habits that put your phone at risk, it will be brief. Avoid malicious websites, applications, and links from unreliable sources moving forward. Some websites may use keystroke logging to capture sensitive information when you type without requiring you to download anything. If you suspect that your privacy has been compromised, here are some strategies for protecting your smartphone.
Change your passwords
Reset your network settings
Avoid suspicious apps and platforms
Manage permissions and access
Backup your data
Conclusion
Remember, prevention is key! Install apps only from trusted sources, keep your device’s operating system and apps up to date, and exercise caution while browsing the internet and opening email attachments. Stay vigilant to protect your Android phone from viruses and malware.
All products, and company names, logos, and service marks (collectively the "Trademarks") displayed are registered® and/or unregistered
trademarks™ of their respective owners.
The authors of this web site are not sponsored by or affiliated with any of the third-party trade mark or third-party registered trade mark owners,
and make no representations about them, their owners, their products or services.
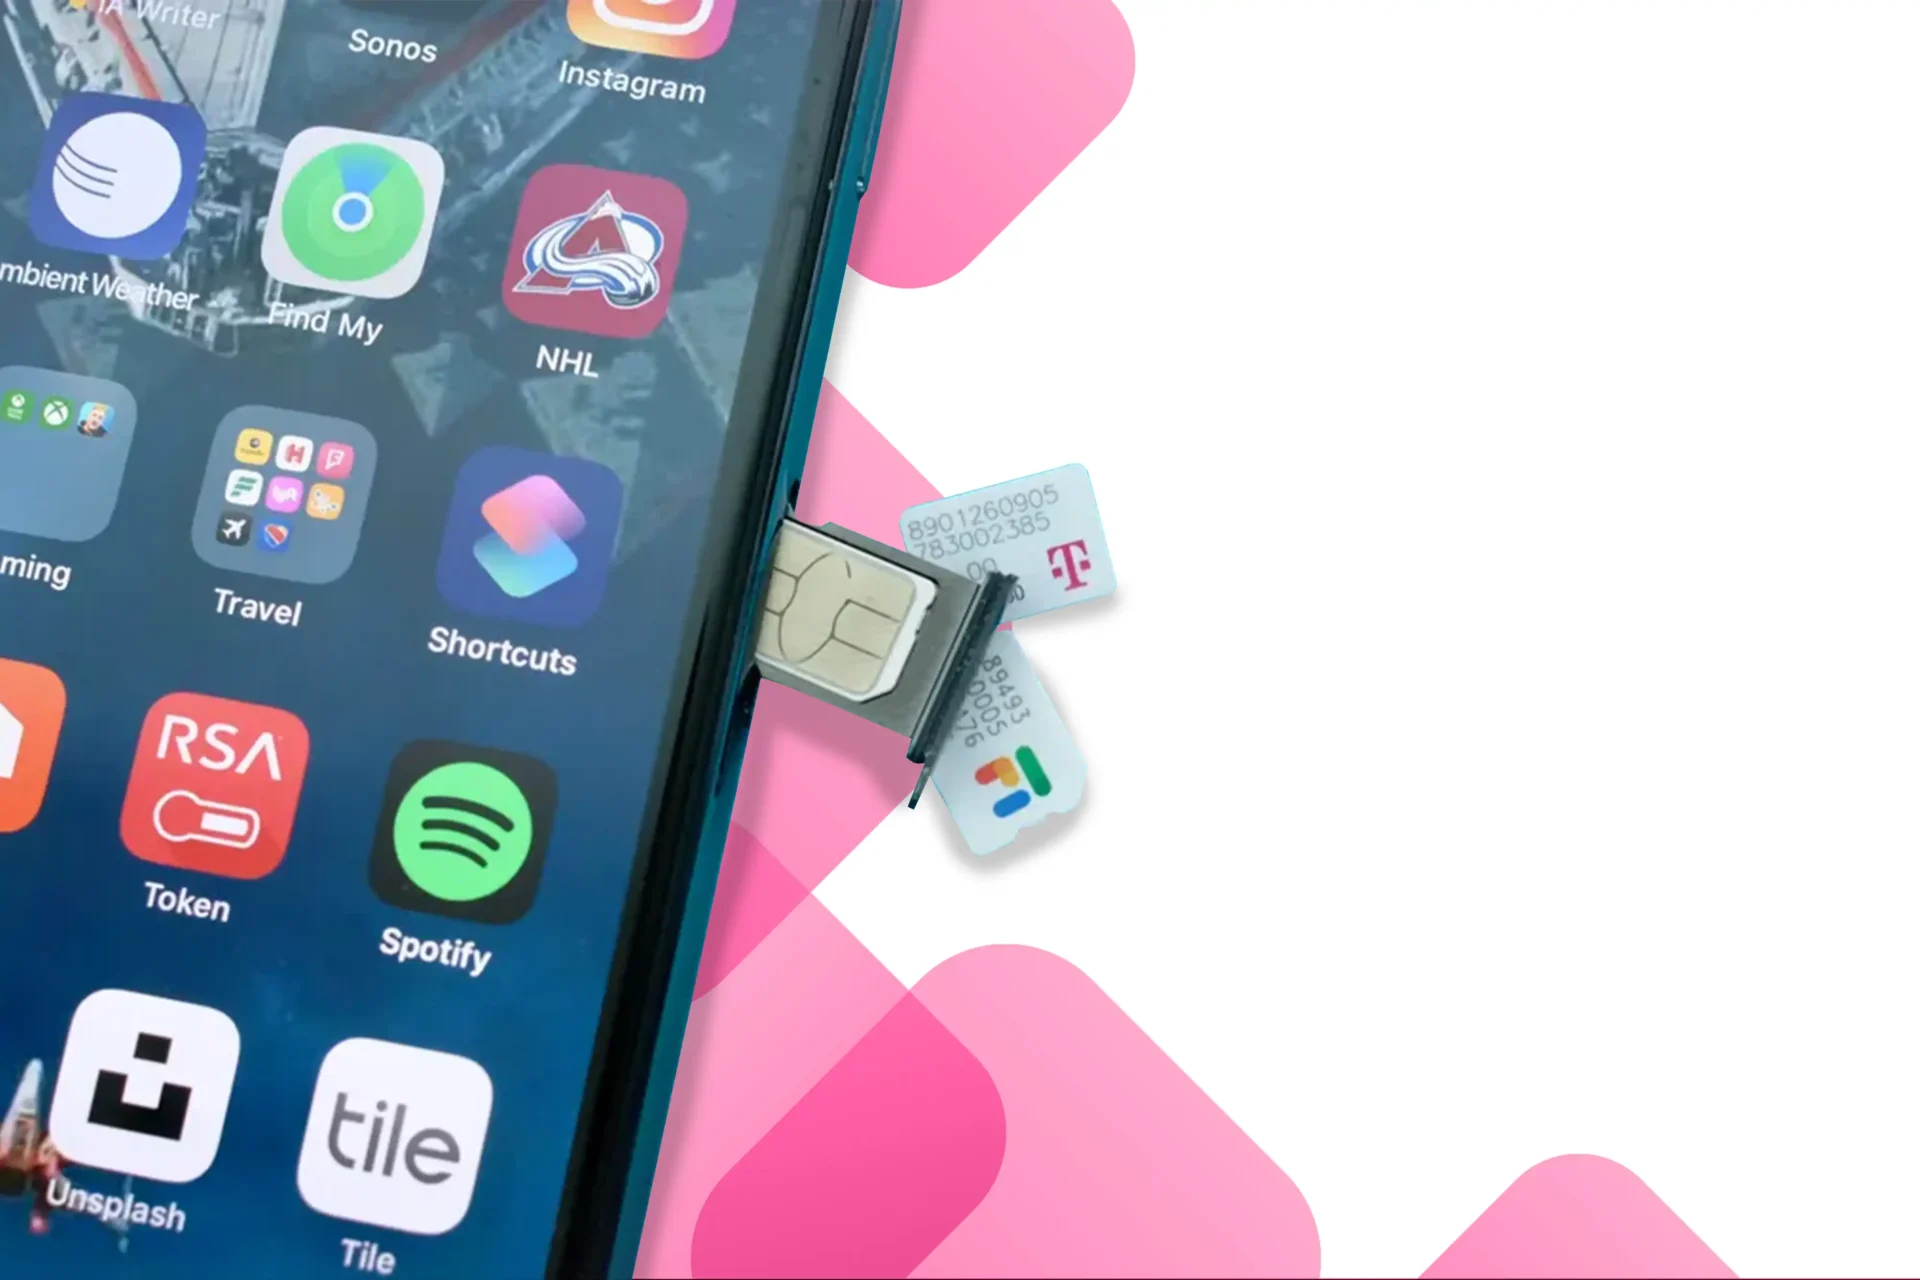
How to activate my new t mobile sim card? Switching to a new mobile carrier can bring a sense of excitement. Perhaps you’re looking forward to getting a shiny new phone or seeking improved coverage in your area. However, it’s essential to understand the setup process. While each carrier has its own approach to SIM cards and activations, the overall process is not difficult.
In this comprehensive guide, we will provide a detailed walkthrough on how to activate your T-Mobile SIM card and ensure your T-Mobile service is operational. Whether you’re a new T-Mobile customer or transitioning from another provider, this step-by-step tutorial will facilitate a quick and hassle-free connection.
How to activate a T-Mobile SIM card
1. Gather Your Materials Before you begin
Make sure you have the following items ready:
Your new T-Mobile SIM card
Your T-Mobile activation code (if provided)
A compatible device (unlocked or T-Mobile-compatible)
2. Activating on phone
The most popular method of activating a T-Mobile SIM card is through your phone. It’s simple, and you’ll need to take the following steps:
While your phone is turned off, insert your SIM card.
Turn on your phone.
Follow the setup instructions on the screen.
Call 1-800-T-MOBILE to finish the process.
To finish the process, you may need to supply the customer support agent with your phone’s IMEI number as well as the number displayed on the SIM card. If you bought an iPhone from T-Mobile, the SIM card was most likely already inserted. To activate your phone, turn it on and follow the setup wizard instructions. You’ll probably need to sign in to your Apple account, but the SIM card should be activated immediately.
3. Activating Online
Launch your device’s web browser and visit T-Mobile’s official activation website. The URL is usually provided in the SIM card packaging or accompanying documentation. If you can’t find it, you can simply search for “T-Mobile SIM card activation” on any search engine.
You might find it easier to activate a T-Mobile SIM card on your computer. You will not have to speak with a customer support representative at all. Simply follow the steps below:
Go to the T-Mobile account page in your web browser.
Log in to your T-Mobile account or follow the steps to create a T-Mobile ID.
If you have numerous lines, select the one for which you want to swap the SIM card.
Follow the steps to authenticate your account.
Enter your ICCID number to confirm the change.
When you open a T-Mobile account, you must enter your phone number and create a PIN. T-Mobile will activate your SIM card after you fill out the appropriate fields and click submit.
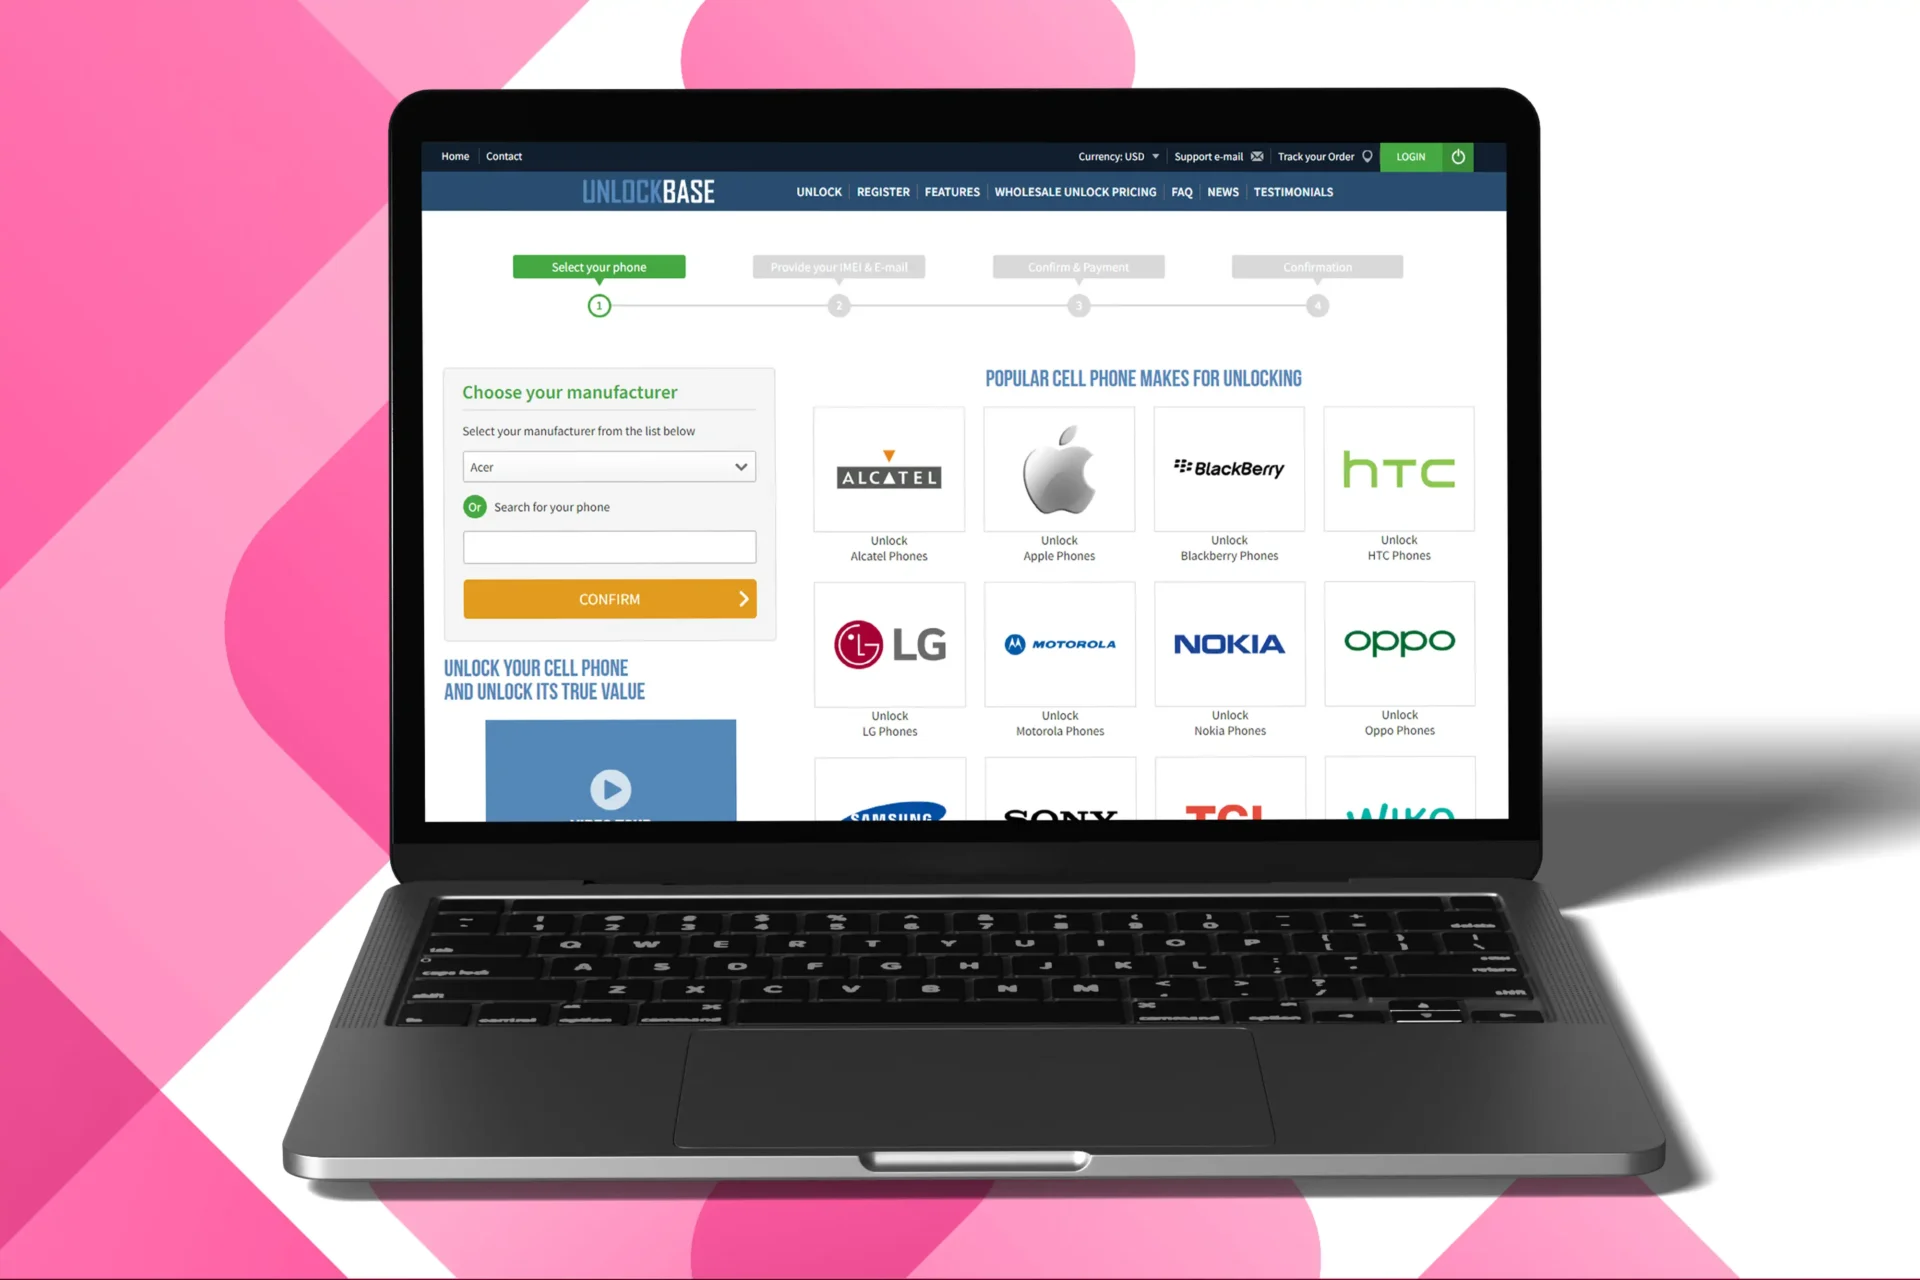
Unlock phone to activate a T-Mobile SIM card
If your T-Mobile SIM card doesn’t work, it’s possible that your phone is not yet unlocked. You can determine if your phone is locked by checking if it prompts you to enter a network unlock code or displays a message indicating that it’s locked to a specific carrier.
To unlock your phone, you’ll need the IMEI number which you can get in the device settings or by calling *#06#.
Confirm your payment and wait for an email confirmation
If you received the email, please remove your SIM card
Insert an unaccepted SIM card
You should now see a box where you can enter the unlock code
Enter the unlock code supplied by UnlockBase
Conclusion
Activating your new T-Mobile SIM card is a straightforward process that requires a few simple steps. By following this guide, you should be able to activate your SIM card smoothly and start enjoying your T-Mobile service. If you encounter any issues during the activation process, don’t hesitate to reach out to T-Mobile’s customer support for assistance.
All products, and company names, logos, and service marks (collectively the "Trademarks") displayed are registered® and/or unregistered
trademarks™ of their respective owners.
The authors of this web site are not sponsored by or affiliated with any of the third-party trade mark or third-party registered trade mark owners,
and make no representations about them, their owners, their products or services.
Navigating your Android smartphone may be a journey full of unexpected and delightful discoveries. You may occasionally encounter a software glitch and need to factory reset your device. Maybe you’re a tech enthusiast who wants to try out modified ROMs or root your smartphone. In any case, you’ll need to understand how to go into recovery mode on your Android device. On Samsung, Google Pixel, and Motorola phones, learn how to enter recovery mode, what you can do in recovery mode, and how to exit recovery mode.
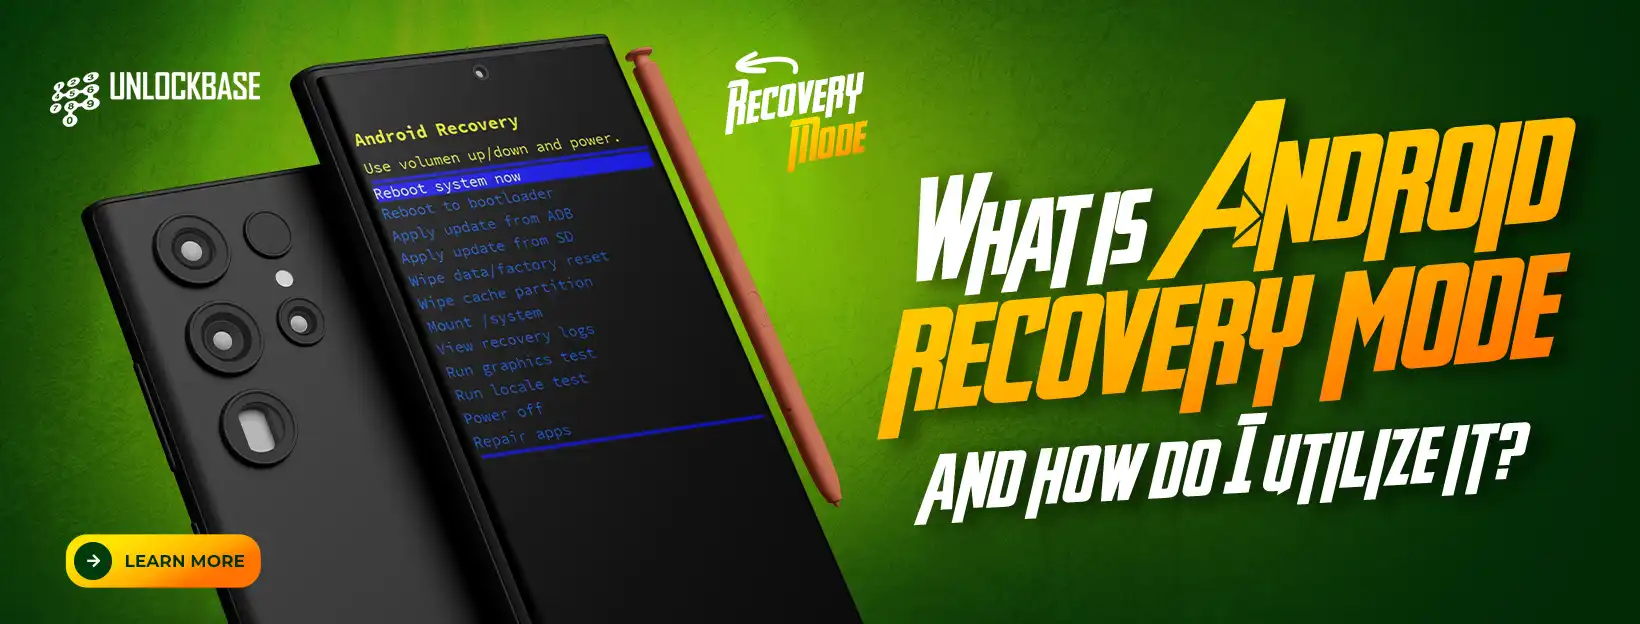
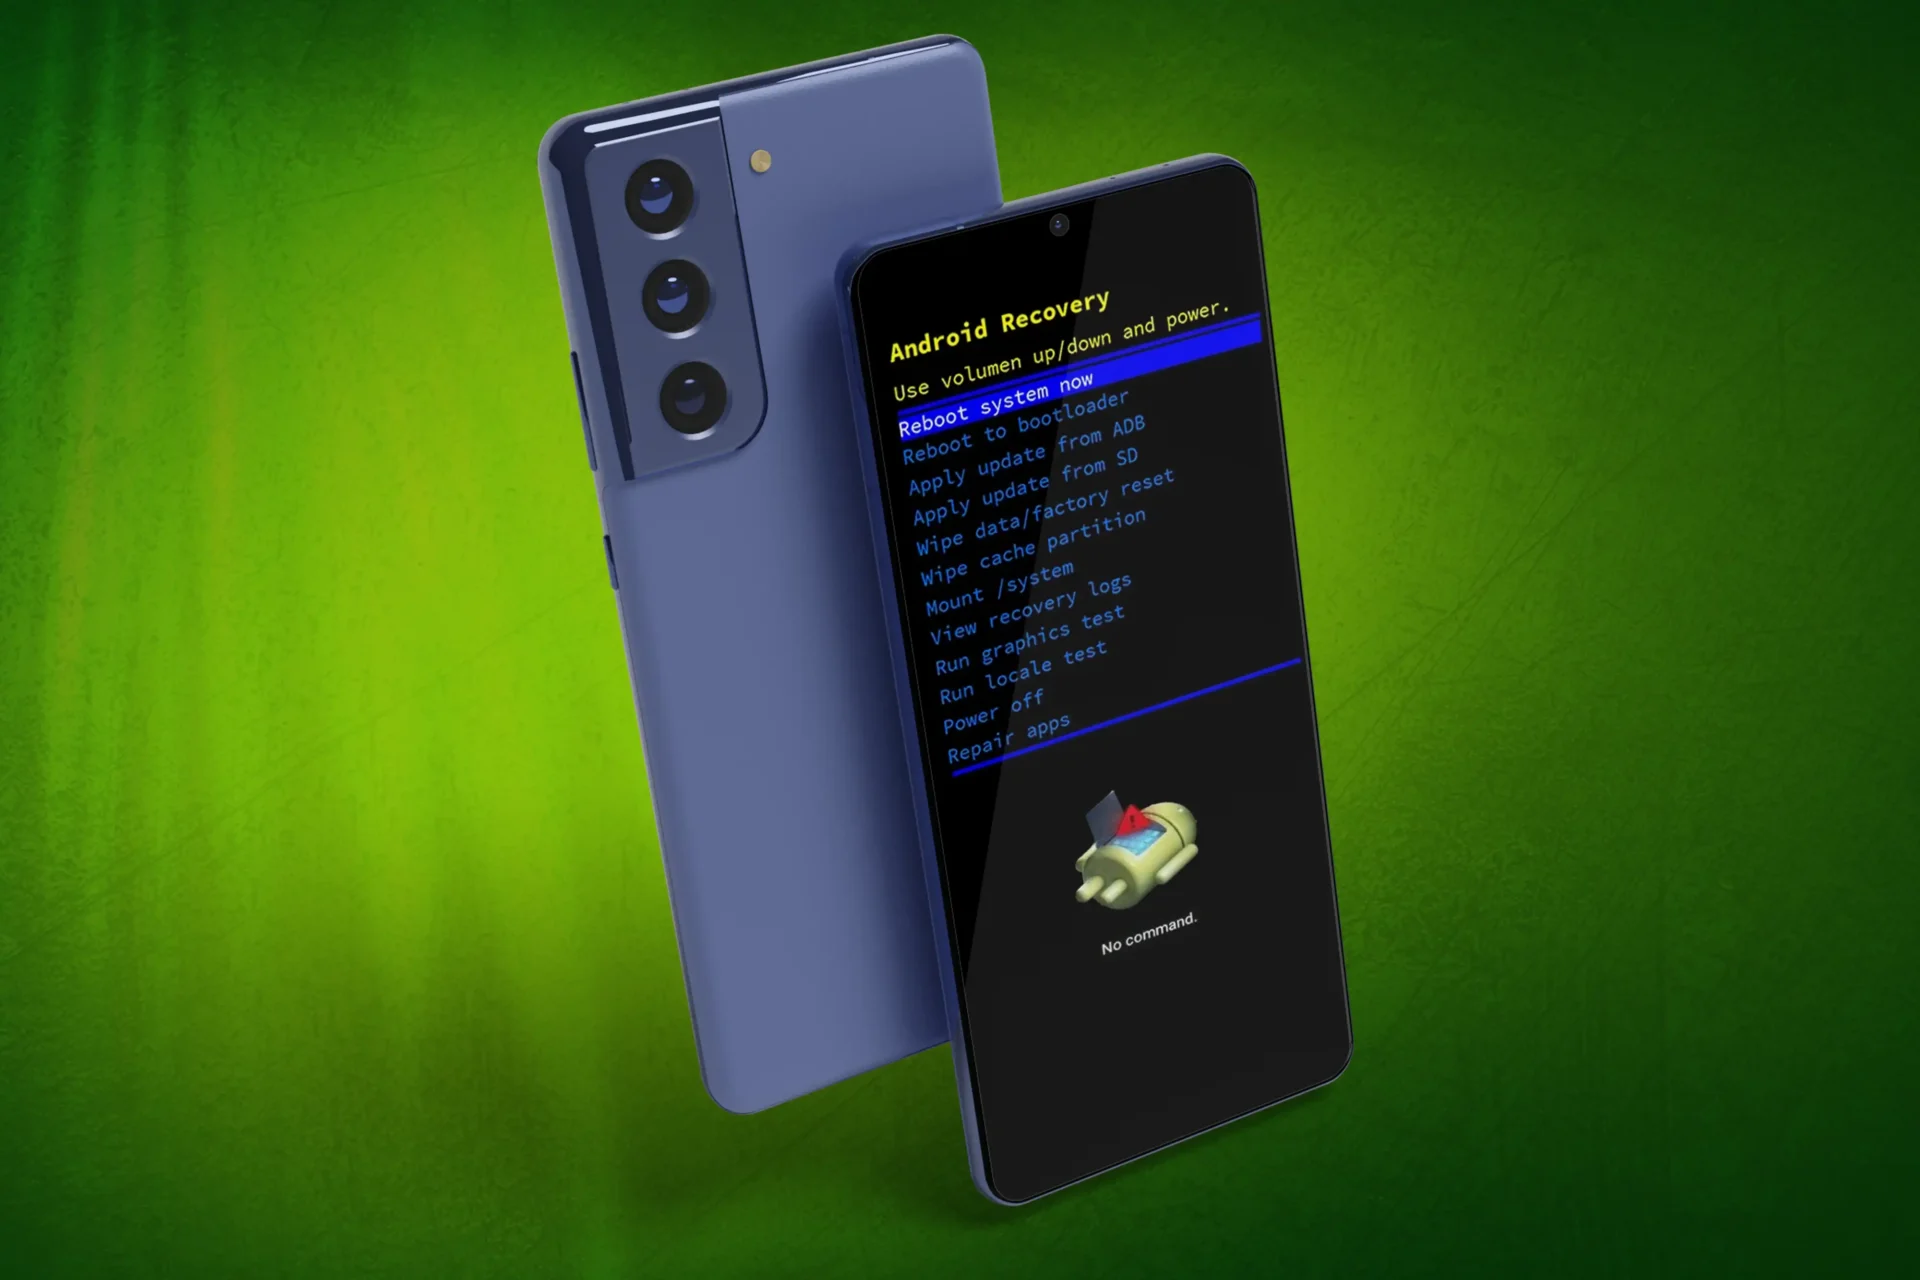
What exactly is Android Recovery mode?
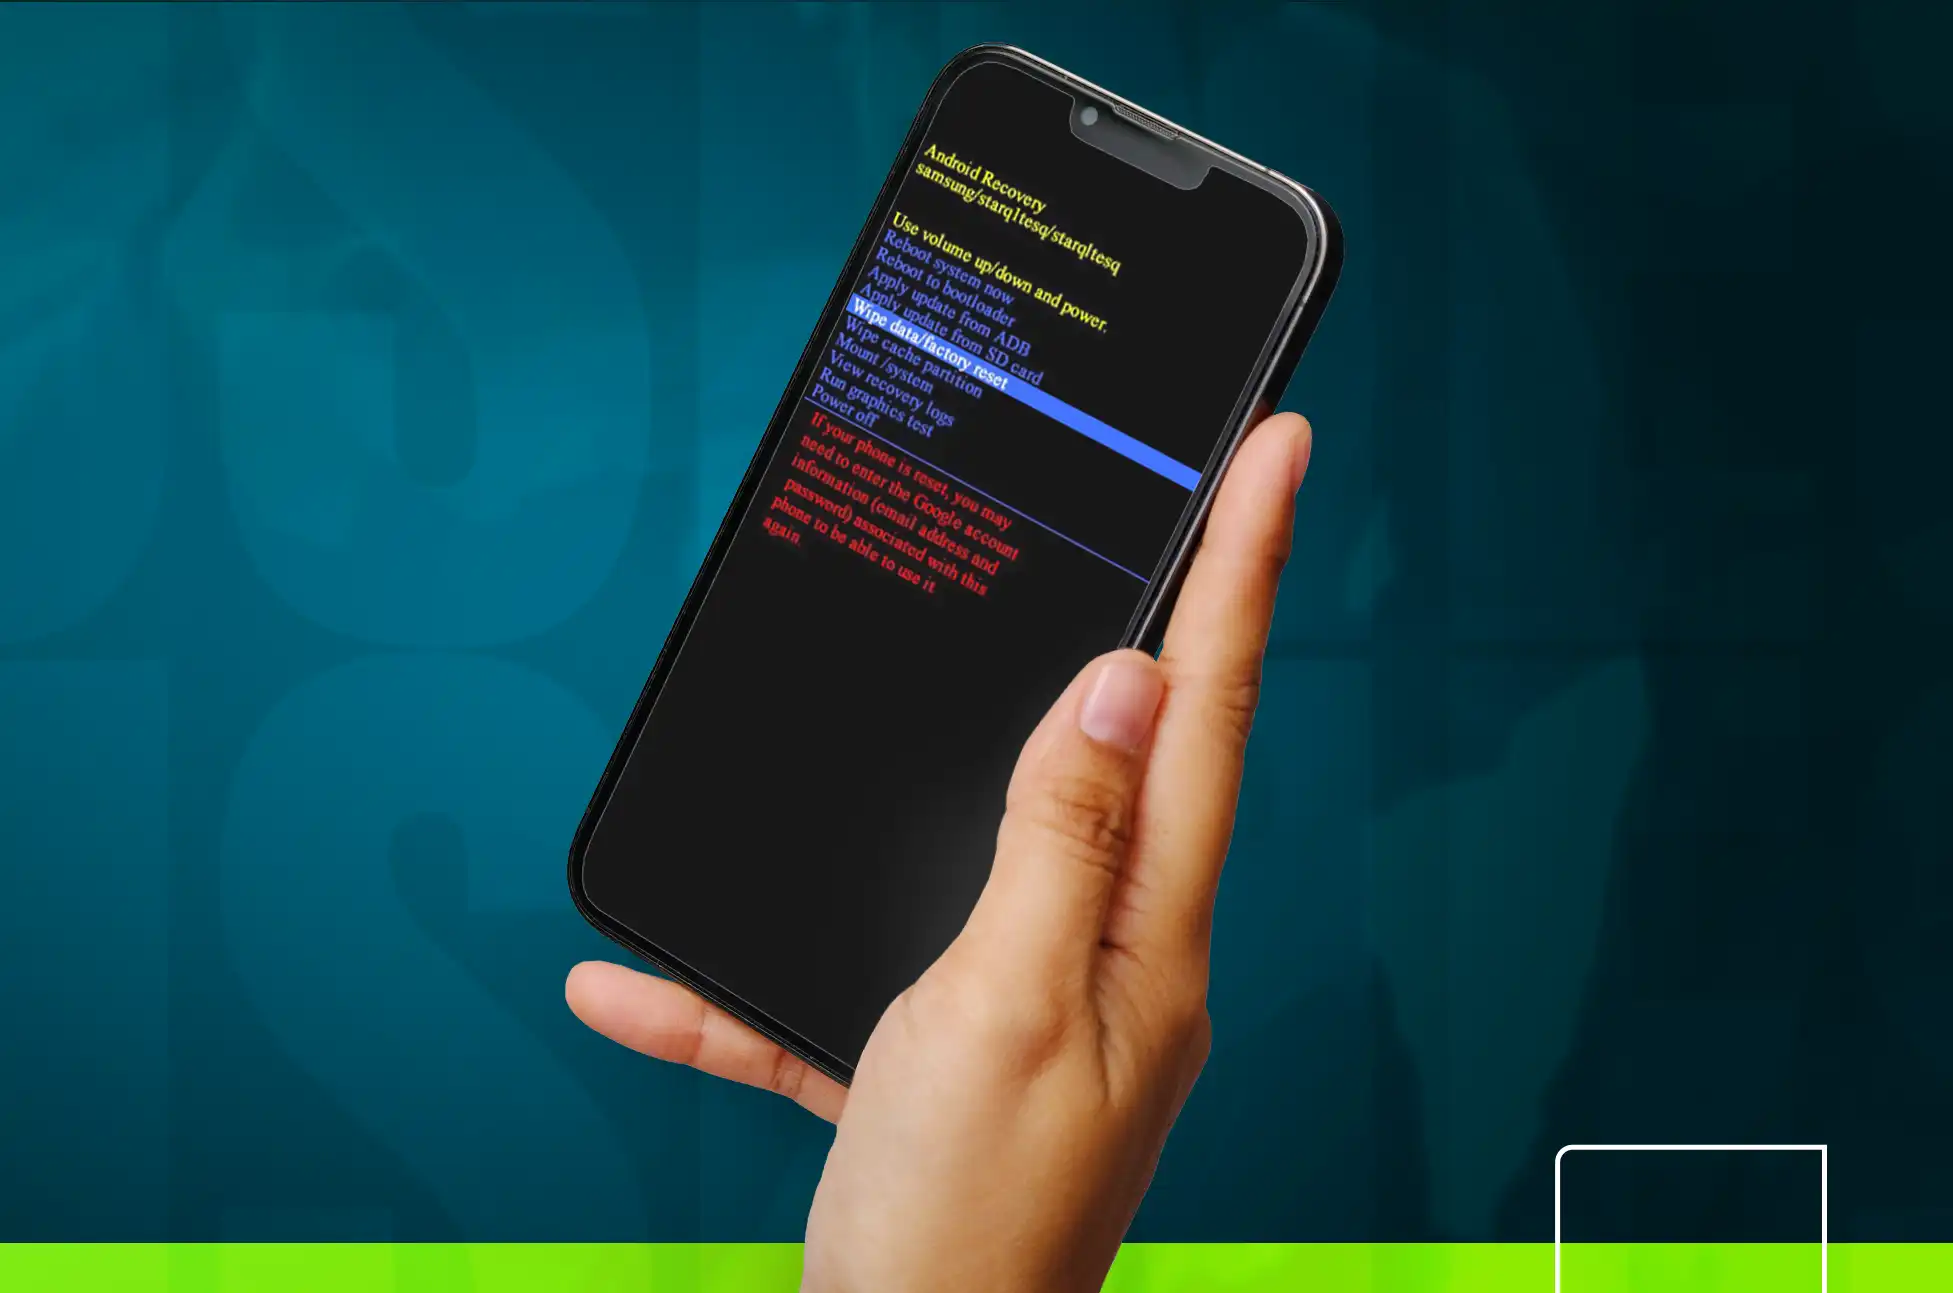
Android recovery mode is a one-of-a-kind starting mode accessible on all Android devices that includes a number of tools for diagnosing and fixing issues that cannot be addressed inside the operating system. This mode is commonly used to conduct system upgrades, factory resets, and the installation of custom ROMs.
The android recovery mode, which is commonly used for troubleshooting and maintenance, offers options such as deleting data/factory reset, cleaning cache partition, installing updates from ABD or SD cards, and more. Recovery mode, in essence, functions as a distinct bootable partition that is required for executing system-level operations and making modifications to the Android system’s file system.
How to activate Recovery Mode on an Android Device
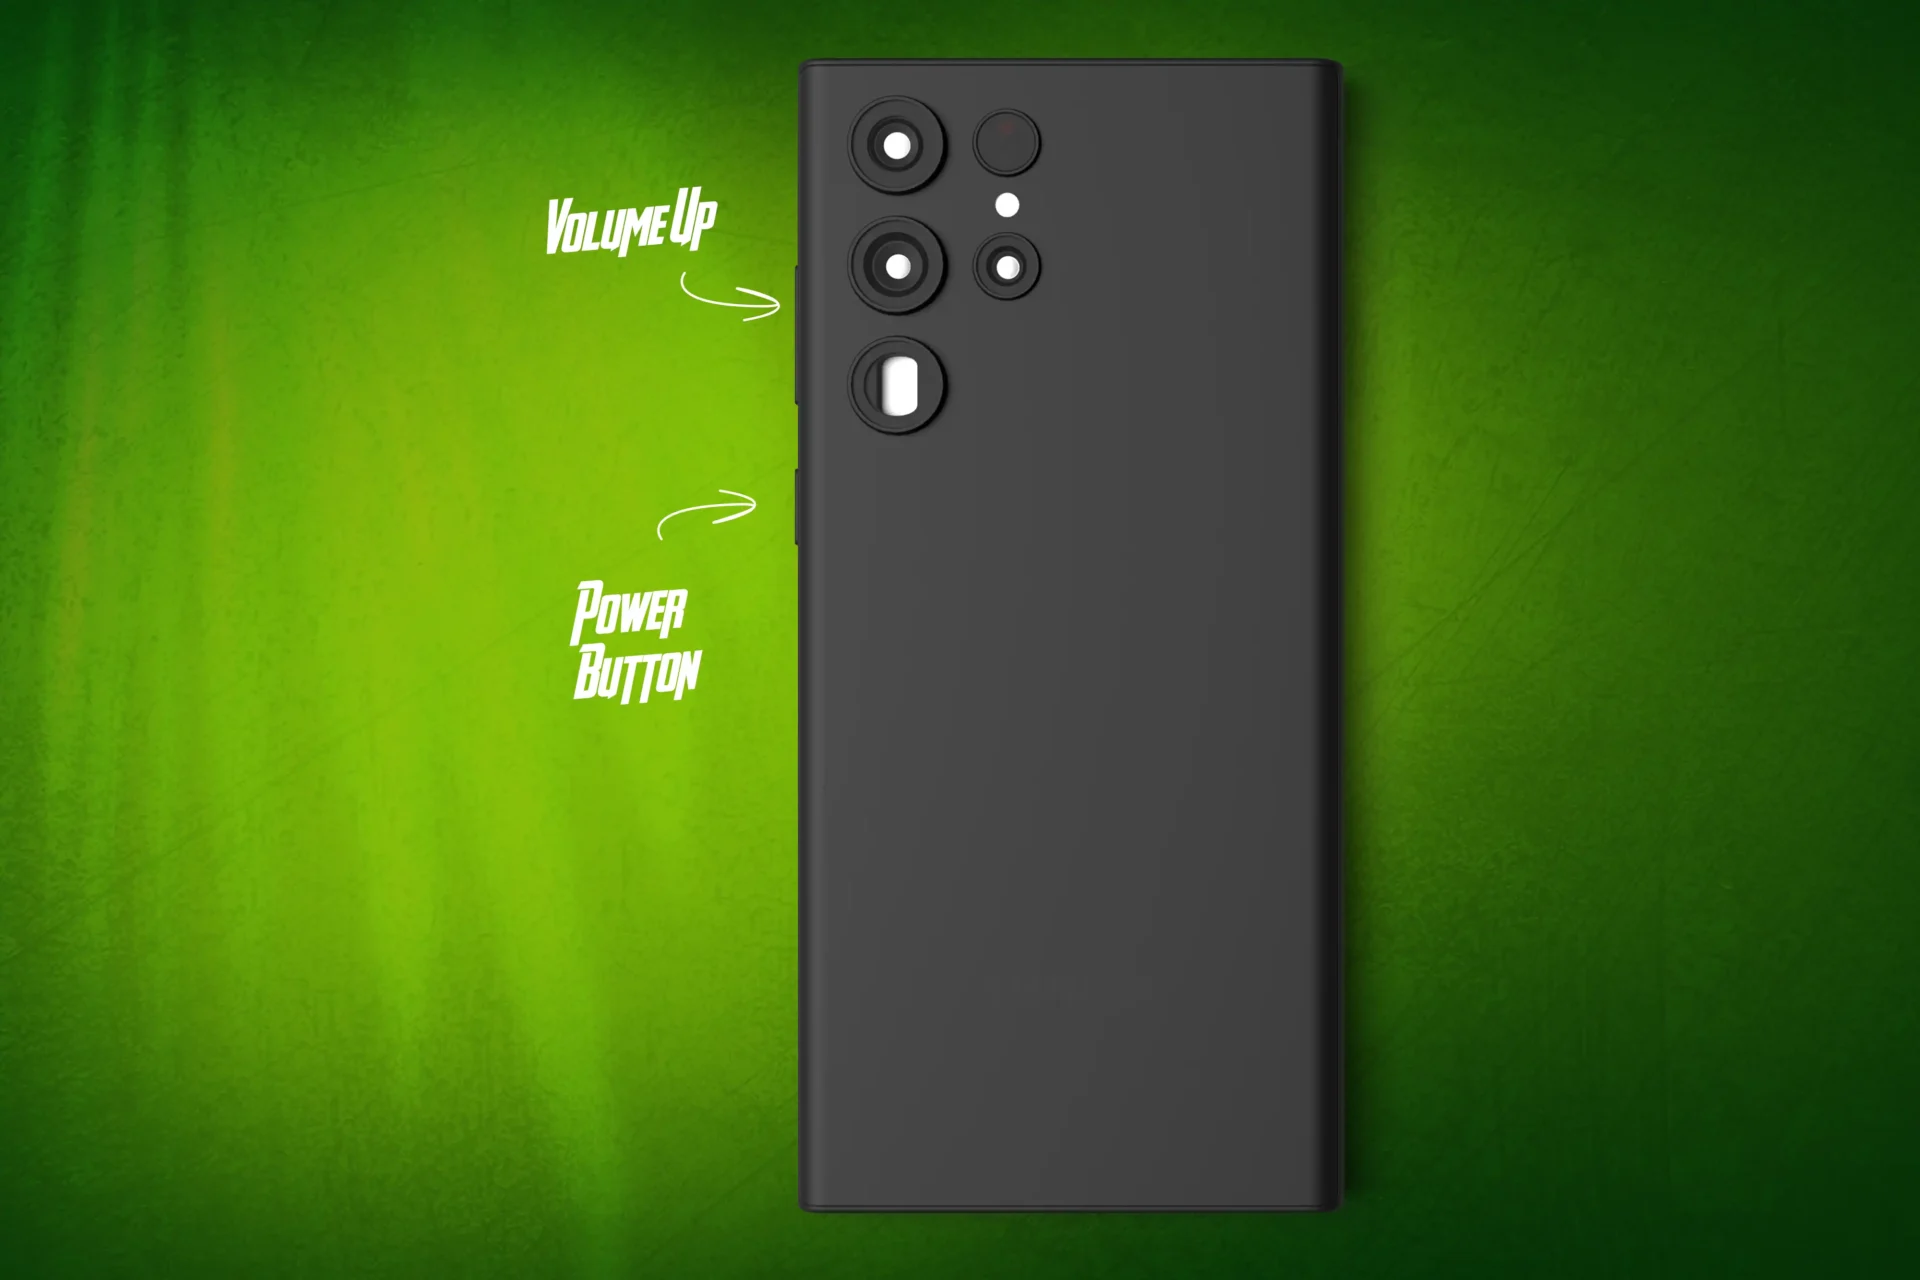
While most Android smartphones enter recovery mode by holding the Power and Volume Down buttons simultaneously, there are differences across manufacturers. We’ll go over the steps for Samsung, Pixel, and Motorola phones.
Samsung Phones
Shut off your Samsung smartphone.
Hold down the Volume Up and Power buttons at the same time until the Samsung logo shows.
When the smartphone vibrates once, release all buttons. The recovery mode menu for Android should now show.
Pixel Phones
Switch off your Pixel phone.
When the screen turns black, press and hold the Power and Volume Down buttons simultaneously until the bootloader screen appears.
Navigate to the Recovery Mode choice using the Volume keys and pick it with the Power button.
Motorola Phones
Shut off your Motorola gadget.
For a few seconds, hold down the Power and Volume Down buttons until the bootloader displays.
Navigate to the Recovery option using the Volume buttons and choose it with the Power button.
How to utilize Recovery mode
Recovery mode provides a number of troubleshooting and device administration options. Let’s look at each function individually:
Wipe cache partition: Clear up storage space and fix data-related issues with ease. Wipe cache partition in recovery mode, removing temporary files without data loss. Get optimal performance now!
Reboot system now: You can use this option to exit recovery mode without making any modifications.
Wipe data/factory reset: This does a factory reset, erasing all data and returning your device to factory settings. It’s a useful feature to have when your gadget isn’t working properly or before you give it away or sell it.
Apply update from ADB: This allows you to install updates or custom ROMs from your computer via the Android Debug Bridge (ADB).
Apply update from SD card: If you have an update file or a custom ROM on your SD card, you can install it with this option.
How to Exit Recovery Mode
To exit the recovery mode on a Samsung, Google Pixel, or Motorola handset, use the Volume buttons to scroll to the Reboot system now option and select it with the Power button.
Conclusion
Android recovery mode is a powerful feature that allows you to manage the troubleshooting and recovery processes on your smartphone. Understanding how to enter and use recovery mode allows you to handle common issues, restore your device’s functionality, and even experiment with advanced solutions. With the knowledge and direction offered in this thorough tutorial, you will be able to successfully utilize the potential of Android recovery mode. Accept its potential, overcome obstacles, and assure a more enjoyable Android experience.
All products, and company names, logos, and service marks (collectively the "Trademarks") displayed are registered® and/or unregistered
trademarks™ of their respective owners.
The authors of this web site are not sponsored by or affiliated with any of the third-party trade mark or third-party registered trade mark owners,
and make no representations about them, their owners, their products or services.