Smartphone prices 2025 are headed upward, and industry insiders are sounding the alarm. Remember when a $1,000 iPhone X felt scandalous? That pricing drama feels quaint now. Today’s flagship smartphones regularly flirt with four-figure price tags, and even solid mid-range options like the Pixel 10 will set you back $800.
Sure, budget alternatives exist. Brands like OnePlus continue proving you can deliver flagship performance without flagship pricing. But here’s the reality: smartphones are about to get more expensive across the board.
Price creep has been gradual enough that most of us haven’t noticed. Companies space out increases strategically, keeping sticker shock to a minimum. That calculated approach might be ending soon, and the reason probably won’t surprise you.
Why Smartphone Prices 2025 Are Climbing: The Memory Chip Crisis
During a November 18 earnings call, Xiaomi sounded the alarm about skyrocketing memory chip costs and their inevitable impact on smartphone pricing. Reuters covered the warning, which wasn’t just aimed at consumers—manufacturers themselves face shrinking margins if they can’t pass these costs along.
The numbers are staggering. Samsung has pushed memory chip prices up by as much as 60%. While data centers consume most of this production, smartphones remain massive chip buyers. The driver behind this surge? Artificial intelligence.
AI infrastructure demands enormous memory resources. As companies race to build AI-capable data centers, chip manufacturers face a dilemma. The AI market remains volatile—everyone’s talking about a potential bubble—so ramping up production carries serious risk. Until the market stabilizes, supply will stay tight and prices will stay high.
This squeeze affects every corner of tech, but smartphones may see the most visible price jumps, even from Samsung itself.
What to Expect: Smartphone Prices 2025 and Beyond
You might assume Samsung Galaxy devices will dodge price hikes since Samsung manufactures its own chips. Unfortunately, the cost surge is too massive for any single company to absorb internally, even one controlling its own supply chain.
Memory chips tell only part of the story. Camera modules and virtually every other smartphone component have seen dramatic price increases over the past year. Until manufacturing capacity catches up with demand, we’re looking at the same pricing explosion that defined the last decade of smartphone evolution.
Historically, manufacturers raise device prices in roughly $100 increments. For 2025 smartphone prices, that might be the floor rather than the ceiling. Expect bigger jumps.
So what’s your move?
How to Beat Rising Smartphone Prices in 2025
Option one: Buy now. Option two: Don’t buy at all.
Manufacturers might try alternative approaches to manage rising production costs—think subscription fees for Android features, premium charges for photo storage, or cost-cutting on components. But if retail prices track hardware costs upward, here’s your playbook.
If you’re in the market, pull the trigger now. If you’ve purchased a smartphone within the last two years, keep it.
Timing works in your favor here. Modern smartphones last longer than ever before. The Pixel 6 remains a solid choice thanks to the Material 3 Expressive update. Owners of a Pixel 10 or Galaxy S25 can comfortably skip the next several upgrade cycles.
Let me be direct: you don’t need a new phone in 2026.
Hardware innovation has hit a plateau. The real progress happens in software. When Google backports exclusive features to older devices, buying the latest release makes less sense than ever.
Smart Consumers Won’t Feel the Pinch
Whether you should buy now, wait it out, or accept higher prices depends entirely on your situation. But this moment calls for an honest assessment of your current device. Odds are, it’s got several good years left.
Price increases naturally trigger anxiety, regardless of the product. Yet the most cost-effective approach remains simple: maximize your current phone’s lifespan.
If replacement becomes necessary within the year, consider previous-generation models like the Pixel 7. You don’t need to hunt through third-party marketplaces either. Google sells certified refurbished devices directly—a like-new Pixel 7 costs just $360 with a full one-year warranty.
Rising smartphone prices in 2025 deserve attention, not panic. With the right strategy, you can sidestep them entirely.
All products, and company names, logos, and service marks (collectively the "Trademarks") displayed are registered® and/or unregistered
trademarks™ of their respective owners.
The authors of this web site are not sponsored by or affiliated with any of the third-party trade mark or third-party registered trade mark owners,
and make no representations about them, their owners, their products or services.
iPhone AirDrop Android? Cross-platform file sharing just got a whole lot simpler. The long-standing barrier between Android and iOS is finally breaking down in a way that actually matters.
Google just announced something that would’ve seemed impossible a few years ago: iPhone AirDrop Android compatibility is now real. Android’s Quick Share connects directly with iPhone’s AirDrop, making file transfers between the two ecosystems seamless. No third-party apps, no email attachments, no awkward workarounds—just straightforward sharing between devices.
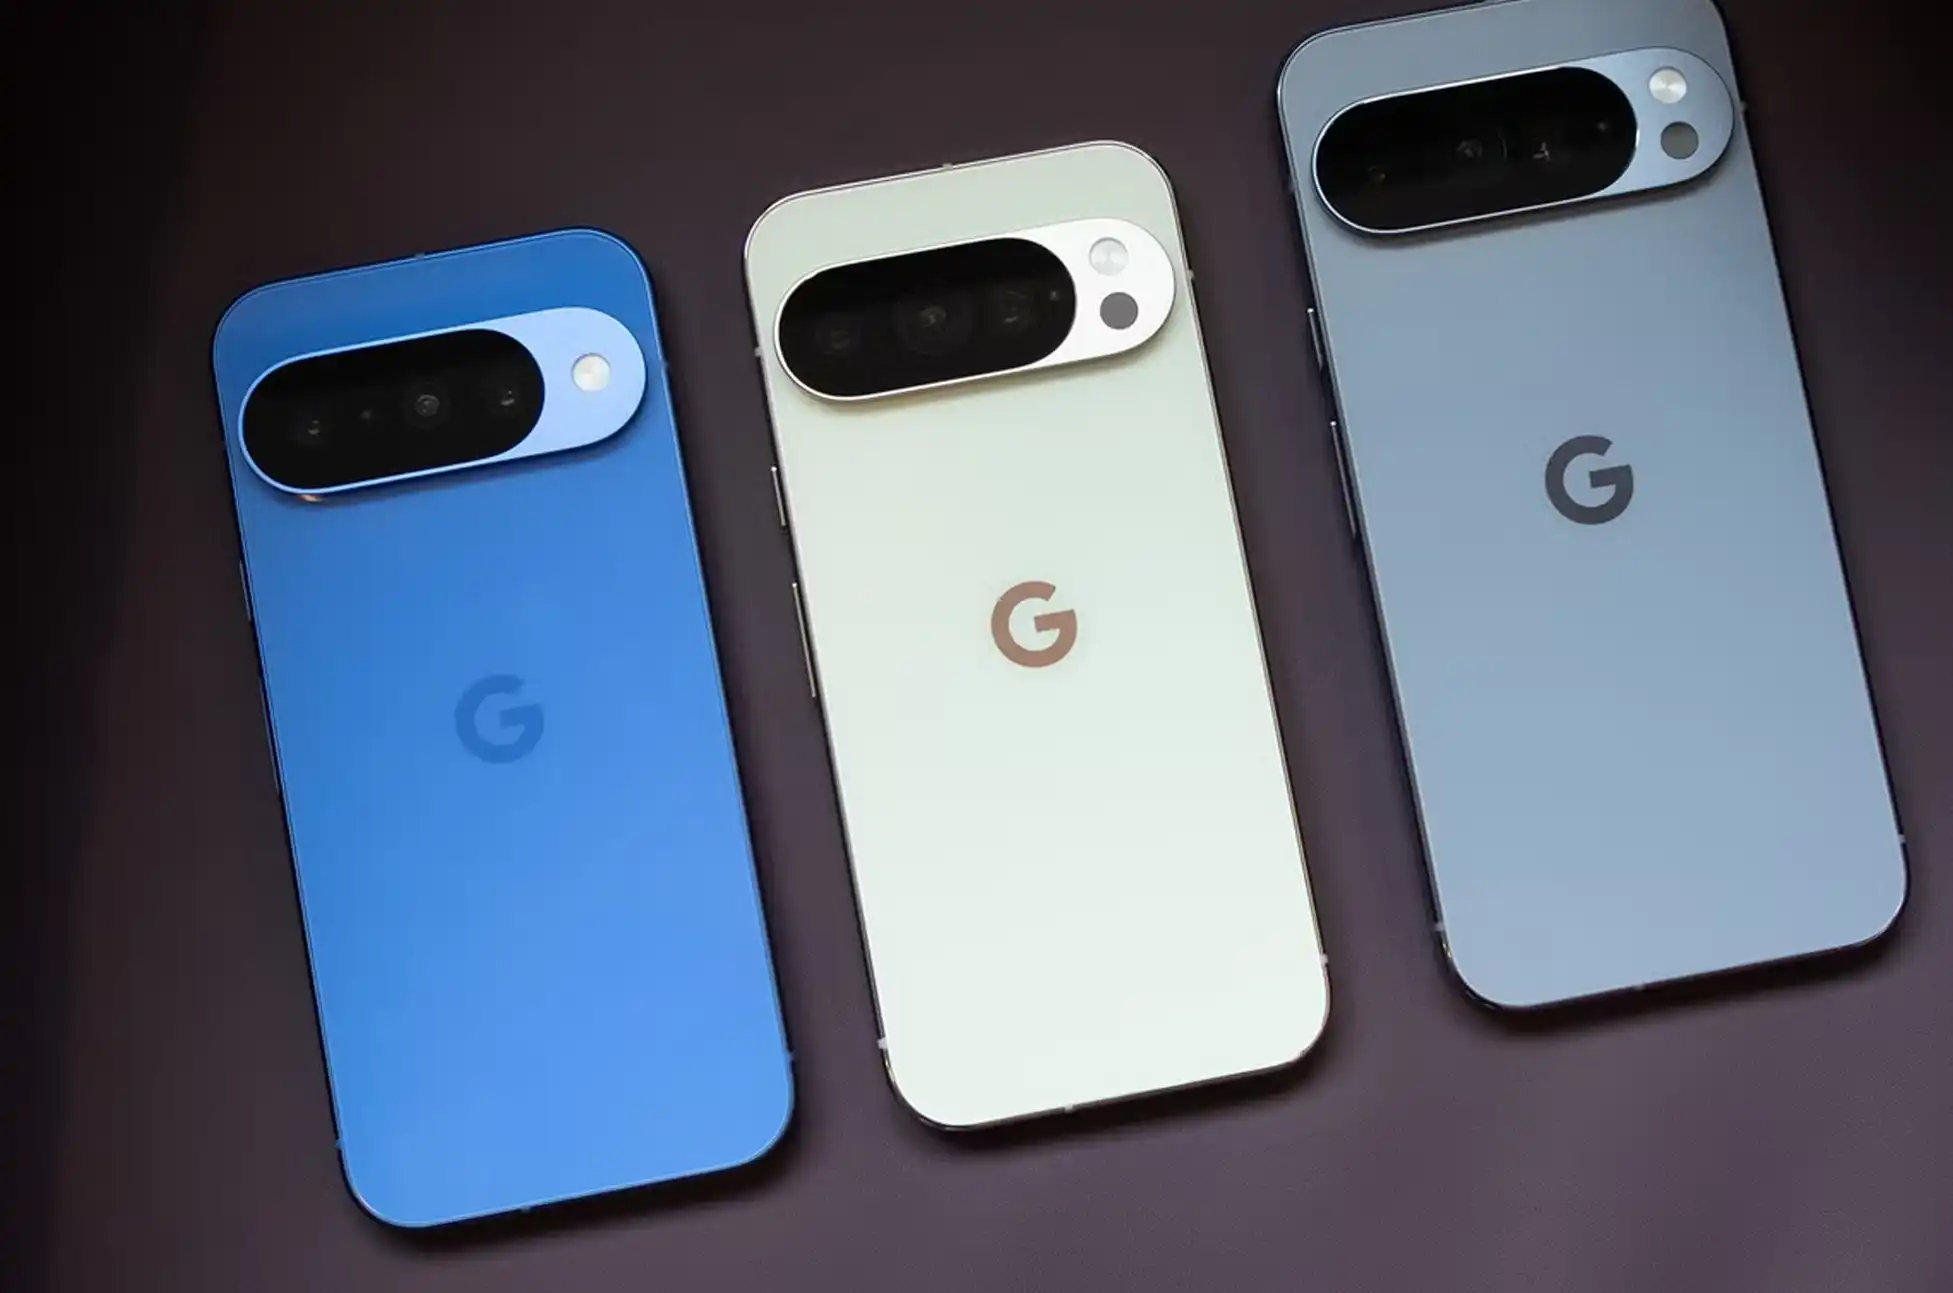
The feature launched first on Google’s newest Pixel lineup—the Pixel 10, 10 Pro, 10 Pro XL, and 10 Fold. But this is just the starting point. Google plans to expand compatibility to more Android devices down the line.
How iPhone AirDrop Android Compatibility Works
The setup is surprisingly straightforward, though there’s a small catch on both sides.
Sending from Android to iPhone: iPhone users need to temporarily adjust their AirDrop settings to “Everyone for 10 Minutes.” Once that’s done, they’ll see a familiar pop-up notification when a Pixel 10 sends them a file—it looks just like a standard AirDrop request. One tap on “Accept” and the transfer begins.
Sending from iPhone to Android: The process mirrors the other direction. Pixel 10 owners need to set Quick Share to “Everyone for 10 minutes” to receive files from an iPhone via AirDrop.
Security Remains a Priority
Google didn’t cut corners on safety to make this happen. The company built the feature with multiple security layers working together: encrypted sharing channels, native platform security measures, and peer-to-peer technology that keeps your files traveling directly between devices.
There’s also good news for privacy-conscious users: Google confirmed that “Contacts Only” mode is coming in a future update, which will tighten control over who can send you files.
Why iPhone AirDrop Android Integration Matters
For years, sharing files between Android and iPhone meant resorting to clunky solutions—cloud uploads, messaging apps with file size limits, or asking someone to email it instead. This iPhone AirDrop Android integration removes that friction entirely, making cross-platform collaboration feel as natural as it should’ve been all along.
Whether you’re in a mixed-device household, working on a team with different phone preferences, or just trying
All products, and company names, logos, and service marks (collectively the "Trademarks") displayed are registered® and/or unregistered
trademarks™ of their respective owners.
The authors of this web site are not sponsored by or affiliated with any of the third-party trade mark or third-party registered trade mark owners,
and make no representations about them, their owners, their products or services.
Pixel 10 Pro hidden features? Among the Pixel 10 Pro hidden features that Google quietly included, one stands out for content creators: the ability to shoot 12-bit 4K RAW video. A Reddit user named RagSaucy discovered this capability that’s never been available on any previous Pixel phone, and it’s exclusive to the Pro models.
Pixel 10 Pro hidden features : Why This Hidden Feature Matters
Higher bit-depth means more information captured in each frame. Think of it as having more room to work with when editing—you get richer shadow details and brighter highlights without blown-out whites or crushed blacks. Earlier Pixel flagships topped out at 10-bit video, and that’s still what you’ll get using the standard Pixel Camera app on the new models.
How to Access This Pixel 10 Pro Hidden Feature
You’ll need to download a third-party camera app with advanced video controls, like MotionCamPro. The native Google camera app won’t give you access to this feature, which makes the whole thing feel a bit like finding a bonus level in a video game.
The Technology Behind the Magic
This capability exists thanks to the Samsung ISOCELL GNV sensor inside the Pixel 10 Pro. It uses something called Smart-ISO Pro—Samsung’s version of Dual Conversion Gain (DCG) technology.
Here’s what makes DCG different: instead of taking multiple photos at different times and stitching them together (the typical HDR approach), DCG captures two images with different ISO settings at the exact same moment. The sensor hardware combines data from two separate ISO circuits simultaneously, eliminating motion blur while pulling in vibrant colors from the low-ISO shot and shadow detail from the high-ISO shot. The final output? A 12-bit RAW file packed with data for post-production work.
This Tech Isn’t Exactly New
Samsung isn’t alone in this approach. Omnivision uses straightforward DCG, while Sony’s LYTIA sensors employ Hybrid Frame-HDR technology—all aiming to expand dynamic range. The concept has been around for years; it appeared in the Xiaomi Mi 10 Ultra back in 2020, and dedicated cameras have used similar techniques even longer. Many current flagship phones probably already use these methods behind the scenes to boost image quality, even if they don’t expose the raw data to users.
What About the Regular Pixel 10?
Only the Pixel 10 Pro and Pro XL support this feature. Both phones use the 50MP Samsung ISOCELL GNV sensor with 12-bit Smart-ISO Pro. The standard Pixel 10 has a Samsung GN8 sensor that technically supports DCG and 12-bit output, but apparently lacks the bandwidth needed for 4K video capture. The smaller sensor might also face quality or power consumption issues that make it impractical to enable.
Pixel 10 Pro hidden features : Why Google Kept This Quiet
The strangest part about these Pixel 10 Pro hidden features? Google never mentioned them during the launch event. For content creators who want maximum flexibility in post-production, the Pixel 10 Pro and Pro XL just became significantly more attractive. It’s worth hoping that phone manufacturers will start building these high bit-rate options directly into their default camera apps rather than making users hunt for third-party solutions.
All products, and company names, logos, and service marks (collectively the "Trademarks") displayed are registered® and/or unregistered
trademarks™ of their respective owners.
The authors of this web site are not sponsored by or affiliated with any of the third-party trade mark or third-party registered trade mark owners,
and make no representations about them, their owners, their products or services.
Stop carrier from collecting data? Signed up with Verizon, AT&T, or T-Mobile recently? You handed over way more than you bargained for. Sure, the basics make sense—Social Security numbers, addresses, billing information. But here’s the kicker: your carrier is also tracking your web browsing habits, pinpointing your location, and mining details about how you use your phone. They claim they don’t peek at this data directly, but it’s being packaged into advertising profiles that follow you around the internet.
And it doesn’t stay in-house. All three major carriers pass your personal information to third parties—sometimes for a profit—feeding the targeted advertising machine and credit reporting agencies. Given the parade of data breaches these companies have suffered lately, you’d be justified in feeling squeamish about giving them more ammunition.
Here’s the silver lining: you can stop carrier from collecting data beyond what’s necessary. Federal regulations force carriers to offer opt-out options for specific data practices, and each major carrier provides privacy controls, though they’re far from uniform.
The problem? Carriers aren’t obligated to advertise these settings. Worse yet, many come switched on right out of the gate. If privacy matters to you, make it a habit to dig through your provider’s security settings periodically. Let’s break down what each carrier offers and how to stop carrier from collecting data you don’t want them to have.
How to Stop T-Mobile from Collecting Data
Log into your account through their website or the T Life app. Click My Account in the top right, then navigate to Profile. Here are the key toggles worth knowing about:
Analytics and reporting: T-Mobile tracks which apps you use, where you go, your age bracket, and gender to build marketing reports shared with external companies.
Sharing certain financial information: This green-lights T-Mobile to pass your data to financial institutions for co-marketing opportunities and assessing your credit profile.
Advertising options: Your app downloads and usage get collected for personalized advertising, mixed with location and demographic details. Flipping this off won’t eliminate ads—just the personalization.
Profiling and automated decisions: This one’s troubling. T-Mobile collects personal data to “evaluate, analyze, or predict certain personal aspects about your performance at work, economic situation, health, personal preferences, interests, reliability, behavior, location, or movements.” At minimum, shut this down—it’s disturbingly vague and sweeping.
Do not sell or share my personal information: Determines whether T-Mobile can distribute or monetize your data with outside companies.
My recommendation? Disable everything except Fraud and Identity Theft Protection to effectively stop carrier from collecting data you’re uncomfortable sharing.
How to Stop Verizon from Collecting Data
Go to Account, then Account Overview on the website or app. Select profile and settings, followed by manage privacy settings:
Customer Proprietary Network Information: Controls whether Verizon can leverage what it knows about you to push additional services beyond your current plan.
Business and Marketing Insights: Verizon collects aggregated data about your browsing, app usage, location, and demographics, then combines it with information from external sources to develop “insights” about consumer patterns.
Custom Experience: When enabled, Verizon monitors websites you visit and apps you use to build a profile of your interests.
Custom Experience Plus: This merges all the data above, giving Verizon complete freedom to personalize marketing messages and product suggestions.
Watch out: changing one setting might automatically affect others. Double-check your selections after making adjustments to properly stop carrier from collecting data across all categories.
How to Stop AT&T from Collecting Data
Log into your AT&T account online or through the app, then head to Profile > Privacy Choices:
Personalized: This allows the use of your data for automated decision making, including AI-generated marketing and customized advertisements.
Personalized Plus: AT&T uses data like web browsing and precise location for customization in offers and ads. They clarify this doesn’t give them access to your texts, emails, or call content.
Identity Verification: AT&T collaborates with third parties for identity verification and fraud prevention. This one’s reasonably innocuous and potentially useful to keep active.
Share or sell my personal information: This permits AT&T to distribute or sell limited personal information used to deliver, measure, and create targeted advertising.
What About Prepaid Carriers?
Using a prepaid carrier instead of the big three? They share limited information too. You can stop carrier from collecting data on prepaid services as well. The exact process varies by provider, but you’ll typically find privacy controls in your account settings. Can’t locate the specifics? Call customer service—they’ll point you where you need to go.
Taking these steps to stop carrier from collecting data puts you back in the driver’s seat. Check your settings regularly, as carriers often introduce new da
All products, and company names, logos, and service marks (collectively the "Trademarks") displayed are registered® and/or unregistered
trademarks™ of their respective owners.
The authors of this web site are not sponsored by or affiliated with any of the third-party trade mark or third-party registered trade mark owners,
and make no representations about them, their owners, their products or services.
Recover Data from Android? That sinking feeling when your phone slips from your hands and hits the pavement? We’ve all been there. Whether it’s a shattered display, water damage, or a screen that simply refuses to light up, the real anxiety isn’t about the phone hardware itself. It’s about everything stored inside: your photos, messages, contacts, and years of digital memories.
The good news? If your phone’s internal components are still functioning, there’s a solid chance you can rescue your data even with a completely unresponsive screen.
Recover Data from Android : The SD Card Solution (If You Have One)
Got an SD card in your device? You’re in luck. Pop it out and plug it into your computer using a card reader. Done.
The catch? Modern flagship phones have largely abandoned expandable storage. Plus, Android keeps most critical information on internal storage anyway—things like contacts, text messages, call history, app data, and media files all live on the device itself. That means you’ll need a different approach to access your phone’s interface when the screen goes dark.
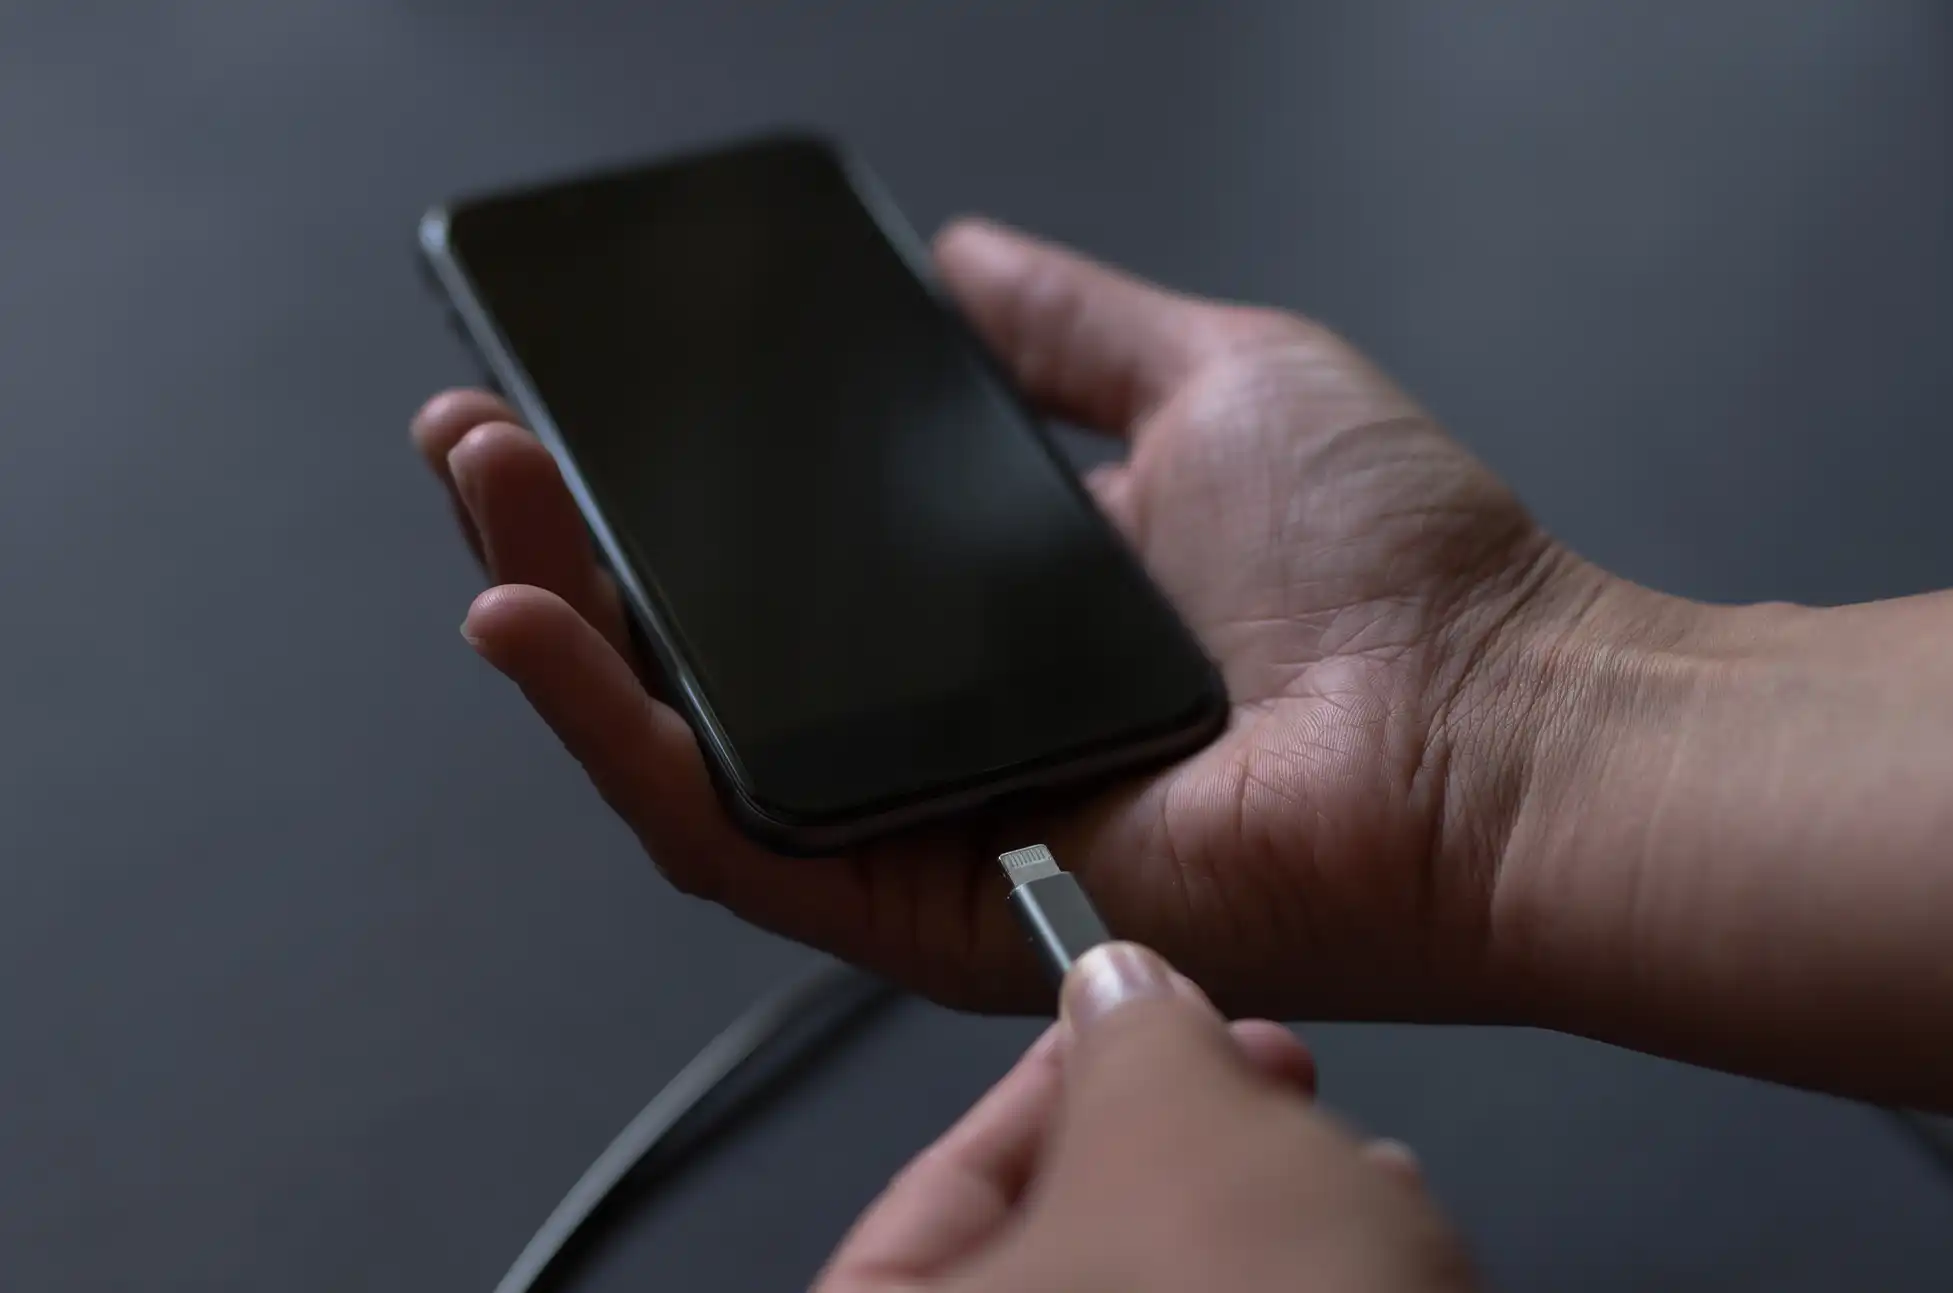
Recover Data from Android : Using an External Display to Bypass a Broken Screen
Here’s the workaround that works for many Android users: connect your phone to an external monitor or TV. This lets you completely sidestep the broken display and interact with your device as if nothing happened.
Before you get too excited, there’s a compatibility caveat. Budget smartphones often use USB 2.1, which lacks the bandwidth needed for video transmission. But if you’re using a mid-range or flagship device from recent years, chances are good that it supports USB-C video output.
Samsung, Google, and Motorola devices even offer desktop modes that transform your phone into a full computer experience when connected to a larger screen. Other manufacturers might simply mirror your phone’s display to the external monitor—which is all you need for data recovery anyway.
What You’ll Need
To pull this off, gather these items:
A USB-C to HDMI adapter or dongle
An HDMI cable
If your touchscreen is also broken: a USB keyboard and mouse
For the latter scenario, grab a multi-port USB-C hub with both HDMI and USB-A ports
Step-by-Step Process
Plug the USB-C adapter into your damaged phone
Connect your HDMI cable between the adapter and your external display (monitor or TV). Your phone’s interface should appear on screen immediately.
Attach peripherals like a keyboard, mouse, or USB flash drive to the adapter’s USB ports if needed.
Unlock your device and start transferring files to external storage or uploading them to Google Drive or another cloud service.
Samsung-Specific Quirk
Samsung users might encounter a gray padlock icon when connecting to an external display. This security feature blocks pattern input on the external screen. Here’s how to work around it:
For PIN users: Connect a keyboard, hit the spacebar, type your PIN, and press Enter.
For pattern users: Double-press the power button to launch the camera app. Swipe down the notification panel and tap the Settings icon. This should trigger a pattern prompt on the external display that you can complete using your connected mouse.
When External Display Won’t Work
If your device doesn’t support USB-C video output, your options narrow considerably. You’ll likely need to have the screen professionally repaired before you can access your data. Yes, it’s an expense, but it’s typically cheaper than specialized data recovery services—assuming the phone still powers on and functions normally aside from the display.
Recover Data from Android : Prevention Is Better Than Recovery
To avoid this headache in the future, set up automatic backups on your Android device. Google’s built-in backup covers most essentials, but consider using additional cloud services for photos and important documents. That way, if disaster strikes, your data is already safe in the cloud before you need to scramble for recovery solutions.
The key takeaway? A broken screen doesn’t mean your data is gone forever. With the right adapter and a bit of patience, you can often rescue everything that matters without spending hundreds on professional recovery services.
All products, and company names, logos, and service marks (collectively the "Trademarks") displayed are registered® and/or unregistered
trademarks™ of their respective owners.
The authors of this web site are not sponsored by or affiliated with any of the third-party trade mark or third-party registered trade mark owners,
and make no representations about them, their owners, their products or services.
Cloned Device? Your smartphone holds everything from banking details to private photos, making it a prime target for cybercriminals. Phone cloning might sound like science fiction, but it’s a real threat that can drain your bank account and steal your identity. Here’s how to spot the warning signs and protect yourself.
Cloned Device : What Phone Cloning Actually Means
Phone cloning happens in two main ways. First, criminals can copy your SIM card data and IMEI number to create a duplicate phone line on their device. This lets them intercept your calls and texts, including those crucial banking verification codes. Second, they might install malware to access your phone’s data remotely, stealing everything from passwords to personal files.
The good news is that most cloning attacks require physical access to your phone. That’s why setting up a strong PIN or password is your first defense against anyone who might get their hands on your device.
SIM Swap Attacks: The Remote Threat
Even if no one touches your phone, you can still become a victim through SIM swapping. Criminals contact your carrier, impersonate you, and request a new SIM card for your number. Once they get it, they can receive all your text messages and bypass two-factor authentication on your accounts.
Red Flags That Signal Phone Cloning
Performance Issues Beyond Normal If your phone suddenly becomes sluggish, crashes frequently, or overheats without explanation, malware might be running in the background. While software bugs can cause similar problems, cloning-related malware typically makes your phone nearly unusable. Watch for excessive pop-up ads, strange emails, and weird text messages that weren’t there before.
Mysterious Charges on Your Bill Check your monthly phone bill for calls you didn’t make, especially to international or premium numbers. Criminals often use cloned phones to rack up expensive charges or conduct illegal activities that could get you in trouble with authorities. Review every line item on your bill and question anything unfamiliar.
Requests to Restart Your Phone Be suspicious of sudden messages asking you to turn off or restart your phone. Cloners sometimes need your device offline briefly to set up their duplicate. Only follow restart instructions from verified sources like your carrier’s official support team.
Missing Calls and Texts If you stop receiving calls and messages unexpectedly, someone might have cloned your SIM card. Unlike network outages that usually show “No SIM card” errors, successful cloning can make your calls and texts disappear without obvious technical problems. Contact your carrier immediately if this happens.
Wrong Location in Find My Device Open your phone’s location app and check where it thinks you are. If you see your device in two places at once or in a location you’ve never been, someone has likely cloned your IMEI number. This works with Android’s Find My Device, Apple’s Find My iPhone, and Samsung’s Find My Mobile.
Cloned Device : What to Do If Your Phone Is Cloned
Contact Your Carrier First Call your service provider immediately if you suspect cloning. Ask if they received any recent requests to activate your number on a new SIM card. Most carriers have fraud protocols and can help you regain control of your account quickly.
Reset Everything Change all your passwords, starting with banking and email accounts. This logs you out of all devices, including any cloned ones. Consider using a password manager to create unique passwords for each account.
Factory Reset Your Phone If malware caused the cloning, a complete factory reset should remove it. Back up your important data first, then wipe your device clean and restore from a backup you know is safe.
Ditch SMS Authentication Stop using text message verification for your important accounts. Switch to app-based two-factor authentication instead, which is much harder for criminals to intercept even with a cloned phone.
Cloned Device : Prevention Beats Detection
The best defense against phone cloning is prevention. Use strong lock screen security, keep your phone updated, avoid suspicious apps and links, and never leave your device unattended with people you don’t completely trust.
Your smartphone contains your digital life. Taking these precautions now can save you from the nightmare of identity theft and financial fraud later.
All products, and company names, logos, and service marks (collectively the "Trademarks") displayed are registered® and/or unregistered
trademarks™ of their respective owners.
The authors of this web site are not sponsored by or affiliated with any of the third-party trade mark or third-party registered trade mark owners,
and make no representations about them, their owners, their products or services.
Low-Cost Phone Carriers? Are you tired of huge phone bills? You’re not alone. Many people pay over $100 monthly for cell service. However, you don’t need to spend that much.
We’ve tested over 12 different carriers. After months of research, I found 5 budget options that actually work well. Moreover, these carriers use the same networks as expensive providers.
In fact, you can get quality service for as little as $5 per month. Furthermore, you won’t sacrifice coverage or reliability.
Low-Cost Phone Carriers : Why I Chose These 5 Carriers
First, let me explain my selection process. Each carrier offers several key benefits:
Low prices with no hidden fees
Good network coverage using major towers
Clear billing without surprise charges
Helpful customer service when needed
Flexible plans for different users
Now, let’s look at each option in detail.
1. US Mobile: Best for Flexibility
Starts at $8 per month
US Mobile stands out for one big reason. Unlike other budget carriers, it works on all three major networks. Additionally, you can even use two networks at once.
Key Benefits
Multiple Networks: First, choose between T-Mobile, Verizon, or AT&T. Then, some plans let you use two networks together. This means better coverage everywhere.
Clear Pricing: Plans start at just $8 monthly for 2GB. Meanwhile, unlimited plans begin at $25. Best of all, taxes and fees are included.
Extra Features: Furthermore, some plans include international calling. Also, you get free smartwatch service. Plus, certain plans offer faster data speeds.
Best for: People who want network options and premium features.
2. Tello: Perfect for Light Users
Starts at $5 per month
Tello keeps things simple. Instead of complex plans, you build exactly what you need. As a result, you only pay for what you use.
What Makes Tello Special
Custom Plans: First, pick your data amount. Next, add talk and text if needed. For example, get 1GB for $5. Then, add unlimited talk and text for $4 more.\
T-Mobile Network: You get T-Mobile’s network coverage. However, data speeds are slower than premium plans. Still, it works well for basic needs.
Low Prices: Plans range from $5 to $25. The unlimited plan gives 35GB of fast data. After that, speeds slow but don’t stop.
Best for: Kids, seniors, or anyone who uses mostly Wi-Fi.
3. Mint Mobile: Best Annual Value – Low-Cost Phone Carriers
Starts at $15 per month (paid yearly)
Thanks to Ryan Reynolds, everyone knows Mint Mobile. More importantly, it offers solid value. However, you must pay for a full year upfront.
Top Features
T-Mobile Network: You get T-Mobile’s coverage nationwide. Still, data priority is lower than expensive plans.
Annual Savings: Pay yearly and save big. Plans cost $15-$30 monthly. Data ranges from 5GB to unlimited.
International Perks: All plans include free calls to Mexico, Canada, and the UK. Plus, the unlimited plan adds free roaming in Canada.
True Unlimited: Unlike some carriers, there’s no hard data limit. After 35GB, speeds may slow during busy times. Nevertheless, service continues.
Best for: Users comfortable paying annually for T-Mobile service.
4. Helium Mobile: The Free Option -Low-Cost Phone Carriers
Starts at $0 per month
Here’s something amazing: truly free cell service. While Helium isn’t perfect, their free plan works as backup service.
Unique Features
Free Plan: Get 3GB data, 100 minutes, and 300 texts for nothing. Yes, it’s completely free.
T-Mobile Network: Like most budget carriers, Helium uses T-Mobile towers. However, data priority is low.
Affordable Upgrades: Paid plans cost $5-$30 monthly. Additionally, they offer special kids’ plans.
Best for: Emergency backup, very light users, or testing before buying.
5. Visible: Best for Heavy Users – Low-Cost Phone Carriers
Starts at $25 per month
Visible is my personal favorite. It’s Verizon’s budget brand. Most importantly, you get truly unlimited data on America’s best network.
Why Visible Wins
Verizon Network: Access Verizon’s reliable, nationwide coverage. This network often works where others don’t.
Three Simple Plans: Choose from $25, $35, or $45 monthly options. Furthermore, get $6 off monthly for your first year.
Real Unlimited: No data caps or throttling. Users report using 300GB+ without problems. Therefore, stream and download freely.
Premium Features: Higher plans include priority data. Also, get free smartwatch service. Plus, enjoy 4K video streaming.
International Benefits: All plans include unlimited calling to Mexico and Canada. Additionally, premium plans add international roaming.
Best for: Heavy data users who want Verizon’s network cheap.
Unlock Your Phone Before Switching Carriers
If your current phone is locked to your carrier, you’ll need to unlock it before switching to a budget provider. Here’s how:
Big carriers want you to pay premium prices. However, these 5 options prove you don’t need to. Each provides real value without typical budget carrier problems. Furthermore, every carrier offers different strengths. Therefore, the best choice depends on your specific needs. Most importantly, consider your data usage and coverage requirements.
All products, and company names, logos, and service marks (collectively the "Trademarks") displayed are registered® and/or unregistered
trademarks™ of their respective owners.
The authors of this web site are not sponsored by or affiliated with any of the third-party trade mark or third-party registered trade mark owners,
and make no representations about them, their owners, their products or services.
Unlocked Phone Security Advantages? Most people buy phones based on camera quality or storage space. However, if you care about security, there’s one feature you shouldn’t ignore: SIM freedom.
What’s a SIM Unlocked Phone?
A SIM unlocked phone works with any carrier. Therefore, you’re not stuck with one provider like you are with locked phones. Furthermore, this freedom does more than save money – it makes your phone more secure.
Unlocked Phone Security Advantages : Why It’s More Secure
Switch Networks When Needed If you think someone tracks your communications, you can quickly change carriers. As a result, this makes it harder for hackers to track you consistently.
Less Junk Software Carrier-locked phones come with bloatware you can’t remove. Moreover, these pre-installed apps often have too many permissions and create security holes. In contrast, unlocked phones have cleaner software.
Faster Security Updates Unlocked phones get security updates directly from manufacturers. Meanwhile, carrier-locked phones wait for provider approval, leaving you vulnerable longer.
Travel Safely
When traveling internationally, buy a local SIM card instead of using expensive roaming. Consequently, this keeps you off potentially unsafe networks and gives you better privacy abroad.
Fight SIM Swapping
SIM swapping happens when criminals steal your phone number. However, with an unlocked phone, you can switch to a different carrier immediately if this happens to you. Thus, you can limit the damage quickly.
Emergency Backup
If one network goes down or becomes compromised, you can switch to another carrier right away. As a result, your phone stays working when others might be stuck.
Unlocked Phone Security Advantages : How to Unlock Your Phone
If you already have a carrier-locked phone, here’s how you can get it unlocked:
Check If You’re Eligible Most carriers require you to meet certain conditions:
You must pay off your phone completely
Your account should be in good standing
You may need to wait 40-60 days after purchase
Military personnel often get special exemptions
If your carrier won’t unlock your phone, don’t worry – UnlockBase has got you covered.
Choose “Network Unlock” and enter your device details
Provide your IMEI (double-check for accuracy!)
Make payment through secure checkout
Wait for processing (you’ll get email updates)
Receive unlock instructions via email
Verify It Worked After unlocking, test with a different carrier’s SIM card to make sure it actually works on other networks.
Unlocked Phone Security Advantages : The Bottom Line
SIM unlocked phones give you control. Additionally, you get faster security updates, cleaner software, and the ability to switch carriers when threats appear.
In today’s world where phones hold our most personal data, having this flexibility isn’t just convenient – it’s smart security practice.
Therefore, your next phone should be unlocked. You’ll have more options and better protection when you need it most.
All products, and company names, logos, and service marks (collectively the "Trademarks") displayed are registered® and/or unregistered
trademarks™ of their respective owners.
The authors of this web site are not sponsored by or affiliated with any of the third-party trade mark or third-party registered trade mark owners,
and make no representations about them, their owners, their products or services.
Android Battery Health? Is your Android phone dying too fast? Unfortunately, this happens to all phones over time. Moreover, your battery gets weaker as you use it more.
However, the good news is that checking your battery health is easy. Additionally, you can find out if you need a new battery or just better settings.
Android Battery Health : Why Check Your Android Battery Health?
First, your battery health shows important info about your phone. Furthermore, here’s what you can learn:
• How much power your battery has lost • If your phone gets too hot • Which apps drain your battery most • How many times you’ve charged your phone
Meanwhile, most Android phones show basic battery info. However, some methods give you more details.
Method 1: Check Through Phone Settings
Initially, this is the easiest way to see your battery info. In fact, every Android phone has this feature.
Here’s how to do it:
First, open Settings on your phone
Next, tap Battery
Then, choose Battery usage
After that, tap any app to see how much power it uses
Finally, look at usage since your last charge
Quick tip: Similarly, apps that use lots of power in the background might mean battery problems.
Method 2: Use Android’s Secret Menu
Alternatively, Android has a hidden menu with battery details. However, this doesn’t work on all phones.
Try these steps:
First, open your Phone app
Next, type *#*#4636#*#*
Then, look for Battery information
Finally, check your battery health and temperature
Note: On the other hand, if you don’t see battery info, try the next method instead.
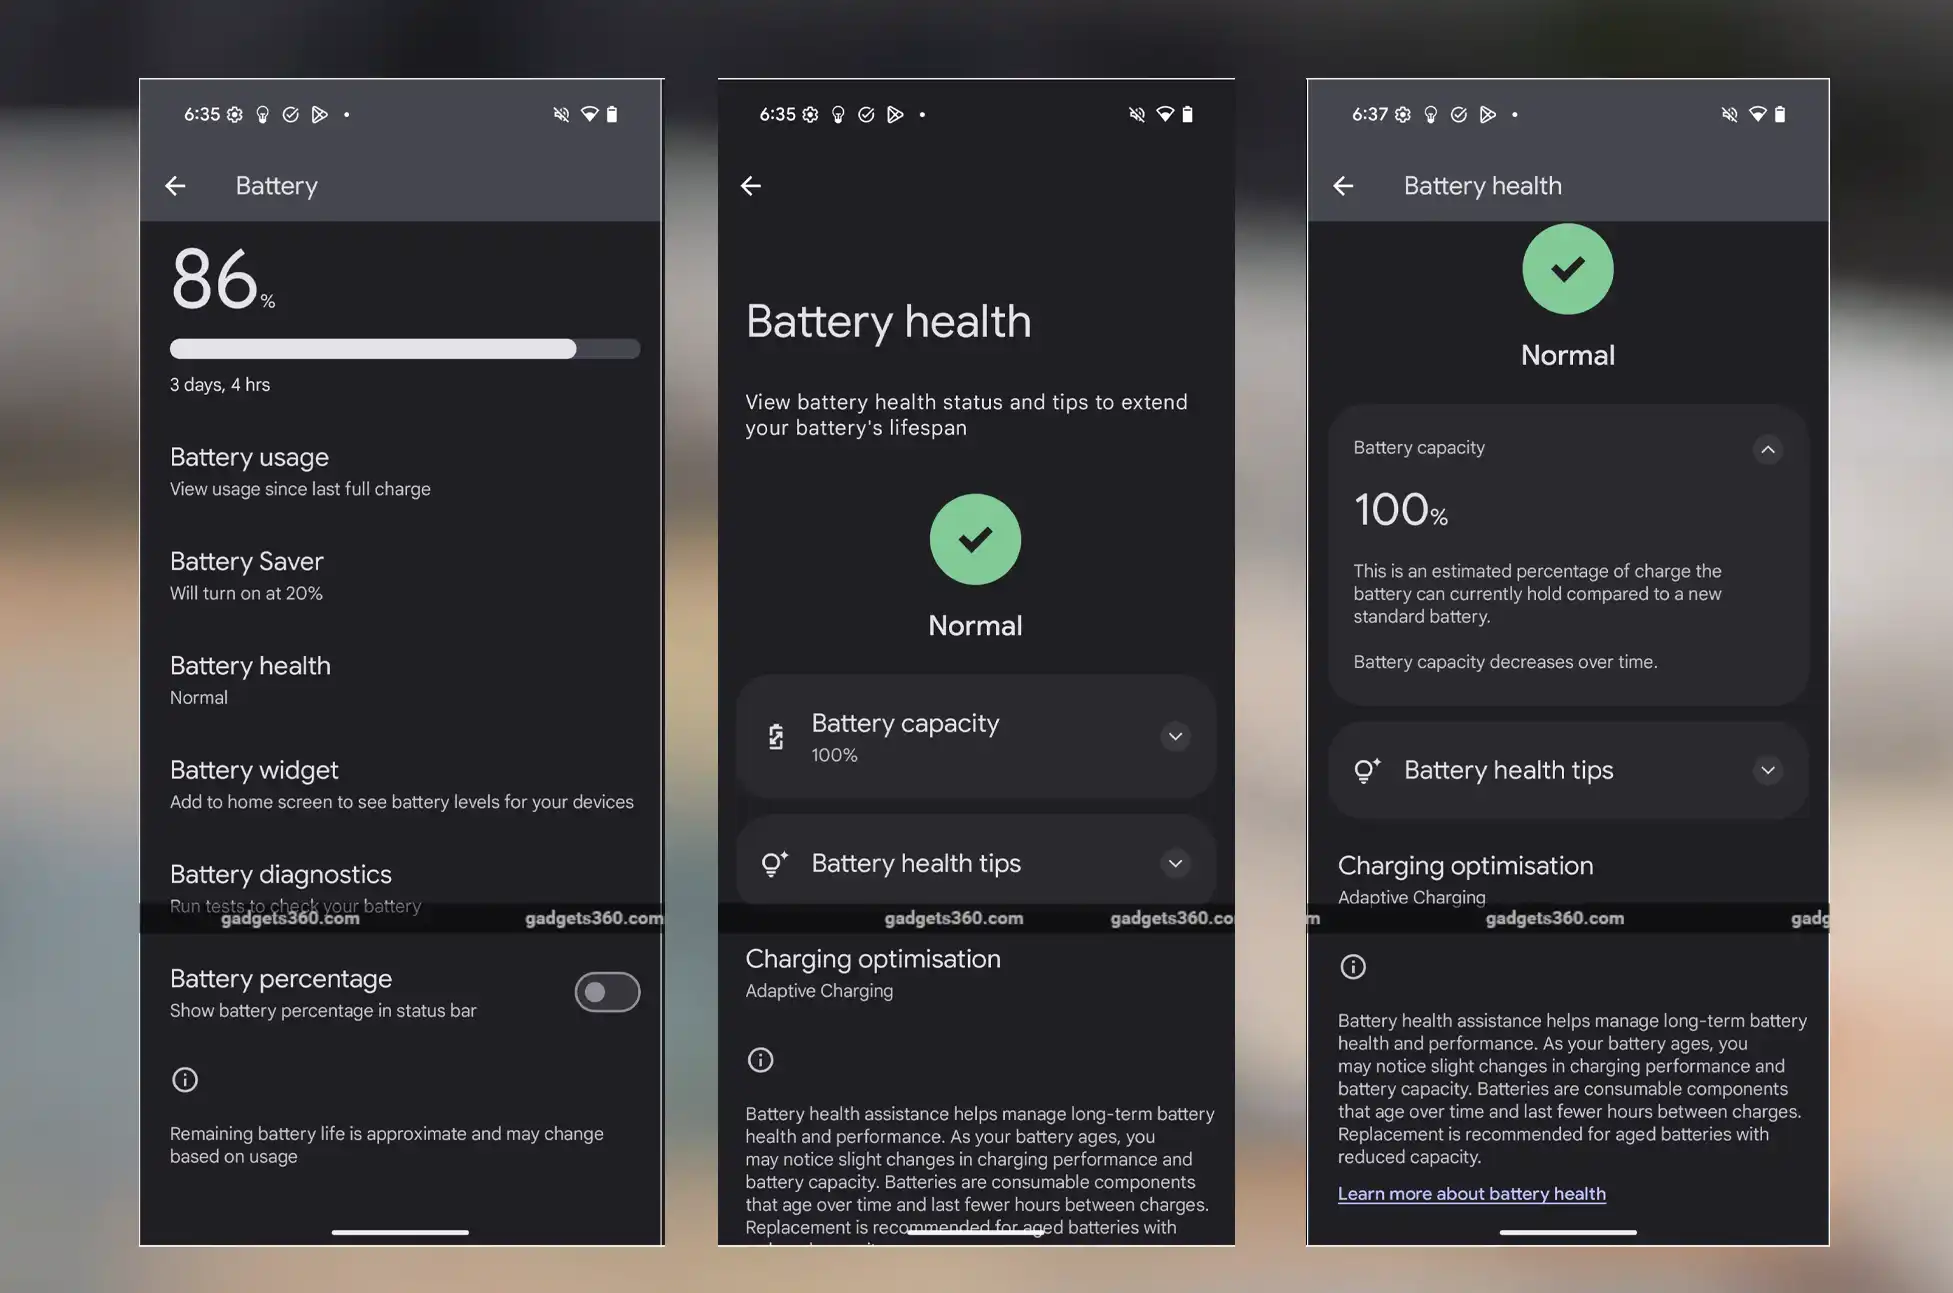
Method 3: Samsung Phone Users Only
Meanwhile, Samsung phones have a special app for checking battery health. Additionally, this app comes with most Samsung phones.
Steps for Samsung phones:
First, open Samsung Members app
Next, tap Diagnostics
Then, choose Phone diagnostics
After that, tap Battery status
Finally, see your battery health details
What to look for: In contrast, your battery should say “Normal.” However, if it says “Bad” or “Weak,” you need a new battery.
Method 4: Use Special Apps
On the other hand, some apps give you the best battery info. Furthermore, they show details that your phone’s built-in tools might miss.
AccuBattery – Best Overall
First of all, AccuBattery is the most popular battery app. Moreover, it tracks your battery over time.
What it does: • Shows real-time charging info • Tracks how fast your battery drains • Shows battery wear and health • Keeps history of your charging
Cost: Initially free with ads, but paid version removes ads.
CPU-Z – Shows Everything
Similarly, CPU-Z shows battery info plus other phone details. Therefore, it’s great for tech lovers.
Features: • Battery level and health • Temperature tracking • Full phone specifications • Free to use
Battery Guru – Advanced Tracking
Likewise, Battery Guru is great for watching battery patterns. Additionally, it sends helpful alerts.
What you get: • Charts of charging and draining • 24-hour usage stats • Alerts for low battery • Warnings for high temperature
Remember: However, these apps need permissions to work. Therefore, only download from Google Play Store.
Android Battery Health : When to Replace Your Phone Battery
Unfortunately, all phone batteries wear out over time. However, here are signs you need a new one:
Replace your battery if: • Phone turns off suddenly • Phone runs very slowly • Battery dies in just a few hours • Phone gets very hot during normal use
Consequently, if these happen often, get a new battery or upgrade your phone.
How to Make Your Battery Last Longer
Although you can’t stop battery aging, you can slow it down a lot.
Always Use Your Phone’s Charger
First, only use the charger that came with your phone. Otherwise, other chargers can hurt your battery. Furthermore, your original charger works best and safest.
Keep Your Phone Cool
Similarly, heat damages batteries fast. Therefore: • Don’t leave phone in hot cars • Avoid using phone while charging • Keep phone out of direct sunlight
Don’t Let Battery Die Completely
Instead, never let your phone reach 0% battery. Rather, charge it at 10-20%. As a result, this helps your battery last much longer.
Delete Apps You Don’t Use
Meanwhile, too many apps drain your battery all the time. Therefore: • Remove apps you never use • Turn off apps running in background • Check which apps use most power
Android Battery Health : Make Your Current Battery Work Better
Furthermore, even old batteries can work better with simple changes:
Easy battery tips: • Turn down screen brightness • Use dark mode • Turn off apps you’re not using • Use battery saver mode • Let screen turn off faster
Consequently, these small changes help your phone last all day.
Android Battery Health : Final Thoughts
Checking your Android battery health is important. Moreover, it helps you know when to get a new battery or phone. Additionally, all batteries get worse over time. However, that’s normal. Still, with good care and regular checks, your battery will last longer. Therefore, try these methods today. Then, see how healthy your battery is. Finally, use our tips to keep it working well.
All products, and company names, logos, and service marks (collectively the "Trademarks") displayed are registered® and/or unregistered
trademarks™ of their respective owners.
The authors of this web site are not sponsored by or affiliated with any of the third-party trade mark or third-party registered trade mark owners,
and make no representations about them, their owners, their products or services.
Esim Management ? Managing your phone’s connectivity just got easier! Whether you’re switching carriers, traveling, or need more network freedom, this quick guide covers everything you need to know about eSIMs and phone unlocking.
ESim Management : How to Delete an eSIM on Your Phone
Removing an eSIM is simple since it’s just a digital file on your phone. Here’s how to do it:
Quick Steps:
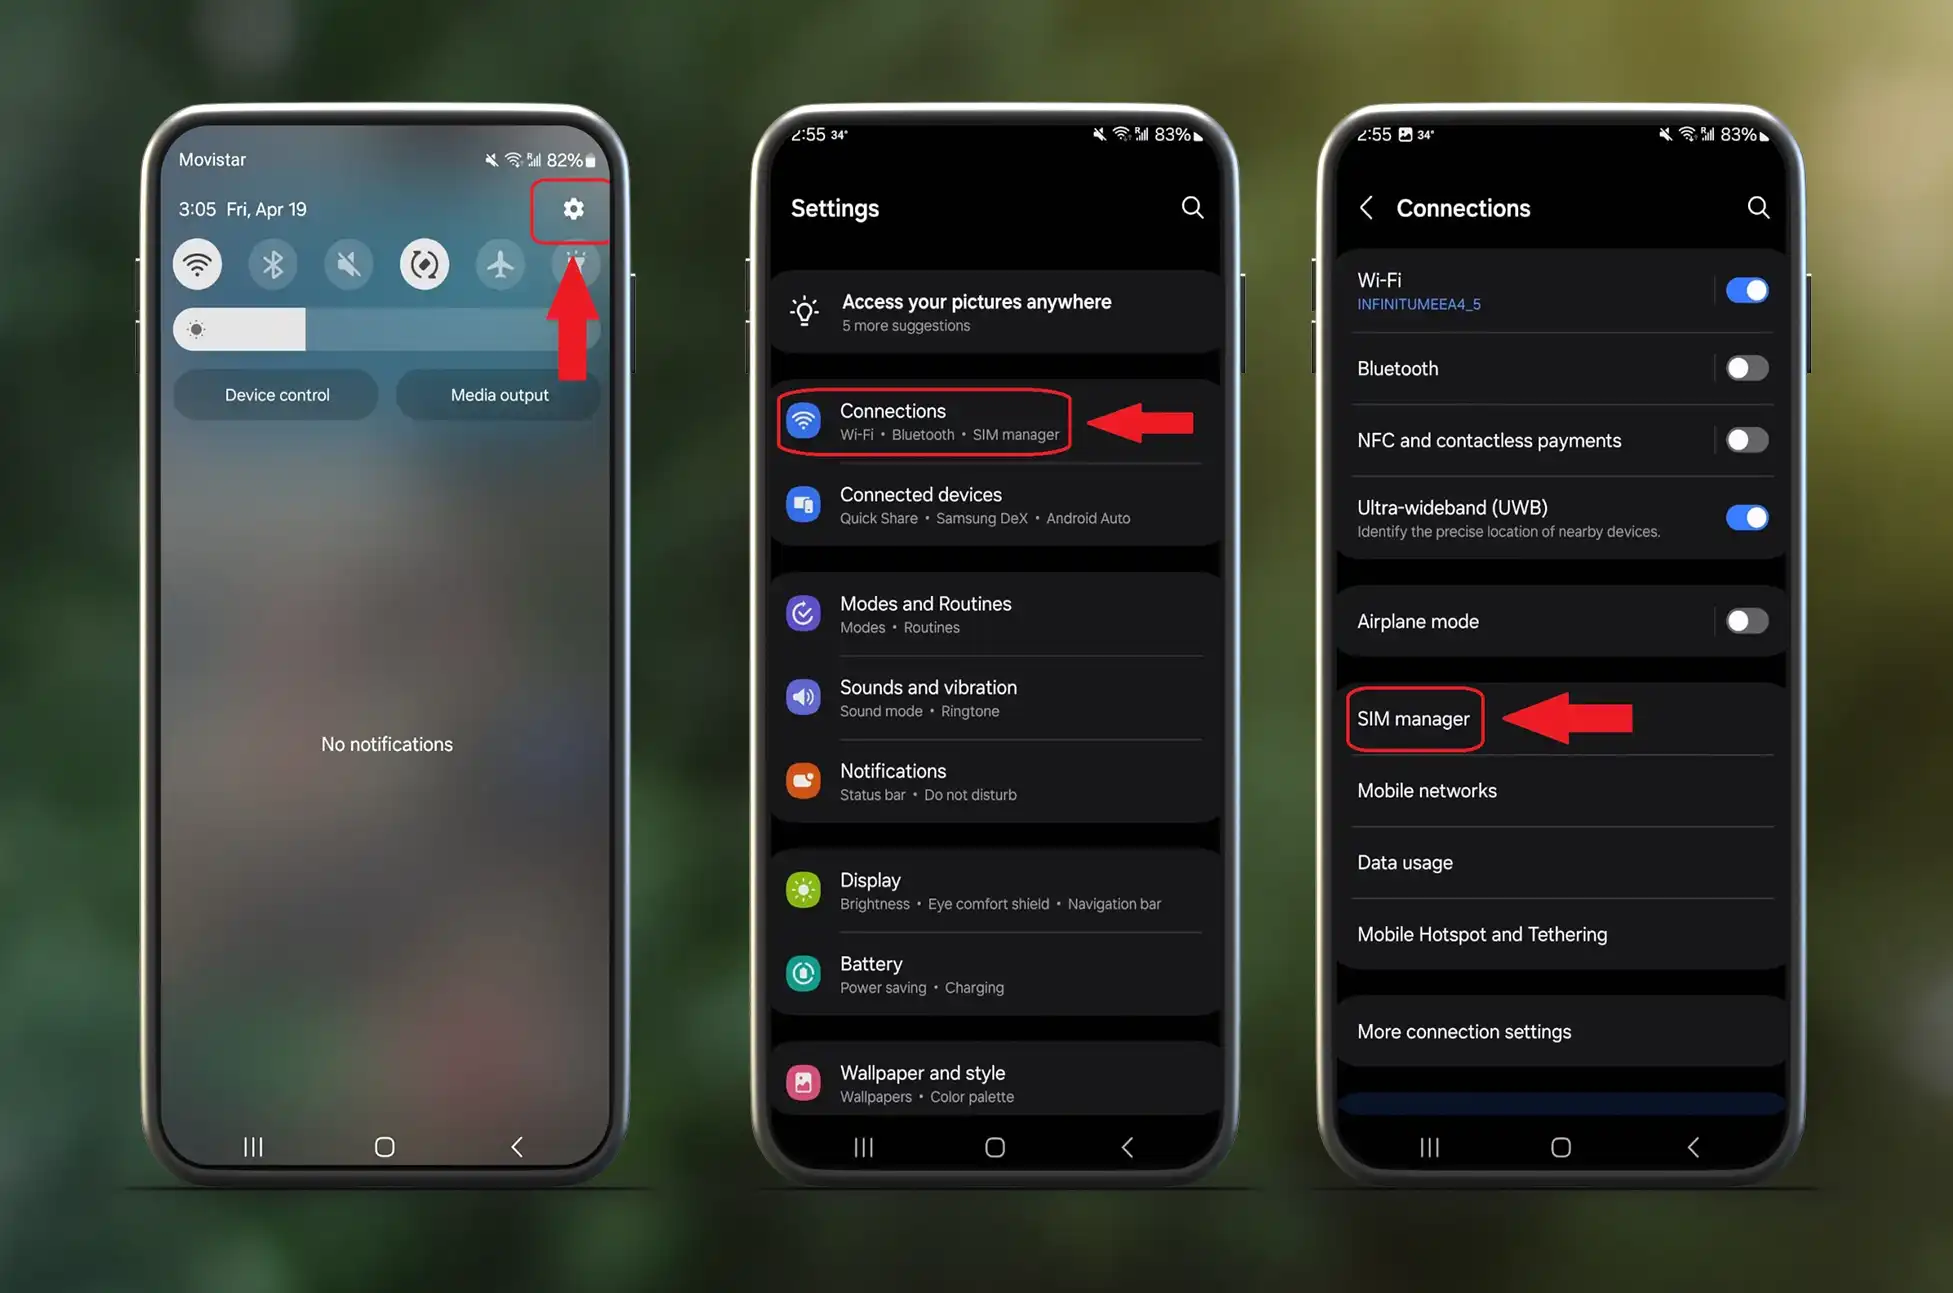
Go to Settings → Connections → SIM Manager
Find your eSIM under the “eSIMs” section
Tap “Erase eSIM”
Hit “Confirm” and you’re done!
Pro Tip: Want to keep it but not use it right now? Simply toggle the switch off instead of deleting. Perfect for travelers who want to reactivate later!
ESim Management : How to Add a New eSIM
Adding a new eSIM takes just a few minutes. First, make sure you have an unlocked phone and an eSIM activation code from your carrier.
Simple Process: • Open Settings → Connections → SIM Manager • Tap “Add eSIM” or “Add Mobile Plan” • Scan the QR code from your carrier OR enter the code manually • Follow the setup prompts
That’s it! Your new eSIM will appear alongside your existing SIMs, ready to use.
ESim Management : Unlocking Your Phone To Use Different Sim
Want to use eSIMs from different carriers? You’ll need an unlocked device. Here’s how to break those digital chains legally and safely.
What You’ll Need: • Your phone’s IMEI number (dial *#06#) • Current carrier info • Device model details
Choose “Network Unlock” and enter your device details
Provide your IMEI (double-check for accuracy!)
Make payment through secure checkout
Wait for processing (you’ll get email updates)
Receive unlock instructions via email
Test with different carrier’s SIM to confirm success
Most unlocks complete within 1-7 days depending on your phone model.
Conclusion
Managing eSIMs and unlocking your phone doesn’t have to be complicated. With these simple steps, you can easily delete old eSIMs, add new ones, and unlock your device for complete carrier freedom. Whether you’re switching carriers, traveling internationally, or just want more control over your mobile experience, these tools put the power back in your hands. Start managing your connectivity like a pro today!
All products, and company names, logos, and service marks (collectively the "Trademarks") displayed are registered® and/or unregistered
trademarks™ of their respective owners.
The authors of this web site are not sponsored by or affiliated with any of the third-party trade mark or third-party registered trade mark owners,
and make no representations about them, their owners, their products or services.