

The game is on to swiftly update and take use of new features with each iOS release. This time, iOS 17 elevates your iPhone experience with interactive widgets, intelligent text prediction, the Check-In feature in Messages, and other features. However, before you hit the download button, follow our step-by-step instructions to ensure a smooth transition to update to iOS 17.
How to Update to iOS 17: Things to Preparing for the Update
There are a few things to keep in mind before you upgrade to iOS 17. We’ve laid them out for you so you can get started right away when you upgrade.
Check Compatibility
Before beginning the update process, make sure your device is compatible with iOS 17. Not all older devices can run the most recent software. To check compatibility, go to Apple’s official website and make sure your device is on the list.
| iPhone 15 | iPhone 13 | iPhone 11 |
| iPhone 15 Plus | iPhone 13 mini | iPhone 11 Pro |
| iPhone 15 Pro | iPhone 13 Pro | iPhone 11 Pro Max |
| iPhone 15 Pro Max | iPhone 13 Pro Max | iPhone XS |
| iPhone 14 | iPhone 12 | iPhone XS Max |
| iPhone 14 Plus | iPhone 12 mini | iPhone XR |
| iPhone 14 Pro | iPhone 12 Pro | iPhone SE (2nd generation or later) |
| iPhone 14 Pro Max | iPhone 12 Pro Max |
The list of supported devices with iPadOS 17 is likewise amazing, spanning numerous device generations:
| iPad Pro 12.9-inch (2nd generation and later) | iPad Air (3rd generation and later) |
| iPad Pro 10.5-inch | iPad (6th generation and later) |
| iPad Pro 11-inch (1st generation and later) | iPad mini (5th generation and later) |
Clear Out your Storage Space
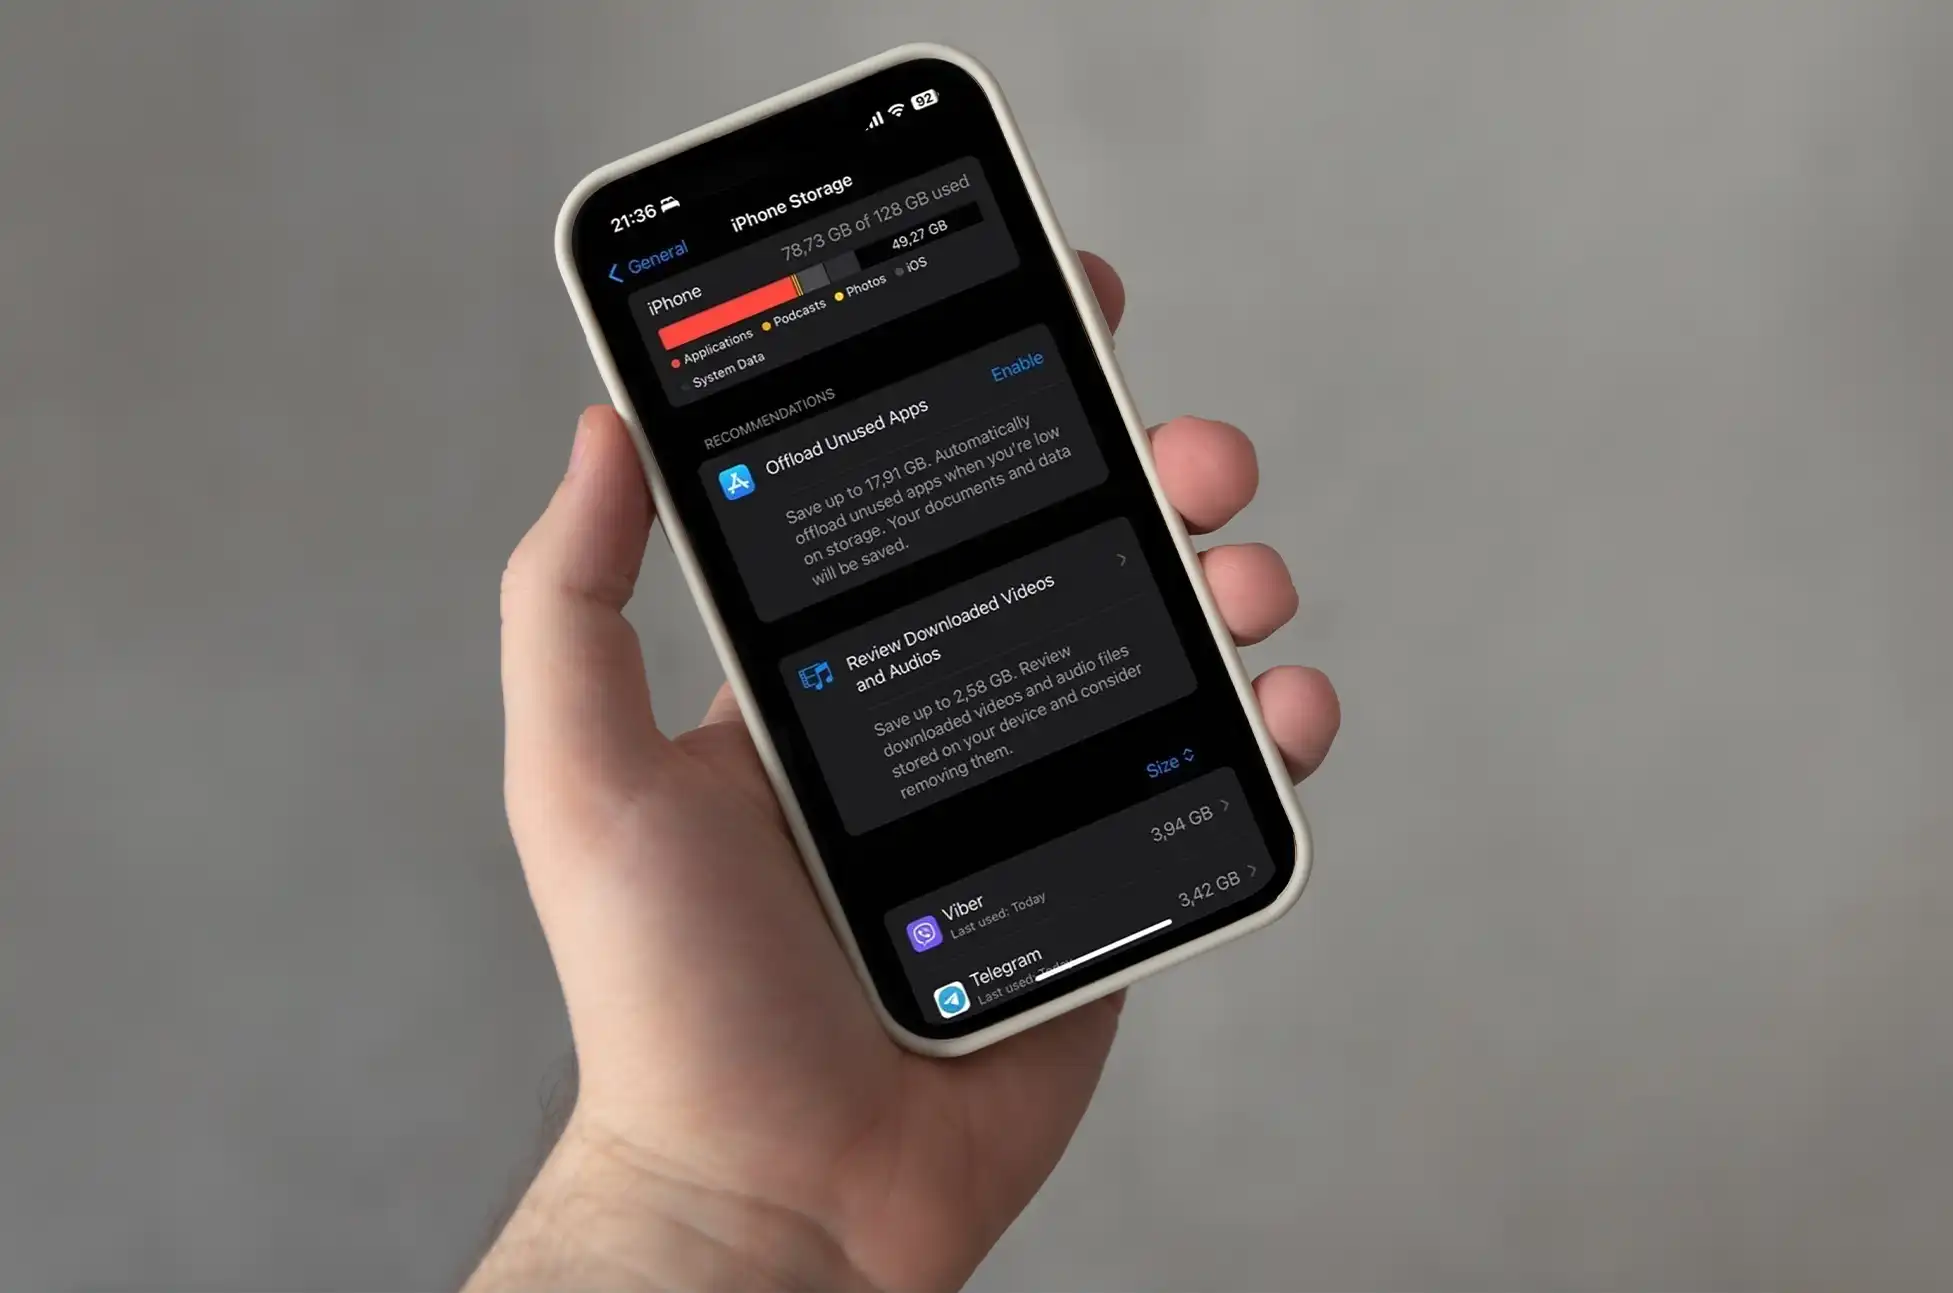
Knowing that you know your device is eligible for the update, it’s time to purge unused apps and free up some space on your device. Open “Settings -> General -> iPhone Storage” to see how much free space you have. Swipe right to delete any app you no longer use.
The iOS/iPadOS 17 update requires approximately 8GB of free space.To free up more storage space, delete outdated mails and clear browser caches. You may also go through the photos and delete old pictures and videos that are taking up space. Backup these to iCloud, Dropbox, or Google Photos before deleting them from your iPhone or iPad.
Backup your Data
The update procedure can occasionally result in unanticipated data loss. Backing up your device is important for securing your treasured pictures, contacts, and apps. You have a choice between using iCloud or iTunes. Here’s how to go about it:
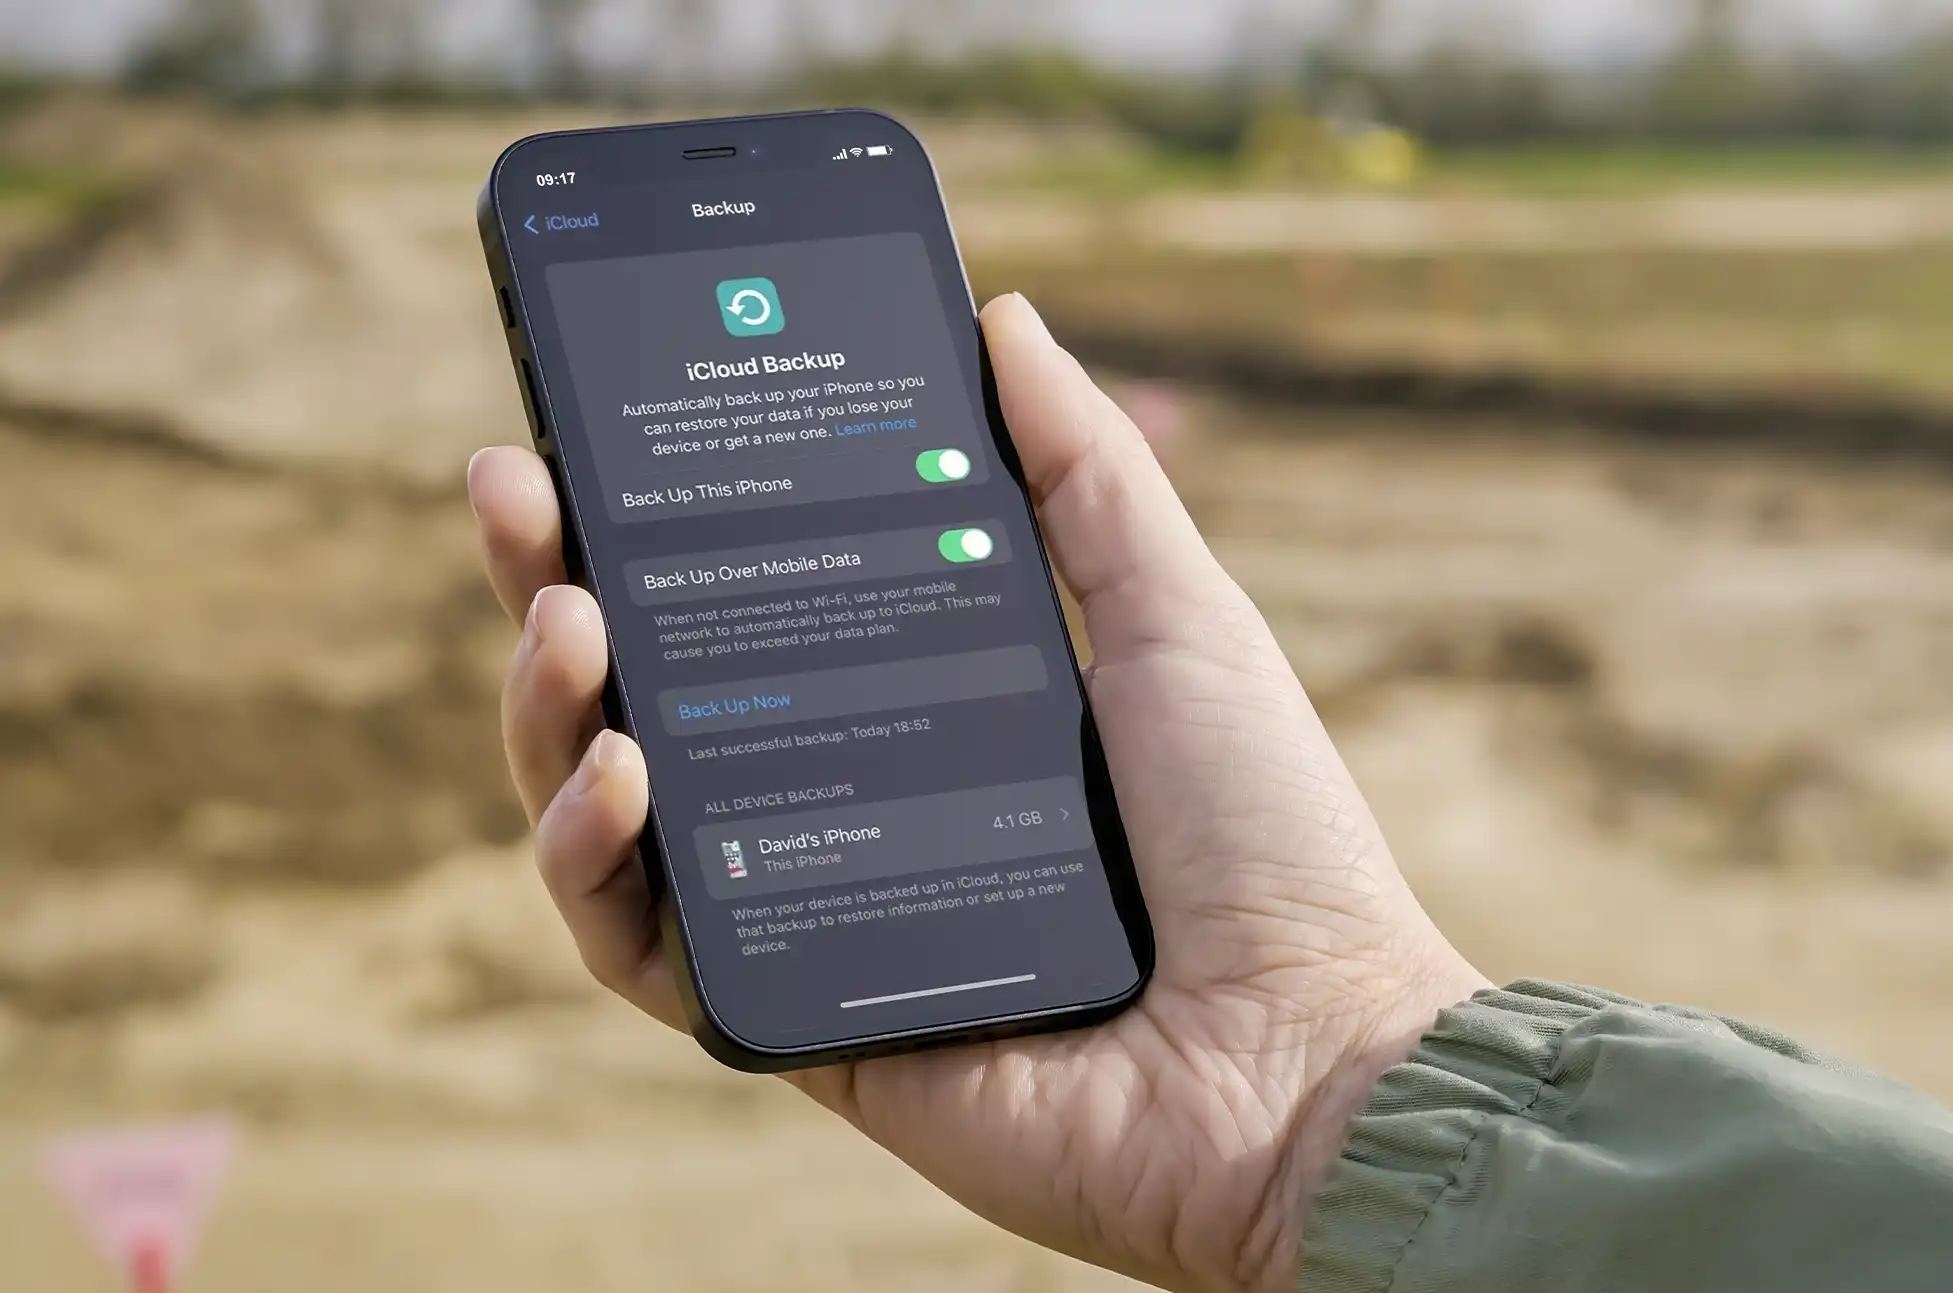
iCloud Backup
- Connect your device to Wi-Fi.
- Go to Settings > [Your Name] > iCloud > iCloud Backup.
- Tap “Back Up Now.”
iTunes Backup
- Connect your device to your computer and open iTunes (or Finder if you’re using macOS Catalina or later).
- Select your device.
- Click “Back Up Now.”
How to Update to iOS 17: Easy Steps
Before getting into how to update to iOS 17, make sure you followed the steps mentioned above to avoid update errors, and that your device is connected to WiFi and has enough battery power during the update.
Update via Settings
The most basic option is to update using the device’s settings:
- Go to Settings > General > Software Update.
- If iOS 17 is available, tap “Download and Install.”
- Follow the on-screen instructions to complete the update.

Update via iTunes/Finder
If you prefer to update your device using a computer, proceed as follows:
- Connect your device to your computer.
- Open iTunes (or Finder on macOS Catalina or later).
- Select your device.
- Click “Check for Update.”
- If iOS 17 is available, click “Download and Update.”
How to Update to iOS 17: Common Update Problems
- Not Enough Storage
While iOS updates are usually smooth, you may encounter common issues, such as insufficient storage. Here’s how to address them:
- Delete unnecessary apps or files to free up space.
- Consider updating via iTunes/Finder if you don’t have enough space on your device.
- Error 14, Error 9, etc.
Don’t be alarmed if you see error messages throughout the upgrade. Common errors frequently have simple solutions:
- Restart your device and try the update again.
- Update iTunes (or Finder) to the latest version.
- If the problem persists, contact Apple Support.
Conclusion
Updating your iOS device to iOS 17 is a simple process that keeps you up to speed on the latest features and improvements. You can confidently manage the upgrade procedure if you follow this step-by-step guide. Remember to back up your data, solve frequent issues, and discover the exciting new features in iOS 17.
Now, enjoy the improved experience that iOS 17 has to offer!
All products, and company names, logos, and service marks (collectively the "Trademarks") displayed are registered® and/or unregistered trademarks™ of their respective owners. The authors of this web site are not sponsored by or affiliated with any of the third-party trade mark or third-party registered trade mark owners, and make no representations about them, their owners, their products or services.
Comments are closed.