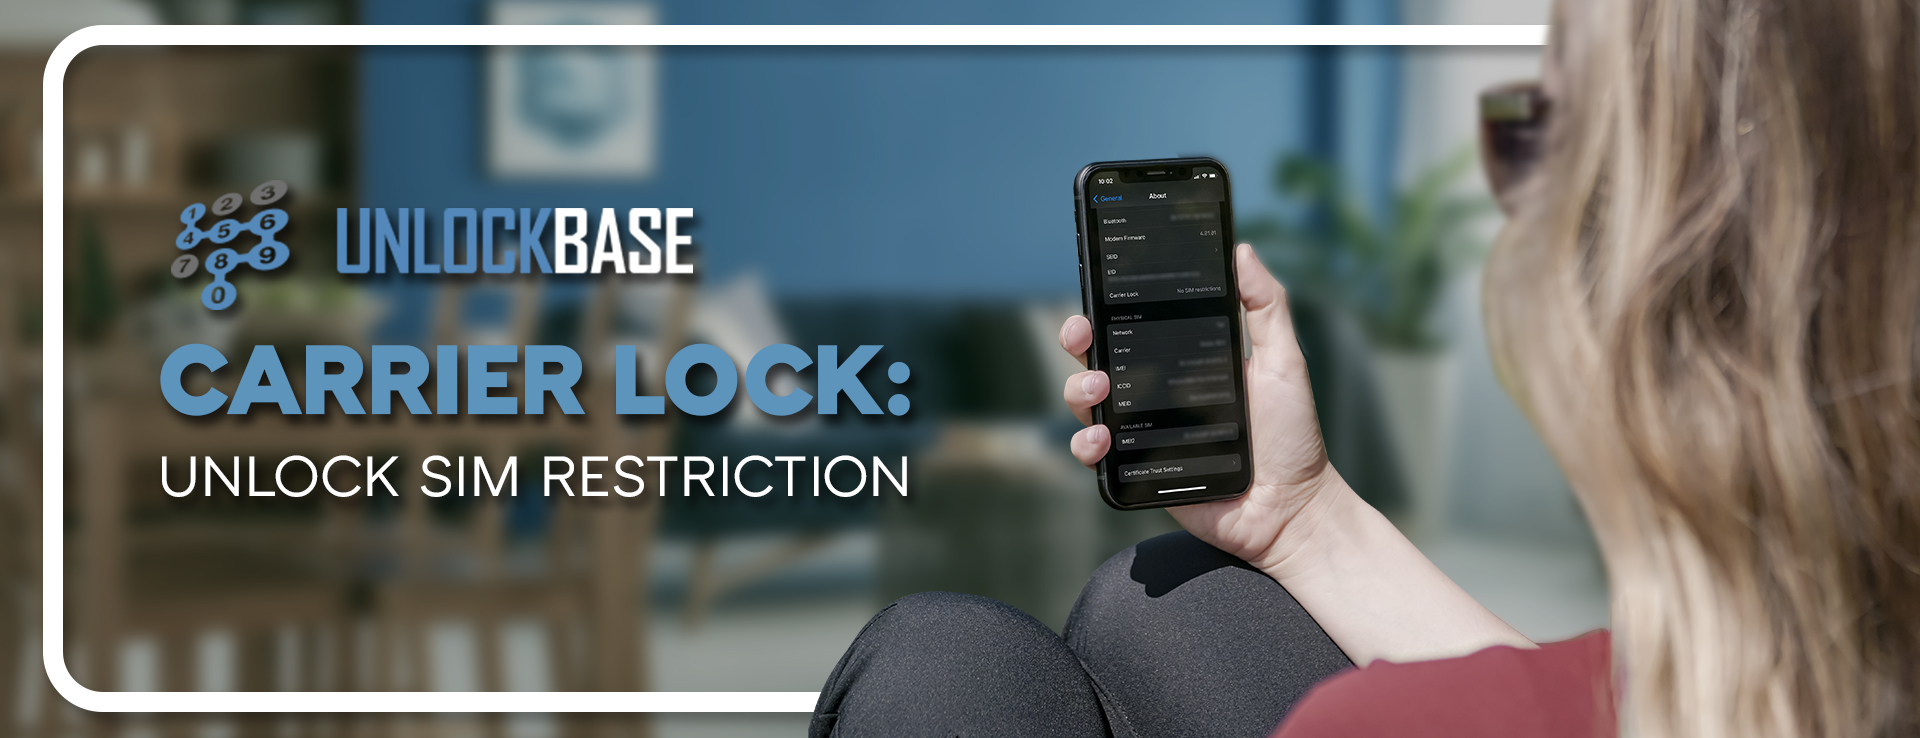
Mobile carriers in the United States, as well as in several other countries, sell phones with special deals or price reductions. However, such phones are often network-locked. You can’t switch to a different carrier’s network by swapping the SIM card. Here are a few options for unlocking phones for a bit of cost while remaining legal and risk-free. This article discusses how to get your carrier to unlock your phone.
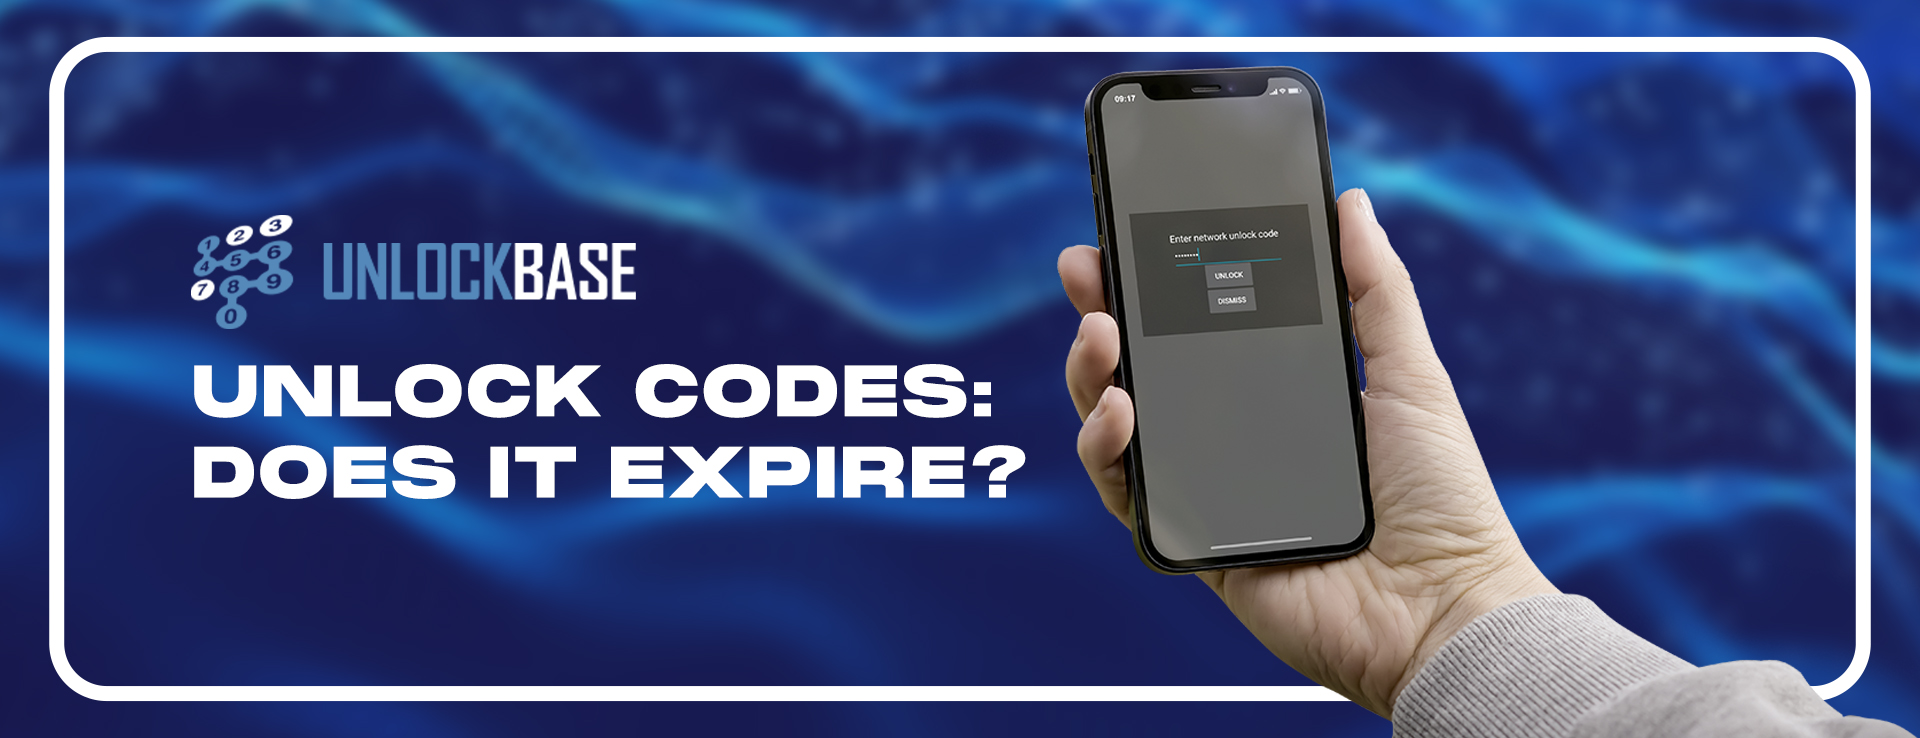
Do Unlock Codes Expire?
Do unlock codes expire? They don’t have an expiration date. They’re calculated using the phone’s serial number, so the code should remain the same as long as that doesn’t change. Unlock codes are permanent and do not expire.
What Are the Benefits of Unlocking Your Phone?
When traveling overseas or at home, unlocked phones allow you to switch providers. The most significant advantage of unlocked phones is that you are no longer reliant on a single operator. You have complete freedom to change networks as you see fit, allowing you to utilize the SIM that best suits your needs in any part of the United States.
Unlocked phones are also quite useful while traveling internationally. Purchase a local SIM card and use it when you arrive in any nation. It will be significantly less expensive than accruing international call and data rates.
Finally, unlocked phones are great backup phones. An unlocked mobile gets the job done whether your regular phone isn’t functioning or someone wants to borrow a gadget for a few days.
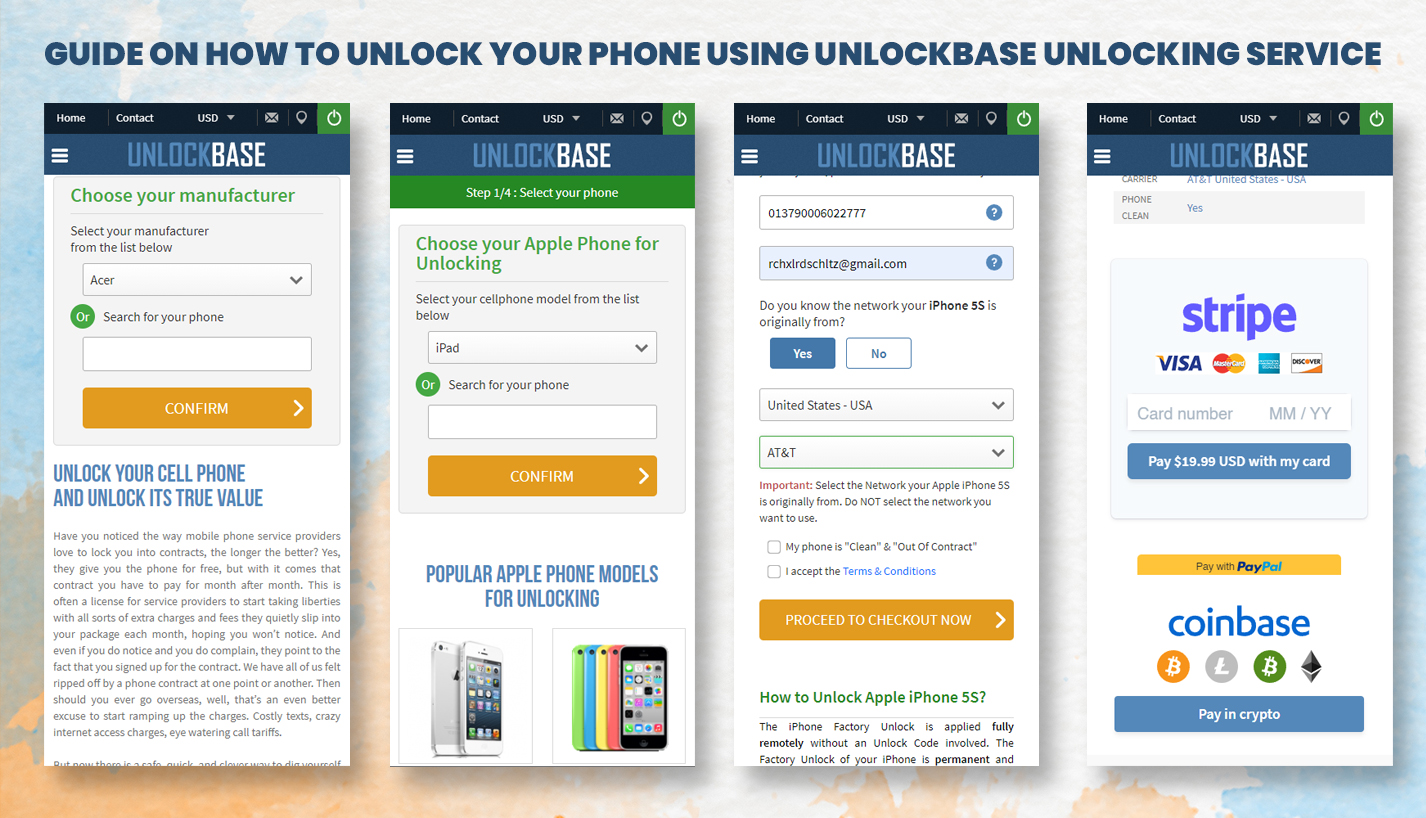
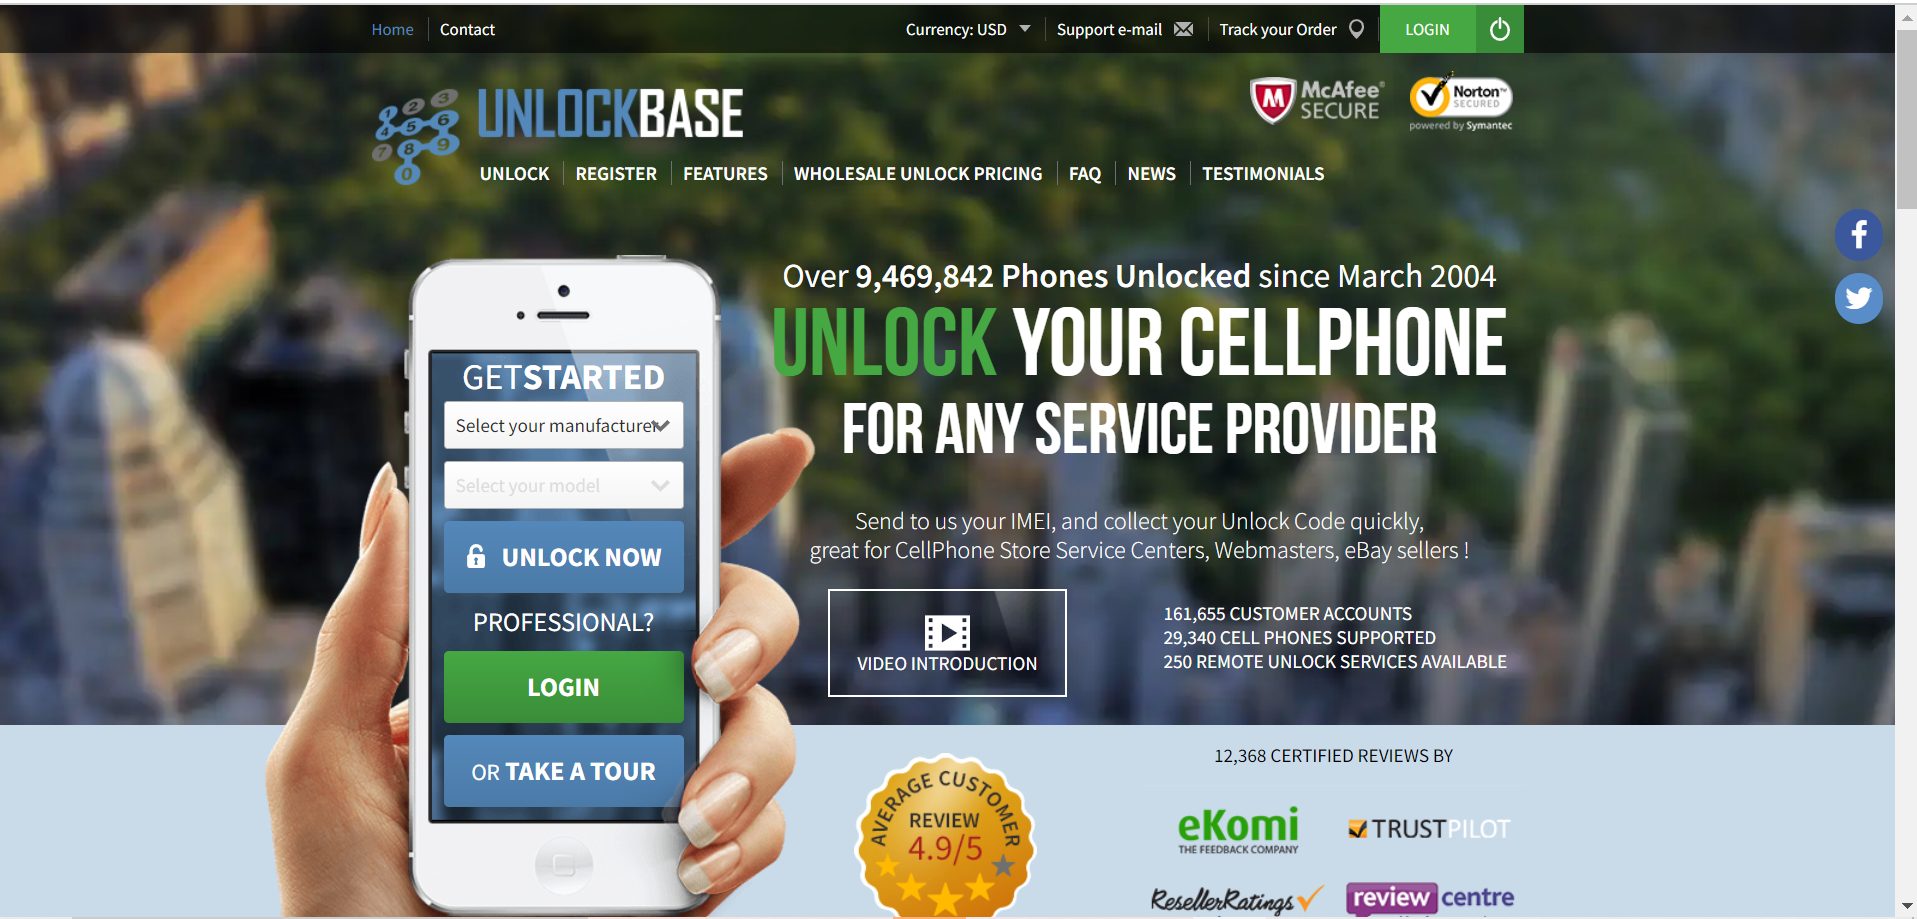
Unlock Your Phone Using UnlockBase
UnlockBase Service is an excellent tool to utilize if you want to unlock your phone without a SIM card. The genuinely unique and fantastic aspect of this instrument is its simplicity of use and convenience compared to other alternatives now available on the market.
It is secure, legal, and most importantly, can be completed independently using a basic step approach. It’s also a permanent solution, meaning that once you’ve broken the carrier lock, you’ll never have to do it again.
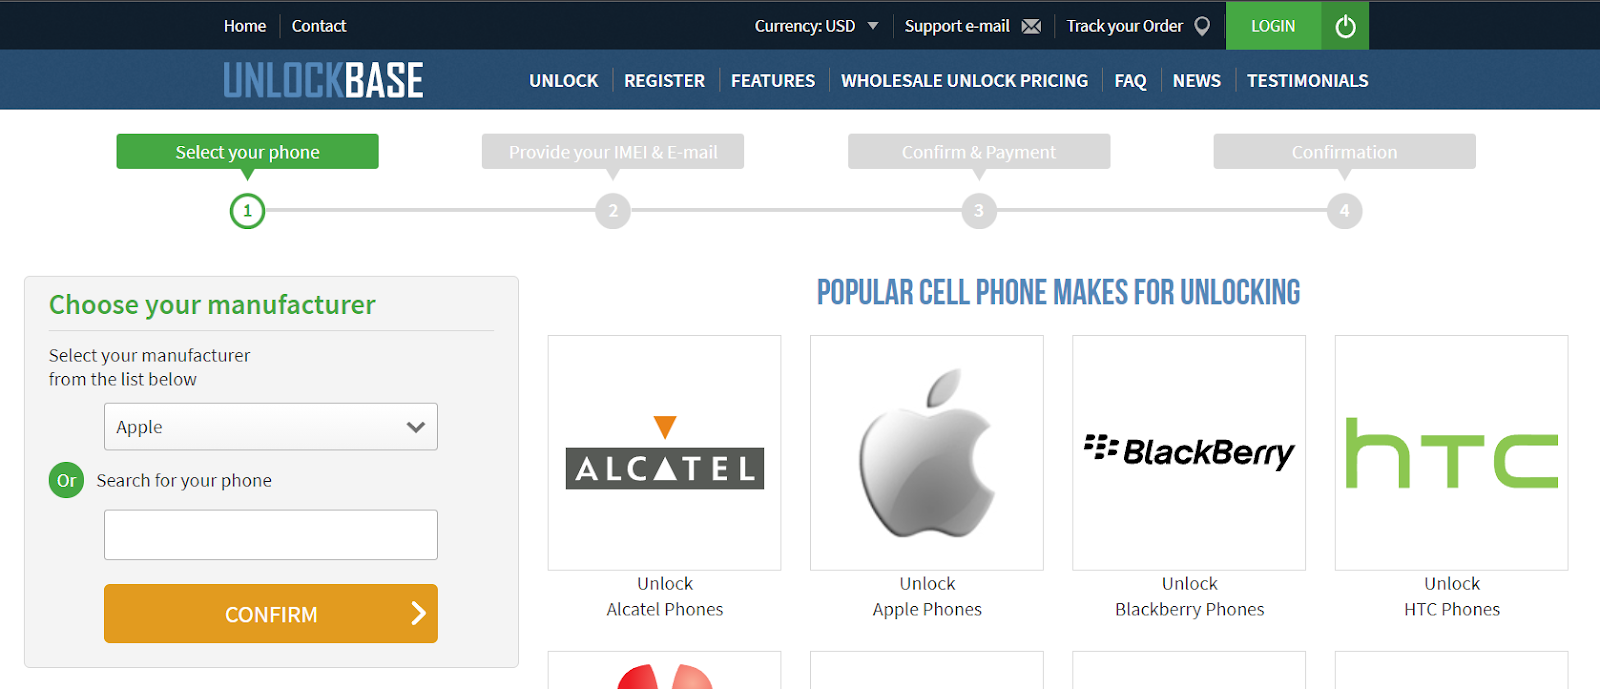
Select your Phone brand
Type your phone’s IMEI Code
Type your email for confirmation
Select the country of the network the phone is locked to
Select your network/carrier
Confirm your payment and wait for an email confirmation
There’s no need to ship your phone to us; simply provide your phone’s IMEI or Serial Number. Once you get an email confirmation from us, you will then proceed with the next step to finish the unlocking process with your device. If you feel lost or unsure at any stage, our dedicated team of customer support staff is available 24/7 to guide you through the unlocking process.
Conclusion
The great thing about network unlocking your smartphone, tablet, or portable hub, is that once you’ve done it, that’s it. Your phone cannot be re-locked to a different network. As per Unlock Codes, They don’t have an expiration date. They’re determined based on the phone’s serial number, so as long as that doesn’t change, the code should stay constant.
Unlock codes are non-transferable and never expire, and any compatible SIM card can be inserted, as long as you have an account and credit with that network, you’ll be able to make calls, send SMS, and perhaps even get online. If you have any other ideas, let us know in the comment below!
All products, and company names, logos, and service marks (collectively the "Trademarks") displayed are registered® and/or unregistered
trademarks™ of their respective owners.
The authors of this web site are not sponsored by or affiliated with any of the third-party trade mark or third-party registered trade mark owners,
and make no representations about them, their owners, their products or services.
Simply, affiliate programs, also known as associate programs, are agreements in which an online merchant Web site compensates affiliate Web sites for sending them, visitors. These affiliate Web sites offer links to the merchant’s site and are compensated in accordance with a contract.
This arrangement is frequently dependent on the number of visitors the affiliate provides to the merchant’s website or the number of visitors who purchase something or take some other action. Some contracts pay based on the number of visitors that visit the page where their merchant site’s banner advertising is displayed. Basically, if a link on an affiliate site drives visitors or money to a merchant site, the merchant site pays the affiliate site according to the terms of their agreement. Recruiting affiliates is a great method to sell things online, but it can also be a cheap and effective marketing approach for getting the word out about your website.
But how exactly does it work?
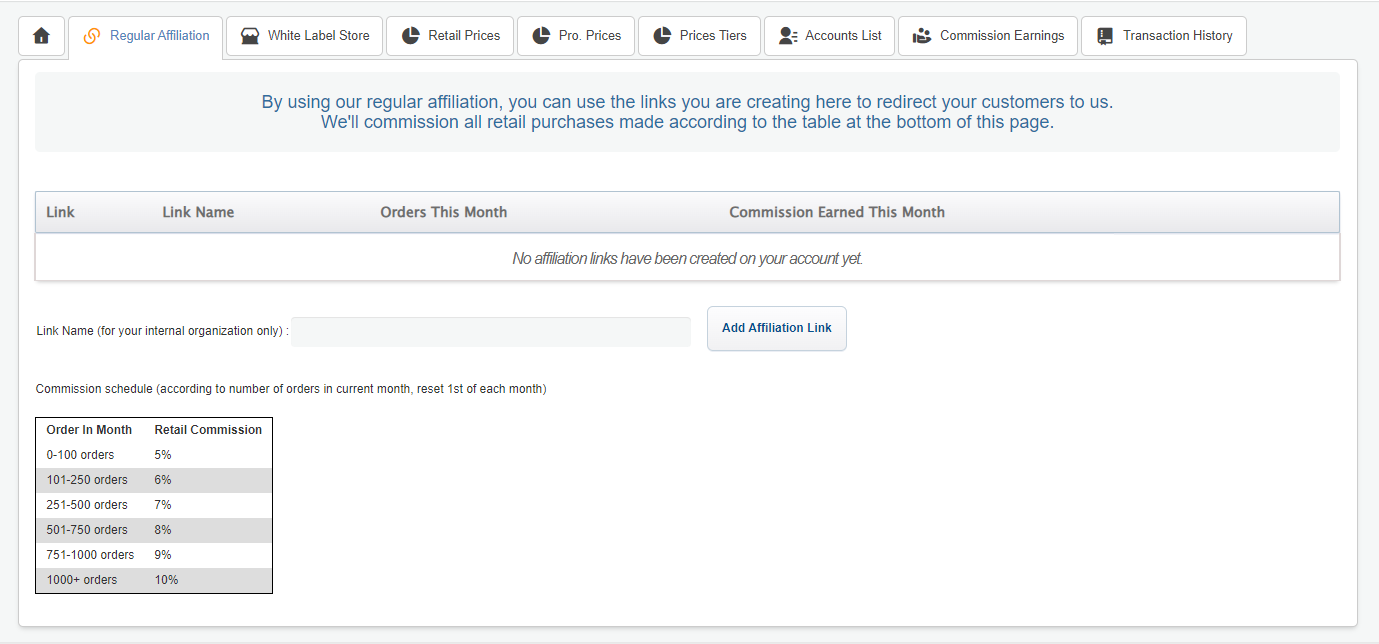
Use our Regular Affiliation platform to get money quickly, or use our White Label solution to promote UnlockBase Solutions on your own domain/website and start generating money right away.
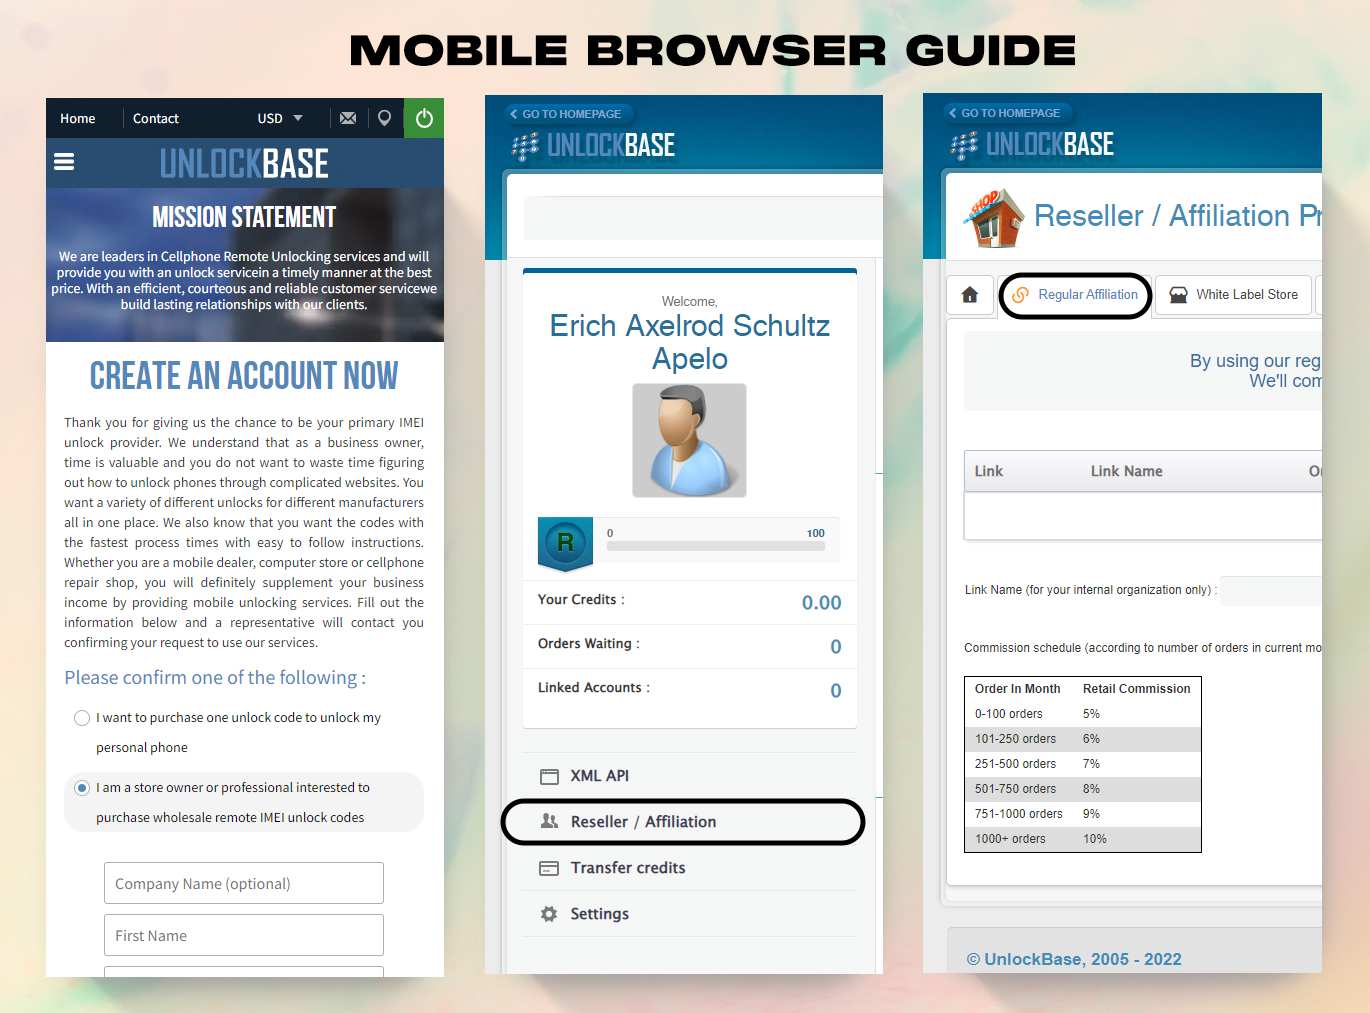
Create your own account and fill out the information and a representative will contact you confirming your request to use our services.
Once you’ve login
Click on the Reseller / Affiliation and check the “Regular Affiliation” tab which is the new affiliate system we offer on a link basis.
By using our regular affiliation, you can use the links you are creating here to redirect your customers to us.
We’ll commission all retail purchases made according to the table at the bottom of this page.
Begin earning commissions right away!
You may earn commissions on every sale made on your store, and you can return to “Your Store” at any moment to tweak the appearance and feel of your website.
You can instantly attract professional clients to your website by using our simple invite system. To let clients know you’re open for business, you may even utilize your own email sending platform!
There’s even more! By bargaining with you, your consumer may also benefit from your negotiated costs. While it will lower your profit, it will significantly raise your volume!)
You may use the links you create here to refer your clients to us if you utilize our normal affiliation.
According to the chart at the bottom of this page, we’ll commission all retail purchases.
How does your account work?
Start earning commissions right away by following these easy steps. Withdraw funds via PayPal or use them to top up your UnlockBase account.
Get your store’s domain name registered. Any domain name will suffice as long as it does not include the term “unlockbase.”
Register a CNAME record pointing to affiliate.unlockbase.com for your domain or subdomain.
Once your domain is correctly set up, go to “Your Store” and fill in all of the essential information.
Once you’ve verified that your domain setup is correct and that your settings have been properly saved in “Your Store,” you may begin configuring on our site. It won’t take more than an hour because it’s so simple.
Do you have any questions?
Have any questions or are unsure what to do next?
All business inquiries should be sent to Customer Support (info@unlockbase.com), and all technical requests should be directed to Adrian (adrian@unlockbase.com).
All products, and company names, logos, and service marks (collectively the "Trademarks") displayed are registered® and/or unregistered
trademarks™ of their respective owners.
The authors of this web site are not sponsored by or affiliated with any of the third-party trade mark or third-party registered trade mark owners,
and make no representations about them, their owners, their products or services.
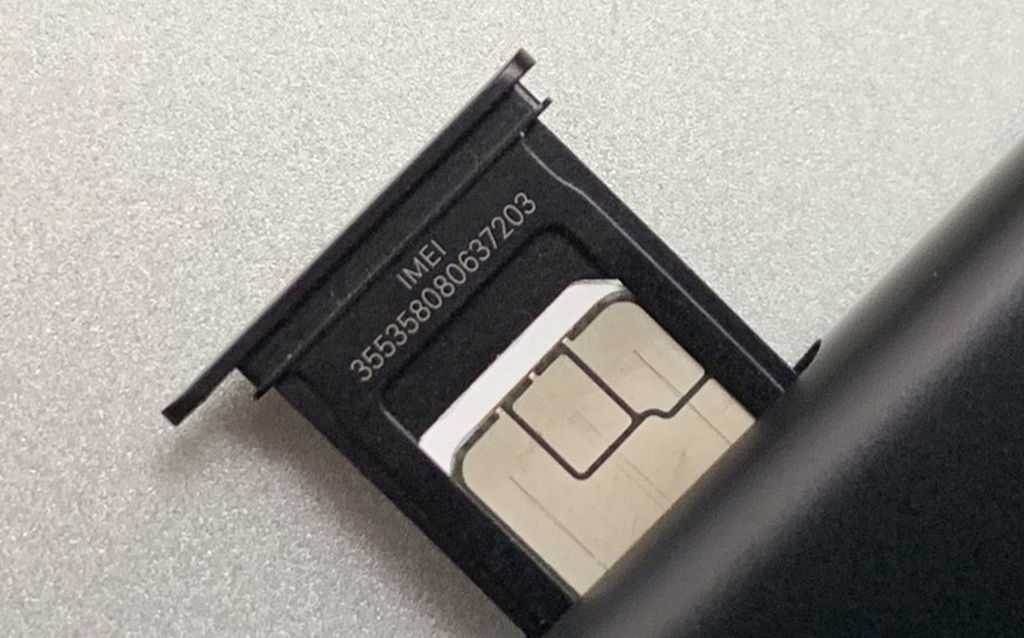
If you’re unfamiliar with the term “IMEI,” you’ve come to the correct spot. The IMEI (International Mobile Equipment Identity) is a unique identifier assigned to each device connected to a mobile network. Consider the social security number for your phone. It is 15 digits in length and is issued to each GSM phone — CDMA devices have their MEID number.
When your phone is lost or stolen, the IMEI number comes in useful. While this won’t miraculously return the phone to you, you can ensure that whoever found or stole it will be unable to use it. Your carrier can blacklist a device using its IMEI number and may coordinate with other networks to do the same. This means the phone will no longer make or receive calls or connect to the internet through the cellular network, even with a new SIM card. For those who prioritize mobile security and functionality, platforms like lyrabet ensure that their mobile betting environment is equally safeguarded—featuring encrypted connections, secure payment processing, and compatibility with smartphones and tablets, giving users peace of mind while enjoying both casino games and sports wagering on the go.
What is the Purpose of an IMEI Number?
IMEI numbers serve a single purpose: to identify mobile devices uniquely. Their secondary objective, or goal, is to deter theft. If a mobile device is generally identifiable, a thief cannot simply swap out the SIM card and expect to retain the phone. Because IMEI numbers are hard-coded into device hardware, changing them is practically tricky without causing damage to the device.
When a carrier becomes aware of a stolen device, it may block the IMEI number and prevent it from connecting to the network. Later, it instructs other cellular networks to follow suit.
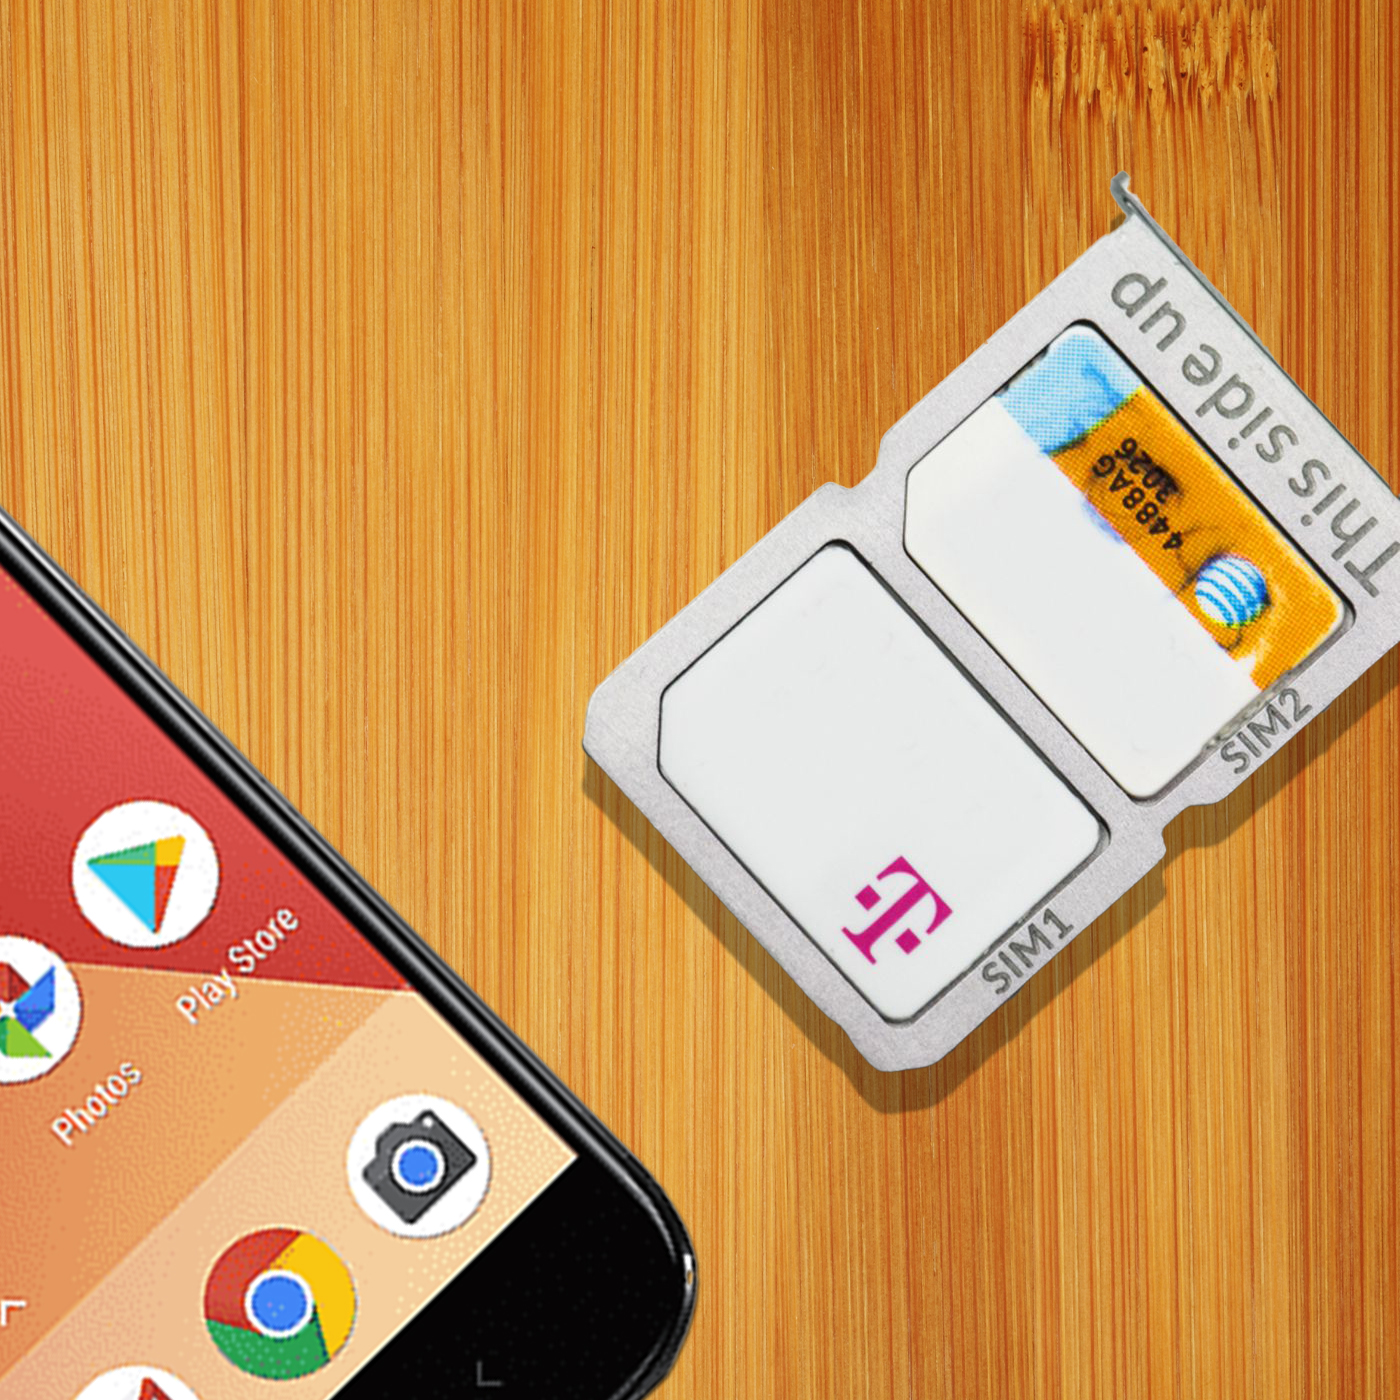
What Is a Dual Sim Phone IMEI number?
Dual-SIM phones enable the use of two SIM cards in a single handset. This is in contrast to a single SIM device, which only has one SIM card slot. Naturally, you’ll need an unlocked phone to use the dual SIM option if it’s available. That is one of the primary reasons to get an unlocked phone.
The majority of dual SIM phones provide active dual SIM capabilities. A dual SIM phone can simultaneously accommodate two active SIM cards, eliminating the need to remove and exchange SIM cards to change your phone number.
This implies that both lines may accept calls and messages. Additionally, you may generally choose which SIM card serves as your primary internet or phone call card. Certain dual SIM phones even allow you to carry on a single conversation with two callers on two separate lines.
Meanwhile, a standby dual SIM phone is another form of dual SIM phone. To enable standby dual SIM devices, you must toggle between SIM cards in your device’s settings. Because your phone can only connect to one network at a time, you will not receive messages or calls from both networks concurrently.
Additionally, dual SIM cellphones support either a second SIM or a microSD card—-but not both. This is a more restricted version of dual SIM capabilities seen on earlier devices, in which you must pick between a second SIM and more storage.
Unlocking A Dual Sim Phone IMEI number
First, let us state that not every dual-SIM phone operates in the same manner. You may discover that certain phones’ SIM card functions similarly to a standard 4G LTE network connection, allowing you to make calls, send text and image messages, and use your carrier’s mobile internet network while not connected to WiFi.
Meanwhile, SIM two is dormant and can only get data through your carrier’s obsolete (and soon to be repurposed) 2G connection. Both SIM cards are operational, and when someone dials the correct number, they may receive incoming calls or texts on either.
Additionally, you may make calls and send messages using either SIM card, including image messages (remember that SIM 2 has a 2G network connection), as long as the SMS program you’re using supports a dual-SIM arrangement.
When Unlocking a phone using an IMEI,
You can submit EITHER of both IMEIs, it does not matter which one
You only need to submit only 1 of both IMEIs and regardless of which IMEI they submit, the unlock will unlock the full device including both SIM Card slots
Unlocking IMEI with a working 4G LTE Network connection to get a mobile network allows you to make calls and send text messages. You can check your IMEI when you dial *#06# on your smartphone.
Conclusion
A dual-SIM card phone is not a magic bullet for doubling your Internet connection, and some phones lack a second Internet connection entirely. But it is a great way to manage two different phone numbers on just one phone, and plenty of us know how great that can be. Using your main IMEI to unlock your phone will probably solve your problem using a different carrier for mobile networks.
All products, and company names, logos, and service marks (collectively the "Trademarks") displayed are registered® and/or unregistered
trademarks™ of their respective owners.
The authors of this web site are not sponsored by or affiliated with any of the third-party trade mark or third-party registered trade mark owners,
and make no representations about them, their owners, their products or services.
Restoring your phone to factory settings might resolve technical issues like limited storage or a laggy touch screen. It deletes all of your settings, including contacts, and forces you to start again or restore a backup of your data to repopulate the device.
A factory reset is possible on an unlocked phone, but can it be relocked throughout the process?
What does a factory reset entail?
A Factory Reset clears all user data from a device and resets it to factory default settings, or, to be more precise, to the state it was in when you first bought it.
Contacts, images, applications, your cache, and everything else you’ve stored on the device since you first began using it will be deleted.
It won’t wipe the device’s operating system (iOS, Android, or Windows Phone), but it will restore its original applications and settings. Furthermore, resetting it does not affect your phone, even if you do it many times.
Why would you want to do a factory restore?
Data corruption or another major mistake that is unresolvable.
You want to get rid of all obsolete software and apps and restore your computer to the state it was in when you first bought it.
Because you want to sell or give the computer away, you’ll need to back up and erase any personal data.
Can You Factory Reset an Unlocked Phone?
A factory reset restores a phone to its factory default settings. All of your applications and data are erased, and you must begin the setup procedure all over again.
Network/SIM lock is independent of the OS, so resetting the device will not affect the SIM lock/unlock state. Usually, unlocked phones are unlocked for good. So the answer is Yes.
If you bought the phone unlocked before going through the setup process, the unlock should stay even if you reset it. If you have to input an unlock code to unlock your phone, you should be able to use it to open it again after resetting it.
Unlock Your Phone and Perform Factory Reset
Before updating, or resetting to factory settings, make a complete backup of your data. This cannot be overstated since all of your data is erased and cannot be restored once you reset it. It also helps to store such data, so you don’t waste time reloading your phone with contacts and other information.
If you have an Android smartphone, encrypting your data before wiping it clean can be a good idea. While the most recent versions of Android have security protections that make retrieving data more difficult, encryption offers an additional layer of security that will always be handy if the smartphone falls into the wrong hands.
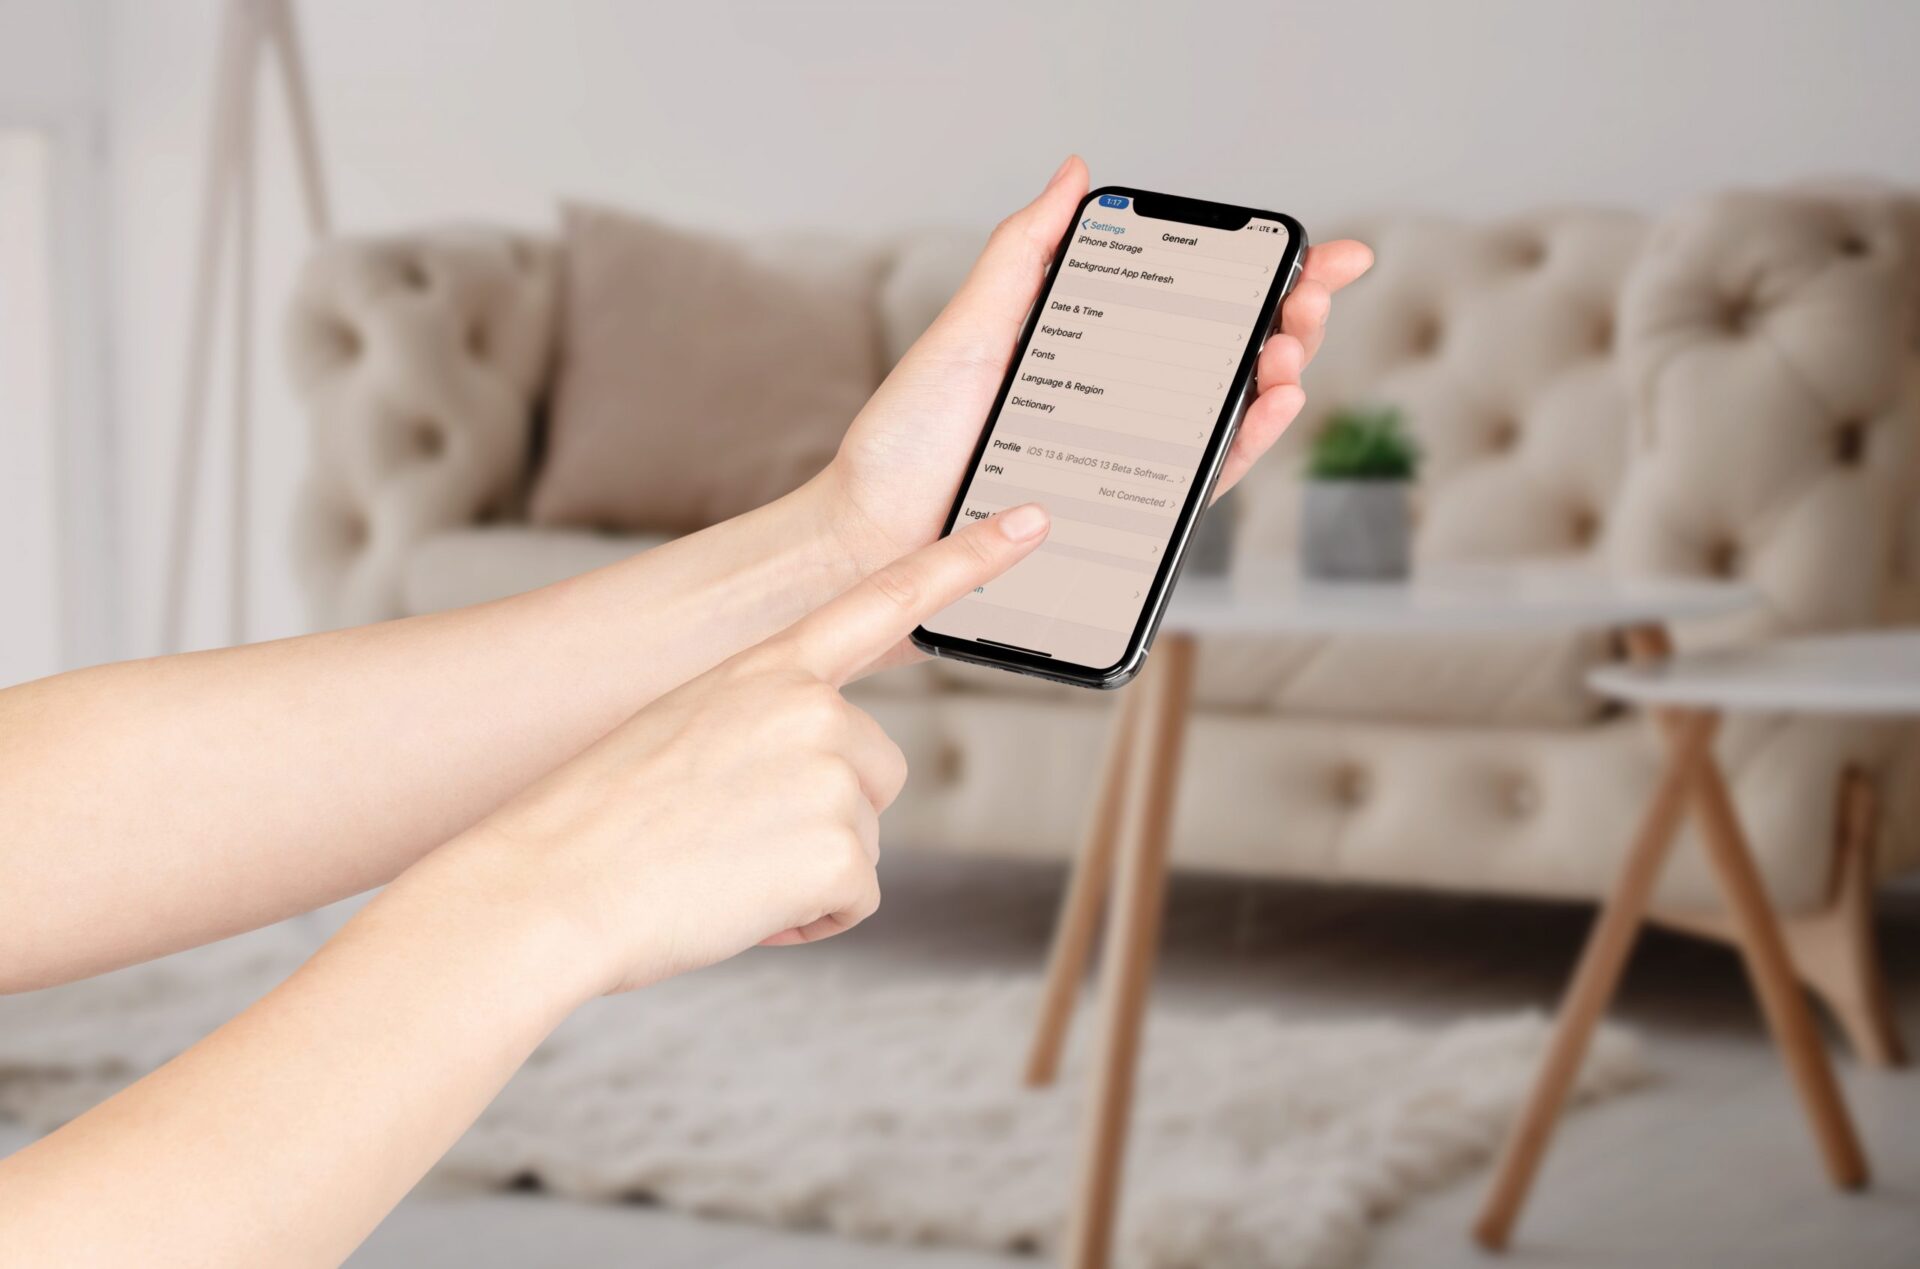
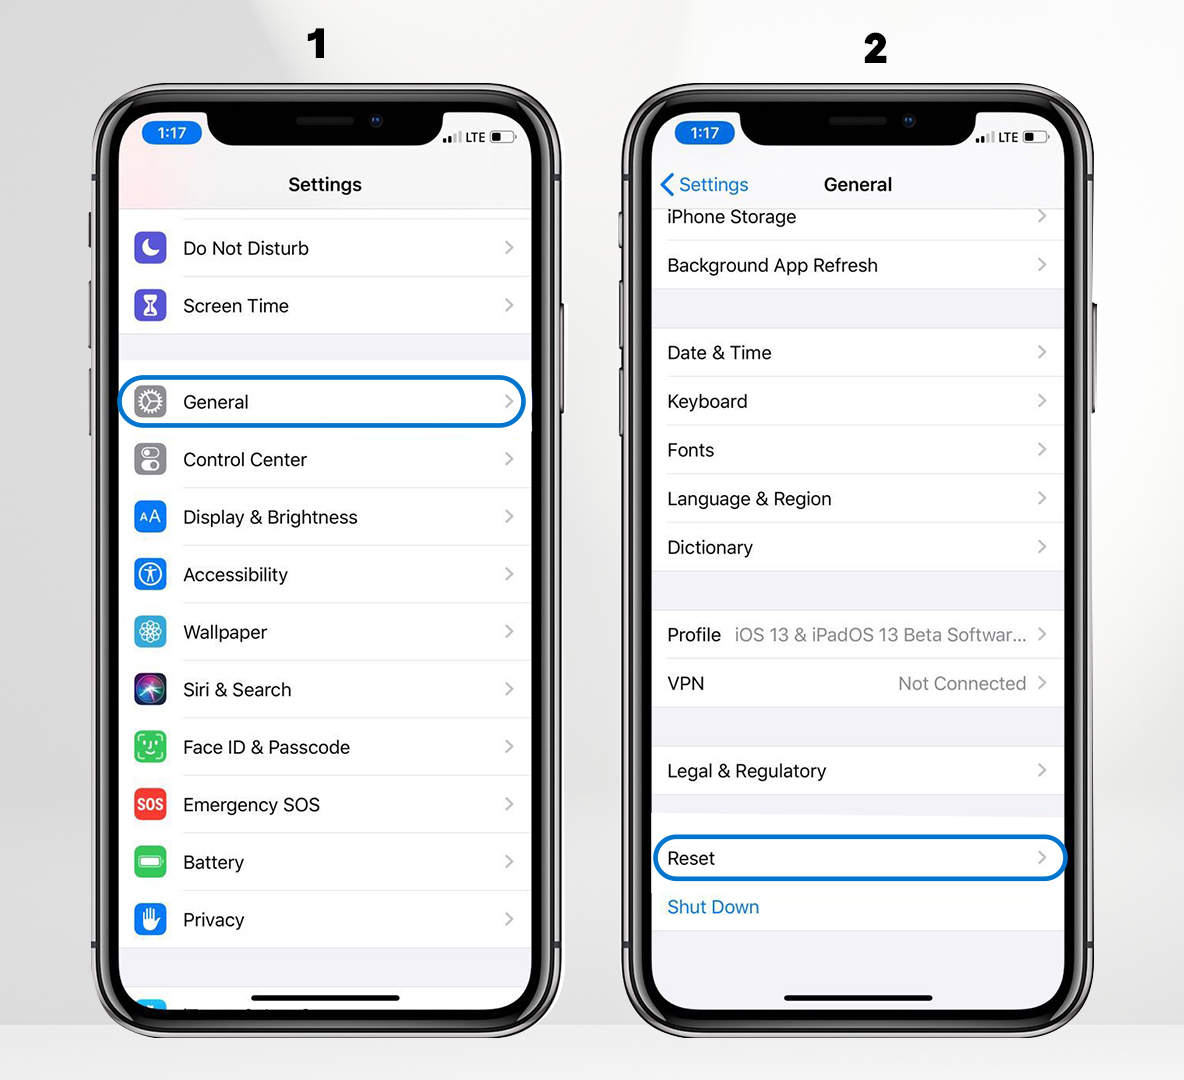
For iOS users, go to Settings > General > Reset.
Go to Settings > Backup and Reset > Factory data reset for Android users.
Conclusion
You can remove all data from your phone; you can reset your phone to factory settings without worrying about getting relocked; while resetting it doesn’t harm your phone, it’s worth knowing the reasons why you would decide to use it in the first place. If you have any thoughts, let us know in the comments below!
All products, and company names, logos, and service marks (collectively the "Trademarks") displayed are registered® and/or unregistered
trademarks™ of their respective owners.
The authors of this web site are not sponsored by or affiliated with any of the third-party trade mark or third-party registered trade mark owners,
and make no representations about them, their owners, their products or services.
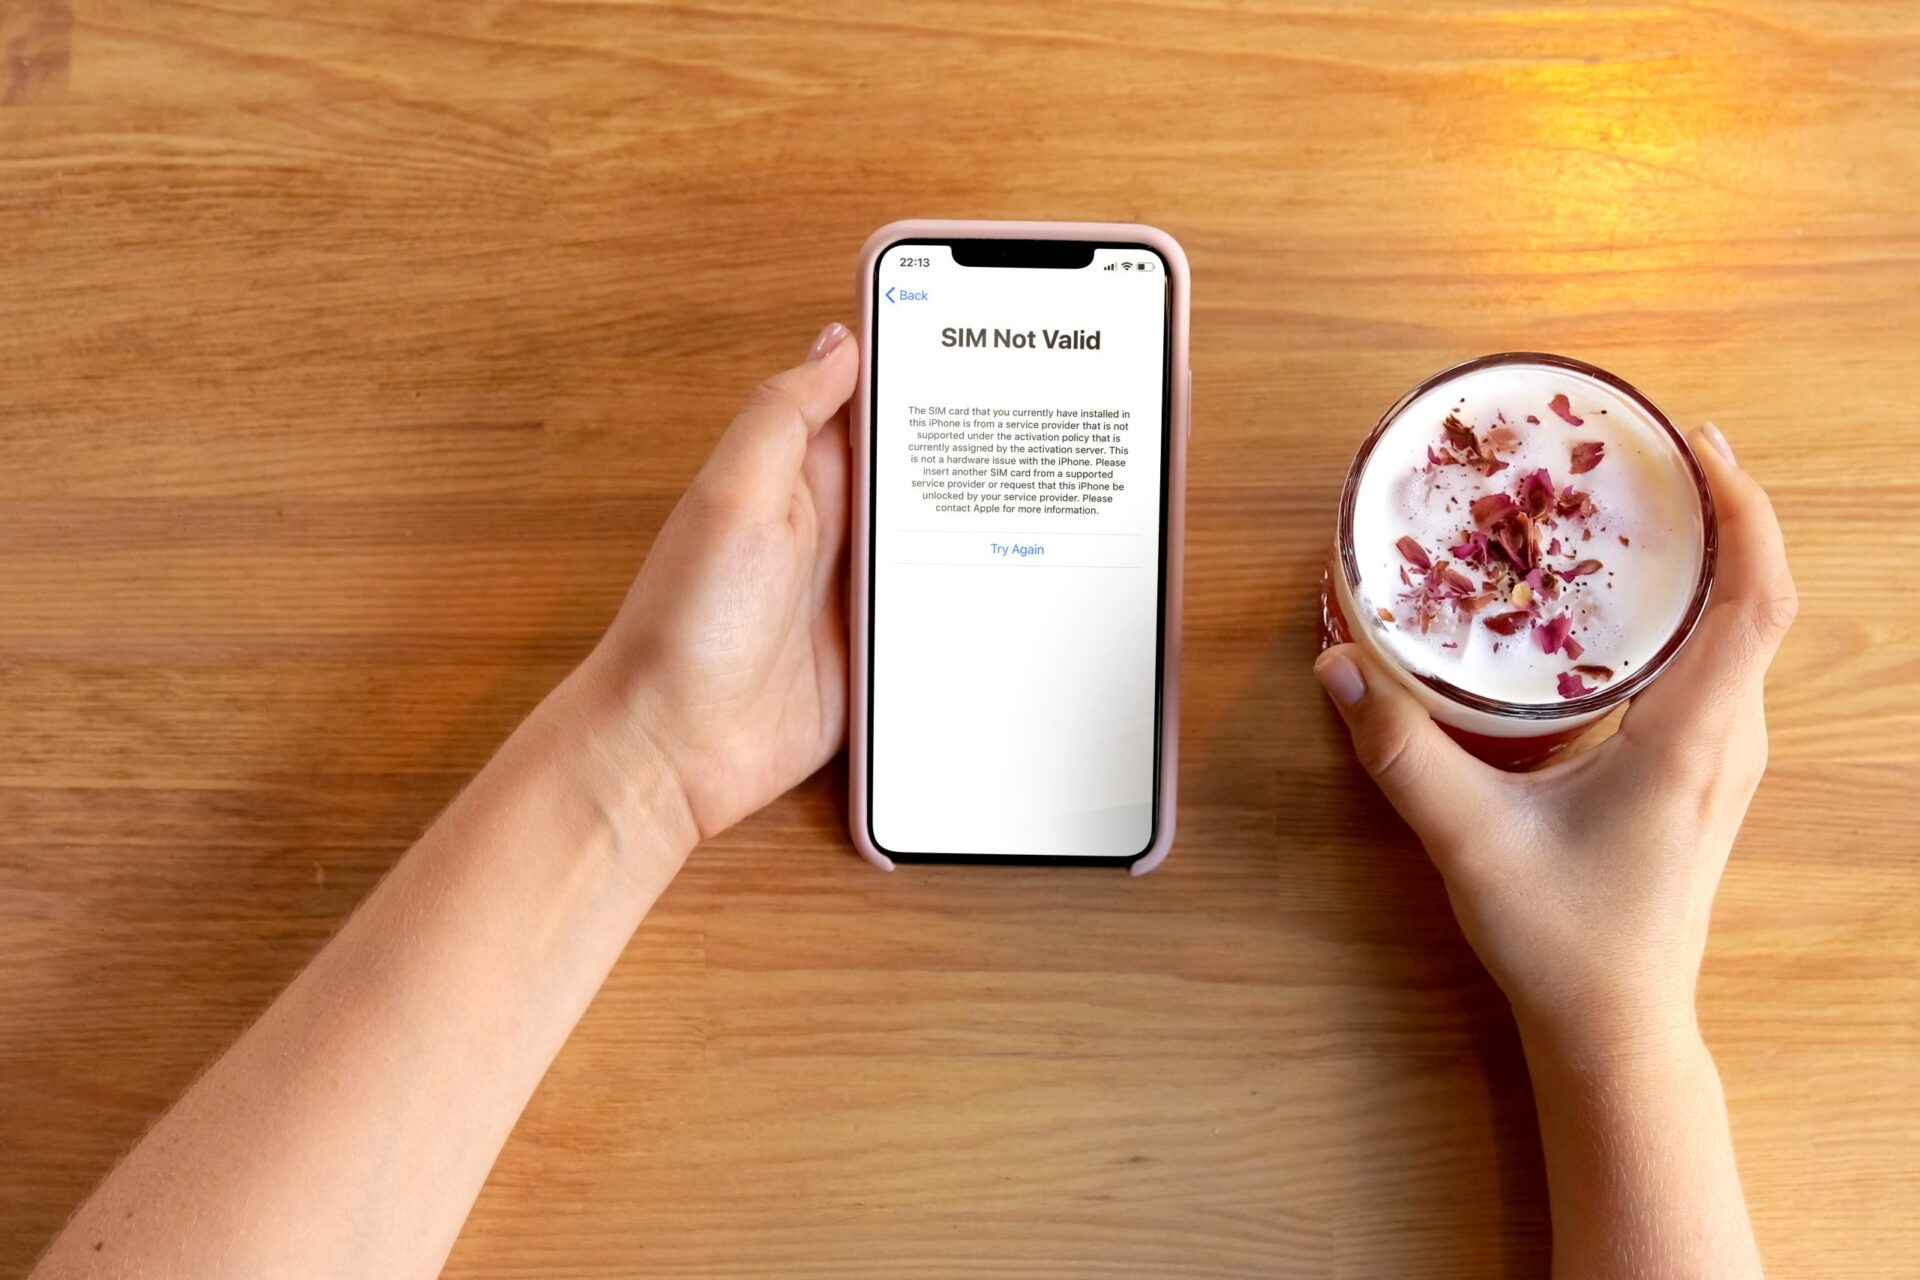
A feature in GSM phones that limits the phone’s usage to a single cellular carrier (a particular SIM card). When phones are significantly subsidized by the carrier, SIM locks are employed to ensure that subscribers complete their service contracts. By entering a code, SIM-locked phones can be unlocked.
You can switch networks after purchasing and using your cellphone for a length of time. However, the phone you’re using now might not be compatible with that network. You must unlock your phone if you want to maintain using your existing handset yet switch to a different network. This implies you must unlock the phone in order for another gsm sim module to be accepted.
Do you have your sim-locked phones unlocked? What’s the best way to find out?
Finding out if your phone is locked is straightforward. Simply insert a SIM card from another carrier (you can acquire one for free at a phone shop or purchase one online) and see if the network’s name displays on your phone.
If it does, and you can use your phone, it’s unlocked.
Why should I unlock my phone?
Most people unlock their phones so they can get cheap SIM-only deals. When your phone is unlocked, you don’t have to pay the same prices as the network that you bought your phone from. Because good SIM-only deals usually only last for a short time, that’s another reason why they’re important. A SIM-only deal gives you the flexibility to change phones and get the best deals while they last.
Many people unlock their phones when they want to sell them, but it’s not always the best idea. As a general rule, phones that are not tied to a network sell for more money and move faster than phones that are still tied to a network. In order to save money on roaming charges when you travel a lot, you’ll need a phone that can accept SIM cards from other networks.
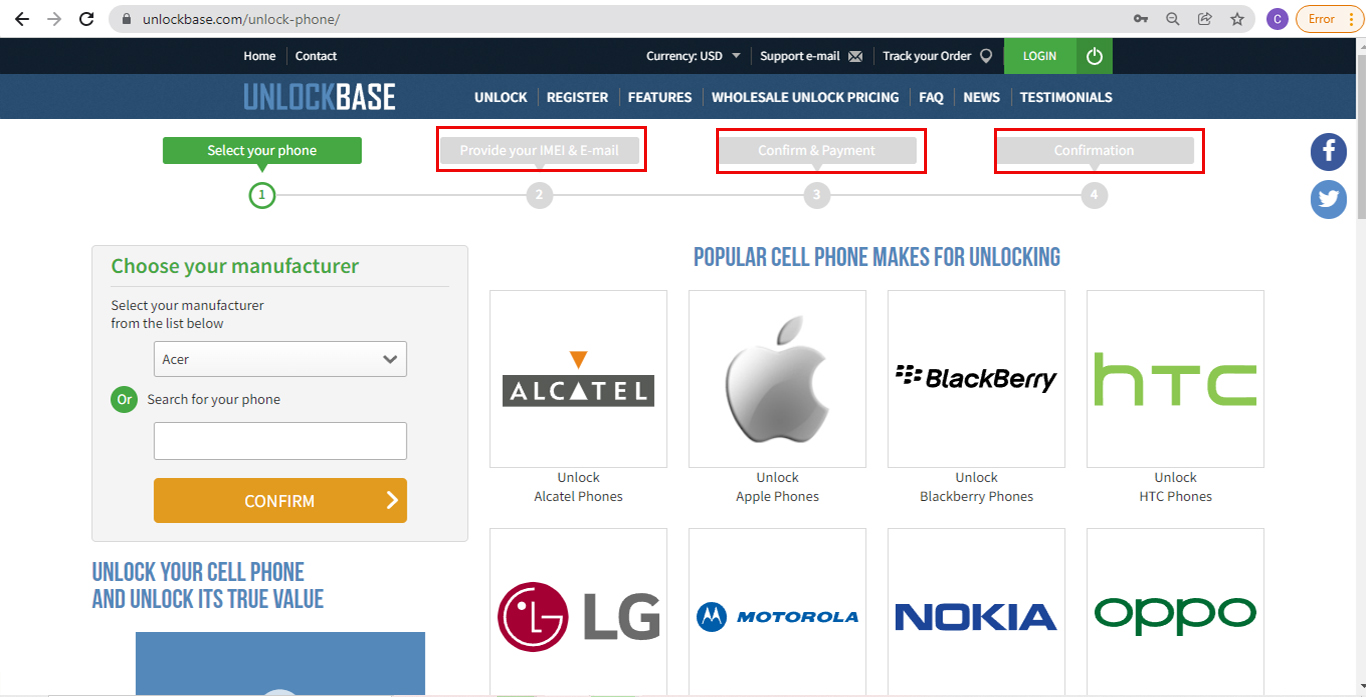
How to Unlock Sim Locked Phones?
1. Unlock Your Phone Using UnlockBase
If you discovered that you don’t meet all of your carrier’s unlock criteria, this is by far the best choice.
1. Go to https://www.unlockbase.com/unlock-phone/ 2. Select or search the manufacturer of your phone that you want to get unlocked 3. Select your cell phone model from the list after getting the right manufacturer of your phone 4. In the first part of the article, we asked you to write down your IMEI Number, Insert your IMEI on the website 5. Select your phone’s carrier. If you’re an Apple user and don’t have any idea what your phone carrier is, you can check it here.
6. Proceed to Check out and give you Account Information to Confirm your Payment.
Your order will begin to be processed once you have completed the payment. Within 24hrs, you will receive an email confirming that your phone has been successfully unlocked.
7. We’ll then send you an email to inform you that your phone is unlocked
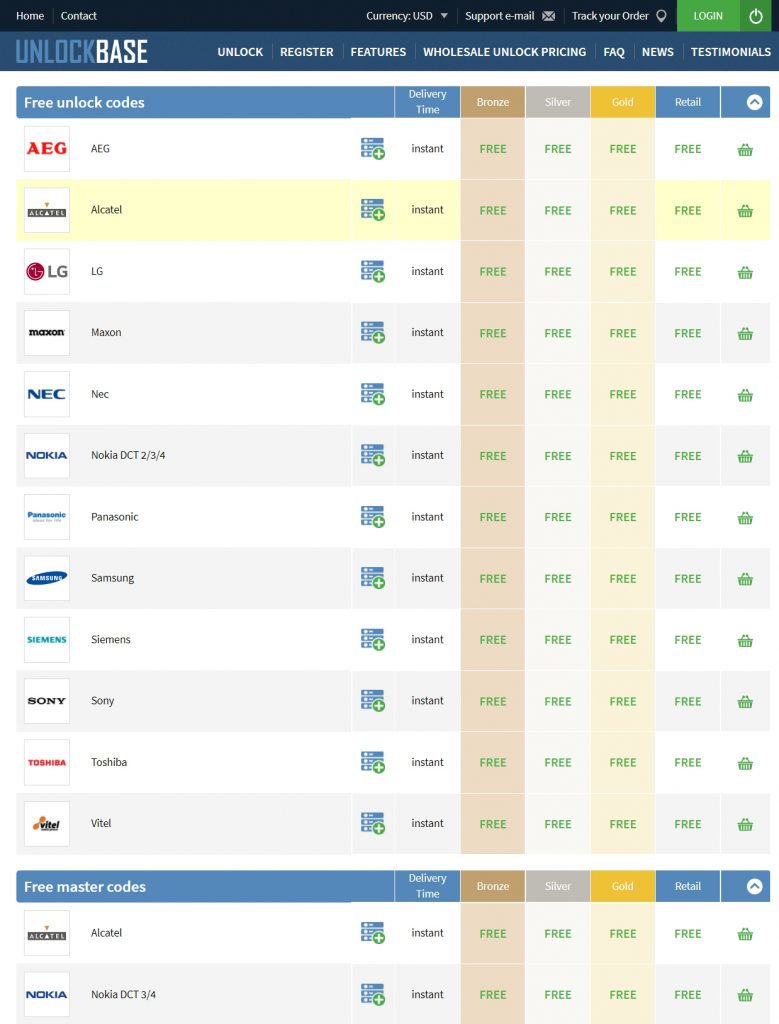
2. We Offer Free Unlock Services!
In case your old device is covered by our FREE services, we can unlock your old device without spending anything, you just need to check the exact model and manufacturer of your old phone and we can unlock it for you. Just go to this link: https://www.unlockbase.com/wholesale-phone-unlocking/
Scroll to the bottom where it says “Free Unlock Codes”.
Here are some of the Manufacturers that we have for free unlock codes for old devices :
Just provide the information needed for your unlock request. Wait for us to send you the unlock code for your phone. We will provide you with an unlock code. We’ll walk you through how to enter the code and unlock your phone.
If your device is one of these old models, You can get the code for free! But if your phone is the newer model you try the other method below :
2. Select or search the manufacturer of your phone that you want to get unlocked
3. Select your cell phone model from the list after getting the right manufacturer of your phone
4. In the first part of the article, we asked you to write down your IMEI Number, Insert your IMEI on the website
5. Select your phone’s carrier. If you’re an Apple user and don’t have any idea what your phone carrier is, you can check it here.
6. Proceed to Check out and give you Account Information to Confirm your Payment.
Your order will begin to be processed once you have completed the payment. Within 24hrs, you will receive an email confirming that your phone has been successfully unlocked.
7. We’ll then send you an email to inform you that your phone is unlocked
The main disadvantage of this strategy is that you will have to spend money on it. However, the advantages of using UnlockBase exceed this disadvantage.
The main disadvantage of this strategy is that you will have to spend money on it. However, the advantages of using UnlockBase exceed this disadvantage. You don’t have to wait 30 days for the unlocking; instead, you only have to wait hours!
UnlockBase Service is an excellent tool to utilize if you want to unlock your phone. The genuinely unique and fantastic aspect of this instrument is its simplicity of use and convenience in comparison to other alternatives now available on the market. It is secure, legal, and most importantly, it can be completed independently using a basic step approach. It’s also a permanent solution, meaning that once you’ve broken the carrier lock, you’ll never have to do it again.
Conclusion
As a general rule, an unlocked phone should work with your service providers. To make sure this, bring your Sim Card with you and have it checked before you buy the phone and leave the store. Second, look at coverage. The phone you choose should work with a service that has a lot of coverage. There is a comment box at the bottom of this page if you have any ideas.
All products, and company names, logos, and service marks (collectively the "Trademarks") displayed are registered® and/or unregistered
trademarks™ of their respective owners.
The authors of this web site are not sponsored by or affiliated with any of the third-party trade mark or third-party registered trade mark owners,
and make no representations about them, their owners, their products or services.
You may have heard that an iPhone may be unlocked or that it can be unlocked from its carrier. This implies you can open an iPhone locked to a specific carrier and use it with multiple pages. Unlocking your iPhone AT&T is advantageous since it allows you to have more options. The phone is often referred to as a SIM-free or contract-free phone due to this. Because an AT&T iPhone unlock may be freeing, this pretty much sums it up.
The thing to Know Before Unlocking :
First, you must be a current or former AT&T subscriber. However, there are exceptions for people who did not fit this requirement but acquired an AT&T phone privately.
Of course, the cellphone we’re unlocking isn’t one of the unlocked phones. You can’t open a Verizon smartphone with AT&T.
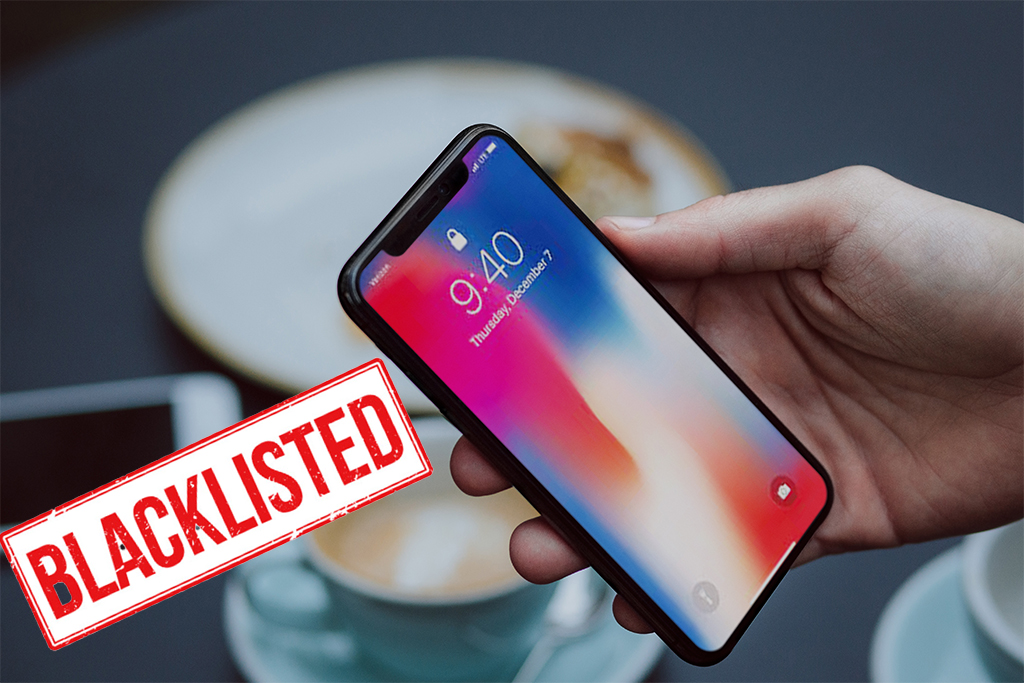
Third, if you are a subscriber, you must pay off your payment plan, but AT&T may give you some leniency based on your loyalty. If you are not an AT&T subscriber, you must pay. Else the phone will be blacklisted and cannot be unlocked.
The device should not be blacklisted from AT&T’s network due to loss, theft, or fraud.
Unlock ATT Phone Without Sim Card Using UnlockBase
UnlockBase Service is an excellent tool to utilize if you want to unlock your iPhone AT&T without a SIM card. The genuinely unique and fantastic aspect of this instrument is its simplicity of use and convenience compared to other alternatives now available on the market. It is secure, legal, and most importantly, can be completed independently using a basic step approach. It’s also a permanent solution, meaning that once you’ve broken the carrier lock, you’ll never have to do it again.
Select your Phone brand
Type your phone’s IMEI Code
Type your email for confirmation
Select the country of the network the phone is locked to
Select your network/carrier
Confirm your payment and wait for an email confirmation
There’s no need to ship your iPhone to us; simply provide your iPhone’s IMEI or Serial Number. Once you get an email confirmation from us, you will then proceed with the next step to finish the unlocking process with your iDevice. If you feel lost or unsure at any stage, our dedicated team of customer support staff is available 24/7 to guide you through the unlocking process.
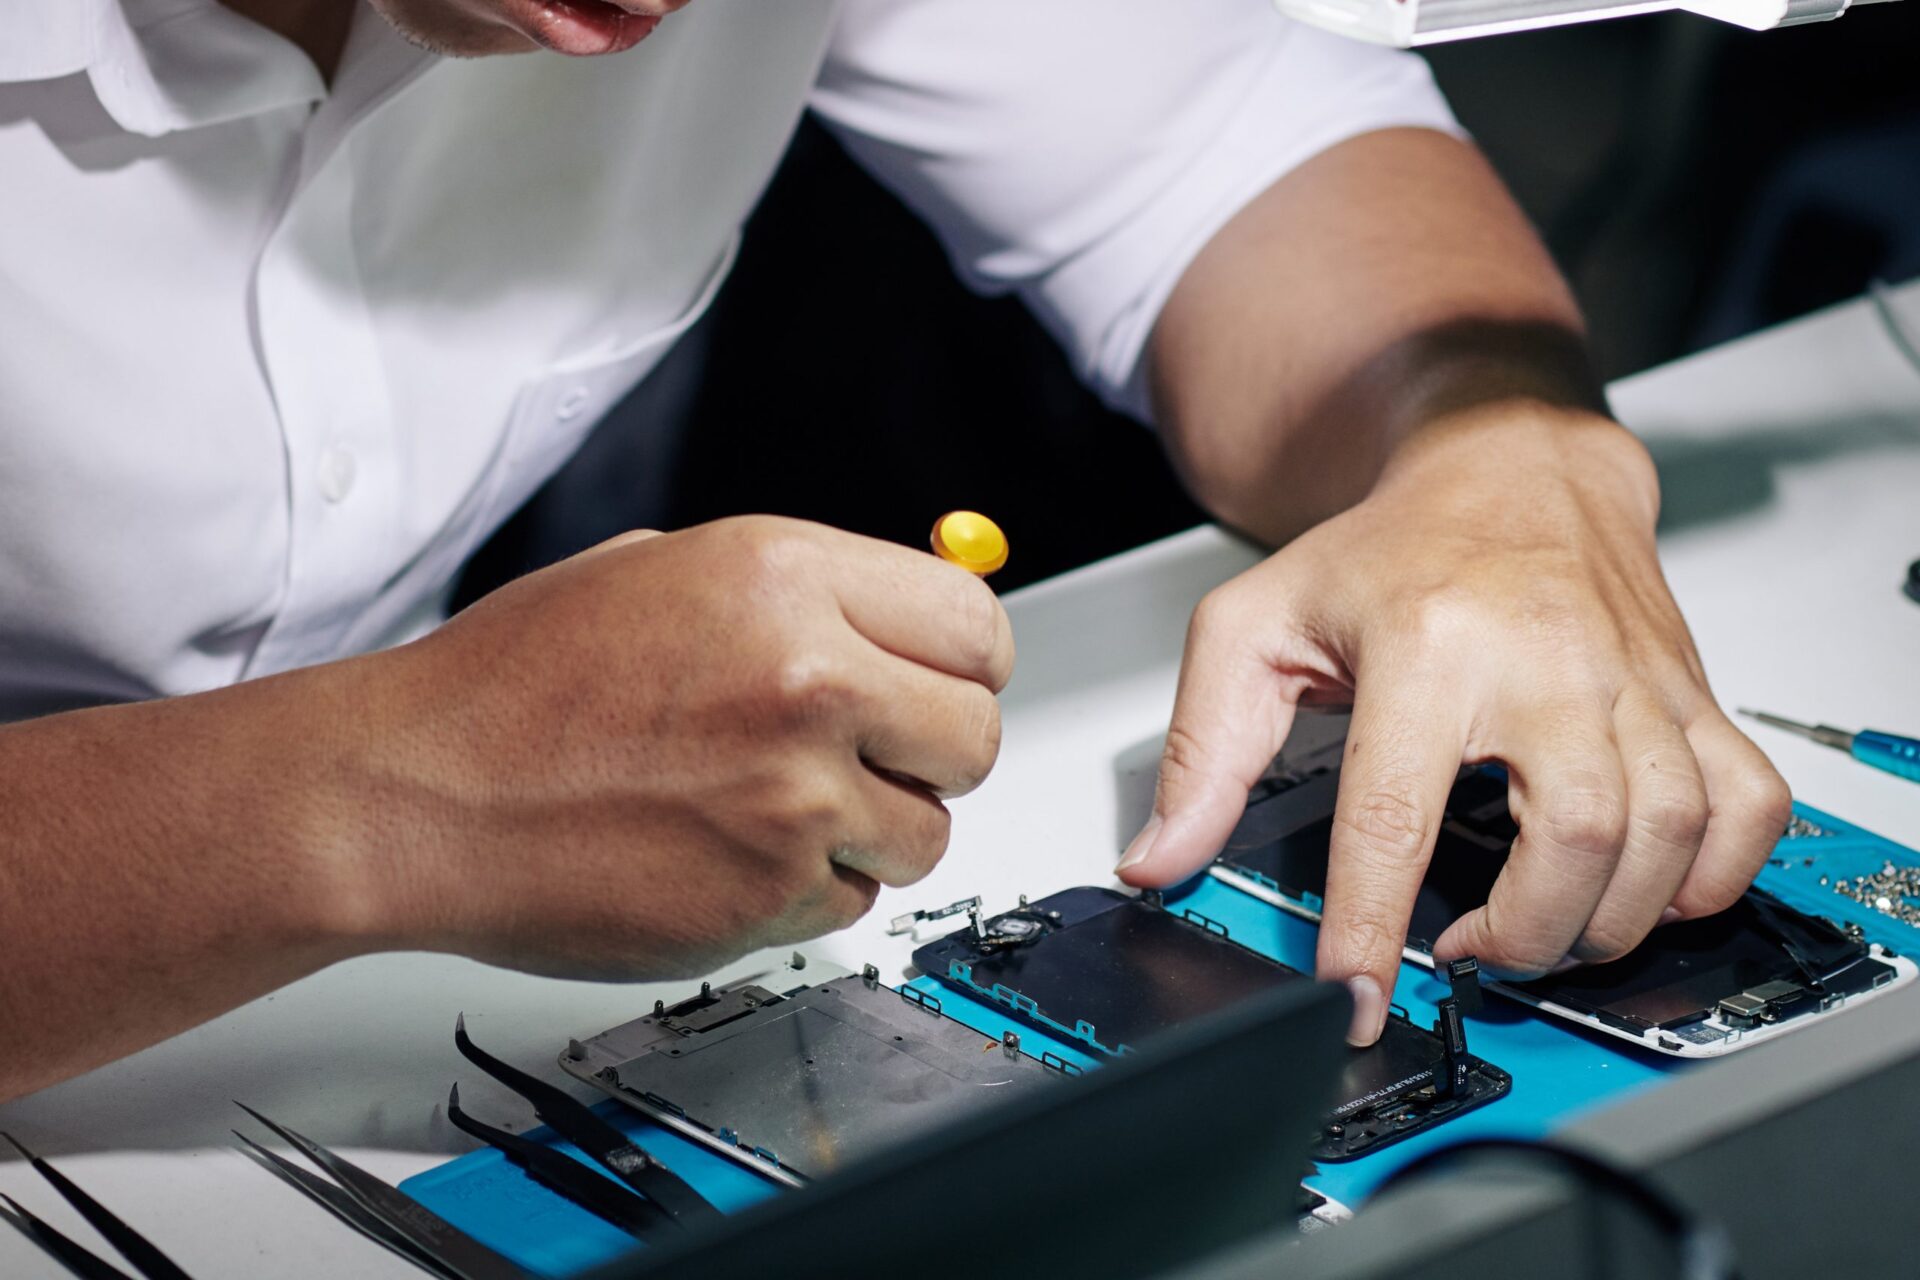
Unlock ATT Phone Without Sim Card By Hardware Unlock
Without a Sim Card, it is possible to unlock an AT&T phone by altering the phone’s hardware. There are several approaches available for this plan, but you will nearly always need to call an expert, or you can use a sim card and a module that can be inserted into your phone if it is an iPhone. When the ICCID Code is set in ICCID mode, the chip included in the hardware bypasses the carrier lock. However, you should be aware that tampering with your phone’s hardware in any manner would invalidate your warranty. It is not a permanent solution, as banned phones cannot be unlocked. The hardware unlock approach is much riskier than the majority of the other methods.
Finding out how to unlock an AT&T iPhone may be a nightmare if you don’t know where to search, all the more so since the open is critical for many individuals to utilize other carriers.
Both of the aforementioned methods are acceptable ways to unlock your iPhone from AT&T, whether without a SIM card or by altering the hardware.
There is an alternate method for AT&T iPhone unlocking. It is a little more inconvenient and may take a little longer, but it is another acceptable method you can use if you so desire. This is accomplished by directly contacting your Carrier. If you are already aware of your carrier being AT&T, you can contact them directly to have your iPhone unlocked
Conclusion
According to my experience, unlocking AT&T through UnlockBase is more straightforward, more efficient, and faster. Additionally, it is more secure since if you go via the carrier without a SIM card, you will need to back up your iPhone, then erase and reinstall it. Not only is this a time-consuming operation, but it may also be dangerous. Additionally, AT&T has several checks and requisites in place that might prevent your iPhone from getting unlocked, and even if you pass the requisites, the procedure is still lengthy and may be refused due to AT&T’s ultimate say. UnlockBase effortlessly opens your iPhone without erasing any data through a straightforward, easy step procedure.
All products, and company names, logos, and service marks (collectively the "Trademarks") displayed are registered® and/or unregistered
trademarks™ of their respective owners.
The authors of this web site are not sponsored by or affiliated with any of the third-party trade mark or third-party registered trade mark owners,
and make no representations about them, their owners, their products or services.
Having a phone with a SIM that isn’t linked to a carrier may be advantageous, which is why some individuals choose not to purchase their phones on contract with a carrier since it allows them to switch carriers or travel internationally.
At the same time, we understand that certain phones are costly and that you would be better off purchasing one on contract, but the good news is that even if your SIM is locked to a carrier, there are methods to unlock it, so continue reading to learn more.
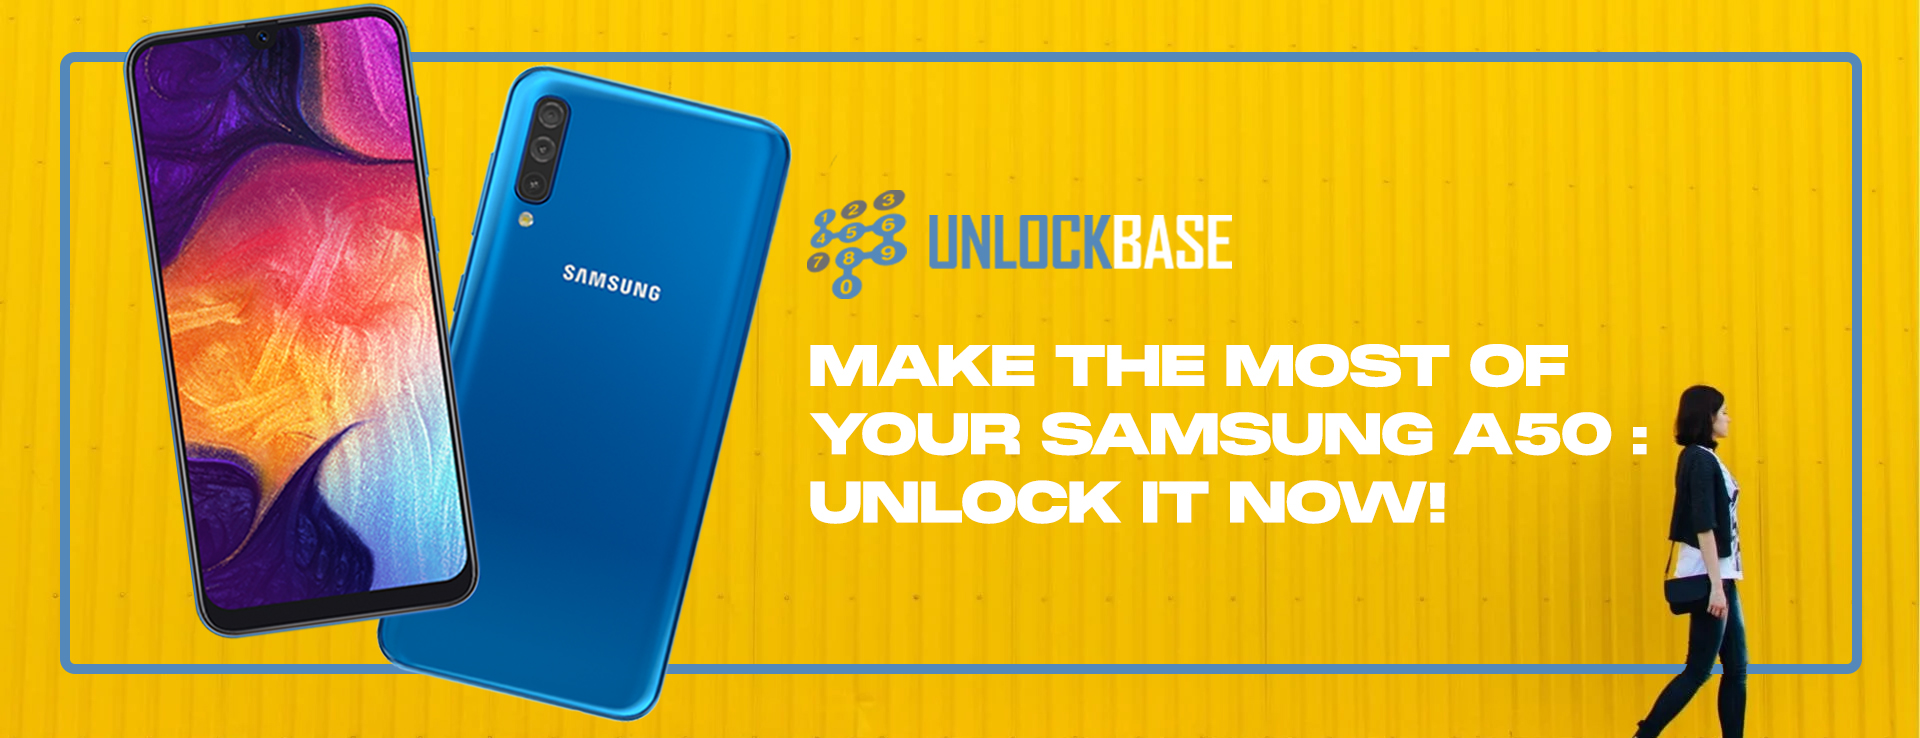
Why Unlock Your Samsung A50?
It can save you money — being able to use local SIMs while traveling allows you to avoid paying exorbitant international rates for calls, messages, and Internet access.
If you sell your phone, it may enhance its worth by up to 300% since prospective purchasers don’t want to deal with the inconvenience of unlocking it themselves.
When transferring between networks, you may utilize a Dual SIM adaptor for further ease.
It is now legal to unlock any phone (manufactured before January 26th 2013 in the US).
It’s a lot simpler and faster than befzore — there’s no need to send your phone away or go to a repair facility. Your phone will be unlocked using a simple code.
How Does Phone Unlocking Work?
Mobile unlocking is done by inputting the unique code supplied by our website into your phone. The procedure is straightforward and straightforward, similar to counting to three. Following the completion of a purchase, the client will get an email with a unique code that will be accepted by both the customer’s phone producer and the service provider. To complete the order, the IMEI number is necessary. Entering *#06# on your phone is the quickest method to obtain your IMEI number.
The sim lock on your phone will be switched off after you input the unique unlock code. A single code disables the sim lock for good. It will not reappear, even if you do software upgrades or switch SIM cards. The remote unlock is totally wireless and requires no further software installation. The simplest approach to eliminate your phone’s limitations is to unlock it using a code.
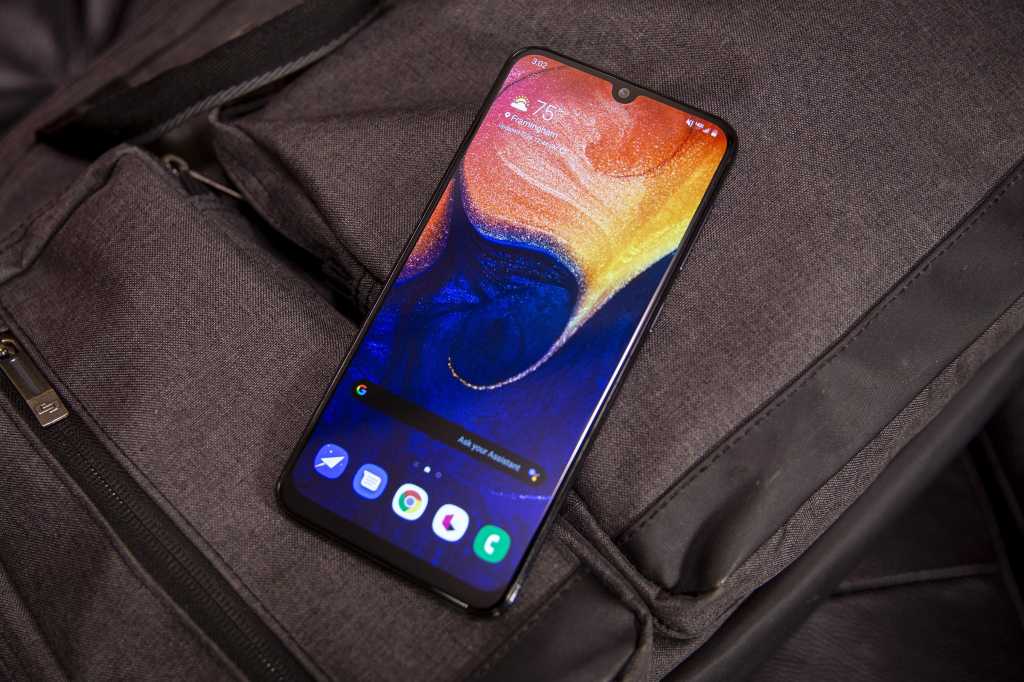
Samsung A50 Unlocked
If you don’t fit the conditions for a free SIM unlock from your carrier, don’t panic; there are paid services like UnlockBase that can supply you with the SIM unlock code for your Galaxy A50 device.
We provide you with the Unlock Code to permanently unlock your Samsung Galaxy A50.
In case your Samsung Galaxy A50 requires multiple Unlock Codes, all Unlock Codes necessary to unlock your Samsung Galaxy A50 are automatically sent to you.
We also provide detailed instructions on How To Unlock your Samsung Galaxy A50. In most cases the procedure is very easy :
Launch the Phone app on your Galaxy A50 and dial *#06# to see your phone’s IMEI number. Make a note of the IMEI number wherever you can readily find it. Go to UnlockBase.com
Enter the device’s IMEI number Fill in your payment and contact information during the checkout procedure. After everything is completed, you should get the unlock code for your Galaxy A50 through email. With a non-accepted SIM card, turn on the Galaxy A50 mobile (Any other SIM card than the network the phone is currently locked to).
You should be prompted to enter the SIM unlock code that you got through email, and you should be good to go after that.
After you’ve performed all of the procedures above, your Samsung Galaxy A50 should be unlocked and you won’t have any trouble switching carriers, such as when going abroad and needing to use a local SIM with your phone.
It’s important to note that this does not liberate you from your carrier’s contract; you’ll still have to pay them, but it does provide you with some flexibility.
Conclusion
You should know that if your account isn’t in good standing or you haven’t paid off the remainder of what you owe for the device, Your carrier won’t grant your request for an unlocking code.
Phones can be done straight from the manufacturer or service providers since they know how these devices work. We hope the information mentioned above gave you an idea of how to fix the Samsung A50 locked issue.
All products, and company names, logos, and service marks (collectively the "Trademarks") displayed are registered® and/or unregistered
trademarks™ of their respective owners.
The authors of this web site are not sponsored by or affiliated with any of the third-party trade mark or third-party registered trade mark owners,
and make no representations about them, their owners, their products or services.
You may have heard that an iPhone may be unlocked or that it can be unlocked from its carrier. This implies you can unlock an iPhone that is locked to a certain carrier and use it with multiple carriers. Unlocking your iPhone AT&T is advantageous since it allows you to have more options. The phone is often referred to as a SIM-free or contract-free phone as a result of this. Because an AT&T iPhone unlock may be freeing, this pretty much sums it up.
Thing to Know Before Unlocking :
First, you must be a current or former AT&T subscriber, however there are exceptions for people who did not fit this requirement but acquired an AT&T phone privately.
Of course, the cellphone we’re unlocking isn’t one of the unlocked phones. You can’t unlock a Verizon smartphone with AT&T.
Third, if you are a subscriber, you must pay off your payment plan, but AT&T may give you some leniency based on your loyalty. If you are not an AT&T subscriber, you must pay else the phone will be blacklisted and cannot be unlocked.
The device should not be blacklisted from AT&T’s network due to loss, theft, or fraud.
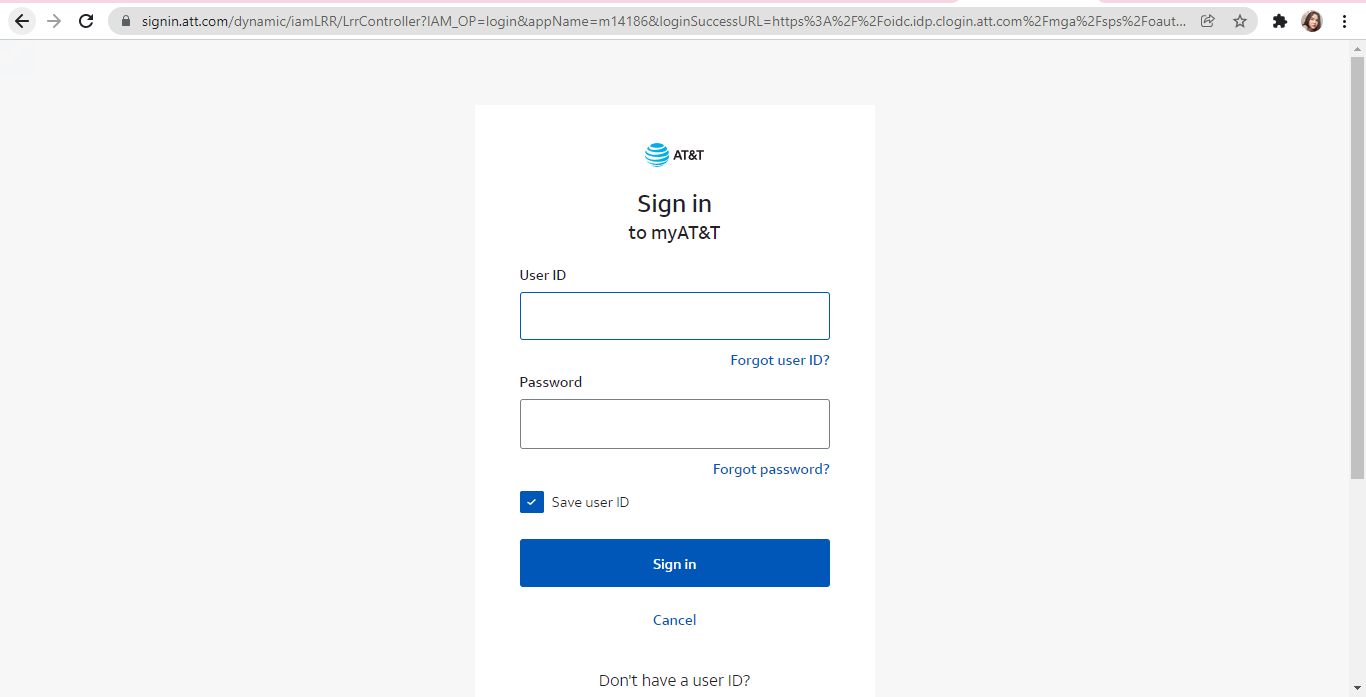
Unlocking AT&T iPhone Without Sim Card Using UnlockBase
UnlockBase Service is an excellent tool to utilize if you want to unlock your iPhone AT&T without a SIM card. The genuinely unique and fantastic aspect of this instrument is its simplicity of use and convenience in comparison to other alternatives now available on the market. It is secure, legal, and most importantly, it can be completed independently using a basic step approach. It’s also a permanent solution, meaning that once you’ve broken the carrier lock, you’ll never have to do it again.
Select your Phone brand
Type your phone’s IMEI Code
Type your email for confirmation
Select the country of the network the phone is locked to
Select your network/carrier
Confirm your payment and wait for Email confirmation
There’s no need to ship your iPhone to us, simply provide your iPhone’s IMEI or Serial Number. Once you get an email confirmation from us, you will then be able to proceed with the next step to finish the unlocking process with your iDevice. If at any stage you feel lost or unsure, our dedicated team of customer support staff is available 24/7 to guide you through the unlocking process.
Unlock Att Phone Without Sim Card By Hardware Unlock
Without a Sim Card, it is possible to unlock an AT&T phone by altering the phone’s hardware. There are several approaches available for this plan, but you will nearly always need to call an expert, or you can use a sim card and a module that can be inserted into your phone if it is an iPhone. When the ICCID Code is set in ICCID mode, the chip included in the hardware bypasses the carrier lock. However, you should be aware that tampering with your phone’s hardware in any manner would invalidate your warranty. It is not a permanent solution, as banned phones cannot be unlocked. The hardware unlock approach is much riskier than the majority of the other methods.
Finding out how to unlock an AT&T iPhone may be a nightmare if you don’t know where to search, all the more so since the unlock is critical for many individuals in order to utilize other carriers.
Both of the aforementioned methods are acceptable ways to unlock your iPhone from AT&T, whether without a SIM card or by altering the hardware
There is an alternate method for AT&T iPhone unlocking. It is a little more inconvenient and may take a little longer, but it is another acceptable method you can use if you so desire. This is accomplished by directly contacting your Carrier. If you are already aware of your carrier being AT&T, you can contact them directly to have your iPhone unlocked
Conclusion
According to my experience, unlocking AT&T through UnlockBase is an easier, more efficient, and faster process. Additionally, it is more secure, since if you go via the carrier without a SIM card, you will need to back up your iPhone, then erase and reinstall it. Not only is this a time-consuming operation, but it may also be dangerous. Additionally, AT&T has several checks and requisites in place that might prevent your iPhone from getting unlocked, and even if you pass the requisites, the procedure is still lengthy and may be refused due to AT&T’s ultimate say. In UnlockBase effortlessly unlocks your iPhone without erasing any data through a straightforward easy step procedure.
All products, and company names, logos, and service marks (collectively the "Trademarks") displayed are registered® and/or unregistered
trademarks™ of their respective owners.
The authors of this web site are not sponsored by or affiliated with any of the third-party trade mark or third-party registered trade mark owners,
and make no representations about them, their owners, their products or services.
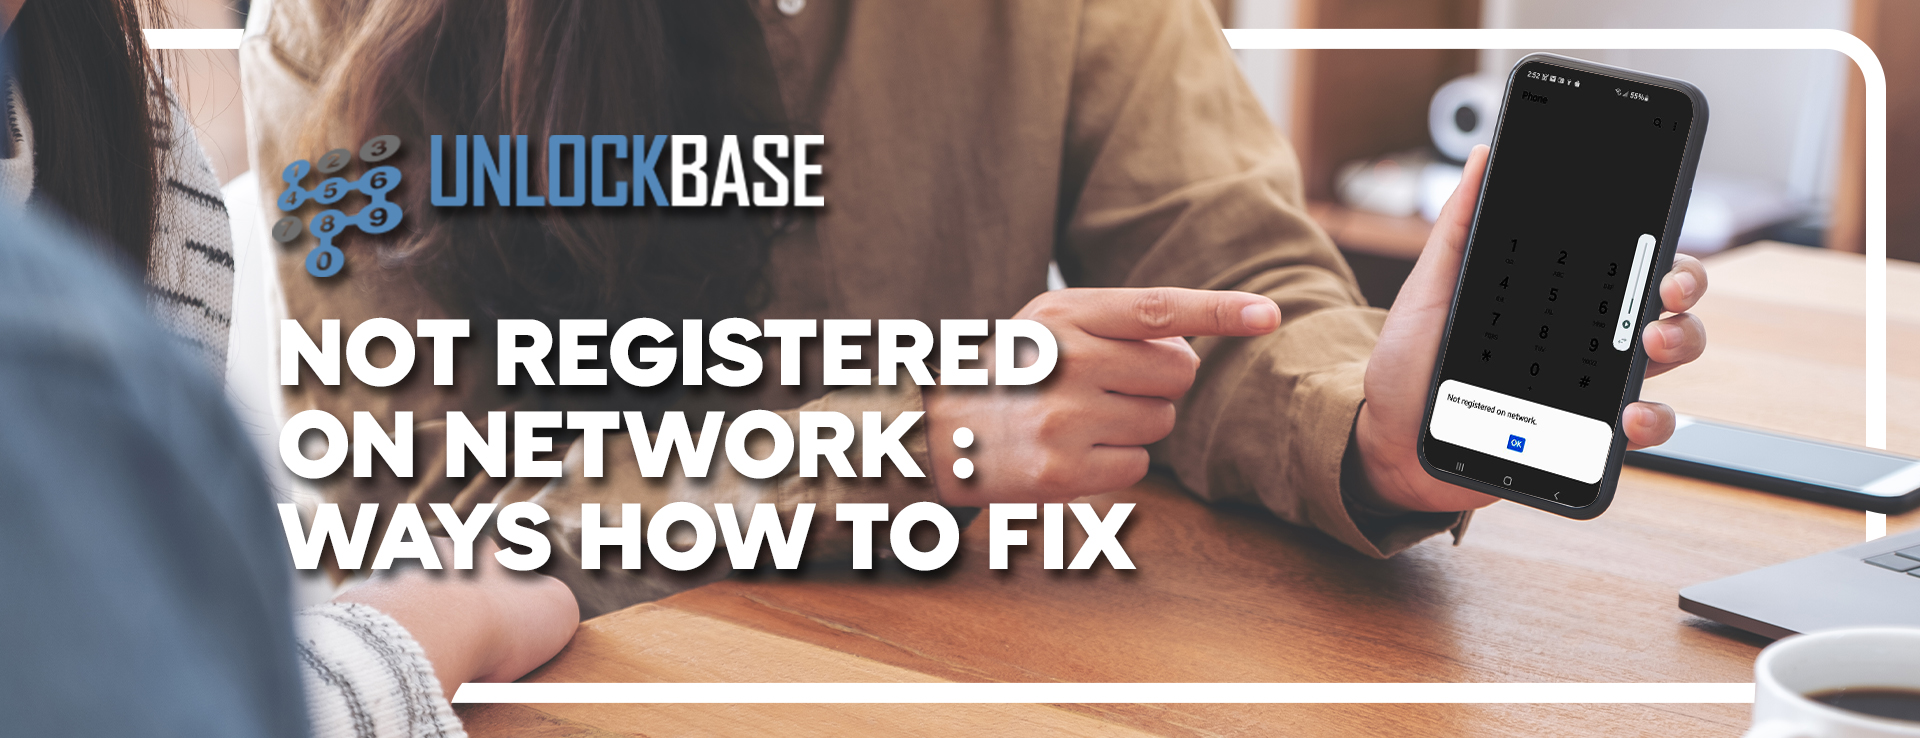
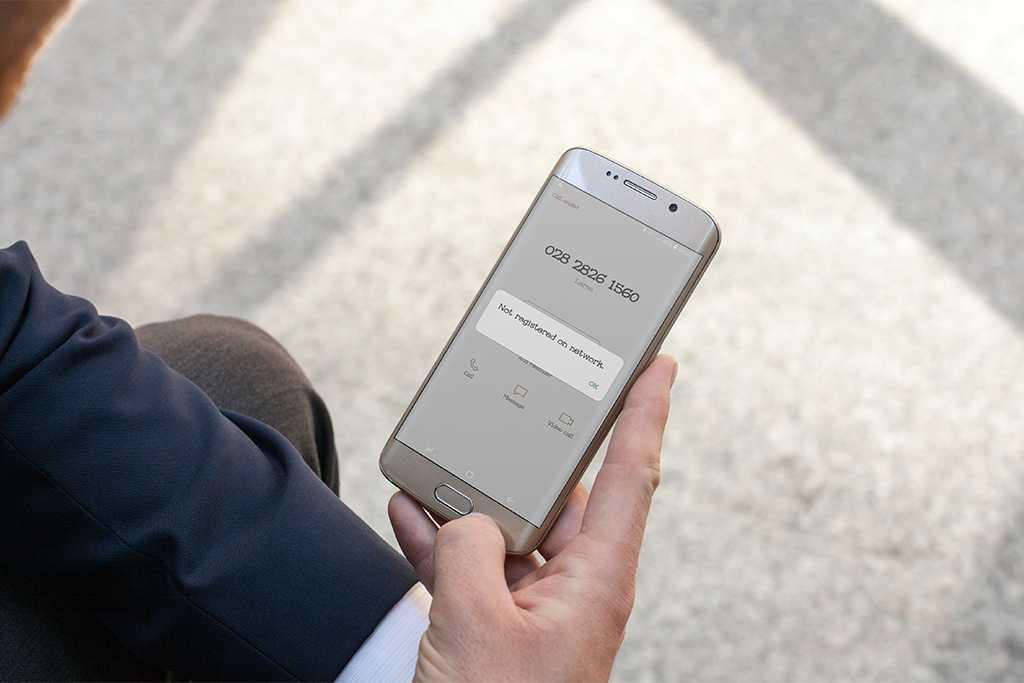
If your smartphone displays the message “not registered on the network,” it implies your SIM card is unable to connect to your carrier’s network. The “Not Registered on the Network” error will appear if your Android fails to recognize the SIM card in its slot. If the device fails to identify the SIM card, the service provider is unable to connect with the IMEI and, as a result, the handset is not connected.
There’s a good chance you won’t be able to make or receive phone calls or text messages. Because this problem may affect any Android phone, the procedures to resolve it are the same regardless of the brand or model.
Why Is It That My Phone Says It’s Not Registered On The Network?
When you encounter this issue, you are unable to make calls to anybody, which is a very annoying condition. And if you’re wondering why your phone claims it’s not registered on the network, here are some of the most prevalent causes:
This type of warning might appear when a new update does not support the device. You’ll have to wait for an official fix if the problem occurs after the update.
Another issue with the error message is the IMEI number.
When you move to a new SIM card, your smartphone may fail to keep up with provider updates, resulting in error popups.
When the firmware on your Android phone or OS is out of date.
If the SIM card has been damaged or is no longer functional.
When your provider is experiencing a service interruption.
Your phone is Carrier Locked
Ways How To Fix Not Registered On The Network
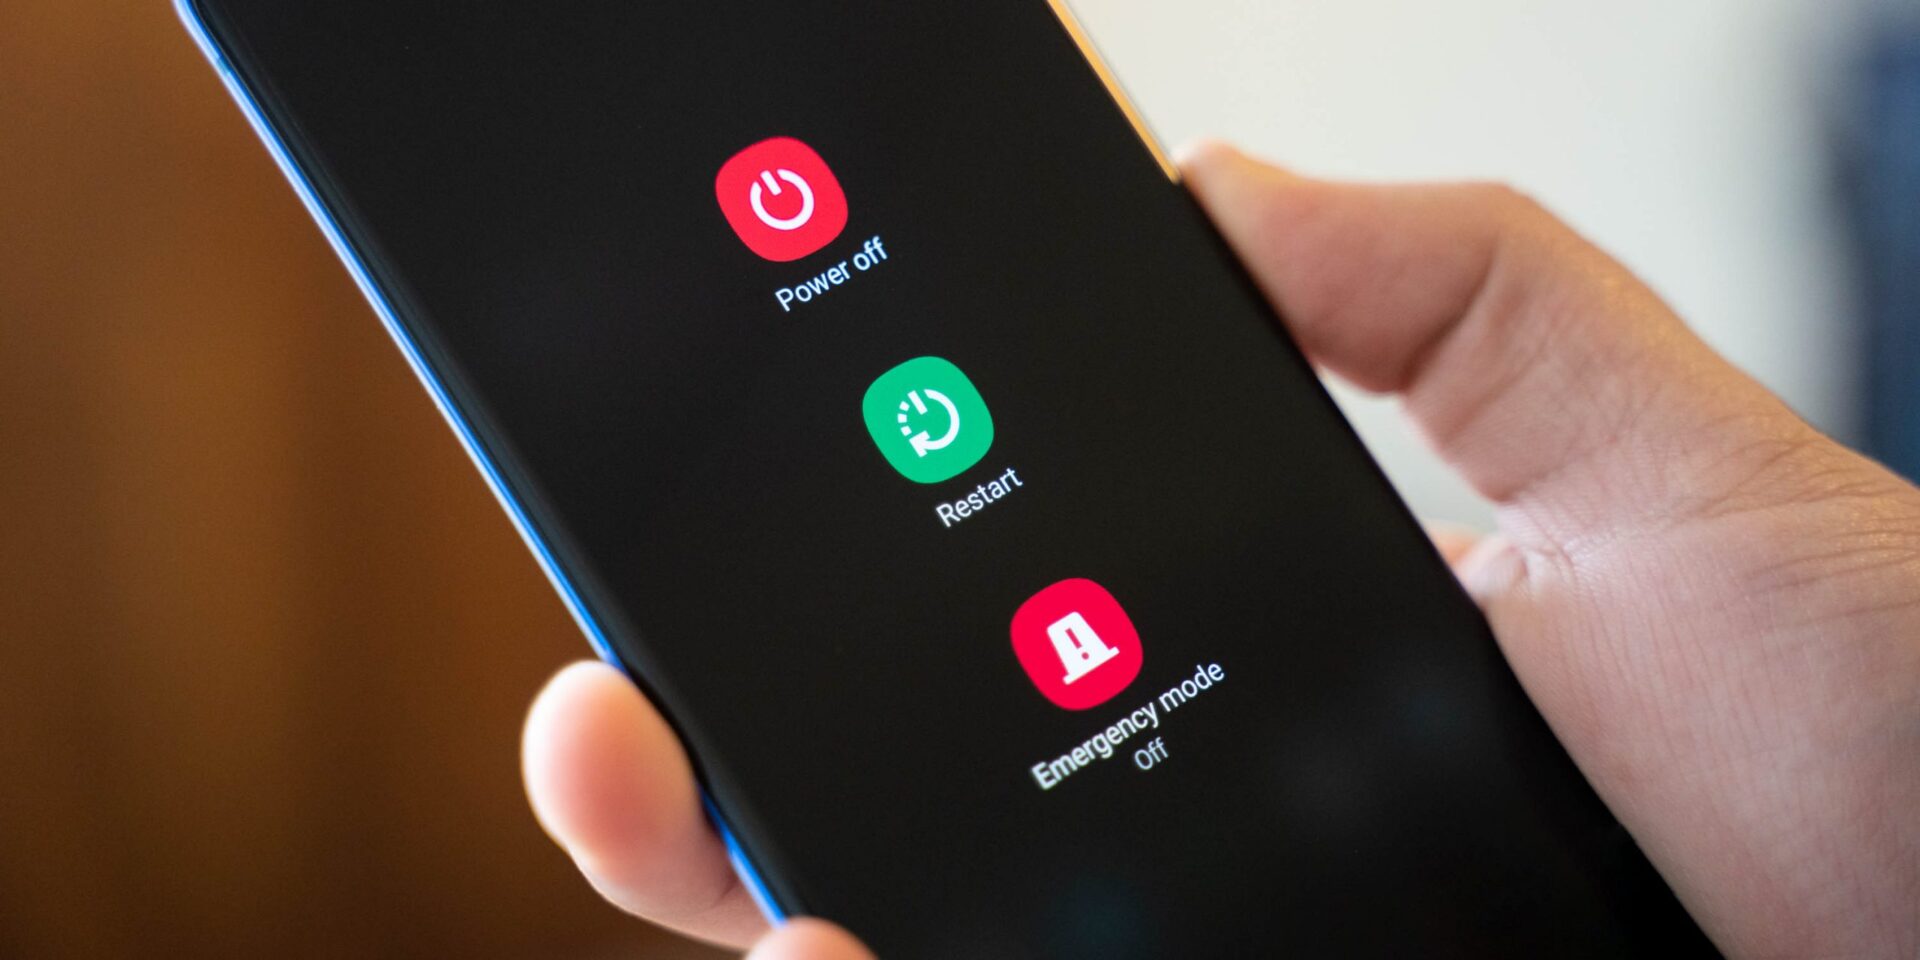
Restart Device
After restarting your phone once, the network problem should be resolved. There might be a number of defects that cause such unanticipated problems, but there’s no reason to be concerned. The problem can be resolved with a simple restart.
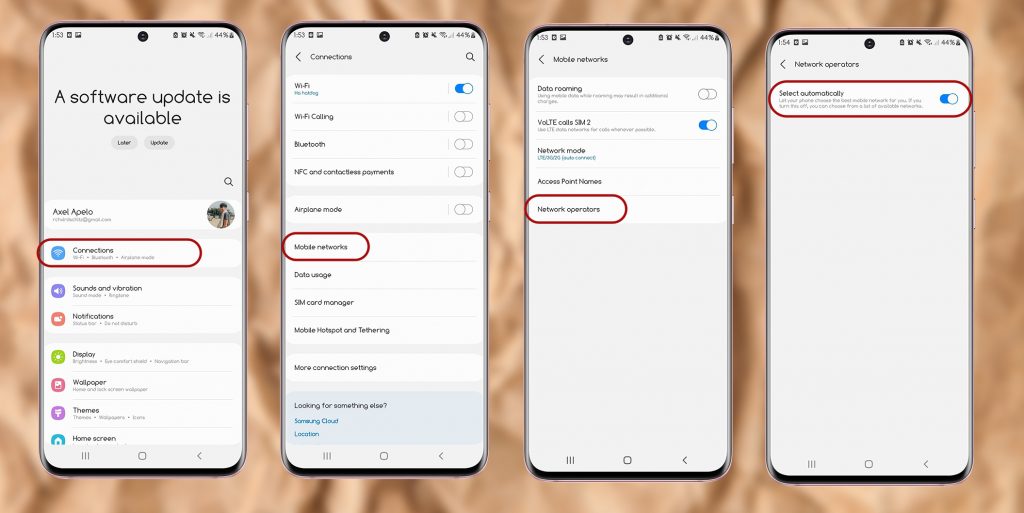
Manually select a network
Make sure you’re using the right carrier in your settings. Select your carrier’s network by going to
Settings > Connections > Mobile Networks > Network Operators > Search now and select your carrier’s network
Disconnect wireless connections.
Turn off Wi-Fi on your phone for 30 seconds before turning it back on. This will re-establish your connection and may help to address any temporary technical issues.
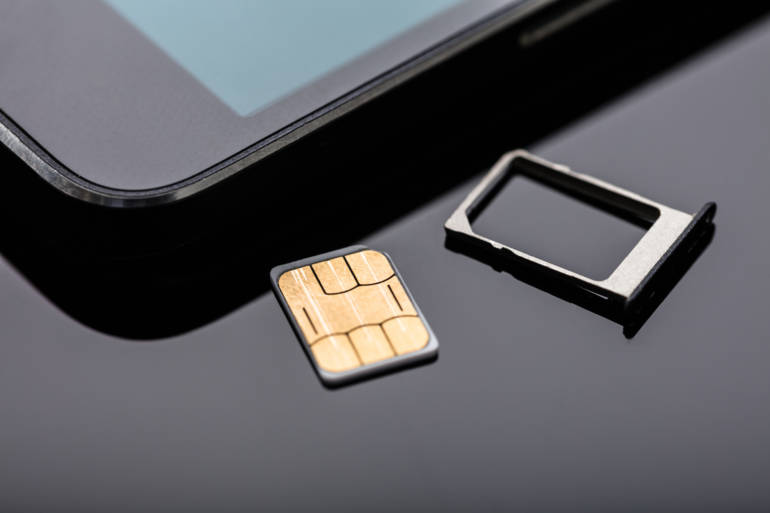
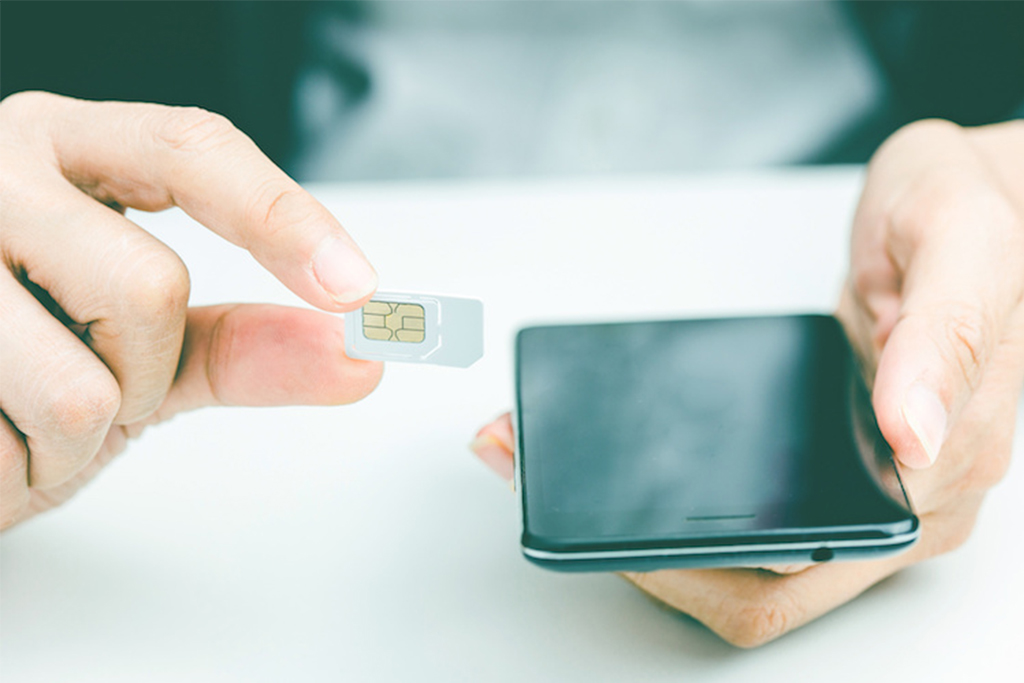
Replace the SIM card / Change your SIM card
Close-up Of Nano Sim Card Ready To Insert In Smart Phone Over The Desk
Remove your SIM card and inspect it for damage before reinstalling it. Check that the card is correctly seated in the tray and that the metal pins are in the correct position or,
Switch out a spare active SIM card to test if your phone can connect to the network. If it can, something is wrong with the SIM card.
Update APN Settings
You may need to alter the Access Point Name (APN) settings if you have switched service providers. This is a more sophisticated remedy, so proceed with caution and make a note of the default APN settings so you can revert if something goes wrong.
Update Your Phone’s Software
Ensure that your operating system and firmware are up to date so that you get the most recent upgrades for your phone.
Go into Service Mode For Samsung Devices
It’s possible that if you’re a Samsung user and you see this error, it’s because your wireless signal is switched off. When there is an issue with Wi-Fi or GPS, this occurs.
As a result, in this case, you must do the following steps:
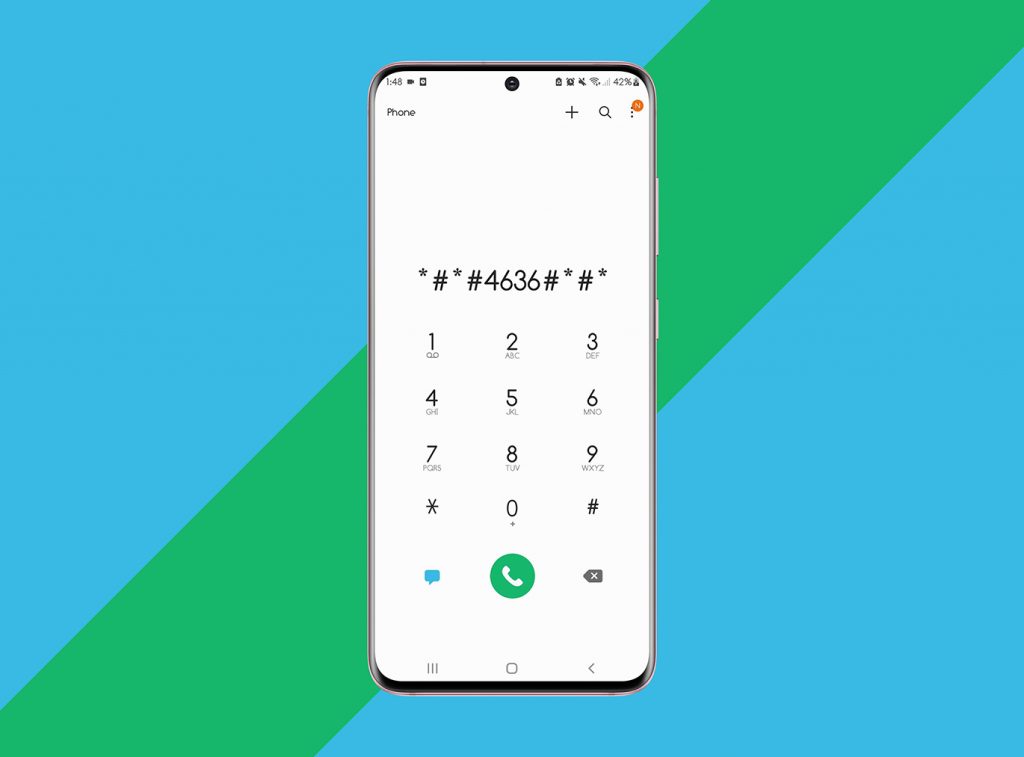
Type (*#*#4636#*#*) onto the dial pad.
A dialogue will appear, prompting you to enter Service Mode; click it.
Then select “Device information” or “Phone information” from the drop-down menu.
Then select “Run Ping Test.”
Now press the “Turn Radio Off” button to restart your smartphone.
Select the Reboot option if required.
Change Network Mode
If you’re in a low reception area that doesn’t support 5G or 4G, it’s best to switch to 3G or 2G.
Reset Network Configuration
A new connection to your carrier’s network can resolve issues that a reboot cannot. All Wi-Fi passwords and Bluetooth connections will be erased if you reset your network settings, so use it only as a last option.
Unlock your device!
If none of these ways to fix your device You may need to unlock your phone with the previous carrier if you recently acquired a phone or are switching to a network from another network.
Unlock your phone now and unlock its true value with UnlockBase A safe, quick, and clever way to dig yourself out of the problem you are currently stuck with.
Unlock your phone here: https://www.unlockbase.com/unlock-phone/
Conclusion
You can’t make any calls if your Android phone isn’t registered on the network since you’re not linked to your carrier. To potentially cure this problem and register a phone on a network, use the techniques listed above. These are the techniques for resolving the Not Registered On the Network issue on Android, and perhaps, after using them, the problem will be fixed. Did we resolve your problem? Let us know in the comments below!
All products, and company names, logos, and service marks (collectively the "Trademarks") displayed are registered® and/or unregistered
trademarks™ of their respective owners.
The authors of this web site are not sponsored by or affiliated with any of the third-party trade mark or third-party registered trade mark owners,
and make no representations about them, their owners, their products or services.
You’re preparing to switch from your current cell phone provider to a new one. There are a few things to consider before making the move, such as unlocking your phone. If you don’t pay the full amount for a new phone upfront, it will be Carrier Locked. This means that until you pay it off, your phone will only be able to connect to that carrier’s network. If you move carriers without first unlocking your phone, you may be unable to send messages or make phone calls.
What does it mean to be carrier-locked?
After purchase, most cell phones are locked to a certain mobile provider. This makes it impossible for customers to utilize the device outside of the nation or with another service provider. You won’t be able to use another SIM from a different carrier until you remove the lock through the carrier or another manner. Carriers may often remove the lock if it has been placed. However, there are some instances where carriers are unable to remove the lock.
What’s the deal with carriers locking phones?
Phone locking, according to cellular carriers, is a fundamental element of their business. They may keep people on their network by locking phones they sell on contract, ensuring that they pay their monthly costs. Remember that phones are subsidized and aren’t genuinely worth their on-contract rates.
High-end cellphones are prohibitively pricey. On the first day of possession, an unlocked iPhone will run you back $599+! When you sign a contract with a carrier, they subsidize the cost of a phone like this to approximately $100-300. (often 2 years). If your phone is tied to your carrier, you are less likely to switch carriers. Some say, however, that the contract binds you to the carrier regardless, and that it is now so simple to unlock your phone that this technique is antiquated.
Should I Unlock My Carrier Locked Phone?
YES! In reality, unlocking your smartphone gives you greater control over it as the owner. So, if you have the opportunity, here are three compelling reasons to do so:
It allows it to be used on a global scale.
Carriers generally subsidize the cost of a smartphone when a user joins up for a new two-year contract and locks the subsidized phone to their service in order to entice users. Carrier Lock Phones are always far more expensive because mobile service in much of the globe is significantly cheaper than in the United States, and partly because carrier partnerships are expensive for the end user. Of course, if your smartphone is locked, you won’t be able to do anything about it.
It allows you to change carriers.
You don’t like your carrier, but you enjoy your phone. This wasn’t a problem before smartphones; simply cancel the service, obtain a new SIM card, and join up for a new service plan with the new carrier. That’s not so easy nowadays, owing to contracts and locking. If your phone is locked, you’ll have to buy a new handset if you wish to transfer service providers for any reason, such as bad mobile coverage in your location. Unlocked phones, on the other hand, can be used on your new carrier’s network if the device is supported. On AT&T and T-Mobile, practically all GSM phones function, and those phones work almost anywhere in the world.
It Increases the Phone’s Value
We all sell or give away our old cell phones at some point, but they have less value if they are locked to a certain cellular operator. If you want to get the most money out of your old cellphone, or if you want to give it to someone who isn’t on the same carrier as you, unlocking it is the easiest method to do it.
Unlock Your Phone Using Unlock Base
We have all felt ripped off by a phone contract at one point or another. Then should you ever go overseas, well, that’s an even better excuse to start ramping up the charges? Costly texts, crazy internet access charges, eye-watering call tariffs. But now there is a safe, quick, and clever way to dig yourself out of the contract you are currently stuck with. In fact, you can be home free in just a few minutes with UnlockBase.com. Why unlock cell phones? Because you deserve the freedom of the best tariffs out there.
Unlocking your phone puts you back in control of your call charges and costs, at home and abroad
Conclusion
The great thing about network unlocking your smartphone, tablet, or portable hub, is that once you’ve done it, that’s it. Your phone cannot be re-locked to a different network. Any compatible SIM card can be inserted, and as long as you have an account and credit with that network, you’ll be able to make calls, send SMS, and perhaps even get online. If you have any other ideas, let us know in the comment below!
All products, and company names, logos, and service marks (collectively the "Trademarks") displayed are registered® and/or unregistered
trademarks™ of their respective owners.
The authors of this web site are not sponsored by or affiliated with any of the third-party trade mark or third-party registered trade mark owners,
and make no representations about them, their owners, their products or services.