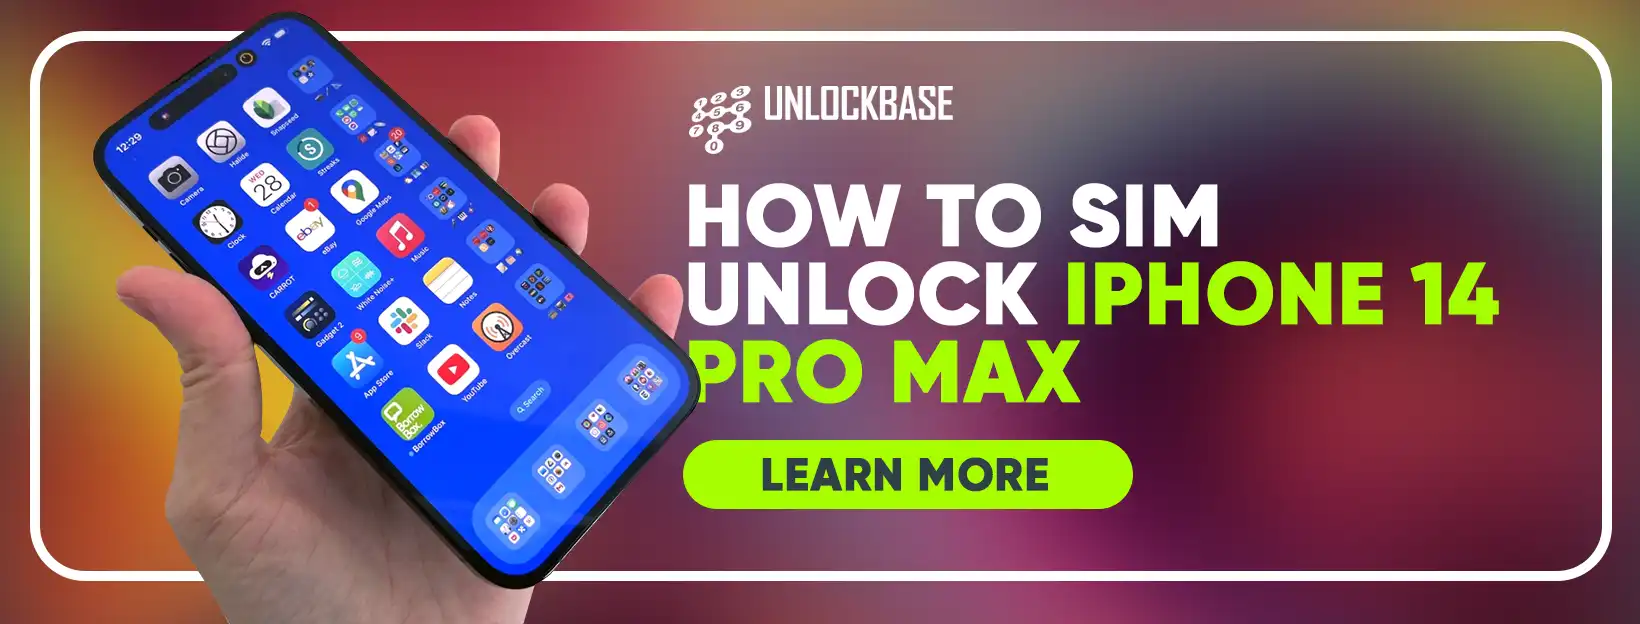
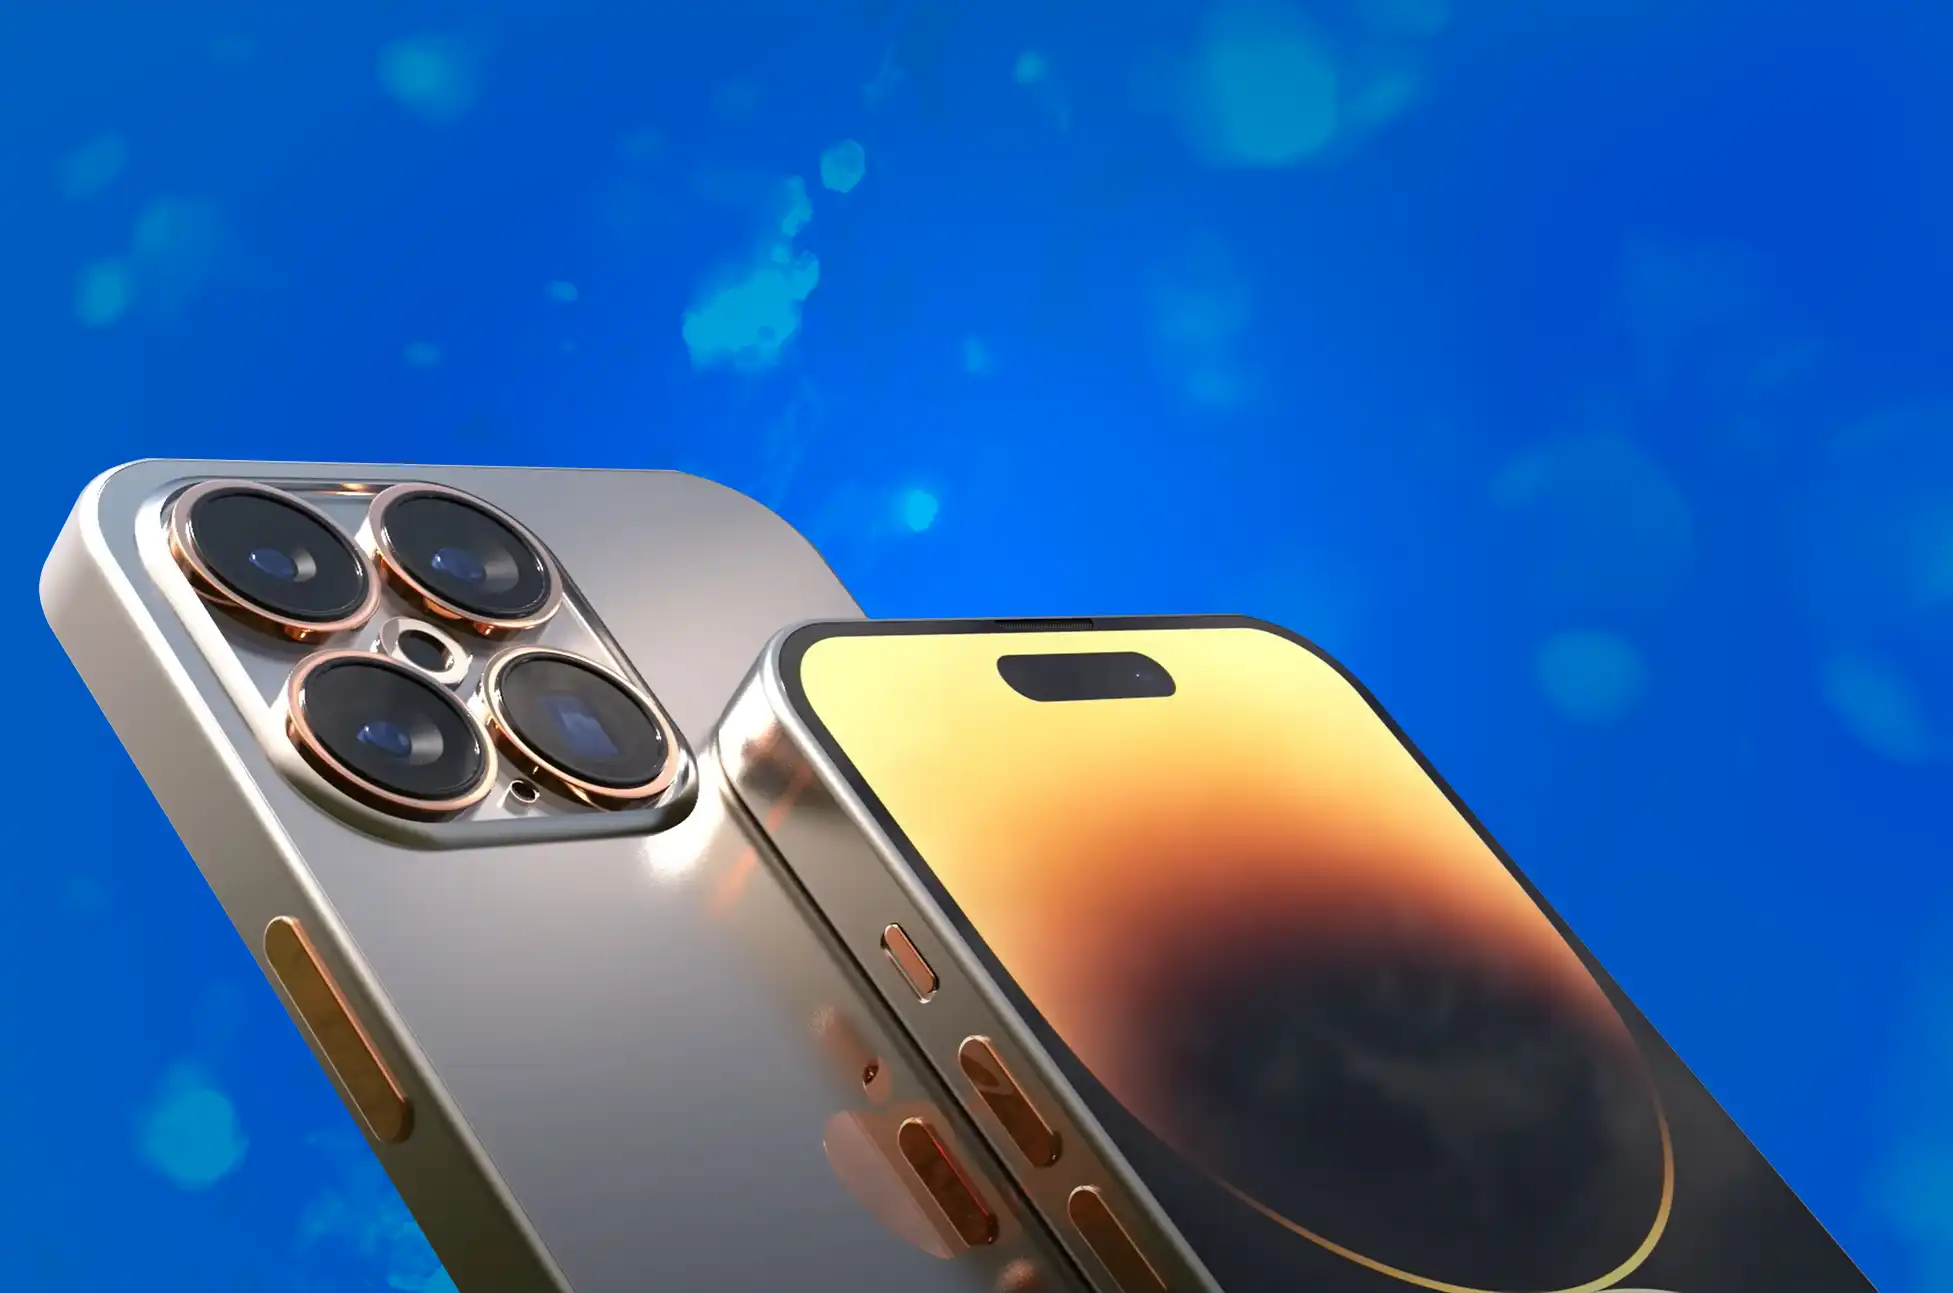
Do you own the powerful iPhone 14 Pro Max, yet your carrier limits your connectivity options? If you’re prepared to break free from carrier restrictions and fully utilize your phone, consider SIM unlocking. We’ll show you how to sim unlock iPhone 14 Pro Max so you can use it with any network you wish and experience truly limitless data transfer speeds.
What is SIM Restriction
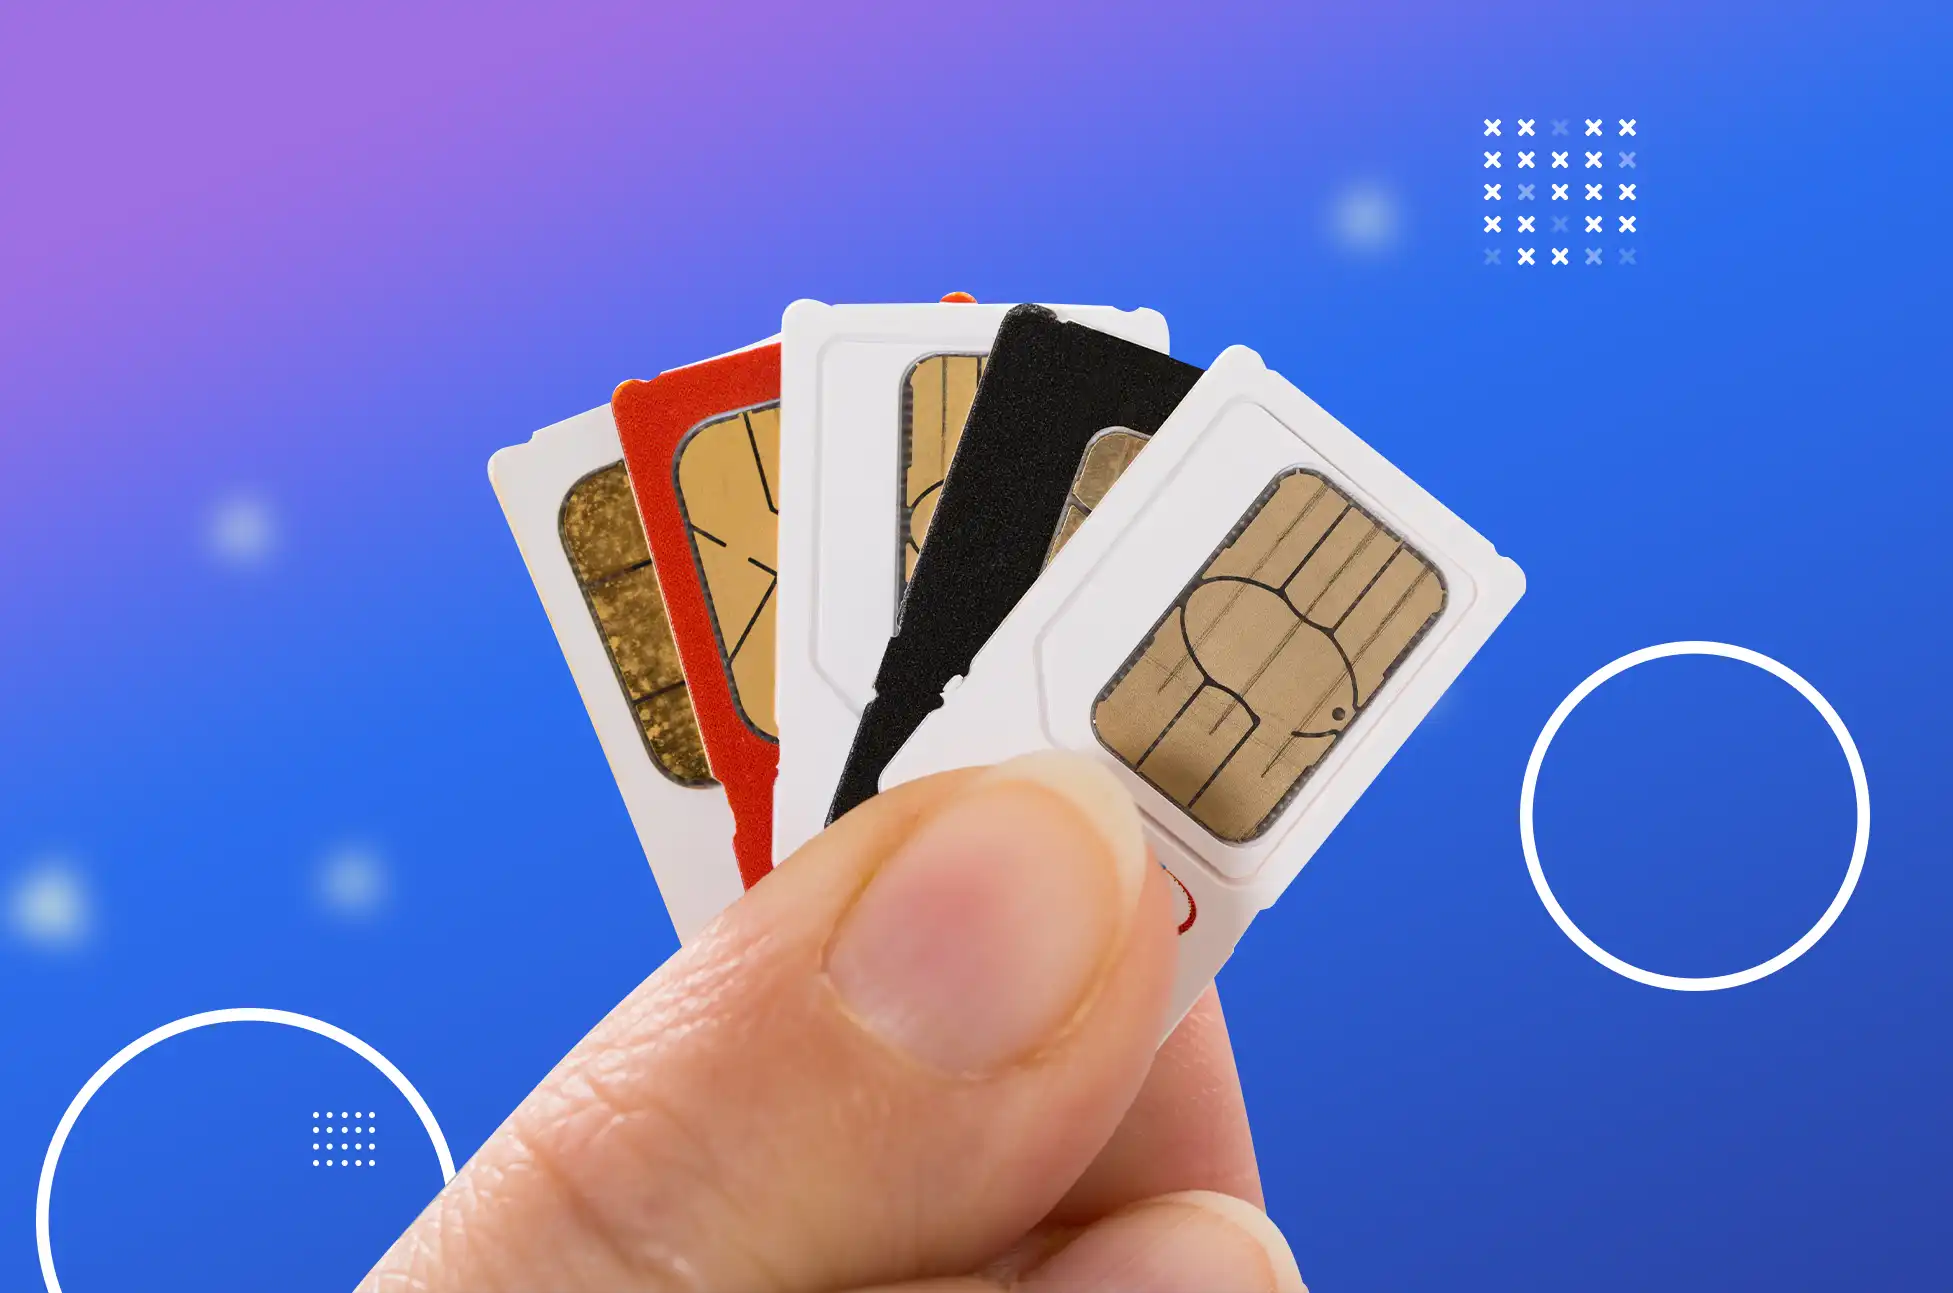
SIM restriction, commonly termed as SIM lock, signifies a mobile device’s incapability to detect a SIM card from a different network provider. A locked phone exclusively functions with the SIM card issued by the carrier to which it is tied.
Therefore, if you introduce a SIM card from a different carrier, your phone will not recognize it.
To use a SIM card from a different network provider, you must unlock the device or purchase a brand-new unlocked device.
How to know if my phone is locked?
provider. If your phone doesn’t activate with a SIM card from another provider, it means your phone is locked.
You can also determine if your service provider has locked your phone by contacting them directly.
Benefits of SIM Unlock iPhone 14 Pro Max:
The following advantages are yours to use once you unlock your iPhone:
The Power to Decide A SIM Unlock gives you the freedom to switch between carriers whenever you like, so you can find the service plan that best fits your needs and your budget.
Adventures Abroad A SIM Unlock allows you to use a SIM card from a different network when abroad, avoiding steep roaming fees.
Sale Price Since more people are interested in purchasing a SIM Unlock iPhone 14 Pro Max, its resale value is higher.
Software Updates SIM Unlock iPhone 14 Pro Max get software updates without the usual testing and rollout delays caused by individual carriers.
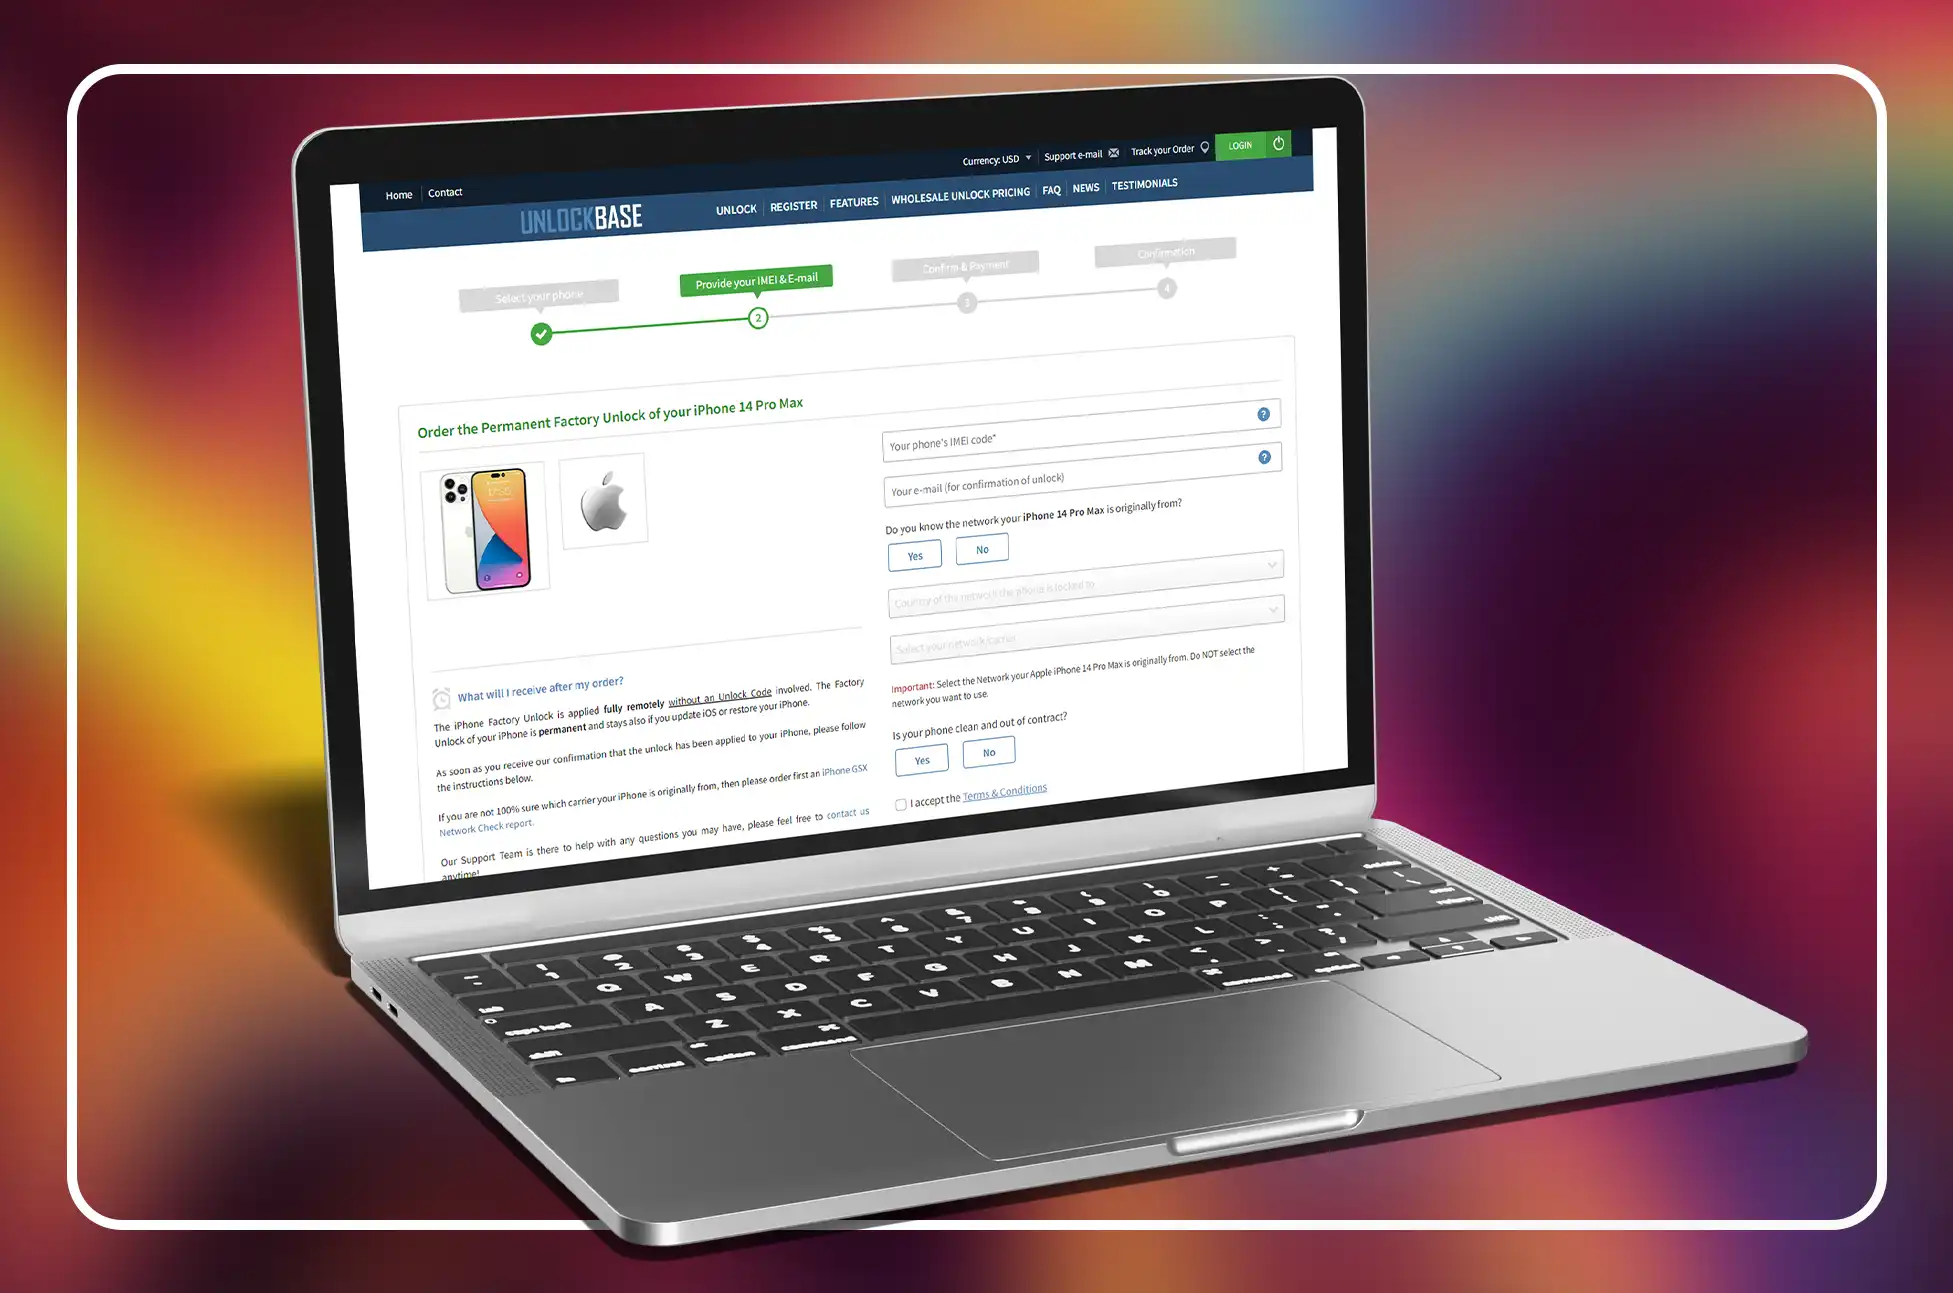
SIM Unlock iPhone 14 Pro Max with UnlockBase: Step-by-Step Guide
Confirm your payment and check your email for confirmation.
Once we process your purchase, we will whitelist your IMEI in Apple’s IMEI database. This ensures a permanent official unlock, preserving warranty and enabling ongoing iOS updates.
Once confirmed, follow these steps for unlocking your iPhone to work with any network.
Open your iPhone with an unsupported SIM card inserted. The SIM Card can be from any other network provider in the world; it need not be the SIM Card you intend to use in the future.
With your new SIM card, your iPhone will activate automatically
Now, you can use your iPhone with any network carrier in the globe!
Conclusion
Unlocking the SIM of your iPhone 14 Pro Max empowers you to fully utilize its potential, free from the constraints of a single carrier. Unlocking a SIM card improves mobile experience through freedom, global usability, higher resale value, and quicker updates. Contact your carrier immediately, follow our guide, and experience the full capability of yourSIM Unlock iPhone 14 Pro Max!
All products, and company names, logos, and service marks (collectively the "Trademarks") displayed are registered® and/or unregistered
trademarks™ of their respective owners.
The authors of this web site are not sponsored by or affiliated with any of the third-party trade mark or third-party registered trade mark owners,
and make no representations about them, their owners, their products or services.
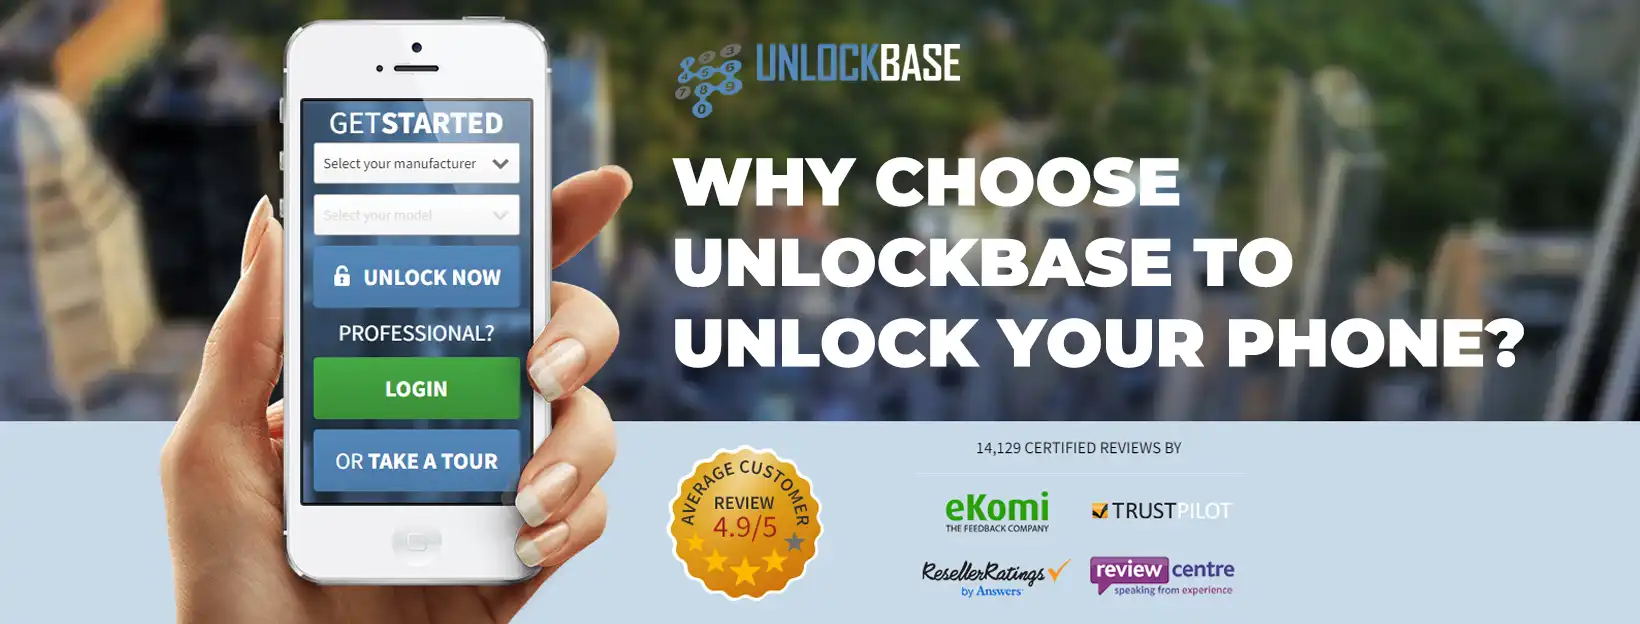
Freedom of your phone is essential in today’s always-connected environment. Do you feel trapped by your current carrier, unable to take advantage of new or different options? Stop right there! The purpose of UnlockBase is to free your phone so that you can use it to its fullest capacity.
What is UnlockBase?
UnlockBase is a Cellphone Remote Unlocking service that will give you with an unlock service in a timely manner and at the best price available. We are able to cultivate enduring connections with our customers by providing service that is prompt, polite, and dependable.
Why choose UnlockBase?
UnlockBase is your reliable friend on the path to unlocking the full potential of your phone, and it does this by allowing you to bypass manufacturer restrictions. Because of our cutting-edge technology and years of industry knowledge, we are able to offer an unrivaled unlocking service that is both hassle-free and completely safe. Whether you possess the latest iPhone, Android, or another brand, rest assured that we have you covered!
UnlockBase isn’t just about unlocking phones; it’s about giving you the ability to take control of the experience you have when using your mobile device. Seize the opportunity to utilize any SIM card, access special features, and unlock the full potential of your device without facing any constraints. The following are some of the benefits of using UnlockBase:
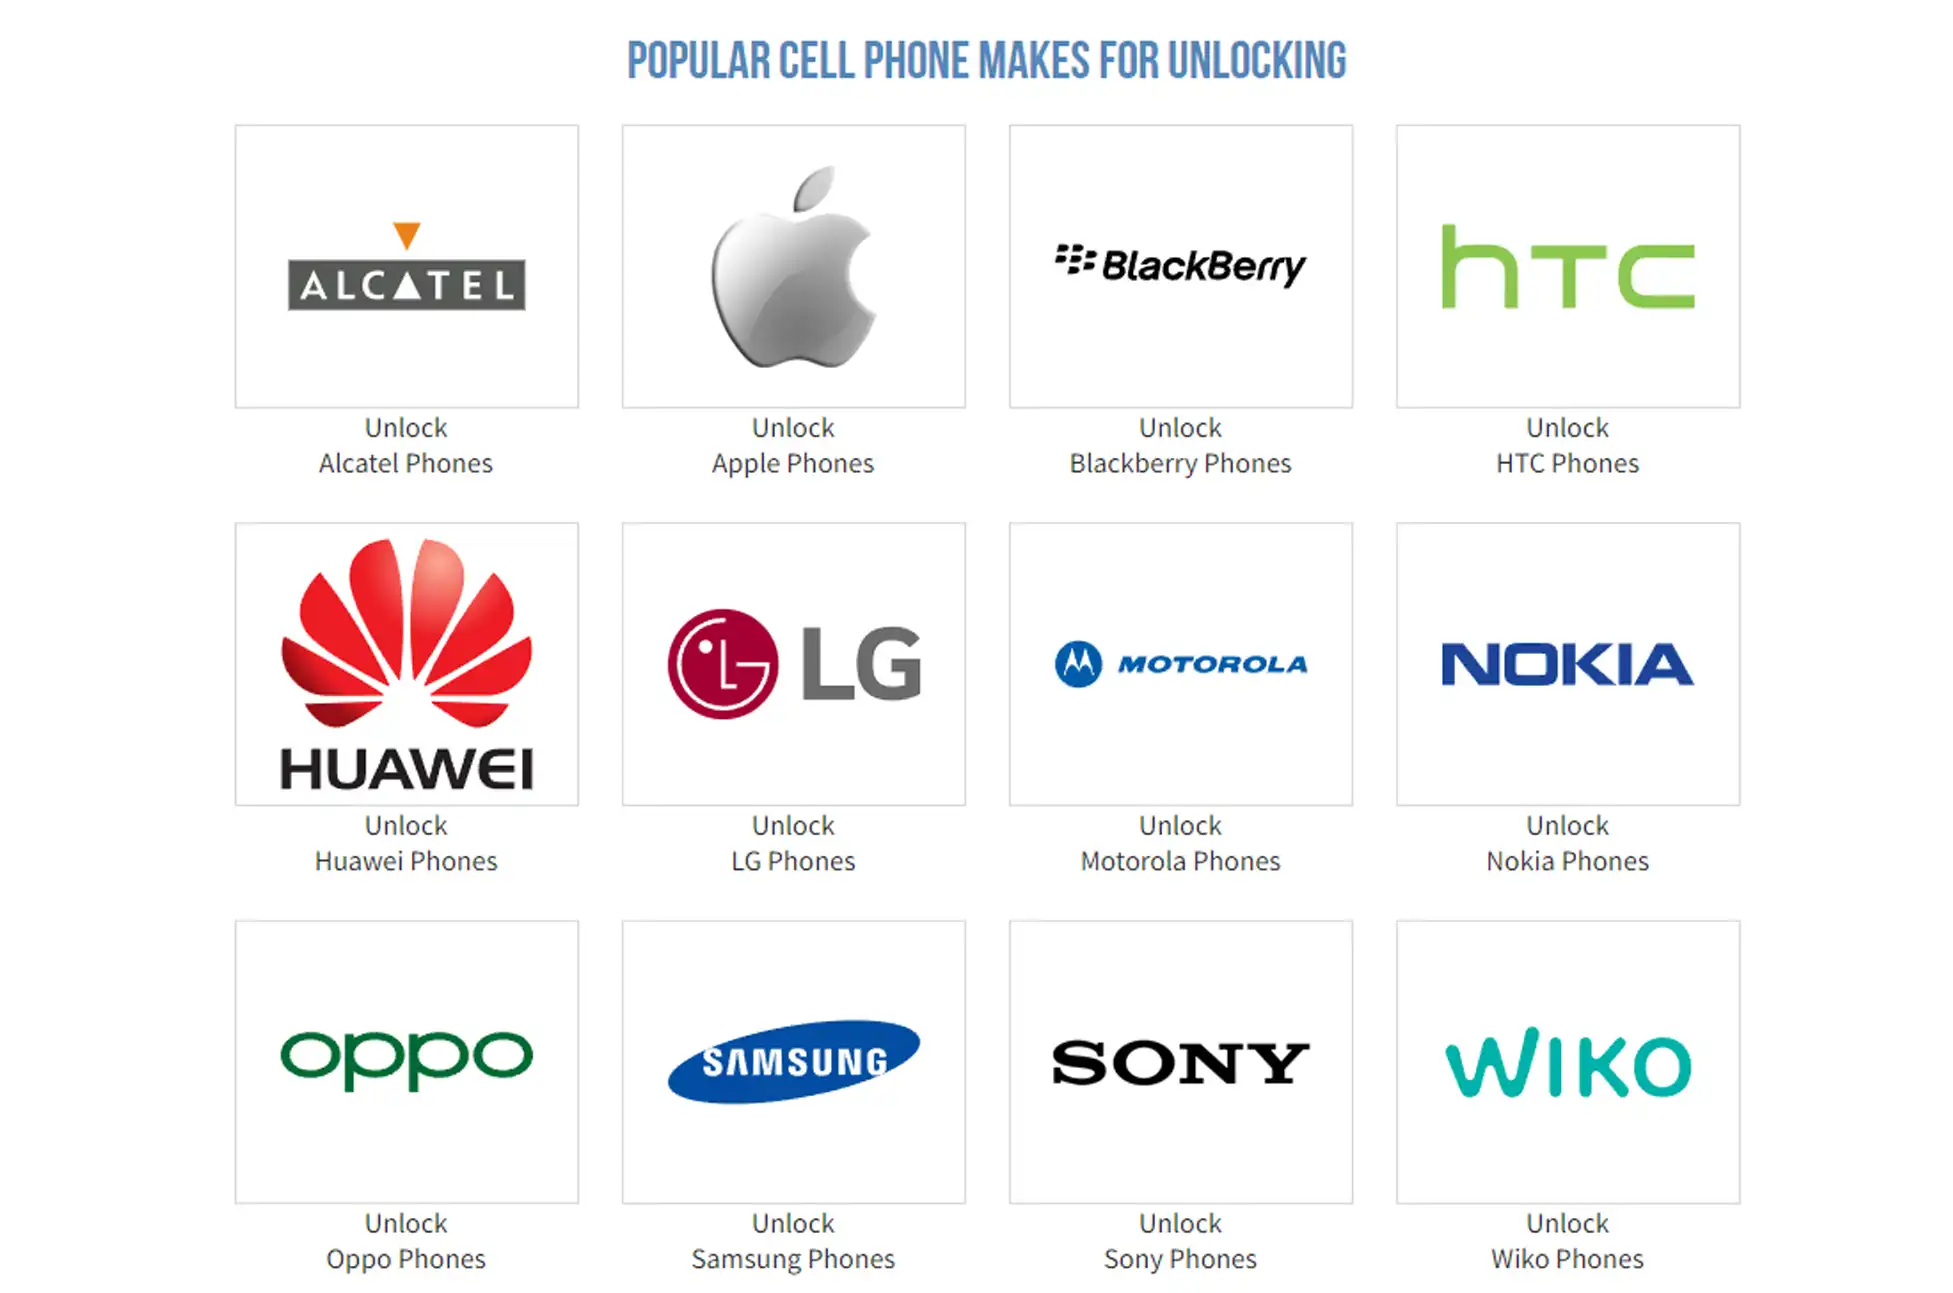
Wide Range of Supported Devices
The unlocking service offered by UnlockBase is compatible not only with Android-based devices like Samsung phones, Sony phones, and Alcatel phones, but also with Apple-based devices like iPhones and iPads.
Safe and Secure Process
UnlockBase has been a leader in the field of phone unlocking for many years thanks to their extensive industry knowledge. Our skilled staff is committed to delivering to you an unlocking service that is both trustworthy and risk-free. Rest easy knowing that the experts who are working on your valuable device respect both the confidentiality of your information and the quality of your phone.
Fast and Efficient Service
On the path to unleashing your phone’s full potential, you can rely on UnlockBase to be your reliable travel partner. We give a faultless and dependable unlocking service that is unrivaled in its superiority thanks to our cutting-edge technology and years of industry experience. We offer a fast unlocking service, and regardless of whether you own the most recent iPhone, Android, or any other brand, you can rest assured that we have you covered.
Using UnlockBase to unlock your phone is a simple and quick process. You will be able to unlock your device without leaving the convenience of your own home thanks to our straightforward procedure. The path to achieving freedom doesn’t involve any complicated procedures or complex terminology; rather, it’s a straightforward process.
You will be able to select the country in which the phone is locked
Choose the network or service provider to which the phone is locked
Check to verify whether your payment was successful, then wait for an email confirmation
Turn on your phone and insert an unauthorized Sim Card
When the device prompts you for a code, enter the one provided by unlockunit
Enter Your Unlock Code
Your phone will be permanently unlocked, and it will continue to get updates even after unlocking.
Conclusion
UnlockBase has already been chosen by thousands of satisfied consumers to unlock their phones. They have experienced the delight of unrestricted mobile usage and unparalleled customer service. The time has come for you to embark on this liberating journey with UnlockBase.
No longer should your phone be restricted! Choose UnlockBase today to liberate your device. Unlock to open up opportunities!
All products, and company names, logos, and service marks (collectively the "Trademarks") displayed are registered® and/or unregistered
trademarks™ of their respective owners.
The authors of this web site are not sponsored by or affiliated with any of the third-party trade mark or third-party registered trade mark owners,
and make no representations about them, their owners, their products or services.
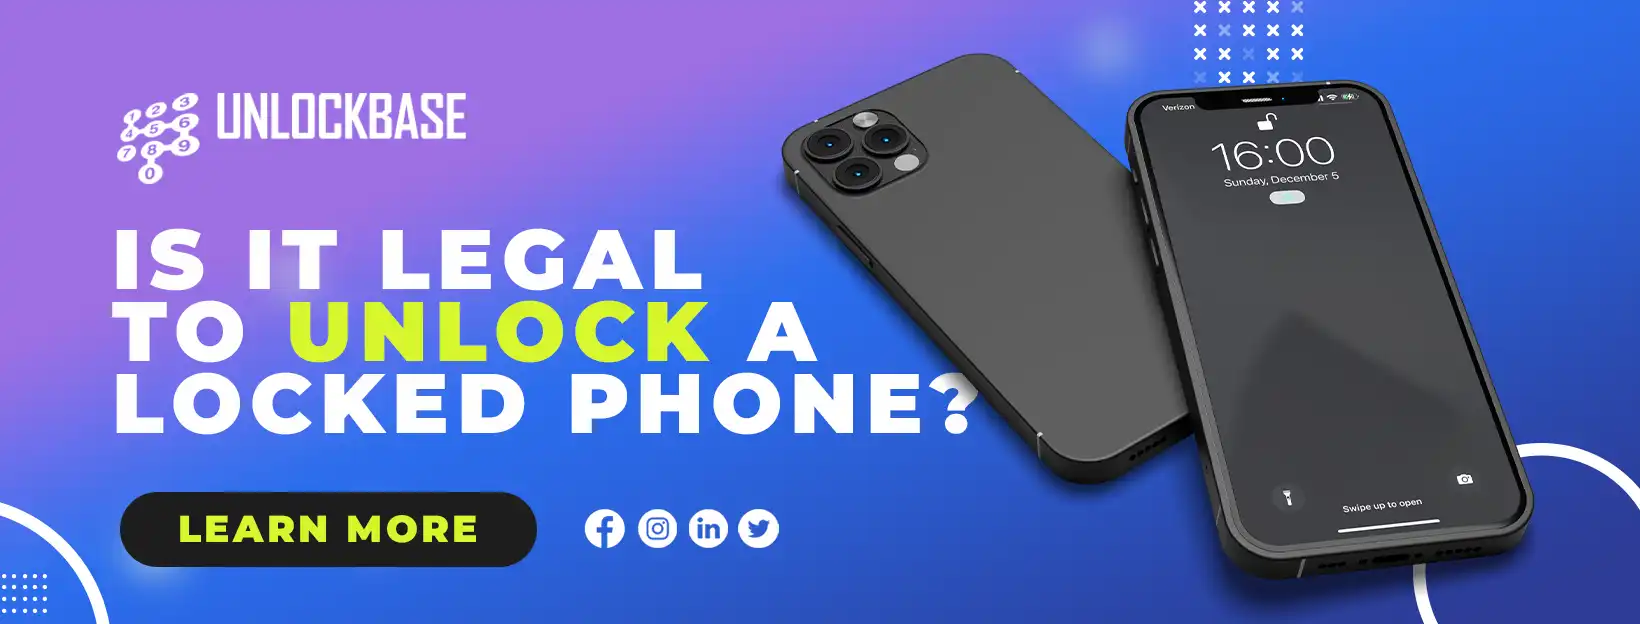
is it legal to unlock a phone? Smartphone users today desire greater control over their gadgets than ever before, creating a dynamic environment. The issue of phone unlocking is one that comes up frequently in this area. The legal nuances around unlocking a phone to change carriers or use it abroad may seem simple, but they can be complicated.
This post will go into detail about the legalities of phone unlocking in the US, educating you on your rights and obligations as a smartphone user.
Understanding Phone Unlocking
In its most basic form, phone unlocking entails releasing a handset from the constraints of its original carrier so that it can function with the SIM cards of other carriers. Users frequently utilize this procedure when they want to switch service providers without getting a new phone or when they want to use a local SIM card while traveling abroad.
The Legal Situation Regarding Phone Unlocking
is it legal to unlock a phone? There have been important turning points along the road to phone unlocking becoming legal in the USA. Due to worries about copyright infringement, the Digital Millennium Copyright Act (DMCA) historically imposed limitations on unlocking. But in 2014, the Unlocking Consumer Choice and Wireless Competition Act was approved as a result of rising customer demand. This Act cleared the door for a more consumer-friendly strategy while restoring the freedom to unlock phones for personal usage.
The Unlocking Consumer Choice and Wireless Competition Act’s main provisions are as follows:
Customers have the right to unlock their devices in order to change carriers, according to the Act. The Library of Congress was also instructed to assess the legitimacy of phone unlocking every three years. This review procedure aids in ensuring that the law is always up to date and accurate in reflecting changing consumer requirements.
Is it Legal to Unlock a Phone? Benefits and Things to Think About
Unlocking your phone can have a number of benefits, like the flexibility to transfer carriers whenever you choose and the usage of local SIM cards while abroad. It’s crucial to balance these advantages with any possible hazards, though. Your phone may lose its warranty if you unlock it, and software upgrades may be affected. Making an educated selection is essential.
How to Unlock Your Phone Legally:
Despite the fact that the legislation provide a foundation for phone unlocking, carrier rules and practices are as important. For phone unlocking, each carrier has its own set of policies and procedures. Others may impose a waiting period before unlocking is a possibility, while some may demand that your device be completely paid off. To avoid any potential issues, it’s crucial that you are informed with the precise policies of your carrier.
The general steps to legally unlocking your phone are as follows:
Examine your eligibility in light of the carrier’s policies.
If you are qualified, speak with your carrier and ask for an unlock.
What if you’re not eligible?
No need to worry – UnlockBase has got you covered!
On your journey to unlocking your phone’s full potential, UnlockBase serves as your reliable companion. We provide a seamless and secure unlocking solution that stands out, thanks to our state-of-the-art technology and extensive experience. Whether you own the latest iPhone, an Android device, or any other brand, we’ve got you covered!
Confirm your payment and wait for an email confirmation.
If you got the email, remove your SIM card.
Insert an unaccepted SIM card.
You should now see a box to enter the unlock code.
Enter the unlock code provided by UnlockBase.
Conclusion:
Consumers can have more flexibility and control over their cellphones by unlocking legalities in the USA. While carrier policy and the UnlockBase service offer unlocking possibilities, the Unlocking Consumer Choice and Wireless Competition Act represents a substantial move in favor of customer empowerment.
You may enjoy the advantages of phone unlocking while being within the law by being aware of the legal landscape and making wise decisions.
All products, and company names, logos, and service marks (collectively the "Trademarks") displayed are registered® and/or unregistered
trademarks™ of their respective owners.
The authors of this web site are not sponsored by or affiliated with any of the third-party trade mark or third-party registered trade mark owners,
and make no representations about them, their owners, their products or services.
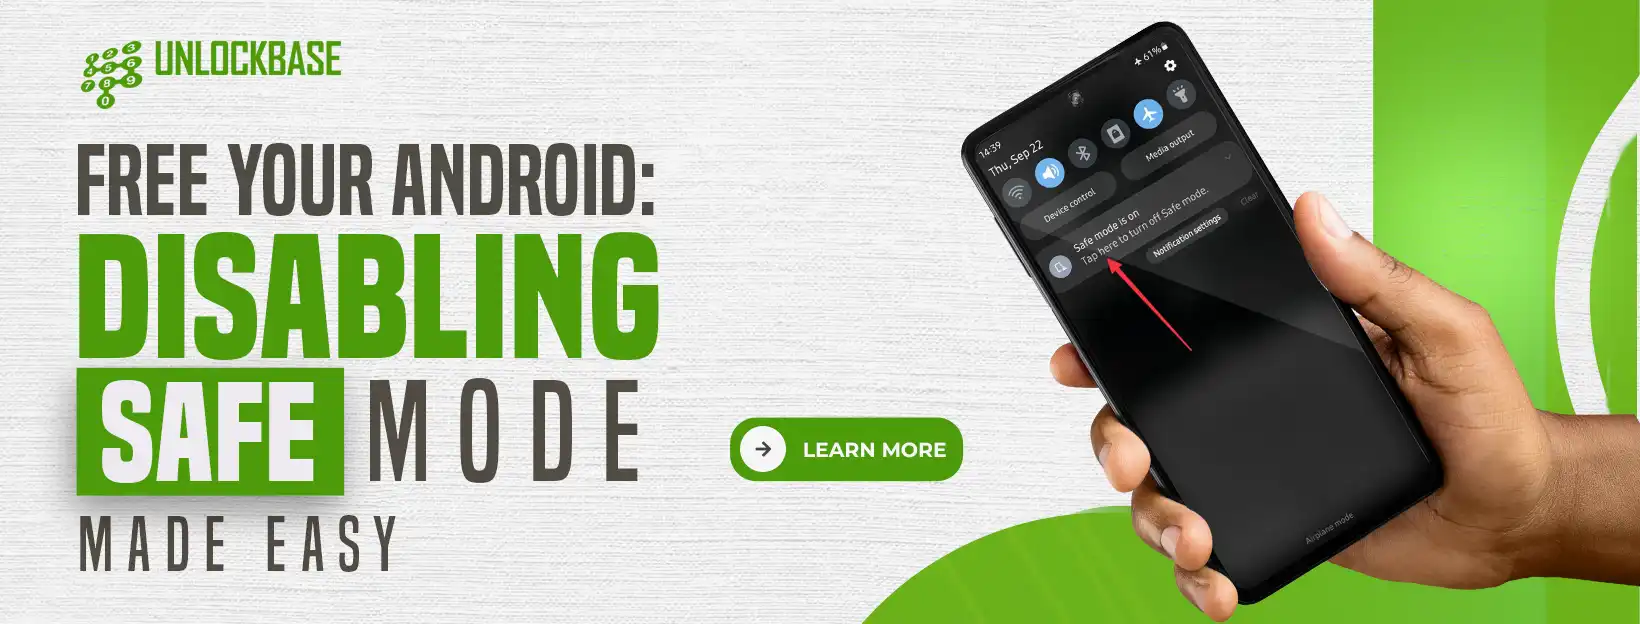
Are you sick of having the sense that your phone is holding you back from achieving your full potential? If you’ve ever found yourself frustrated by “Safe Mode” on your Android device because you feel like it limits your options, there’s no need to be! Today, we’re going to teach you how to take control of your phone and use it to the most of its powers. Put those restrictions behind you and be ready for an Android experience with more room for adventure!
What is “Safe Mode” ?
As its name implies, Android’s Safe Mode is a protective mode that can be used during troubleshooting. It is intended to aid in the isolation and resolution of problems that may originate in external programs. Only the factory-installed programs will function in Safe Mode; downloaded programs will be temporarily disabled.
Why turn off Safe Mode?
Although entering “Safe Mode” is necessary for locating and fixing issues, the mode is not intended to be utilized on a continuous basis. When you’re forced to use Safe Mode on your Android, some of the device’s functionality is disabled, and it can be extremely annoying to be prevented from using your preferred applications and features.
It’s time to say goodbye to Safe Mode once you’ve proven that you’ve effectively resolved the problem at hand and are ready to return to the regular functionality of your Android device.
Ways to Turn Off Safe Mode
There’s no need to panic if your smartphone or tablet is presently in Safe Mode. Your data is secure, even if the applications on your homescreen are grayed out and your app drawer is empty. Once you disable Safe Mode, your device returns to its previous state.
Turn off Safe Mode by restarting your phone or tablet
Using the power menu is the quickest method to disable Safe Mode on an Android device. Restarting your device and exiting Safe Mode typically takes only a few seconds.
To resume your device and exit Safe Mode, perform the steps below:
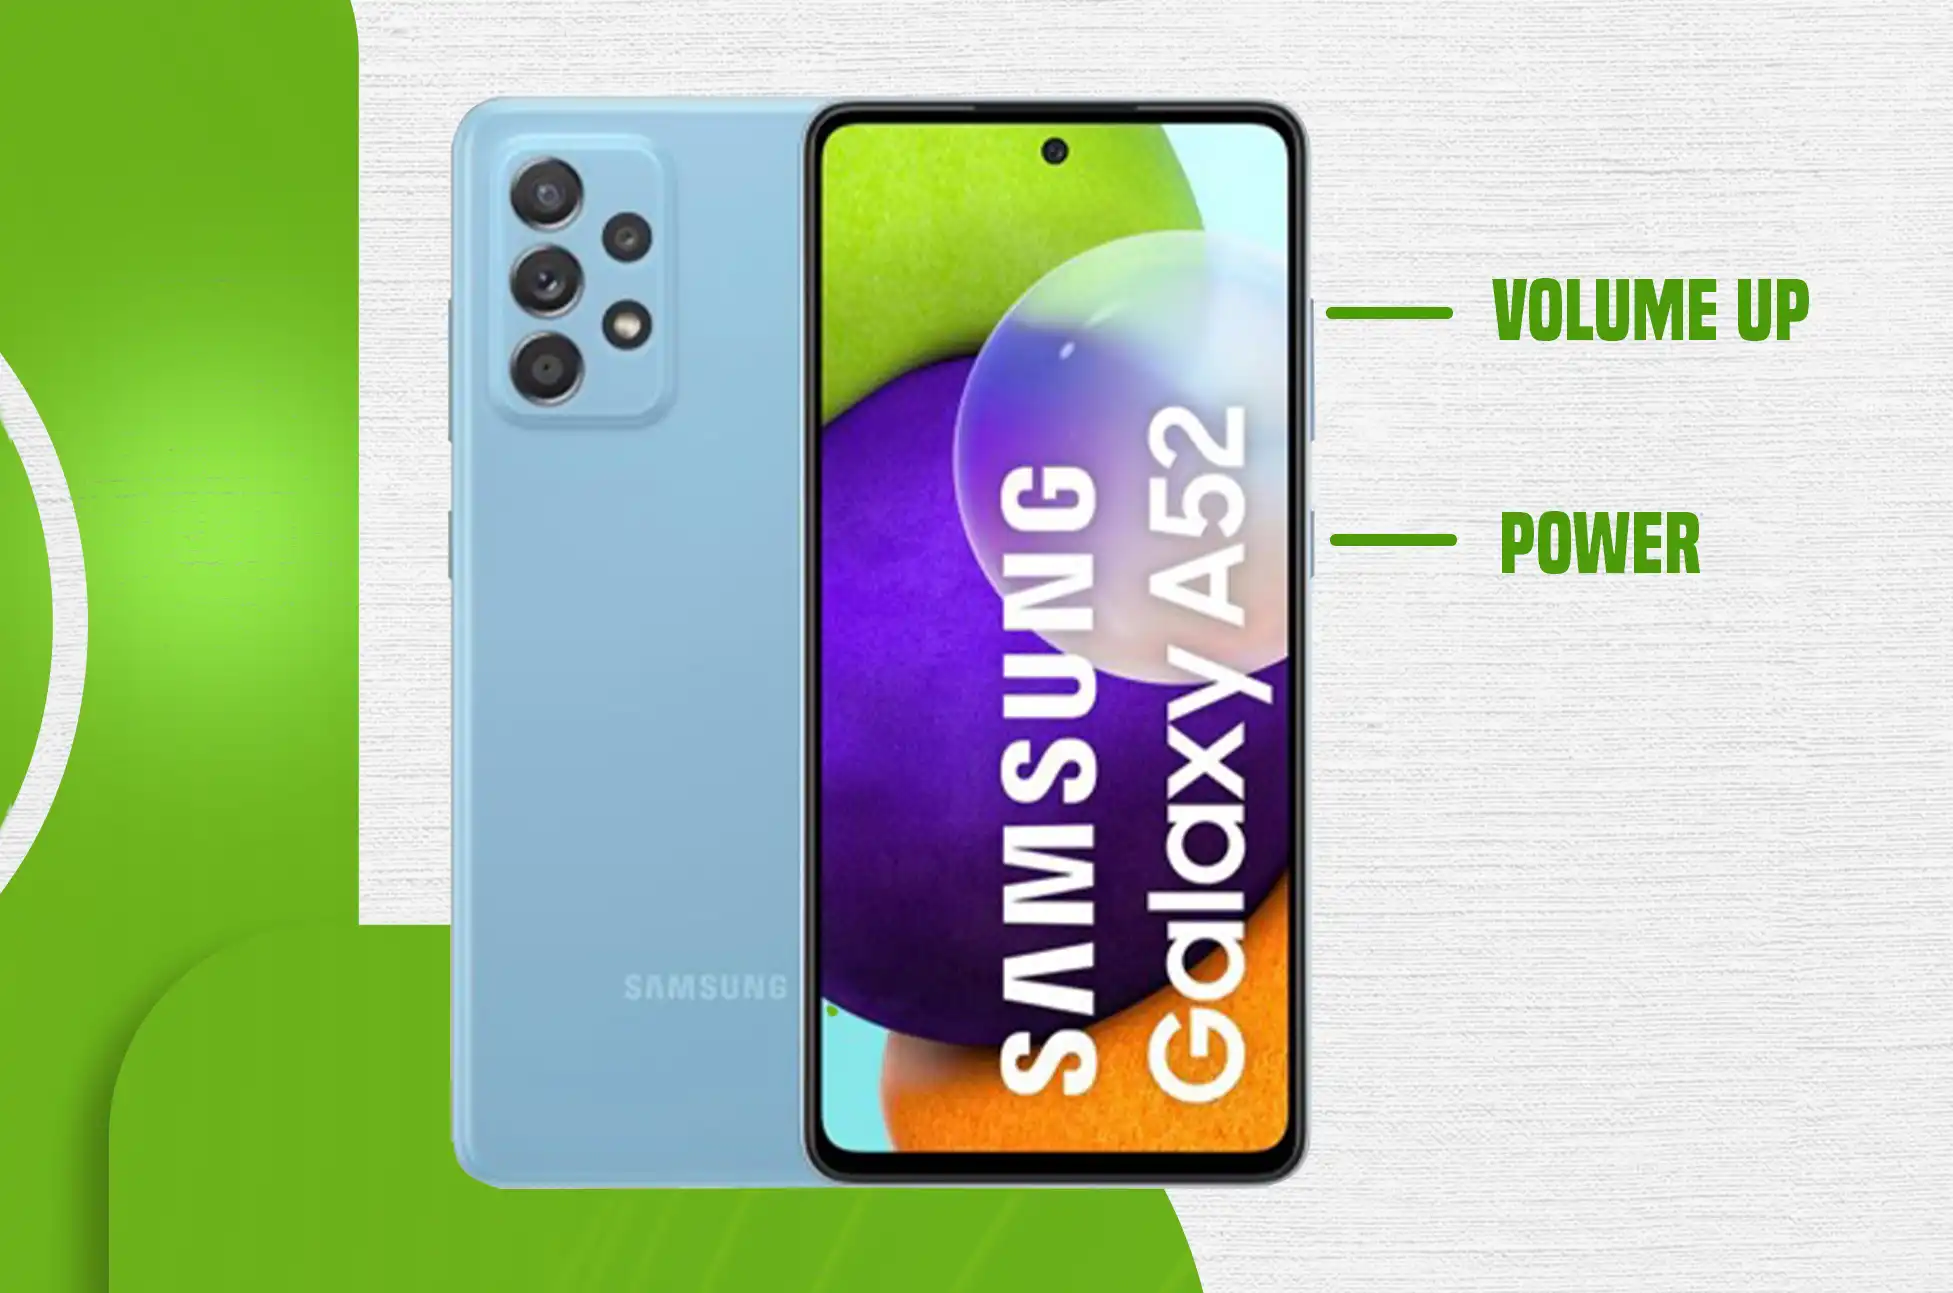
For Samsung and Google devices prior to Pixel 5a, press and hold the Power button until the power menu appears.
If you have a OnePlus smartphone or a Google Pixel 6 or later device, tap and hold the Power and Volume up buttons for several seconds.
To restart your phone, tap the Restart icon.
If there is no Restart button, press and hold the Power button (or Power and Volume up) for approximately 30 seconds. Your phone either restarts or powers down automatically. To turn it back on, press and hold the Power button.
Use the Android Notification Panel to turn off Safe Mode
Since Android is designed to be customizable by default, different Android device manufacturers offer unique experiences and features. The finest Samsung smartphones, for instance, allow you to disable Safe Mode via the notification panel.
If you own a Samsung device and wish to disable Safe Mode, refer to the information below:
Pull the notification panel down.
If your Android device supports this feature, a persistent notification will indicate that Safe Mode is active.
Select the Turn off option by tapping the notification.
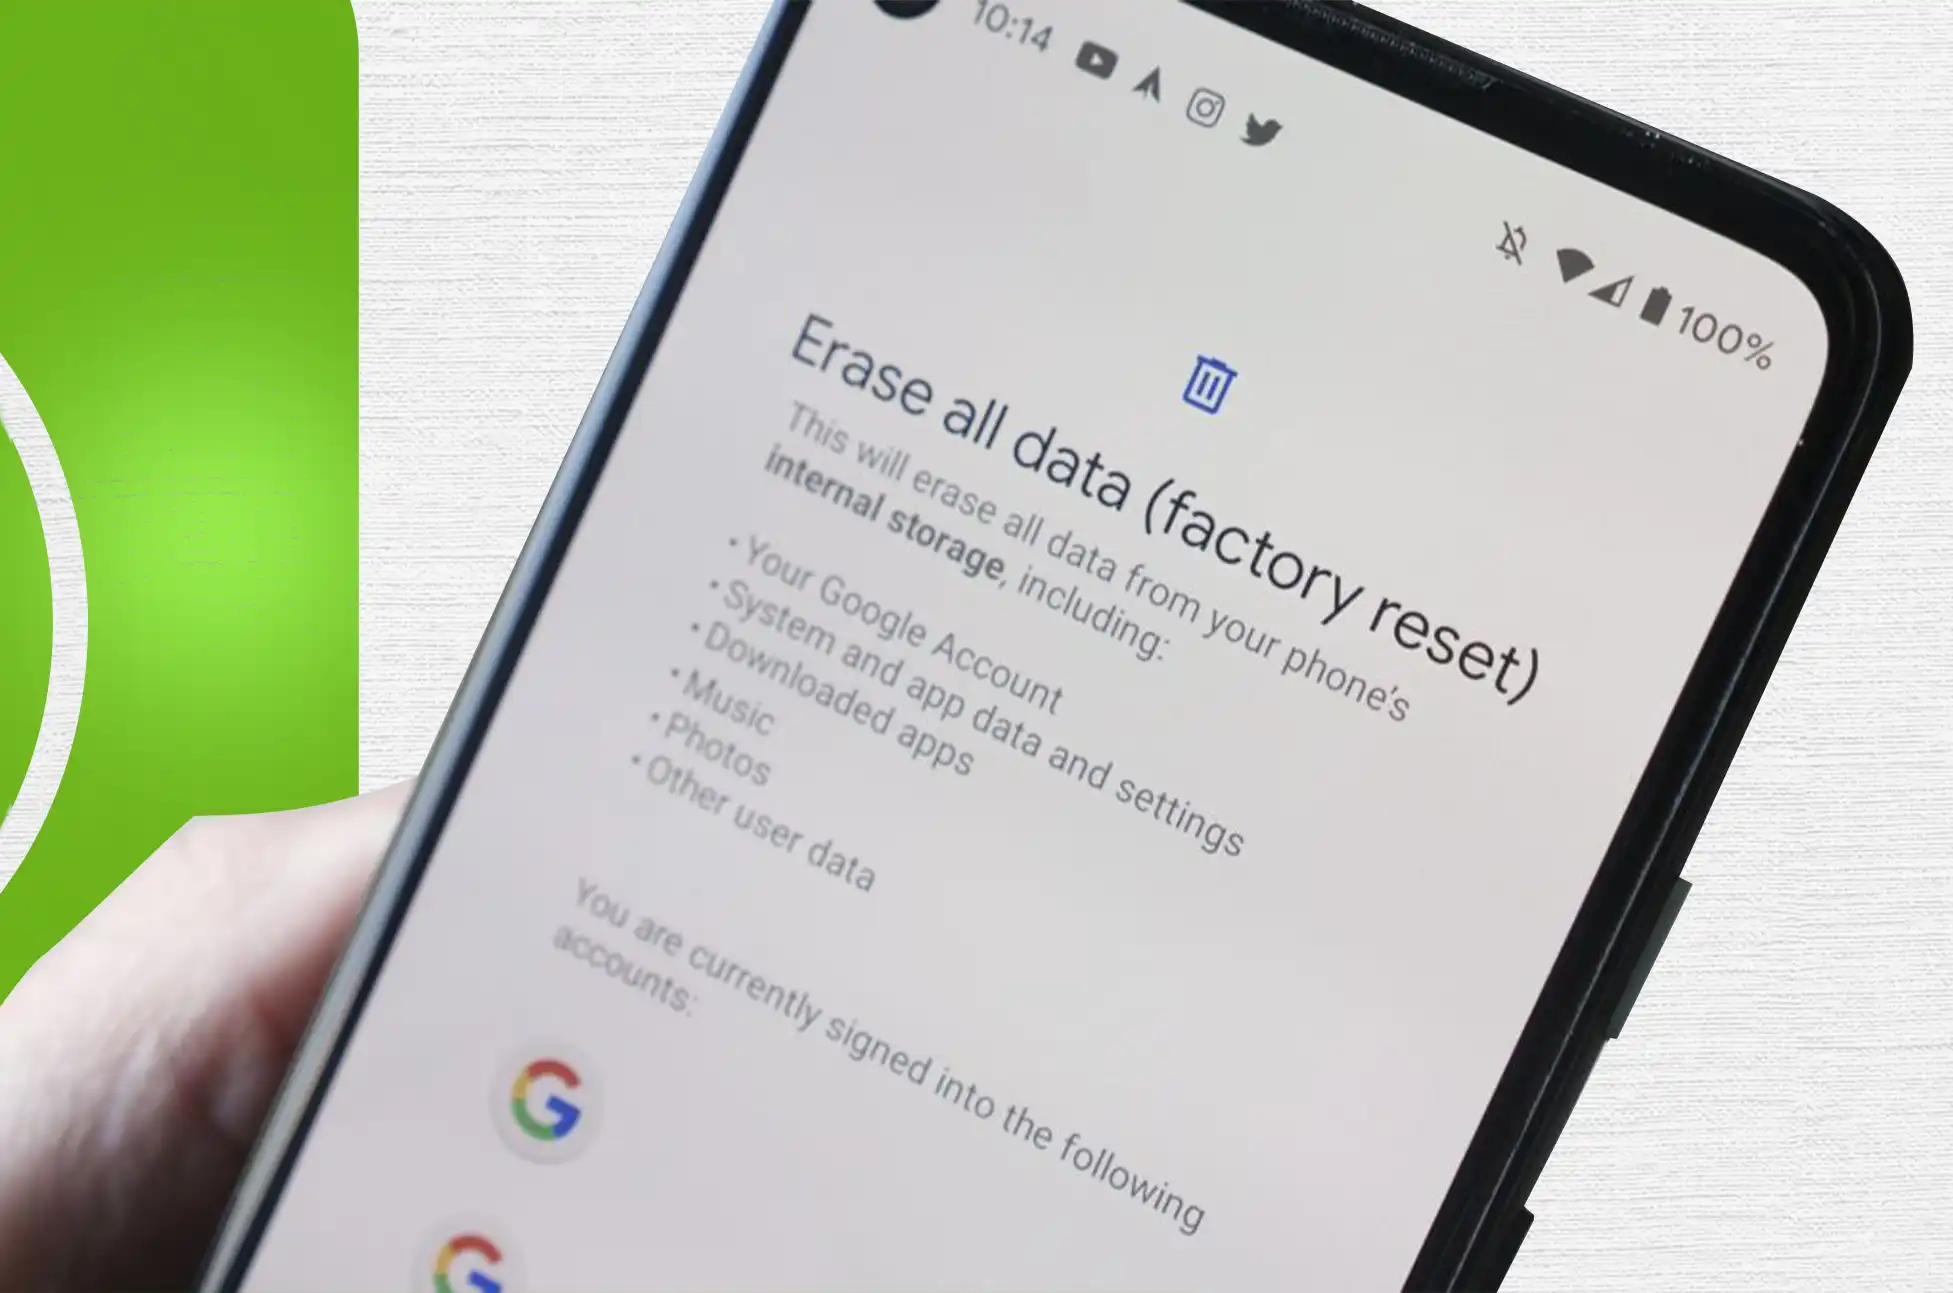
Turn Off Safe Mode with Factory Reset
If neither of the above methods work, something else could prevent you from exiting Safe Mode. In such cases, a factory reset is the only viable option. A factory reset obliterates all user data and account information. If nothing else works on your device, we recommend attempting this. Create a backup of your Android device before proceeding with the method outlined below to ensure the safety of your data.
Below is a step-by-step guide for resetting a Google Pixel phone to factory settings. The steps to factory reset an Android device are nearly identical, though they vary depending on the device manufacturer. Not all features or configurations are located in the same location, but they are comparable. Visit our guide on how to factory reset Android devices for detailed instructions on resetting Samsung and OnePlus devices.
To factory reset a Google Pixel smartphone, carry out the steps below:
Launch the phone’s Settings app and navigate to the System section.
Tap Reset options and select the option to Erase all data (factory reset).
Tap the Erase all data icon and enter your password, pattern, or PIN when prompted.
How to use Safe Mode to identify Android issues
If you want to turn your device into Safe Mode to assist with troubleshooting, we explain how to do so.
Initially, launch into Safe Mode using one of the aforementioned methods. If entering Safe Mode resolves the problem, it is likely that one of your installed third-party applications is to blame. To identify the offending app, you must remove or disable each one individually. If the issue is recent, start with the most recently installed third-party applications.
First, provide an inventory of the most recently installed apps on your device. To exit Safe Mode, delete an app’s cache and storage while in Safe Mode and restart your device. To delete the cache and storage of an app, navigate to Settings > Apps, select the app, and touch Storage & data.
If the errors are resolved after uninstalling an app, that app is responsible for them. You should delete and reinstall the application, or notify any problems to the app’s developers. However, if the problem persists, repeat the steps with the other applications until you identify the offending program. You will need perseverance as you work through the list of third-party applications, as the process is slow. However, once you identify the problematic app, you can reinstall the other apps and return your device to normal mode.
Conclusion
Well done! You now know how to exit Safe Mode and use your Android device to its full potential. Proceed at your own risk and take advantage of your phone’s many wonderful capabilities. There are now no limits; use your Android as you see fit.
All products, and company names, logos, and service marks (collectively the "Trademarks") displayed are registered® and/or unregistered
trademarks™ of their respective owners.
The authors of this web site are not sponsored by or affiliated with any of the third-party trade mark or third-party registered trade mark owners,
and make no representations about them, their owners, their products or services.
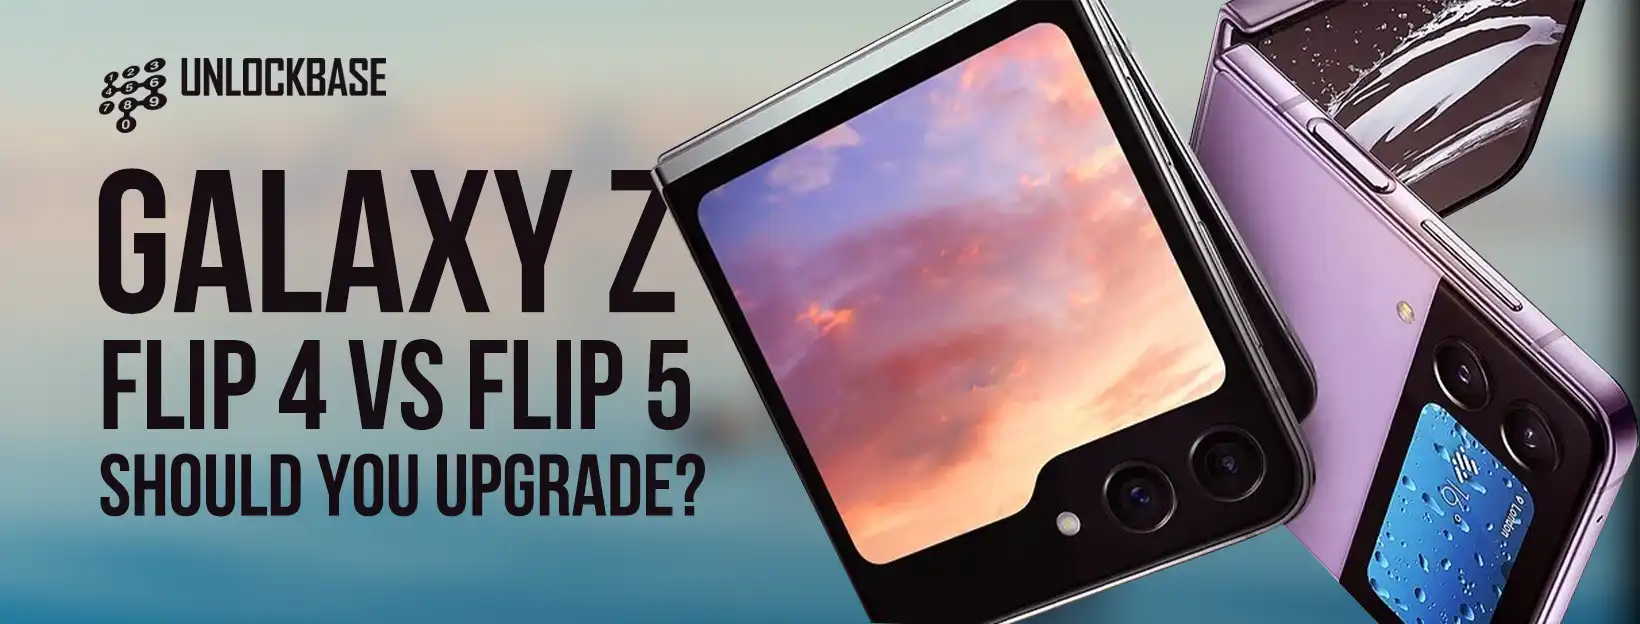
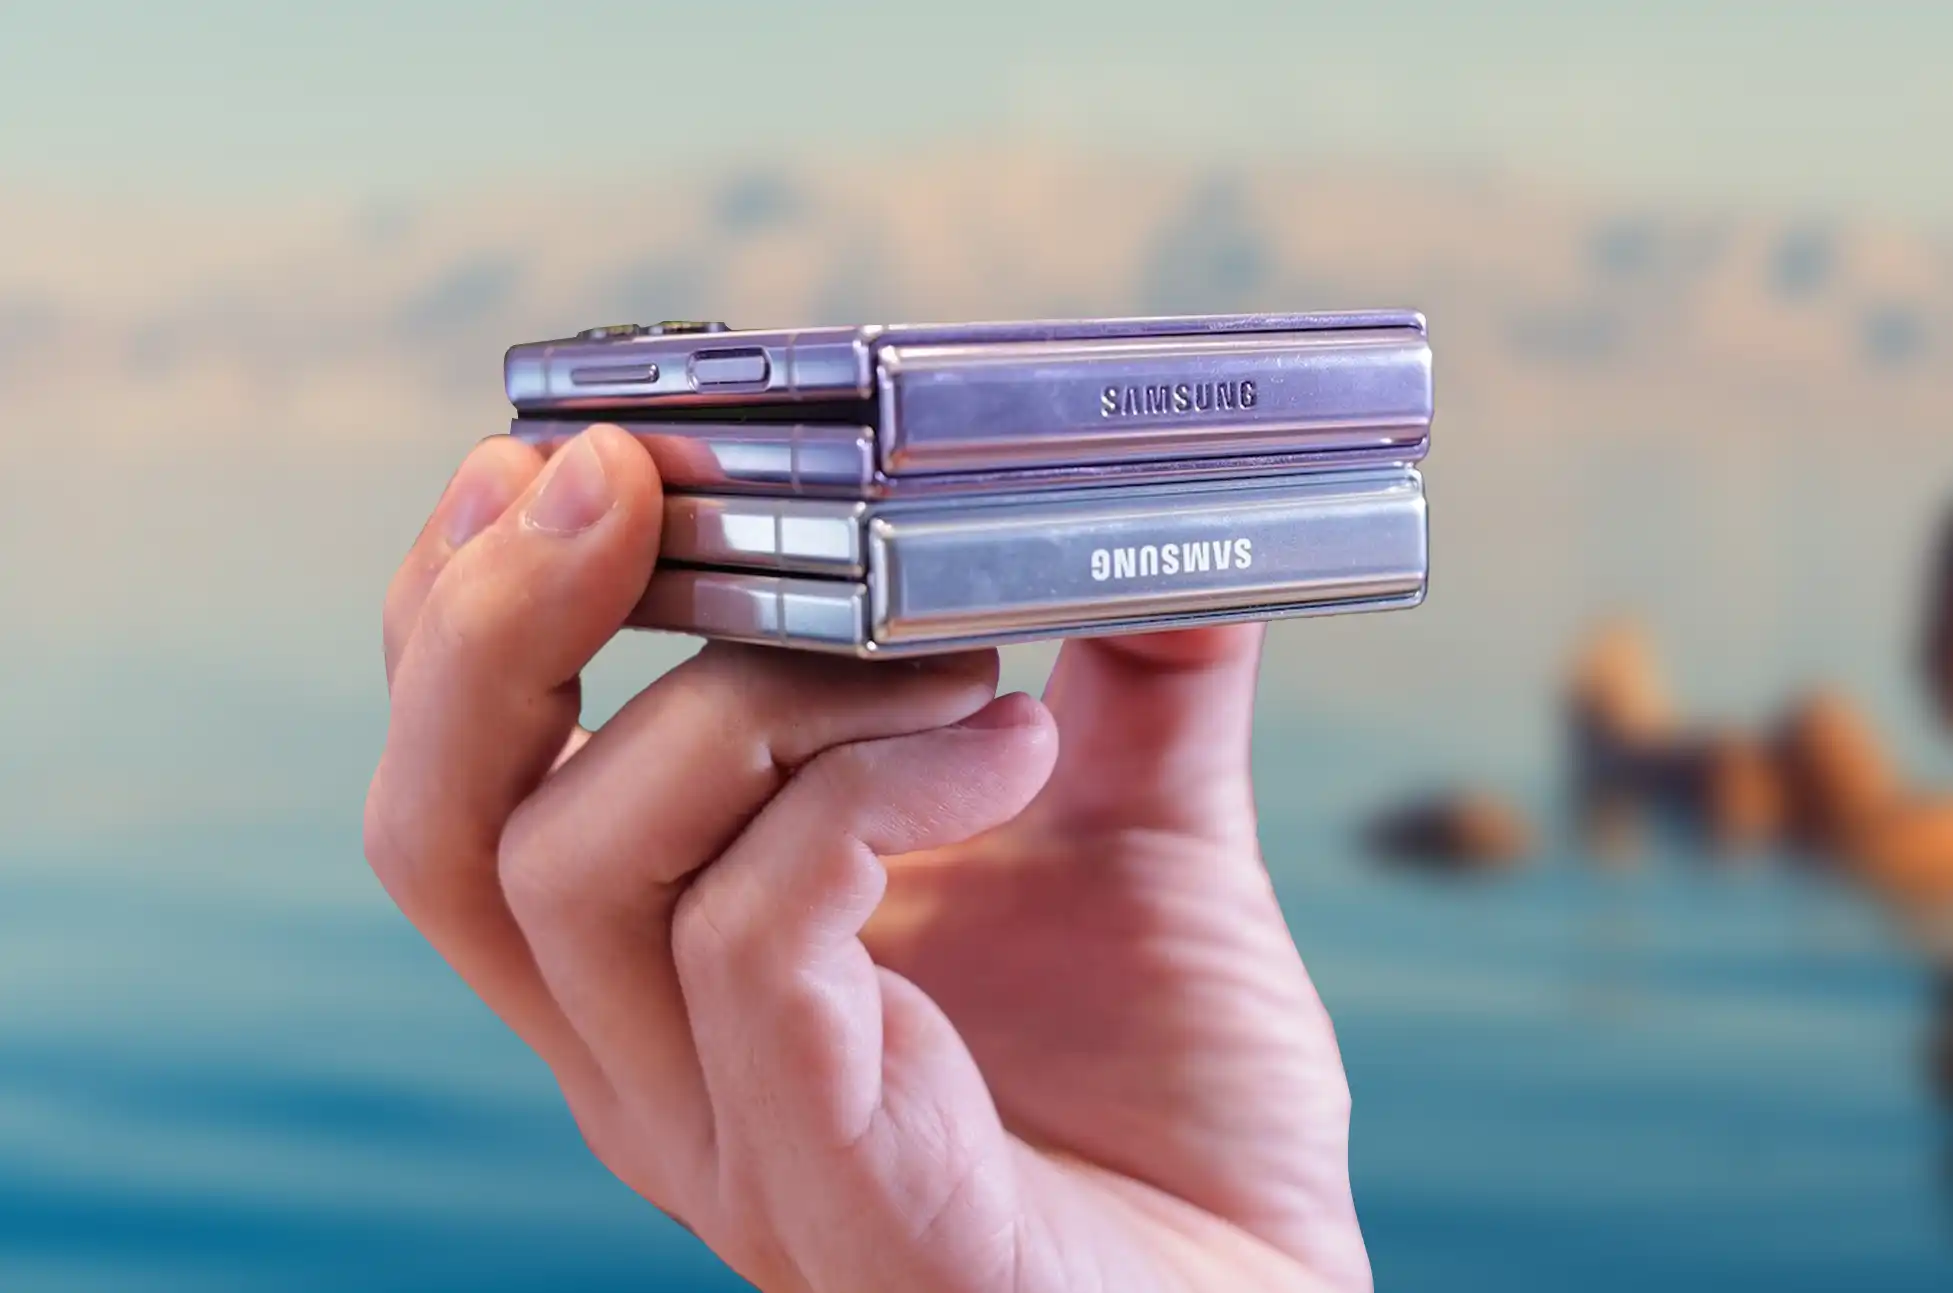
Galaxy Z Flip 4 vs Flip 5? Listen up, techies! If foldable smartphones are your thing, you’ve definitely heard of Samsung’s Z Flip line. In this blog, we’ll look at the differences between two fantastic devices, the Z Flip 4 and the Z Flip 5. The burning question on everyone’s mind: Should I upgrade? Let’s get right to the question and see what the answer is!
Samsung Galaxy Z Flip 4
Samsung Galaxy Z Flip 5
Chip
Qualcomm Snapdragon 8+ Gen 1
Qualcomm Snapdragon 8 Gen 2
Display
6.7″ 2640 x 1080 120Hz OLED primary, 1.9″ 260 x 512 OLED cover display
6.7″ 2640 x 1080 120Hz OLED primary display, 3.4″ 720 x 748 60Hz OLED cover display
RAM
8GB LPDDR5
8GB LPDDR5X
Storage
128GB, 256GB, or 512GB
256GB or 512GB
Battery
3,700mAh
3,700mAh
Ports
USB Type-C 2.0, OTG
USB-C
OS
Android 13 (OneUI 5.1)
Android 13 (OneUI 5.1.1)
Selfie Camera
10MP f/2.4 hole-punch camera (80˚ FoV, 1.22μm pixels)
Open: 71.9 x 165.2 x 6.9mm, Closed: 71.9 x 84.9 x 17.1mm folded (tapering to 15.9mm)
Unfolded: 71.9 x 165.1 x 6.9mm, Folded: 71.9 x 85.1 x 15.1mm
Colors
Bora Purple, Graphite, Pink Gold, Blue
Graphite, Cream, Lavender, Mint
Weight
187g
187g
IP Rating
IPX8
IPX8
Prince
Starting at $1,000 (at launch)
Starting at $1,000
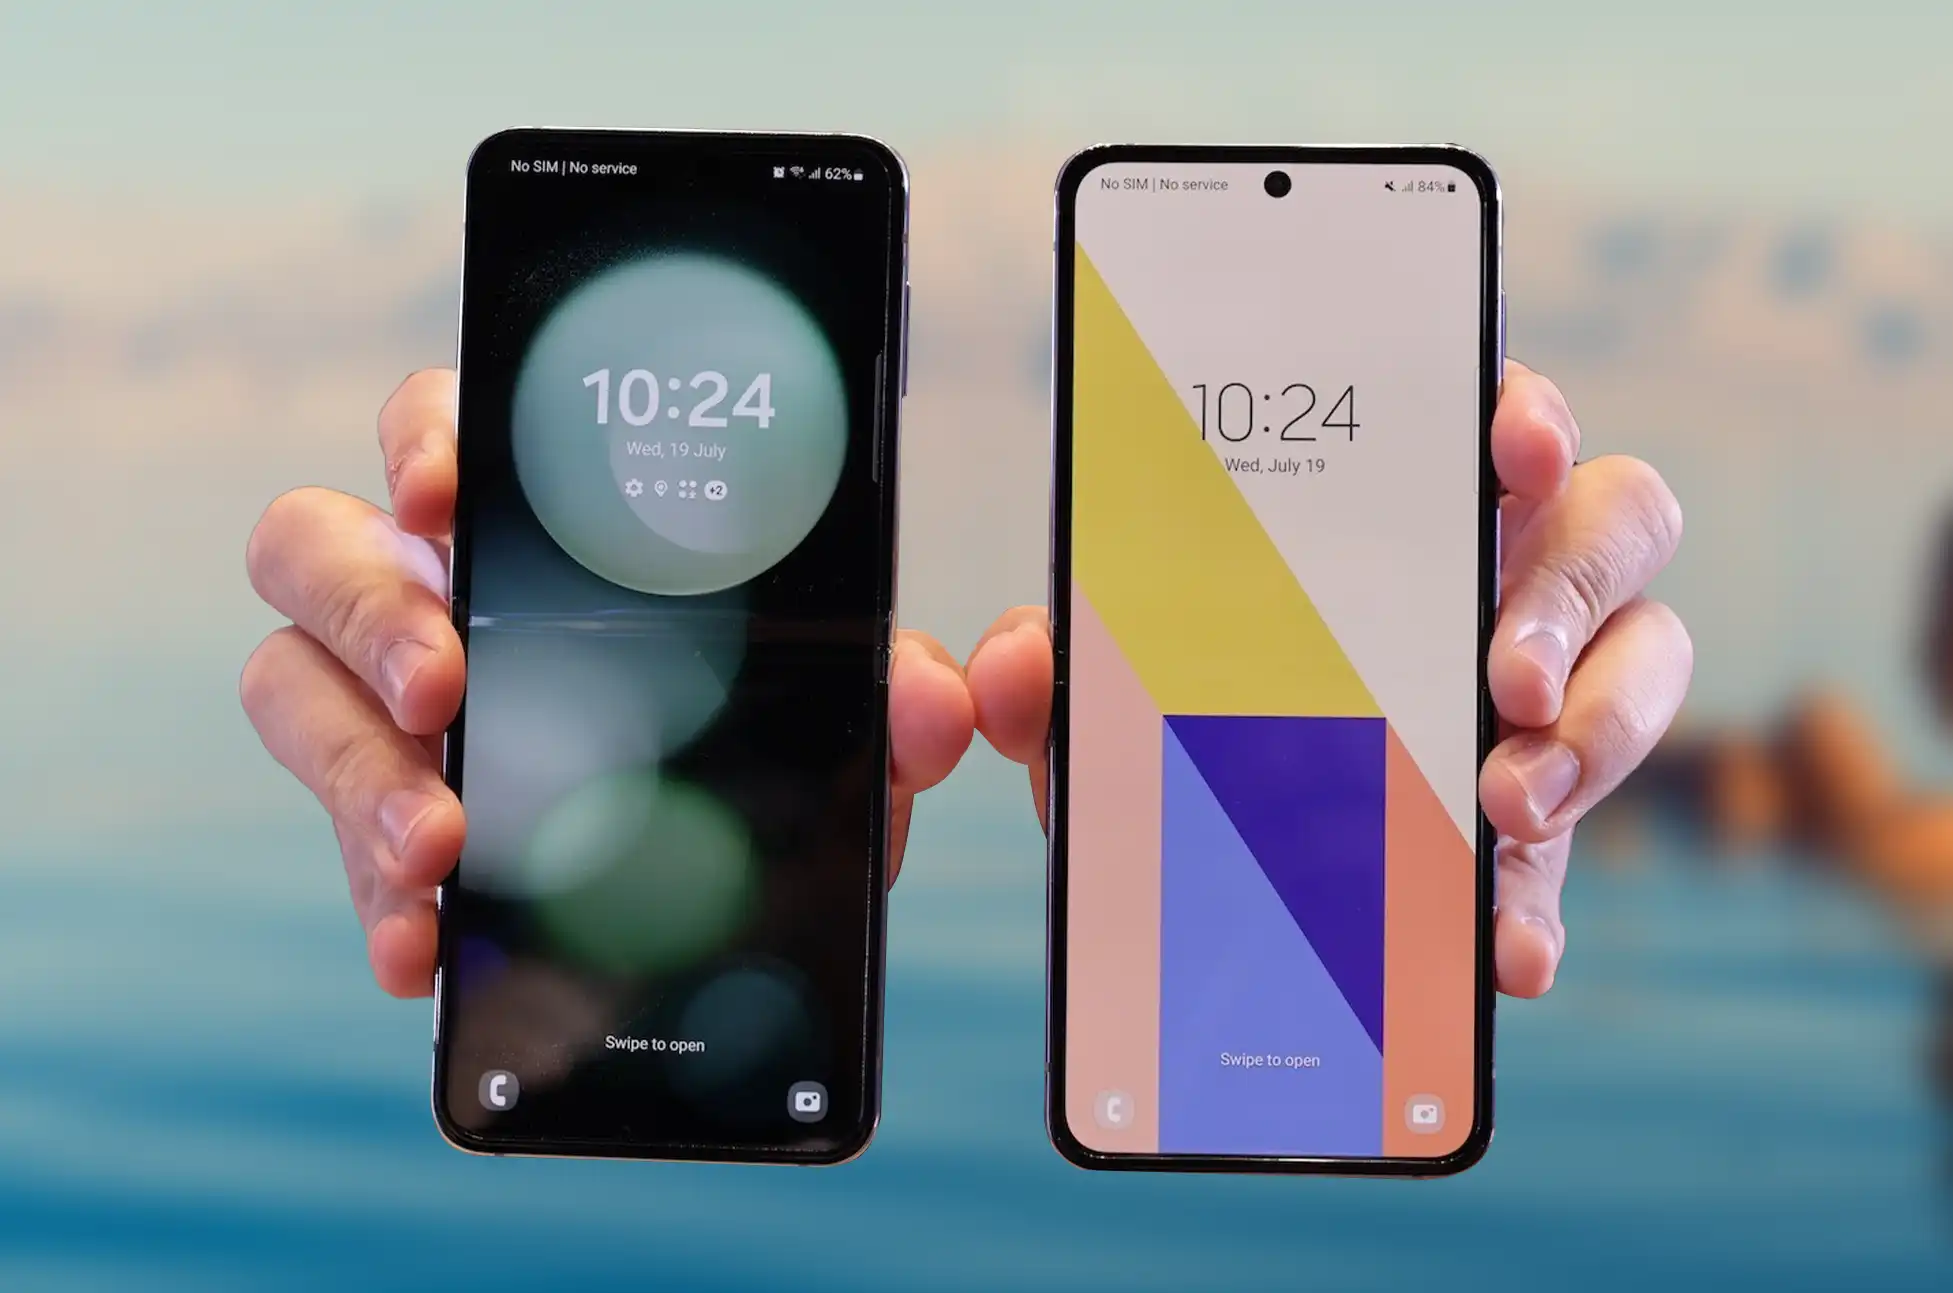
Galaxy Z Flip 4 vs Flip 5: Display and Design
Let’s get the most important thing out of the way and discuss the display. The Z Flip 4 and Z Flip 5 both feature that slick, captivating design that will make you exclaim, “Wow!” The Z Flip 4 features a primary display with a resolution of 6.7 inches with a refresh rate of 120 hertz and a cover display with a resolution of 1.9 inches and 260 by 512 hertz, making it ideal for one-handed operation. In the meantime, the Z Flip 5 ups the stakes with a primary display that measures 6.7 inches and has a resolution of 2640 by 1080 at 120 hertz and a cover display that measures 3.4 inches and has a resolution of 720 by 748 at 60 hertz. This provides you with slightly additional screen real estate without making the device excessively bulky.
Nevertheless, when the Galaxy Z Flip 5 is folded up, it appears to be around the same size as its predecessor was when it was folded up. However, the minimal thickness where it tapers off is a tiny bit smaller at only 15.1mm instead of the 15.9mm that we saw last year. It’s probably not going to make a huge difference, but it’s still comforting to know that Samsung is working hard to reduce the thickness of the phone as much as it possibly can.
Galaxy Z Flip 4 vs Flip 5: Software and Performance
Both of these devices are quite capable when it comes to their overall performance. The Snapdragon 8 Gen 2 processor in the Z Flip 4 ensures that it performs smoothly and is up to the challenge of managing the apps and tasks you use on a daily basis. But here’s the kicker: the Z Flip 5 passes it a step further by adding a more powerful Snapdragon 8+ Gen 1 processor, which means even faster performance and smoother multitasking than before. This upgrade could be ideal for you if you are a frequent user or a gamer who enjoys pushing their system to its limits. The Galaxy Flip 5 retains the Flip 4’s 8GB of RAM, but upgrades it to LPDDR5X rather than LPDDR5. Even though you won’t notice any difference in performance while using the phone, the battery life will improve marginally.
The Flip 5 will ship with the most recent version of OneUI (OneUI 5.1.1), which is built on Android 13. Nobody will feel like the Flip 5 is lacking in features thanks to Samsung’s version of Android, which is quite sophisticated at this point and gives a ton of customization and options to play around with. The software experience when using the Flip 5 folded up has also been greatly enhanced thanks to the new cover screen. With Samsung’s continued innovation in post-release software support, the Flip 5 is poised to receive numerous updates over the next few years and will be supported for only one more year than the Flip 4.
Galaxy Z Flip 4 vs Flip 5: Camera
The value of a good camera in a mobile device is common knowledge. Samsung’s clamshell folding falls short in the camera department compared to the Galaxy Z Fold 5 due to the company’s decision to use less high-end components in the lenses. However, that doesn’t mean they can’t capture decent photos; in fact, the Z Flip 4 enhanced the foldable’s night photography capabilities over the Flip 3.
The Flip 5’s primary sensor is the same 12MP f/1.8 wide-angle lens as in the previous generation’s flagship model, the Flip 4. It’s versatile and easy to use, making it a superb point-and-shoot choice; the ultra-wide angle is particularly well suited to landscape photography.
The Z Flip’s cameras have traditionally succeeded when Samsung takes advantage of the device’s innovative foldable form. Selfies taken with the cover screen as a viewfinder or by placing the phone on an angle are always more entertaining than those taken with a standard slab phone. The Galaxy Z Flip 5’s improved and larger cover display should make using the phone even more of a pleasure and an asset.
The front-facing camera has also been updated, now boasting a 10 megapixel (MP) f/2.2 sensor rather than the previous f/2.4. This should improve your selfie-taking experience slightly by allowing more light in, hence increasing the quality of your photographs’ natural bokeh. It’s a little improvement, and probably won’t be seen unless you’re a photography nut.
Battery Life
Let’s move on to the fuel that powers these gadgets: batteries. Since there aren’t many external differences between the Galaxy Z Flip 5 and its predecessor, it shouldn’t come as a surprise that it uses the same 3,700mAh battery. We found the Galaxy Z Flip 4’s battery life to be rather satisfactory, lasting through a full day of moderate use in most cases. This will naturally decrease if you play games frequently throughout the day, although the Galaxy Flip 5 does have several features that could compensate for this.
The Z Flip 5’s LPDDR5X RAM and Snapdragon 8 Gen 2 processor should be easier on the battery than the Flip 4’s components. Battery life may not improve much even with the improved efficiency of the internals because the new 3.4-inch cover screen will consume more power than the little 1.9-inch screen on the Flip 4. I wouldn’t expect much longer battery life than the Flip 4 provided, but we won’t know for sure until we get our hands on it.
It will take roughly 30 minutes to charge the battery from zero to fifty percent through wired connection, which is disappointing given the 45W available on other Samsung flagships like the Galaxy S23+. Additionally, Wireless PowerShare is back with the Flip 5, so you can once again use the Flip 5’s battery to charge your Samsung earphones or other compatible devices.
Price and Specs
We can’t help but consider cost when making any choice. Despite substantial improvements over its predecessor, the new Samsung Galaxy Z Flip 5 is available at the same launch pricing. The Flip 5 will be available for purchase from Samsung and the three major U.S. carriers beginning at $1,000 on August 11 (pre-orders begin on July 26). The new model, like the Flip 4, will be accessible everywhere you typically purchase mobile devices and will support 5G on all of the main networks.
Conclusion
Is it safe to say that the Z Flip 5 is the next phone you need to upgrade to? If you own a previous generation Z Flip and are looking for an improvement in terms of screen size, processing power, camera quality, and battery life, the Z Flip 5 is an excellent choice. But if you’re happy with your Z Flip 4 and don’t need the newest features, it’s still a great folding gadget, the Z Flip 4 is still a great option.
You can’t go wrong with either the Z Flip 4 or the Z Flip 5; they’re both excellent smartphones. Your preference and how you plan to use your phone will determine which is best.
All products, and company names, logos, and service marks (collectively the "Trademarks") displayed are registered® and/or unregistered
trademarks™ of their respective owners.
The authors of this web site are not sponsored by or affiliated with any of the third-party trade mark or third-party registered trade mark owners,
and make no representations about them, their owners, their products or services.
Apple iPhone 15? You can count on Apple to release a new version of the iPhone with a spectacular launch event and eye-catching advertising, even if the phones themselves haven’t changed significantly. The leaks and rumors surrounding the iPhone 15 series show that 2023 will be no different. When the iPhone 15 series debuts in 2023, will it provide more than simply cosmetic upgrades to get more people to make the switch? Let’s find out.
Apple iPhone 15: Models and Colors
Similar to 2022, we expect four new iPhone models in 2023. Apple plans to release a standard iPhone 15, a larger Plus option, and two more expensive, high-end phones, resembling the iPhone 14 lineup. While the two devices may have the same name, there have been rumors that Apple is considering rebranding the Pro Max as the iPhone Ultra. In keeping with the new branding for the Apple Watch Series 1, this could enable the corporation to demand an even higher premium for the device. However, it would have to stand out from the smaller iPhone Pro by using novel materials or having more functionality.
Although there hasn’t been any official announcement regarding the color scheme, earlier this year, a leak provided us with the first peek at a new color option. Above, you can see that the color’s hex code is 410D0D and that its name is Dark Sienna. Dark Sienna is the name of the hex code for this color, but Apple may decide to call it something else. This hue is expected to be a Pro and Pro Max-only offering.
The same source also says pink and light blue could be available for the regular and Plus models. It did, however, caution that these preferences might shift before the product went live. The news source went on to say that the iPhone 15 and iPhone 15 Plus might also be available in a mint green hue. Possible future additions to this palette include the standard primary colors plus black, white, silver, gold, and red. It has been said that only the Pro models include frosted glass on the backs of their models. The publication claims, however, that the frosted glass may be standard on all new models for the next generation. Meanwhile, in other tech news, UK crypto adoption reaches 35%, fueling $43B investment surge, indicating how digital currencies and blockchain technology continue to shape financial landscapes alongside new product innovations like the iPhone.
Apple iPhone 15: Design, Display Sizes and Specs
Lighting Port or USB-C Port
Apple concedes the need to abandon its proprietary Lightning port for a USB-C connector to meet EU regulations. The deadline is 2024, but there are speculations that the iPhone 15 series might feature a USB-C port to comply with the rule.
However, it’s unclear if the USB-C change would be universal. Apple may introduce the port update only to Pro models or specific SKUs in select markets. In the near future, an iPhone without any ports is also expected, so time will tell
Flat or Curve?
With the iPhone 12 release, Apple shifted from rounded edges to flat edges in its mobile device design. However, the iPhone 15 series might bring a new change by adopting rounded corners on at least one side, resembling the iPhone 5C’s design as per ShrimpApplePro claims. This design choice seems inspired by the current MacBook’s base case, showcasing Apple’s unified design themes across product categories.
Rumors suggest a titanium frame for the Ultra model, which aligns with earlier leaks. If these changes don’t materialize in time for the iPhone 15, it could be due to supply chain capacity constraints.
Display
Given Apple’s track record, it’s hardly surprising that the iPhone 15 is visually similar to the iPhone 14. However, it appears that the interface may undergo some modifications. Expectations are that the next-generation standard iPhone will include a 6.2-inch screen, making it slightly larger than the 6.1-inch display of the iPhone 14.
It has also been speculated that the Pro Max’s display will feature a brightness of 2,500 nits. Unfortunately, Apple may not upgrade from its 60Hz refresh rate. While there have been speculations that Cupertino may eventually adopt micro-LED panels, the next generation of Apple’s mobile devices will not feature them.
Processor
Without a doubt, Apple plans to introduce a fresh new processor; the rumored A17 Bionic might become the first one manufactured using TSMC’s brand-new 3nm technology. Hopefully, this will be standard across all iPhone 15 variants, just as Apple’s new A16 Bionic was only available in the iPhone 14 Pro and Pro Max and not the more affordable iPhone 14 versions.
As a cost-cutting measure, Apple may consider making the transition from TSMC’s N3B process to N3E in 2024. This would result in much less efficient new A17 Bionic chips compared to the original batch. The publication, however, expresses skepticism that this will occur before the iPhone 15 is discontinued.
In 2023, Apple may increase the amount of memory in the iPhone 15 series. In their assessment on the next iPhone 15, research firm TrendForce claimed that “Apple will bump up the capacity and specifications” of RAM. The company has previously speculated that the iPhone 15 Pro would “feature a memory capacity upgrade to 8GB to match its new processor.” The base model and Plus might be left out of this RAM increase, but they could still get an LPDDR5 upgrade.
Battery
A report claims that the iPhone 15 has a 3,877mAh battery, the iPhone 15 Plus has a 4,912mAh battery, the iPhone 15 Pro has a 3,650mAh battery, and the iPhone 15 Pro Max has a 4,852mAh battery. In an amended version of the post, however, the publication cites a second leaker who disputes these figures. This specific leak should be taken with a large pinch of salt.
Another theory proposes that Apple may use a stacked battery design. The battery life and energy density of the iPhone 15 would be much improved as a result. It is also speculated that the cable charging speed for the iPhone 15 or 16 could be 40W, with MagSafe charging at 20W. You should treat this rumor with caution as well, as it comes from a leaker we aren’t familiar w
New Chip?
Apple updated its Ultra Wideband (UWB) processor to the next generation, featuring it in all iPhone 15 versions. The new chip’s fabrication process reportedly shrinks from 16nm to 7nm, aiming for improved performance and reduced power consumption. The introduction of the Vision Pro likely inspired this change to advance spatial computing and maintain Apple’s connected environment’s reliability.
Apple iPhone 15: Camera
Every year, Apple improves the cameras on its smartphones, either through new hardware or enhanced software. In 2023, Sony’s most advanced image sensor is expected to enhance the primary camera’s capabilities, possibly only on Pro models. The saturation signal intensity in each pixel is doubled, boosting the effectiveness of this ‘state-of-the-art’ sensor.
All the rumored photographs suggest the iPhone 15 will have the same dual-camera configuration at the back. Only the Pro models are likely to feature a third camera. The lenses on the iPhone 15 Pro also appear thicker, possibly indicating an increase in sensor size.
An upgraded LiDAR scanner could significantly improve photography. According to a leak from MacRumors, the iPhone 15 Pro and iPhone 15 Pro Max are speculated to receive new LiDAR scanner components from Sony.
More intriguing is the speculation that the iPhone 15 may debut an exclusive periscope lens with 5x or 6x optical zoom. Theories predict this lens will first be exclusive to the iPhone 15 Pro Max before reaching the iPhone 16 Pro in 2024. High-end Android flagships have long included folded zoom cameras, making this another example of Apple catching up. Still, it’s an exciting possibility and could be the most significant enhancement to the iPhone’s camera in years.
Apple iPhone 15: Release Date and Price
The release of the previous two iPhone versions coincided with the middle of September announcements. A postponement seems likely at this point, even though we normally anticipate Apple to continue this cycle in 2023. Apple has not explained why the release of the new iPhone would be postponed until the fourth quarter. The release date, if correct, would be between October and December.
Apple may have a special event for the introduction of the iPhone 15 Ultra if the company decides to shake things up by releasing an enhanced version of the phone. Based on the information we have at this time, one live announcement show remains the most likely scenario.
Under the assumption that Apple maintains the same pricing structure for the iPhone 15 series in the US, the 128GB models would cost:
iPhone 15 — $799
iPhone 15 Plus — $899
iPhone 15 Pro — $999
iPhone 15 Pro Max — $1,099
Conclusion
As the actual debut of the iPhone 15 draws near, the time for conjecture is coming to an end. Apple’s carefully planned keynote event will stop all the speculation and reveal the true depth of the iPhone 15’s innovation, putting an end to the leaks and speculations. No matter how closely the iPhone 15 matches our expectations or how wildly it deviates from them, one thing is certain. It will captivate our imaginations and forever change the way we use our smartphones.
All products, and company names, logos, and service marks (collectively the "Trademarks") displayed are registered® and/or unregistered
trademarks™ of their respective owners.
The authors of this web site are not sponsored by or affiliated with any of the third-party trade mark or third-party registered trade mark owners,
and make no representations about them, their owners, their products or services.
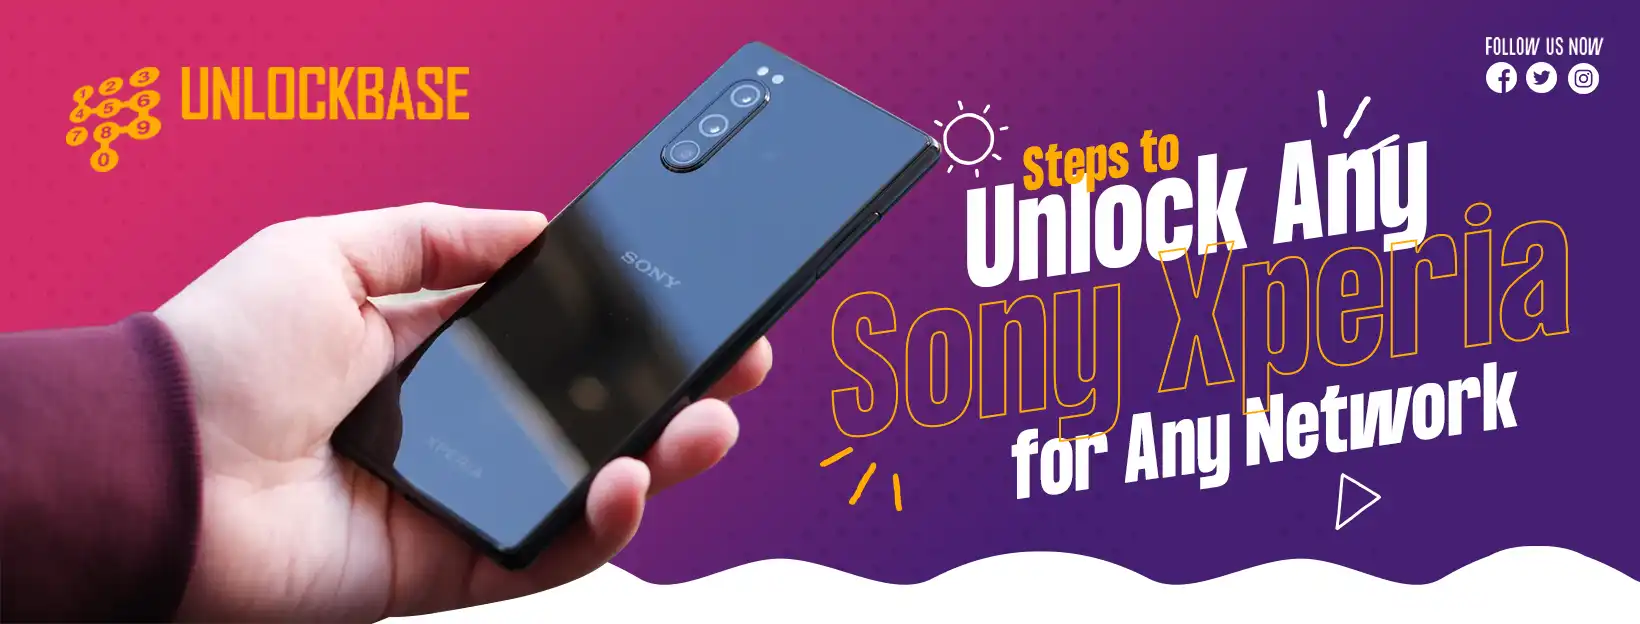
Sony Xperia Unlock? The process of unlocking mobile phones has been a subject of mystery despite their integral role in our lives over the past two decades. Unlocking a Sony Xperia phone not only allows you to take advantage of affordable SIM-only packages and use it with any network but also enables you to share it with family or friends.
In this blog post, we will explore the meaning of a locked Sony Xperia phone, how to determine if your phone is locked, the benefits of unlocking your phone, and provide a step-by-step guide to unlock your Sony Xperia device.”
What is a Locked Sony Xperia?
When you lock a Sony Xperia phone, it limits its usage to the service provider from whom you originally purchased it. Even if you fulfill your contract with the provider or completely pay off your phone, it will not automatically become unlocked.
Determining if your Sony Xperia phone is locked is a simple process:
Insert a SIM card from a different carrier into your Sony Xperia phone.
Check if the name of the new network displays on your device.
If you can use the phone with the new SIM card and the network name is visible, your phone is unlocked.
Understand SIM Unlocking
SIM unlocking refers to the process of removing the carrier restrictions imposed on your phone, allowing you to use it with SIM cards from different networks. It opens up a world of possibilities, giving you the flexibility to choose the best carrier plans, enjoy international roaming, and use local SIM cards while traveling abroad.
Benefits of unlocking your Sony Xperia phone
Unlocking your Sony Xperia phone offers various advantages:
Cheaper roaming charges overseas
When traveling abroad, you can use local SIM cards from other countries to avoid high roaming charges, resulting in significant cost savings.
Warranty coverage remains intact
Unlocking your phone does not void its warranty, and it will still be covered by the manufacturer’s warranty.
Permanent unlock and updates
Once unlocked, your phone will remain permanently unlocked, and you will continue to receive software updates.
Increased resale value
Unlocking your phone makes it carrier-free, increasing its value if you decide to sell it in the future.
How to unlock your Sony Xperia phone
Unlocking your Sony Xperia phone is a straightforward process. Follow these steps:
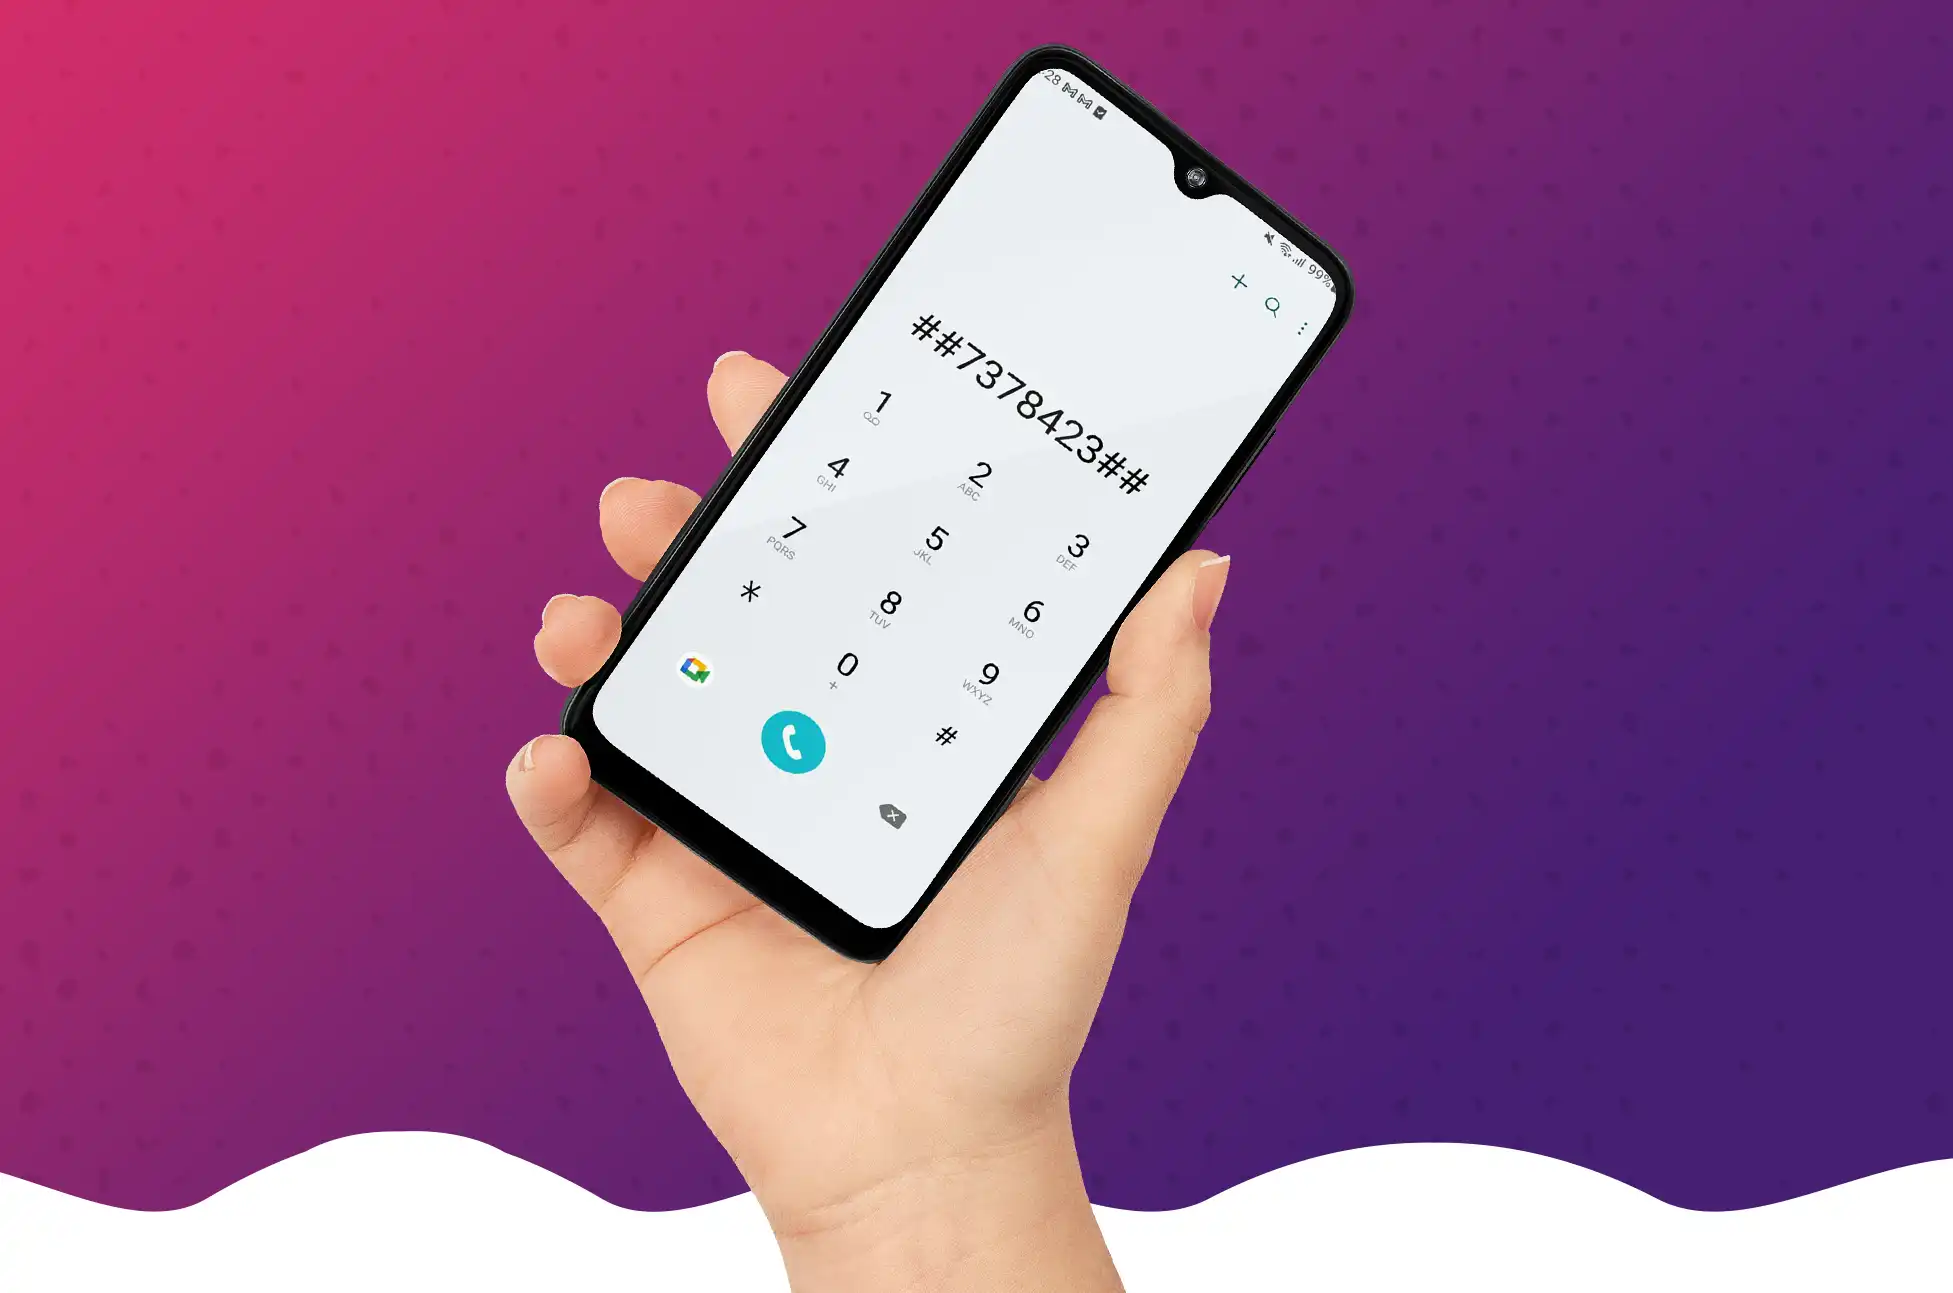
Check your SIM lock status by dialing ##7378423##
Choose Service info then Sim lock.
Confirm if your Sony Xperia phone is eligible for the service. There should be an “X” before the Network and the counter should show a number above 0 (zero). The number beside Network indicates how many attempts you have to unlock the phoneIf it shows ‘7,’ you have seven attempts; if it displays ‘0,’ it simply means you cannot unlock it using this method.
Obtain your IMEI number by dialing *#06# and make a note of it. Visit https://www.unlockbase.com/unlock-phone/sony/ and select the model of your phone.
Enter your phone’s IMEI number and provide your email for confirmation.
Choose the country where your phone is locked and select your network/carrier.
Confirm your payment and wait for an email confirmation from UnlockBase.
If you have received the email, proceed to the procedures that are listed below:
Remove the original SIM card from your phone.
Insert an unaccepted SIM card.
You should now see a box to enter the unlock code.
Enter the unlock code provided by UnlockBase.
Conclusion
Unlocking your Sony Xperia phone offers several advantages, including affordable roaming charges, warranty coverage, permanent unlock, and increased resale value. IMEI unlocking, a method recommended by Sony and other manufacturers, is simple and legal. By following the step-by-step guide provided in this blog, you can unlock your Sony Xperia phone hassle-free. Share your thoughts and suggestions in the comments section below.
All products, and company names, logos, and service marks (collectively the "Trademarks") displayed are registered® and/or unregistered
trademarks™ of their respective owners.
The authors of this web site are not sponsored by or affiliated with any of the third-party trade mark or third-party registered trade mark owners,
and make no representations about them, their owners, their products or services.
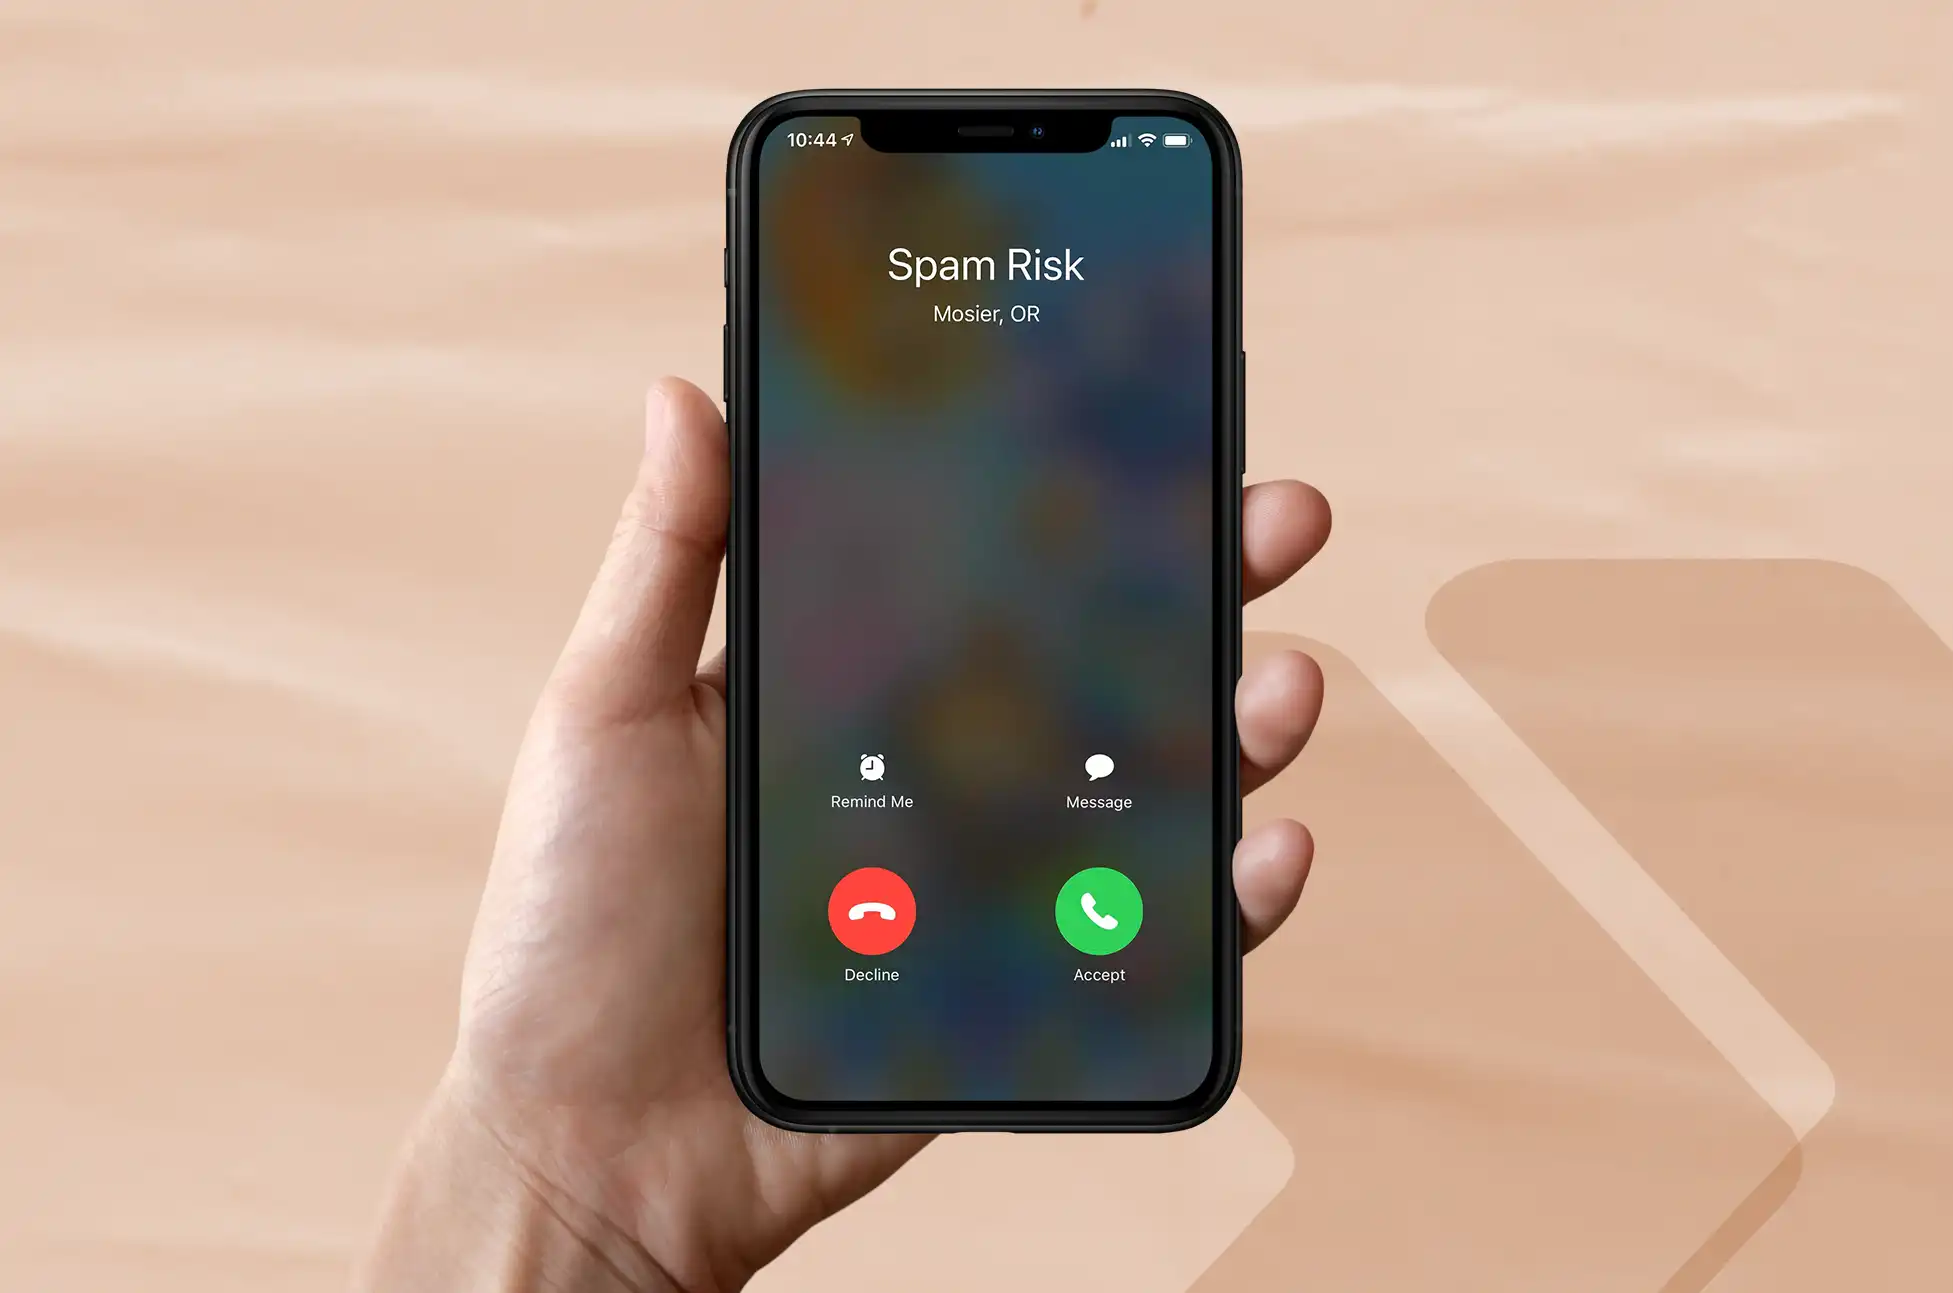
Spam calls can be incredibly frustrating and intrusive. They waste our time, invade our privacy, and can even lead to scams or identity theft.
Fortunately, there are several effective measures you can take to protect yourself from spam calls on your Android device. In this blog post, we will explore some practical steps you can follow to prevent spam calls and enjoy a more peaceful mobile experience.
Prevent Spam Calls by Switching on the spam filter
Using Android’s built-in spam filter is the simplest approach to block spam calls. Although the procedure varies slightly depending on the phone and carrier, your phone’s dialer program should have a spam filter by default. For some Android phones with the built-in Phone by Google app, follow these instructions.
Open your Phone app.
In the top-right corner, tap the three dots symbol.
Select “Settings.”
Click “Caller ID & spam”
Activate “Filter spam calls.” If you discover that you’re missing important calls, you can activate “See call and spam ID”. If the program just offers the “See call and spam ID” option, then just turn that on if that’s the case.
Prevent Spam Calls using Manually Block Spam
On Android, blocking a certain number might be less complicated if you’re fortunate and only sometimes receive spam calls. Depending on your phone model and carrier, the procedure will once more differ slightly. Manually blocking a number can be done in two ways that are most frequently used:
To display recent calls, open the Phone dialer app and select “Recent”.
Long-press the phone number, then select “Block.”
If you long-press a number and don’t see “Block” appear, tap the number you wish to block. Just tap the number; don’t tap the phone icon.
Choose “Block number” from the three dots in the top right corner of the screen.
This obviously only blocks one number. In order to avoid being permanently blocked by you, spammers frequently alter their phone numbers.
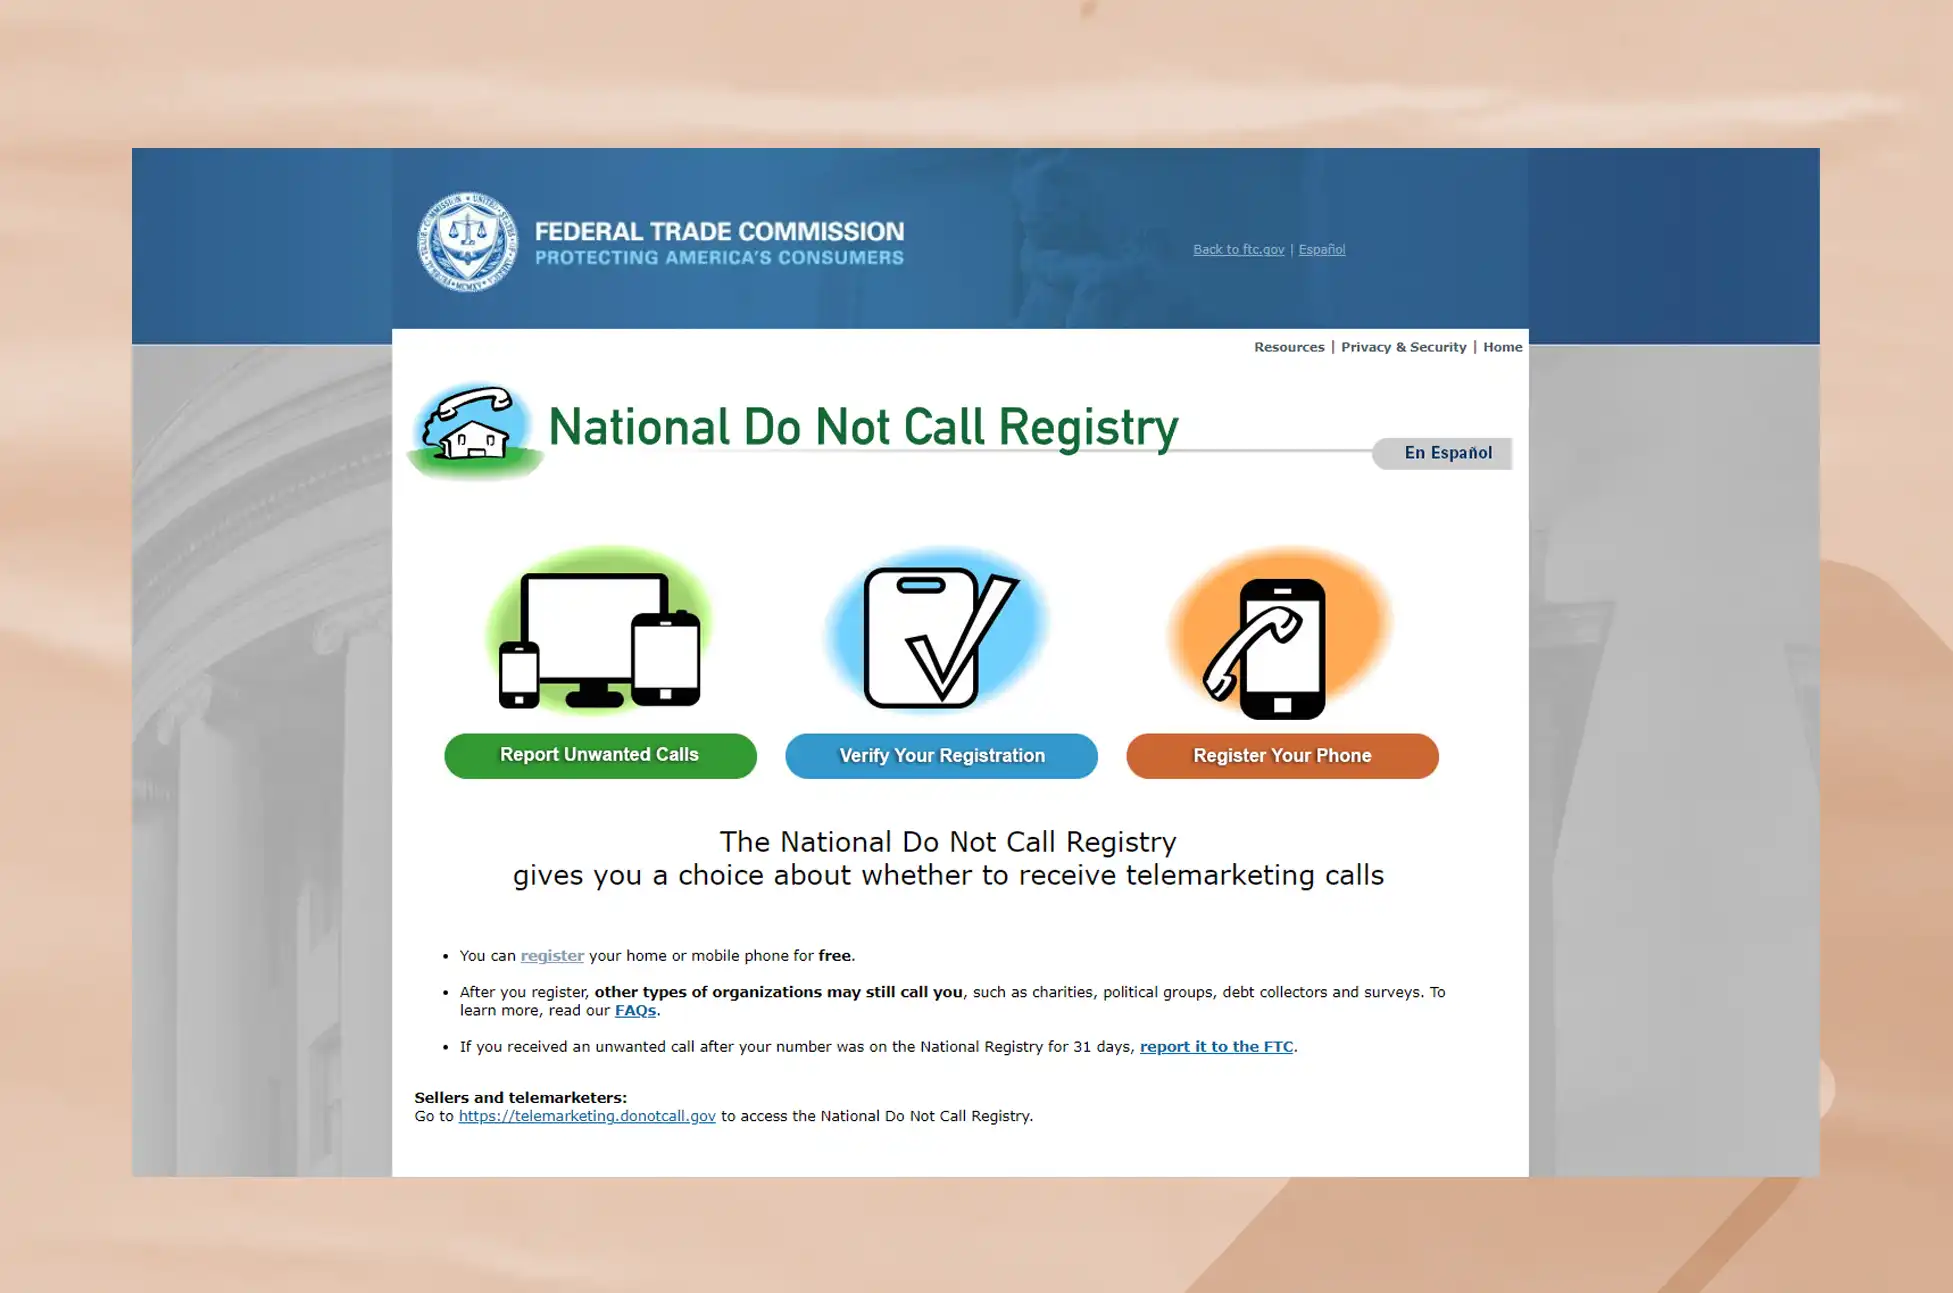
Register your number on the Do Not Call List
Adding your phone number to the national Do Not Call List is another action you can do to stop spam calls. This registry aids in reducing telemarketing calls that aren’t necessary. In order to register your phone number and decrease the number of legitimate marketing calls you receive, go to the Do Not Call official website or dial the toll-free number.
Install a call-blocking app
Numerous call-blocking apps are readily available on the Google Play Store and offer advanced spam call prevention in addition to the built-in functions. These apps automatically detect and reject spam calls using crowdsourcing databases and artificial intelligence. Truecaller, Hiya, and RoboKiller are a few well-known call-blocking applications. Install one of these programs, then adjust the parameters to your taste.
Be cautious with sharing your number
Refrain from giving it to unreliable websites or online platforms, especially those that seem suspect. Spammers frequently gain phone numbers through website scraping or data breaches. When completing online forms, doing surveys, or signing up for services, use caution. If you want to reduce the likelihood of getting spam calls, think hard before disclosing your phone number.
Avoid responding to or engaging with unknown callers
It’s preferable to let a call from an unknown number go to voicemail if you receive one. Answering or conversing with obtrusive callers can reveal that your number is live and bring on other spam calls. A voicemail will probably be left if it’s an important call from a reliable source. If you choose to return the call, use your discretion.
Report spam calls
Be proactive in the fight against spam calls by filing a report on them. The call log or Caller ID screen on Android devices frequently allows you to report spam calls directly. Informing authorities and service providers about spam calls enables them to take action against spammers and enhance call-blocking technology.
Conclusion
You may drastically cut down on the number of spam calls that your Android device receives by taking these proactive measures. Always be on the lookout for spam calls, and report any you receive. You can have a more tranquil and trouble-free mobile experience with these preventive measures in place.
All products, and company names, logos, and service marks (collectively the "Trademarks") displayed are registered® and/or unregistered
trademarks™ of their respective owners.
The authors of this web site are not sponsored by or affiliated with any of the third-party trade mark or third-party registered trade mark owners,
and make no representations about them, their owners, their products or services.
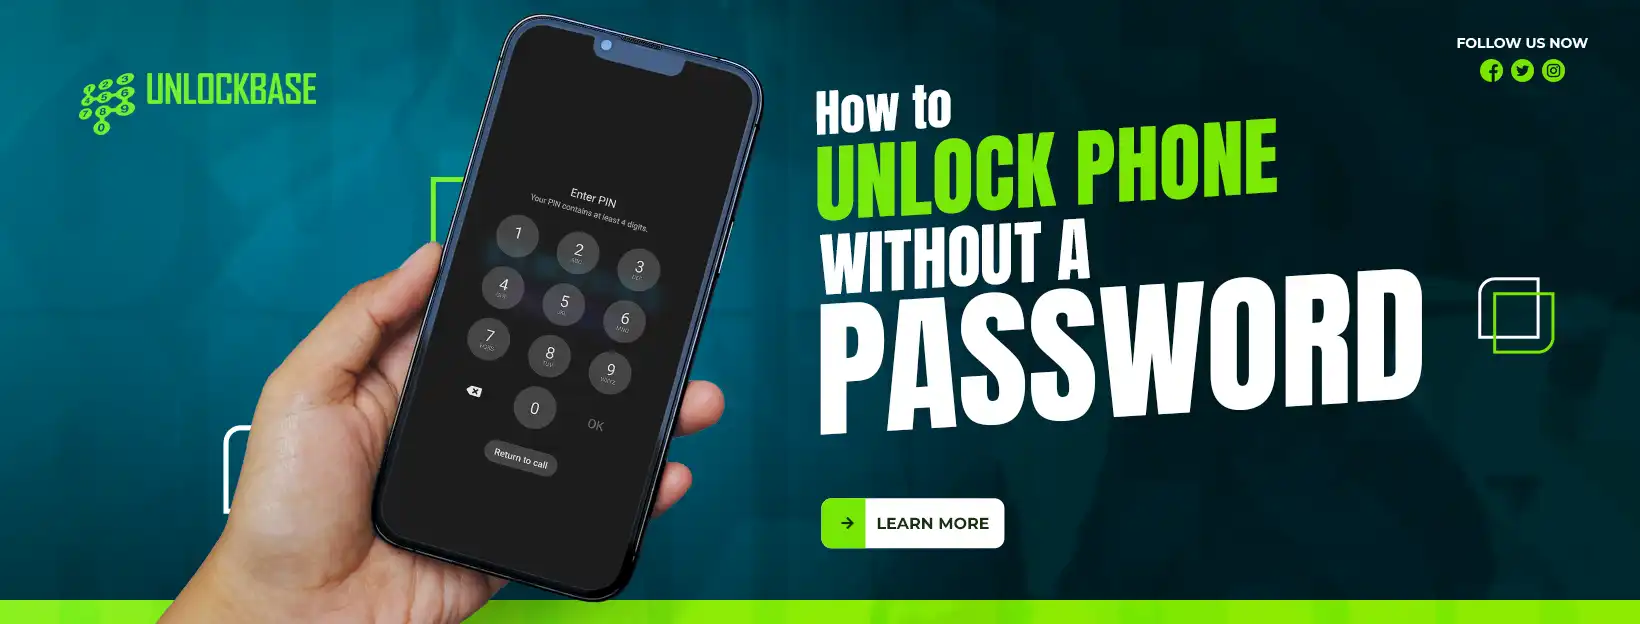
How to unlock phone without password? Smartphones have become indispensable in the modern world, where we must perform several tasks quickly and frequently. The password or pattern we choose to keep our gadget secure is easily forgotten, though. Don’t worry if you accidentally lock yourself out of your phone. In this guide, we will go over a number of options for bypassing a locked phone that you can try. Before we go any further, it’s important to remember that these techniques should only be used on devices that you own.
How to unlock phone without password
No longer do we need to remember tedious passwords and patterns to access our beloved smartphones! If you’ve ever been shut out of your phone, don’t worry, because we have the perfect guide to help you unlock it without breaking a sweat.
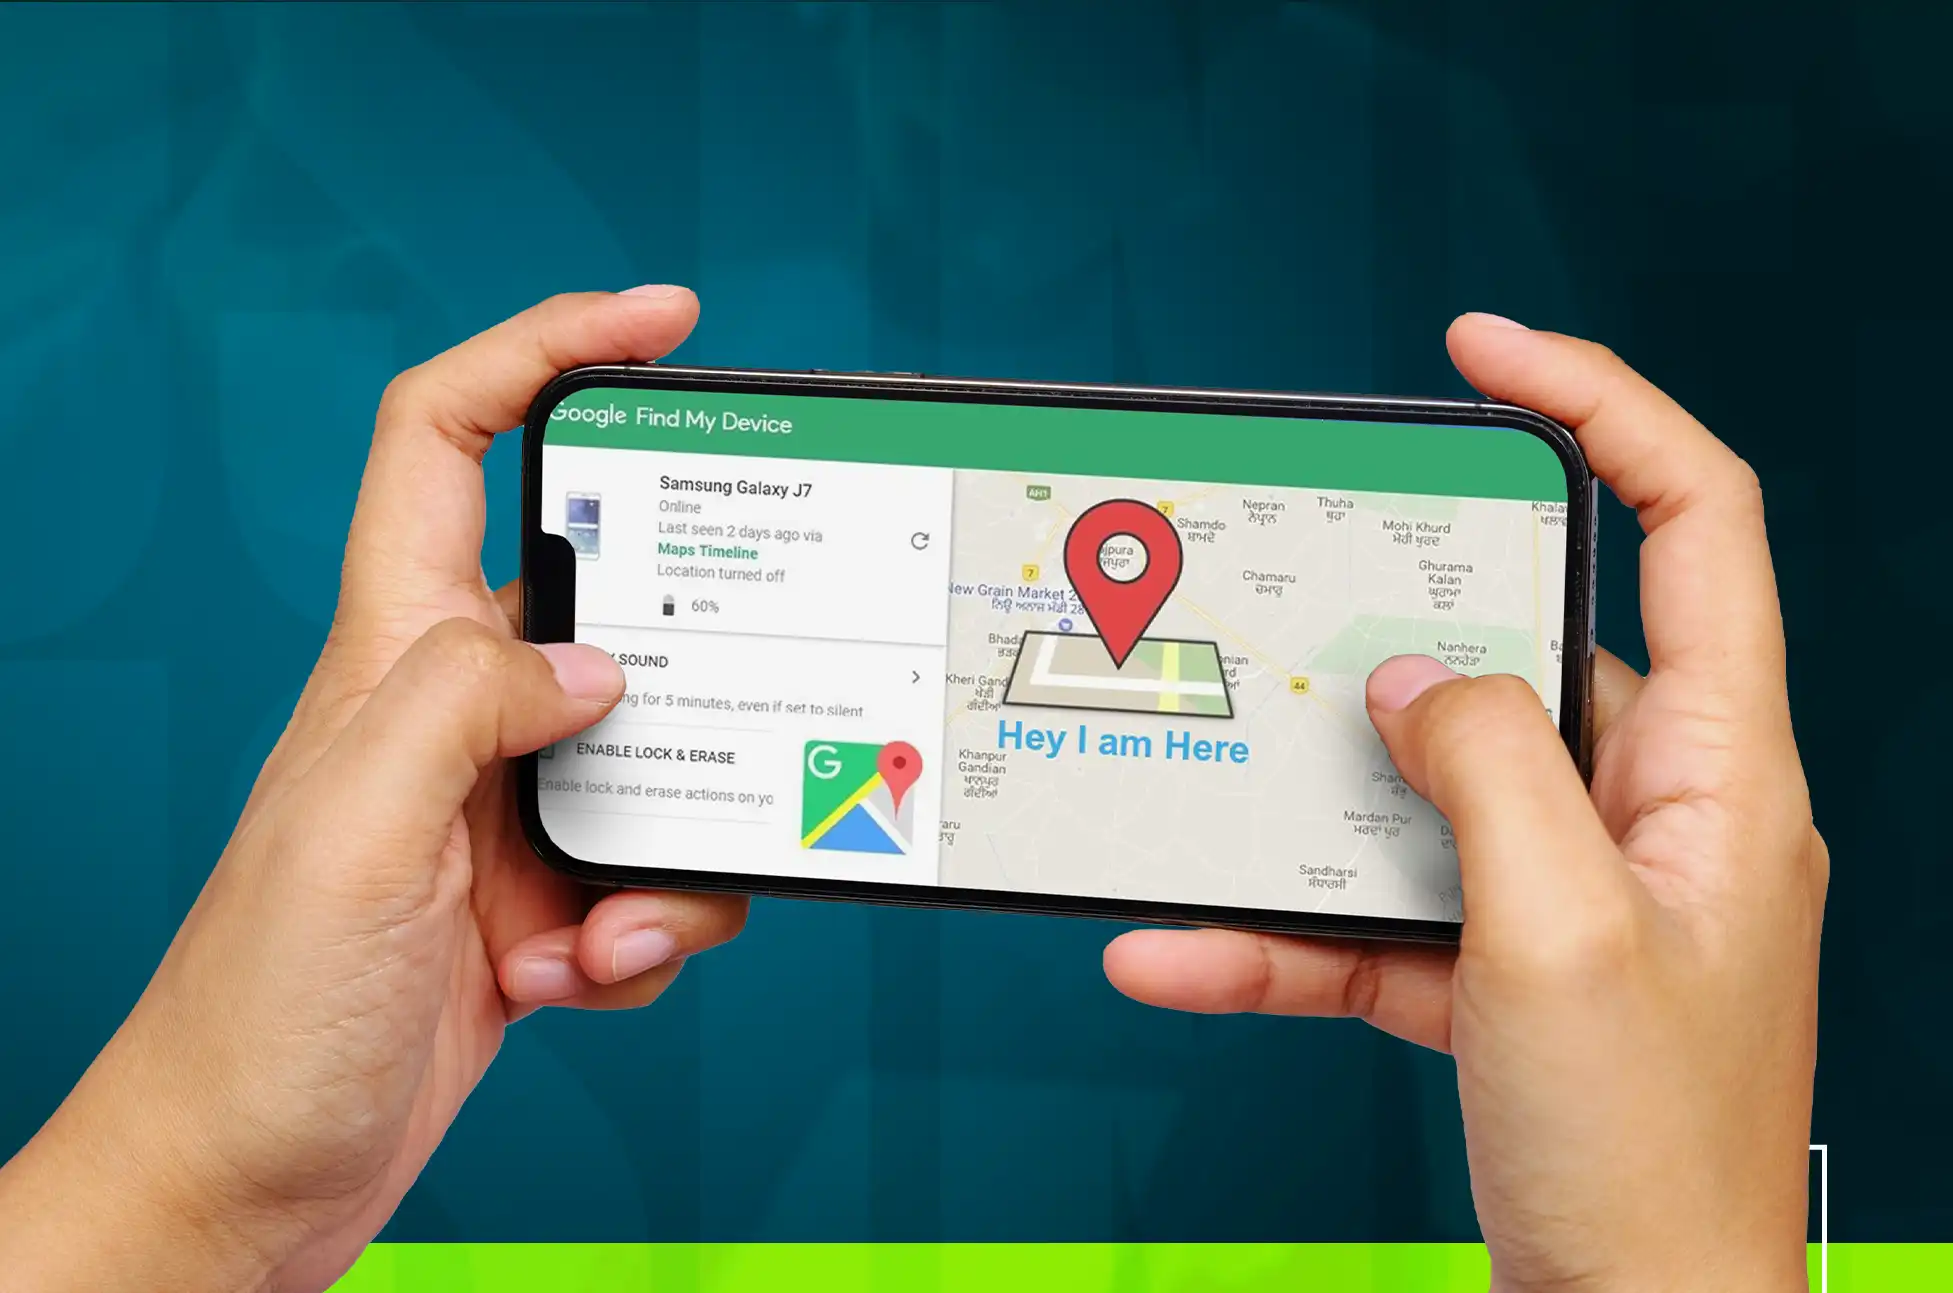
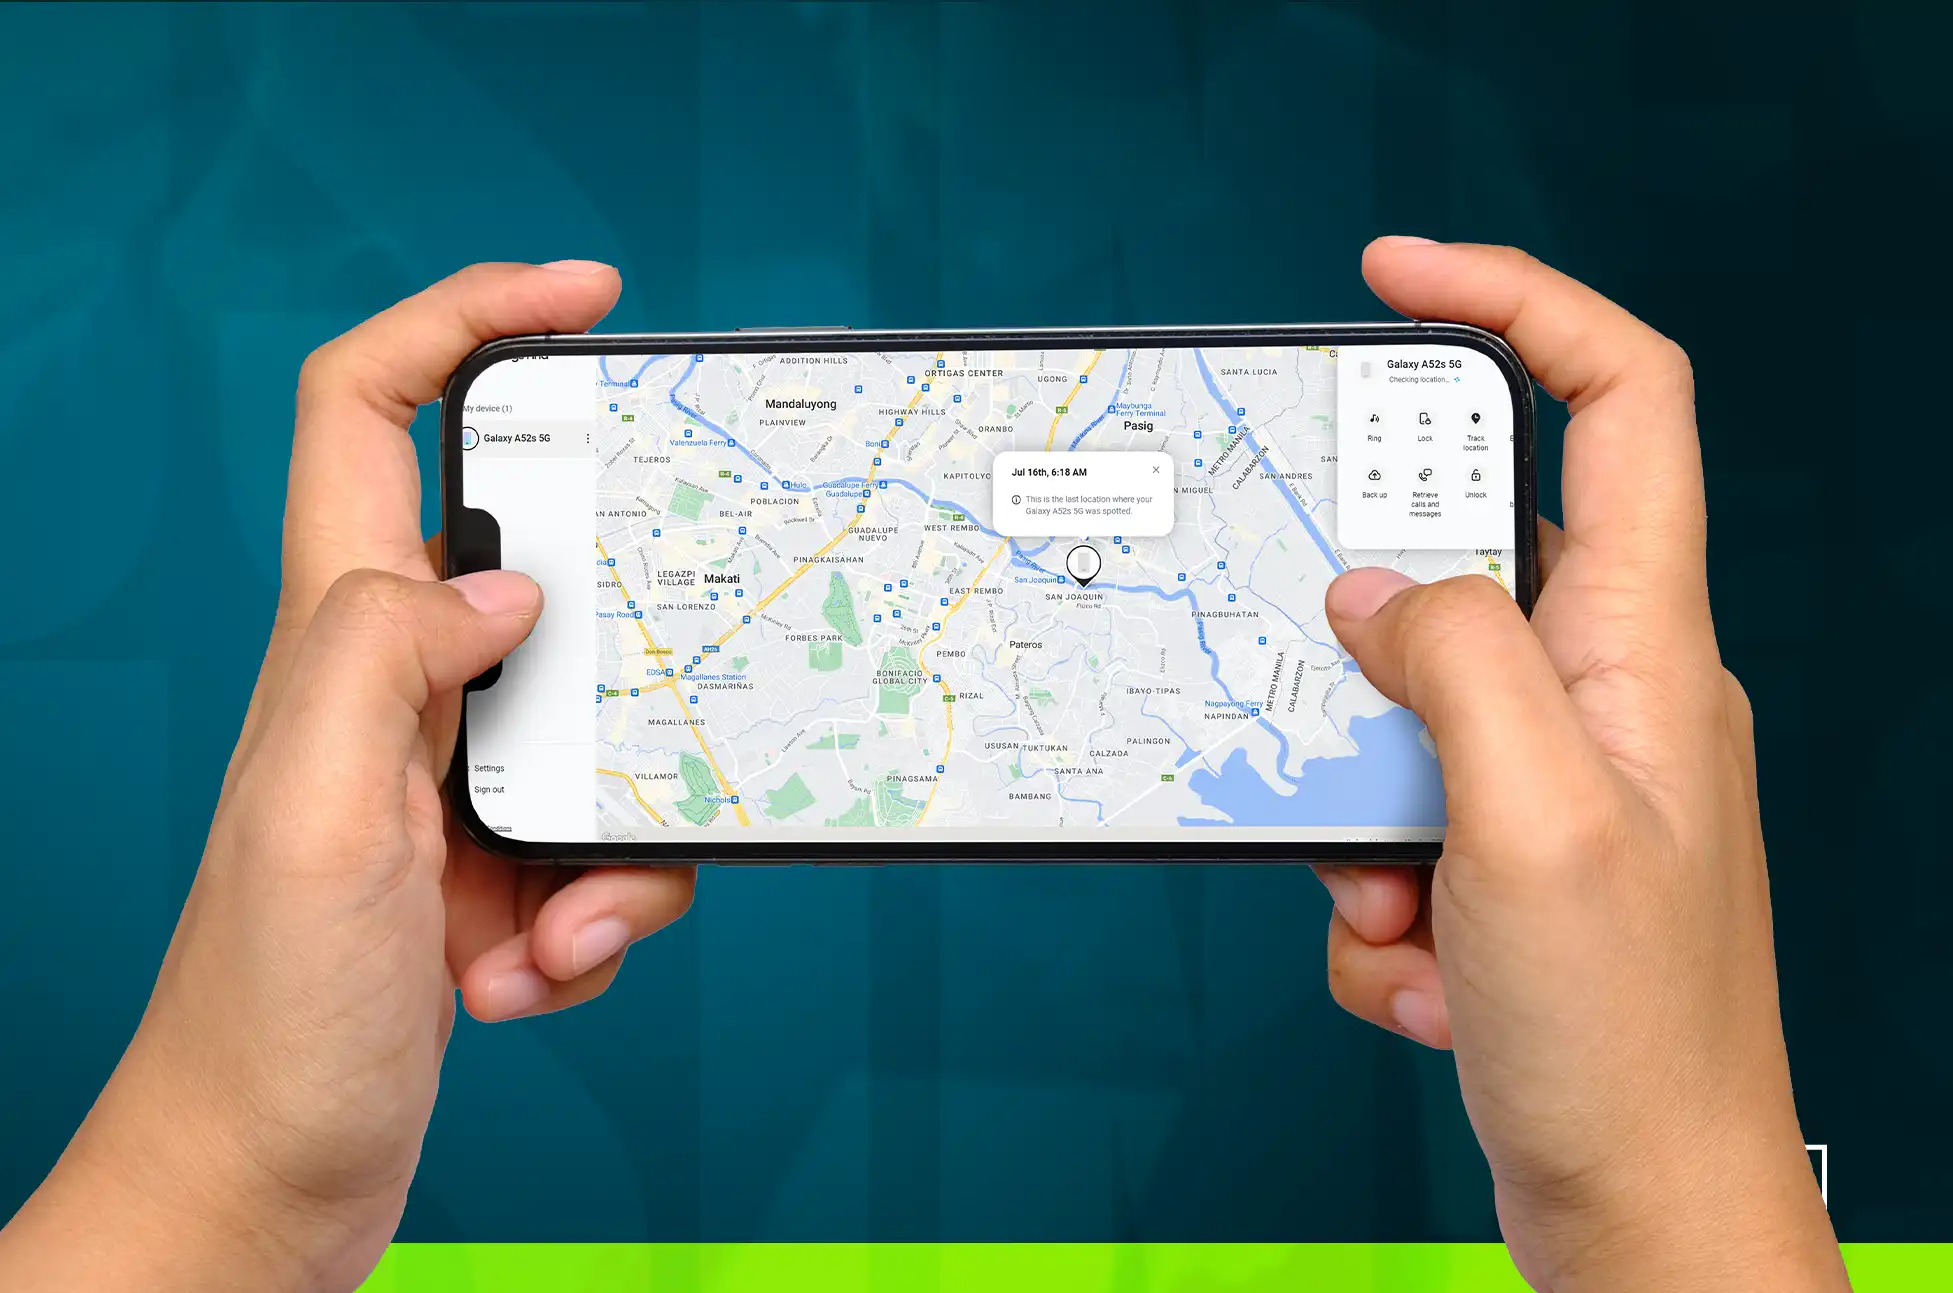
Google Find My Device
Phone go missing? Don’t fret! Both the Android and iOS versions of Find My Device (developed by Google) and Find My iPhone (developed by Apple) have your back. Log in to your account through a web browser on your computer, and then use the phone locator feature. You can release your tension by unlocking your phone from afar. It’s like having a personal angel watch over your mobile device.
Select Secure Device from the menu. Select Erase Device once you have successfully locked the phone. Your phone will be untraceable when you wipe it, but you can protect it with a new passcode. Once you’ve signed into your Google account again, you can restore your applications and photos.
Android Smart Lock
Sometimes all it takes to get your phone unlocked is to put it in your pocket or bring it indoors. Because a feature called Smart Lock has been standard on Android devices ever roughly version 5. The lock screen’s proximity condition allows the phone to remain unlocked in one of the following circumstances:
On your person (such as in your pocket or hand), for example.
At the location that you specify
In close proximity to another Android device that you specify
Smart Lock has a single flaw, which you’ve undoubtedly guessed: it cannot be activated after the phone has been locked. You must put it up in advance. Open the Settings app on your Android device and select Security & lock screen, followed by Smart Lock, if you wish to implement this feature. If a screen lock is not enabled, this control will not be displayed.
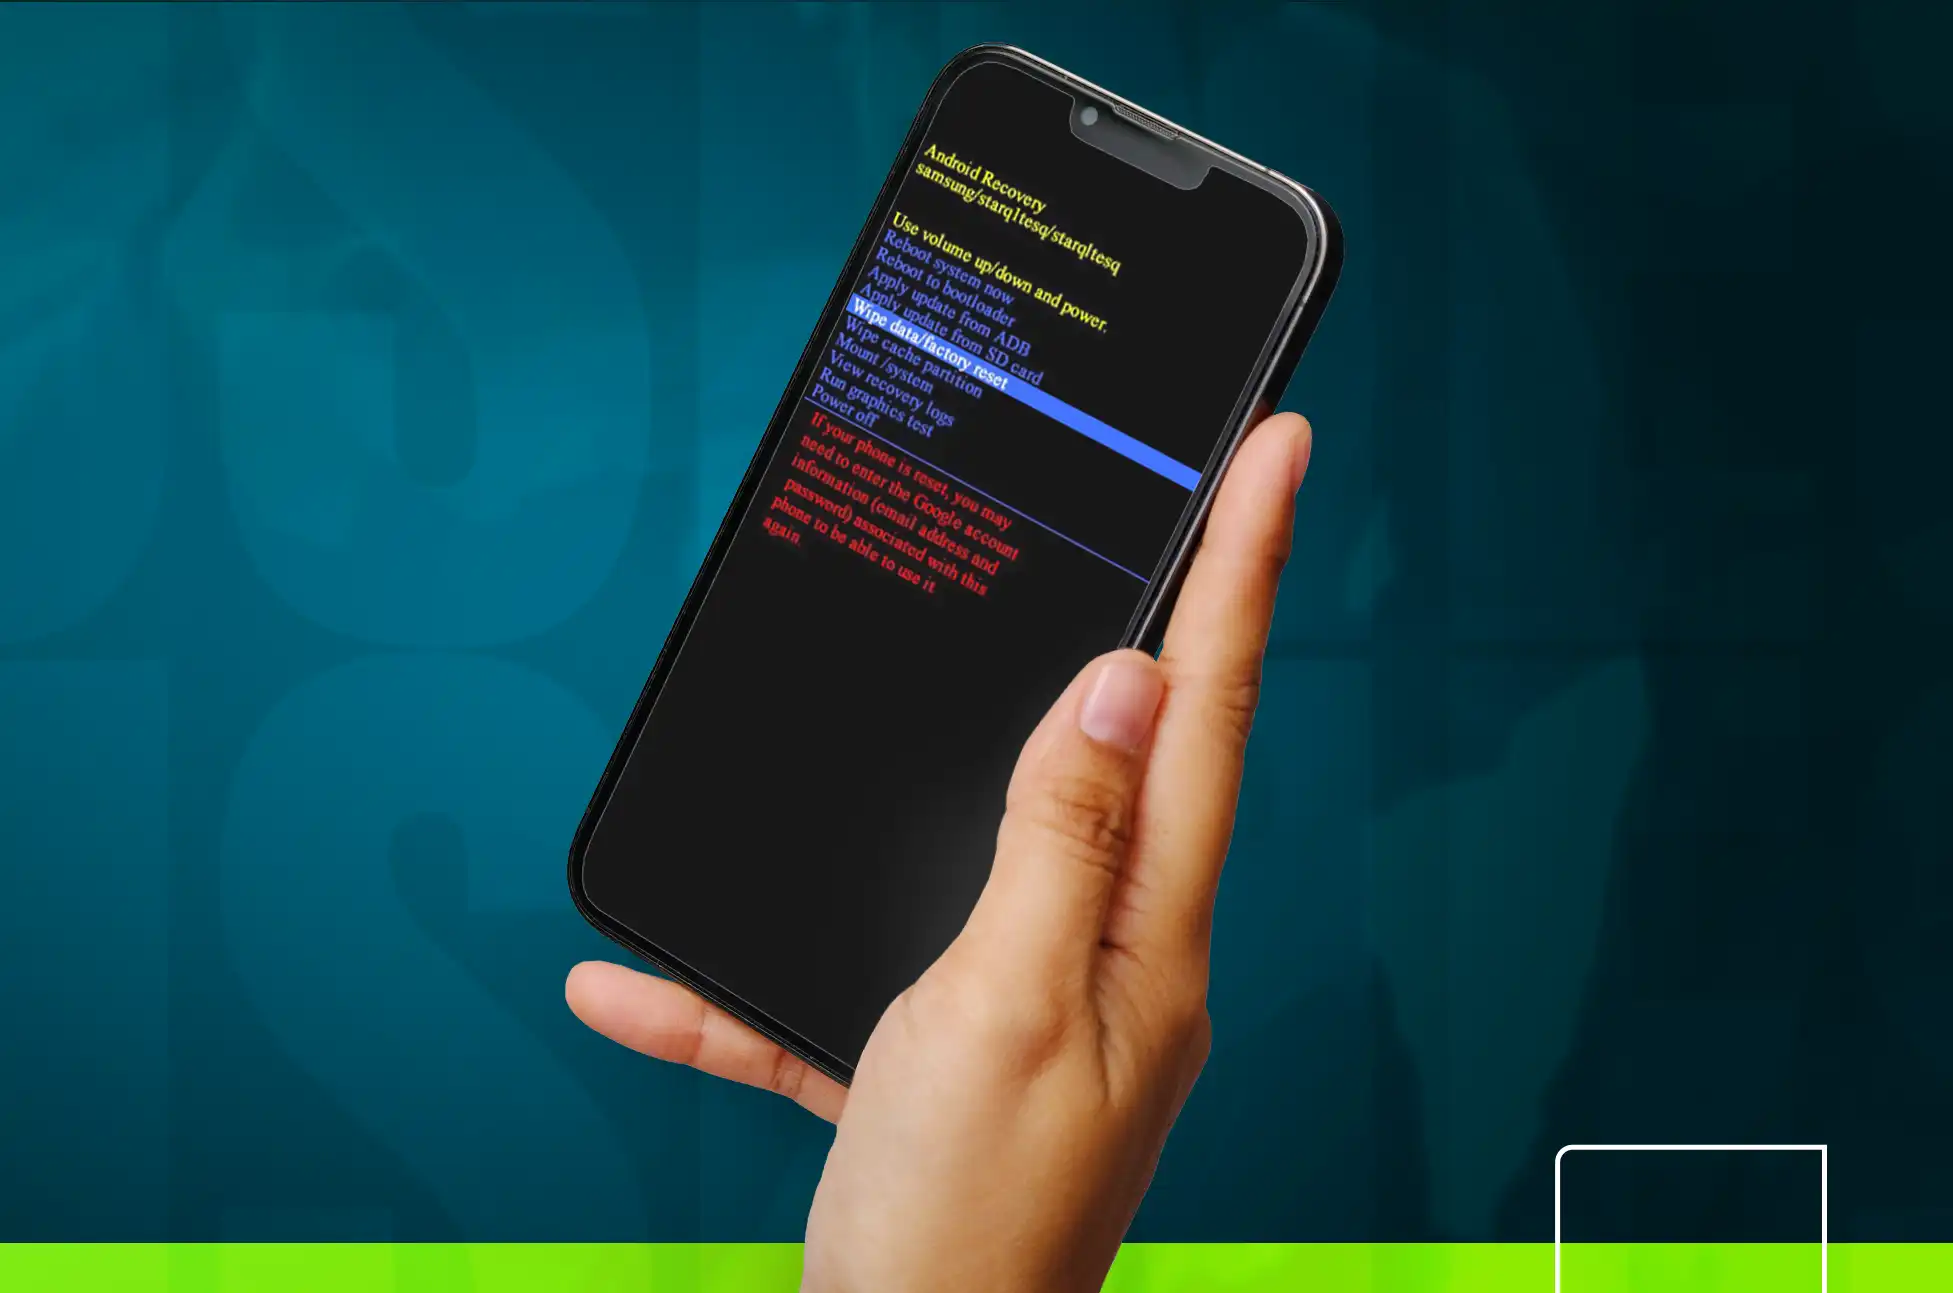
Factory Reset: The Last Resort:
Android phones can be reset from a locked state by simultaneously tapping and holding the power button and volume down button. Make sure your phone is connected to a charger during this procedure, as it requires a lot of power.
A menu should appear following the Android logo. Press the power button again after using the volume controls to navigate down to Recovery. You’ve reached the reset menu. Press the power button after using the volume controls to navigate to the Wipe data/factory reset option. You will be prompted to validate the reset; press the power button once more to do so. Resetting will begin. The phone should be turned off when the task is complete. Turn the phone back on and reinstall your apps or download your backup from Google, if you have one.
Some mobile devices have a tangible home button. Press the home button in addition to the power and volume up buttons at the outset of the process if your phone has this configuration.
How to unlock phone without password ( Samsung )
About 25% of all mobile phones sold today are Samsung products. You can see that Samsung has placed its own stamp on certain parts of Android if you own a Samsung phone and compare it to the pure Android experience offered by the Pixel. Because of this, you may find some duplicate software or slightly altered settings menus. Samsung’s SmartThings Find is similar to Google’s Find My Device.
To access the site, you must first sign in with your Samsung account. When you do, a map and list of all of your Samsung devices that are on, connected to Wi-Fi or cellular, and have Remote Unlock enabled will be displayed on the left. When you click on the locked device, a menu will appear on the right. The Unlock option is available. Just click it and say yes when prompted. In just a few seconds, your phone will be free of its lock. Remote Unlock, like Android Smart Lock, requires setup before it can be used.
Conclusion
There has never been a time when bypassing the need for a password on a mobile device was simpler or more fun. The options are practically limitless, ranging from the charmingly futuristic appeal of the personalized ease of Smart Lock to the powerful remote capabilities of Find My Device or Find My iPhone. Always put the safety and confidentiality of your phone first when using these methods, and don’t forget to act properly.
All products, and company names, logos, and service marks (collectively the "Trademarks") displayed are registered® and/or unregistered
trademarks™ of their respective owners.
The authors of this web site are not sponsored by or affiliated with any of the third-party trade mark or third-party registered trade mark owners,
and make no representations about them, their owners, their products or services.
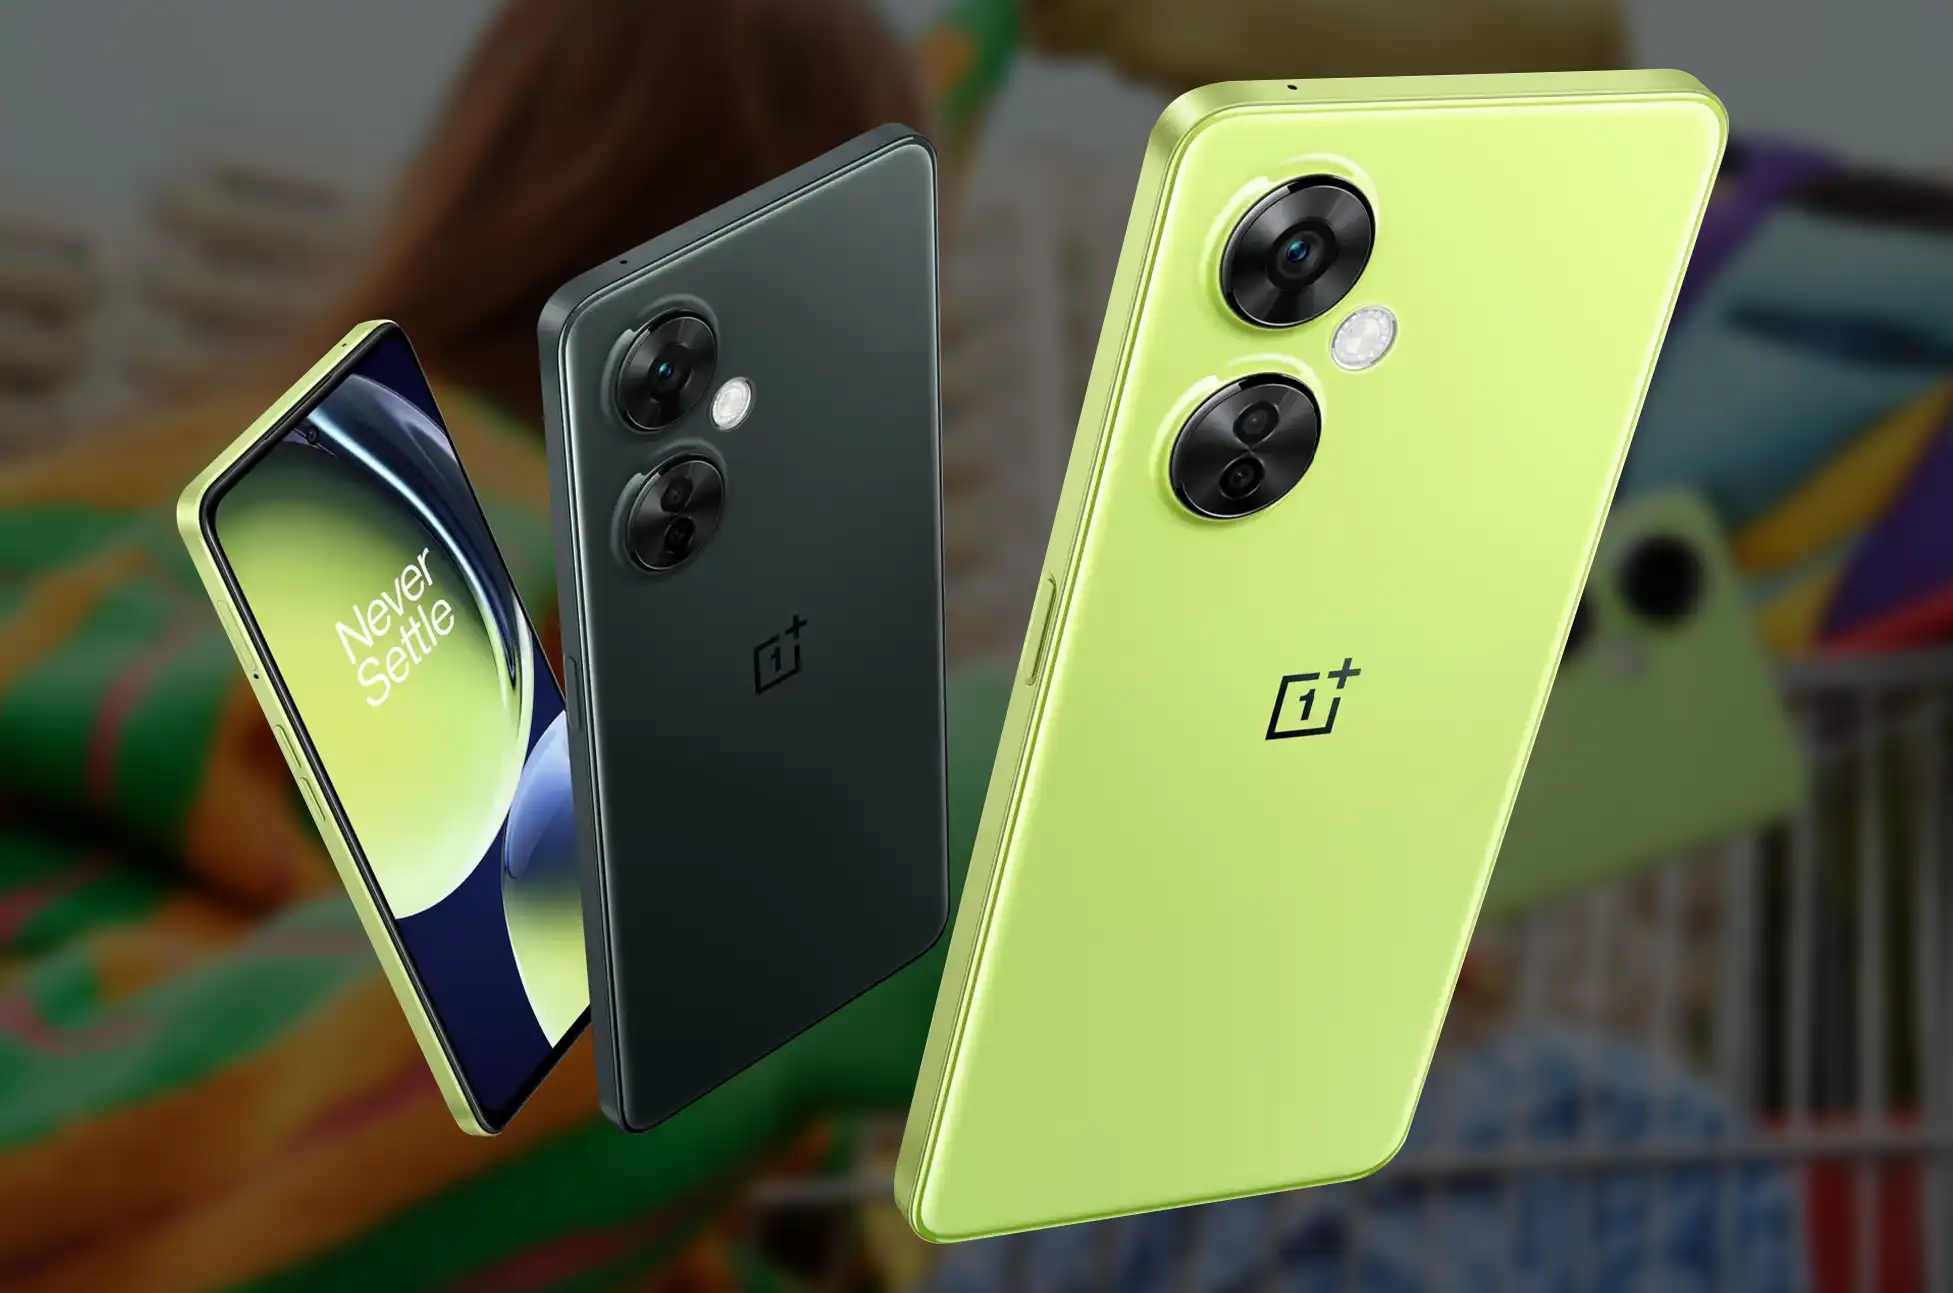
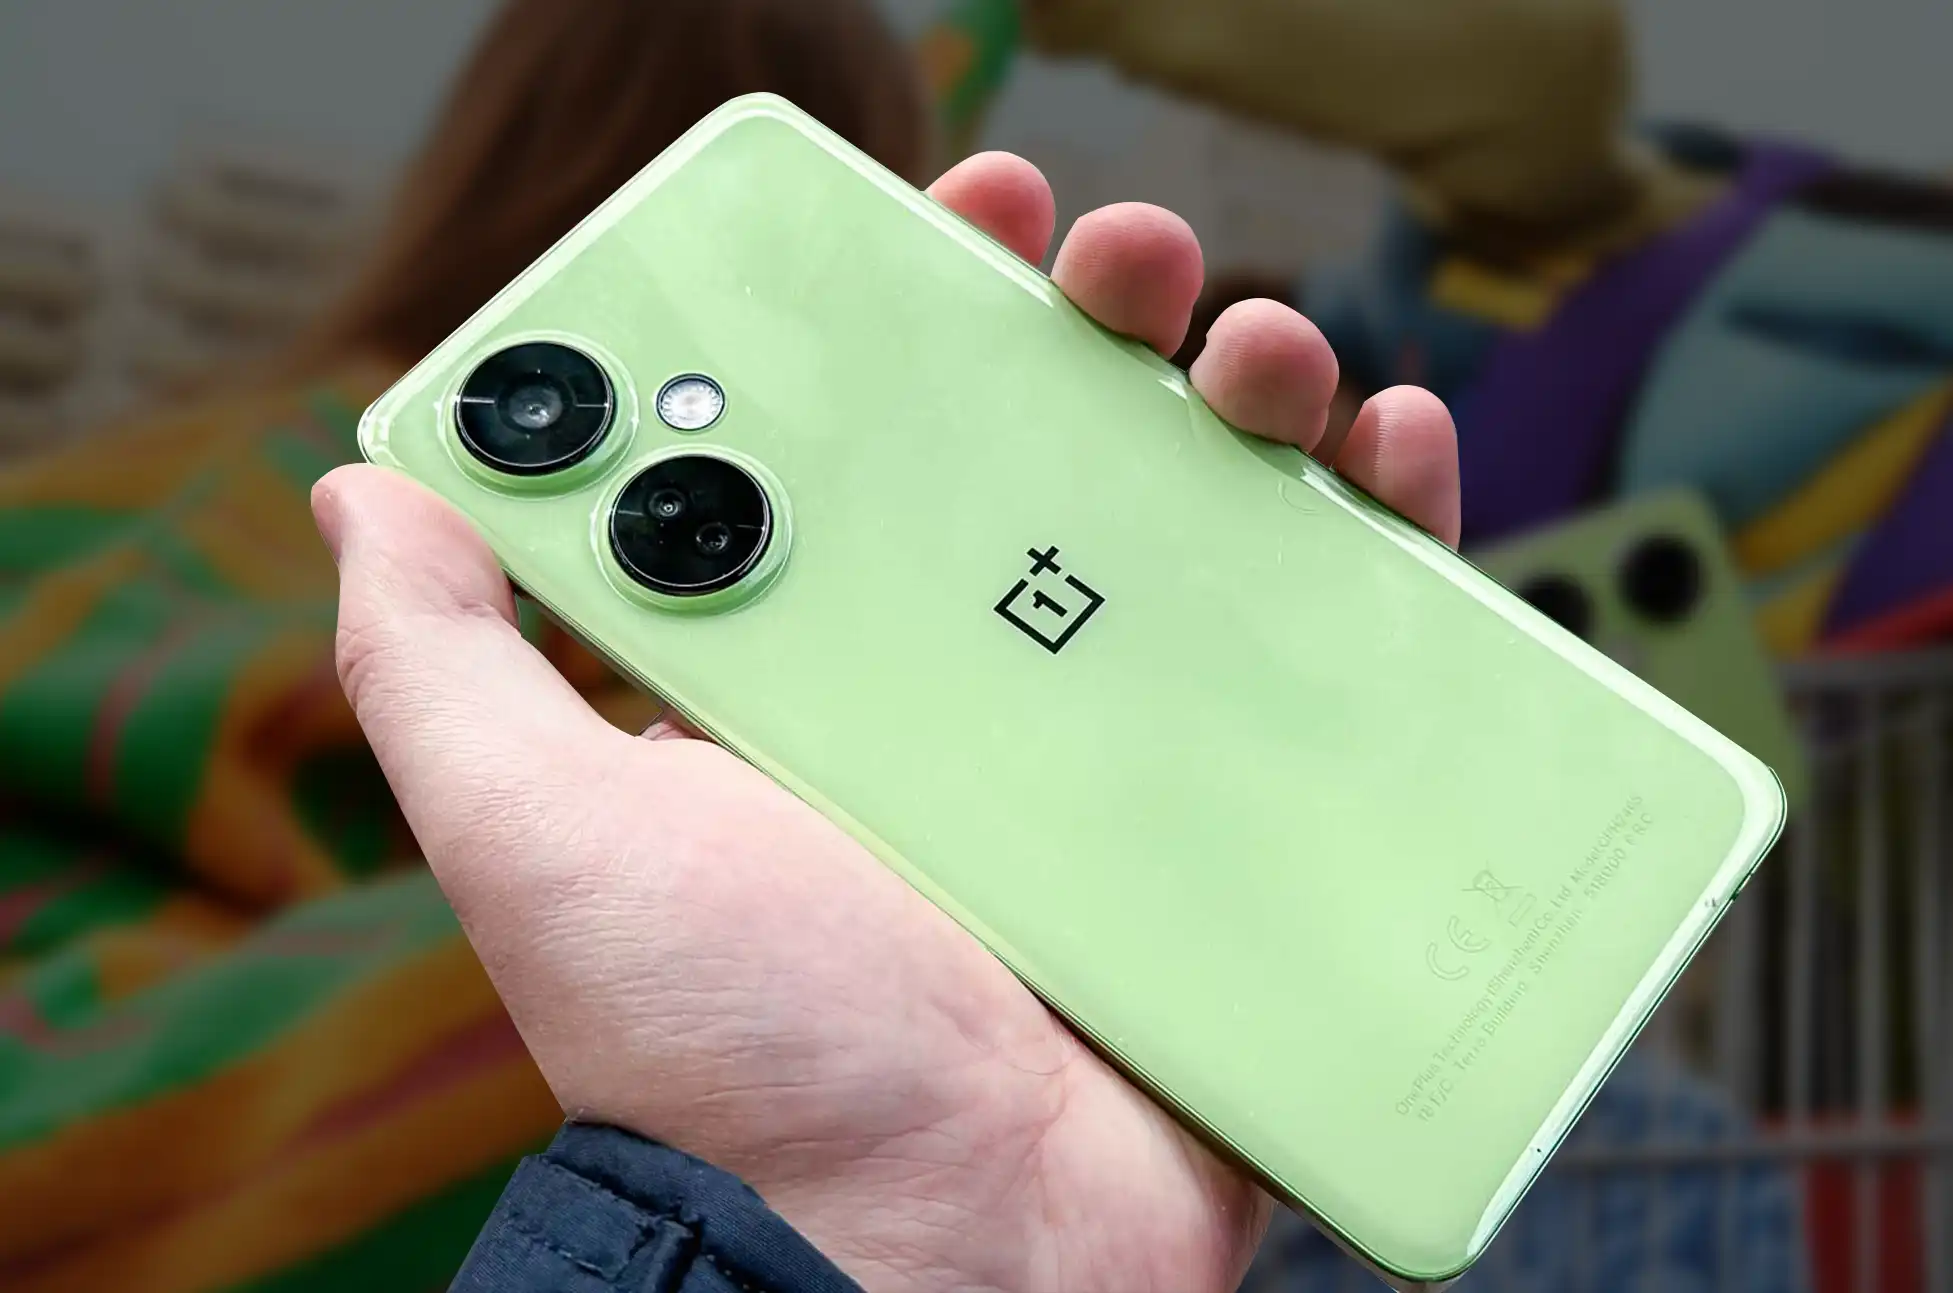
Are you ready to maximize the performance of your OnePlus Nord CE 3 smartphone? Here on the blog, we’ll show you how to unlock your SIM card so you can use it with any network you like. We’ve laid out a detailed guide on how to unlock your OnePlus Nord CE 3 so you may use it with any network provider you like.
Confirm your OnePlus Nord CE 3 Compatibility
If you own a OnePlus Nord CE 3, you should double-check its SIM-unlocking compatibility before continuing. Typically, unlocked smartphones are compatible with both GSM and some CDMA service providers. If you want to make sure your existing carrier is compatible, you should ask them or OnePlus’s support team.
Why should I SIM Unlock my OnePlus?
A SIM unlocked phone grants you access to a number of additional features that enhance your overall mobile experience. Here’s a list of perks that accompany owning a SIM unlocked device:
Freedom to Choose Your Network: A SIM-unlocked OnePlus Nord CE 3 enables the use of alternative network carriers and the freedom to transfer between them. You are not restricted to a single carrier and have the freedom to choose a network with superior coverage, pricing, or services based on your preferences and requirements.
Hassle-Free International Travels: A SIM-unlocked device allows you to use local SIM cards from international carriers if you are a frequent traveler or intend to go abroad. This allows you to utilize local calling, messaging, and data plans, thereby avoiding costly roaming fees.
Cost Savings: With an unlocked OnePlus Nord CE 3, you can search for the best rates and offers from a number of different carriers. You have the option to transfer to a carrier with more affordable plans, thereby saving money on monthly bills and data bundles.
Increased Resale Value: In general, SIM-unlocked devices are more desirable on the secondary market. If you decide to sell or upgrade your OnePlus Nord CE 3 in the future, having a SIM-unlocked device can potentially increase its resale value and attract additional purchasers.
Dual-SIM Capability: Some models of the OnePlus support dual-SIM functionality. You can take advantage of this feature with a SIM-unlocked device by using two separate SIM cards simultaneously. This is useful for separating personal and professional contacts, managing various network services, or using a local SIM card while maintaining service with your home carrier.
Gather Essential Information
Make sure you have the necessary data on hand before attempting to SIM unlock your OnePlus:
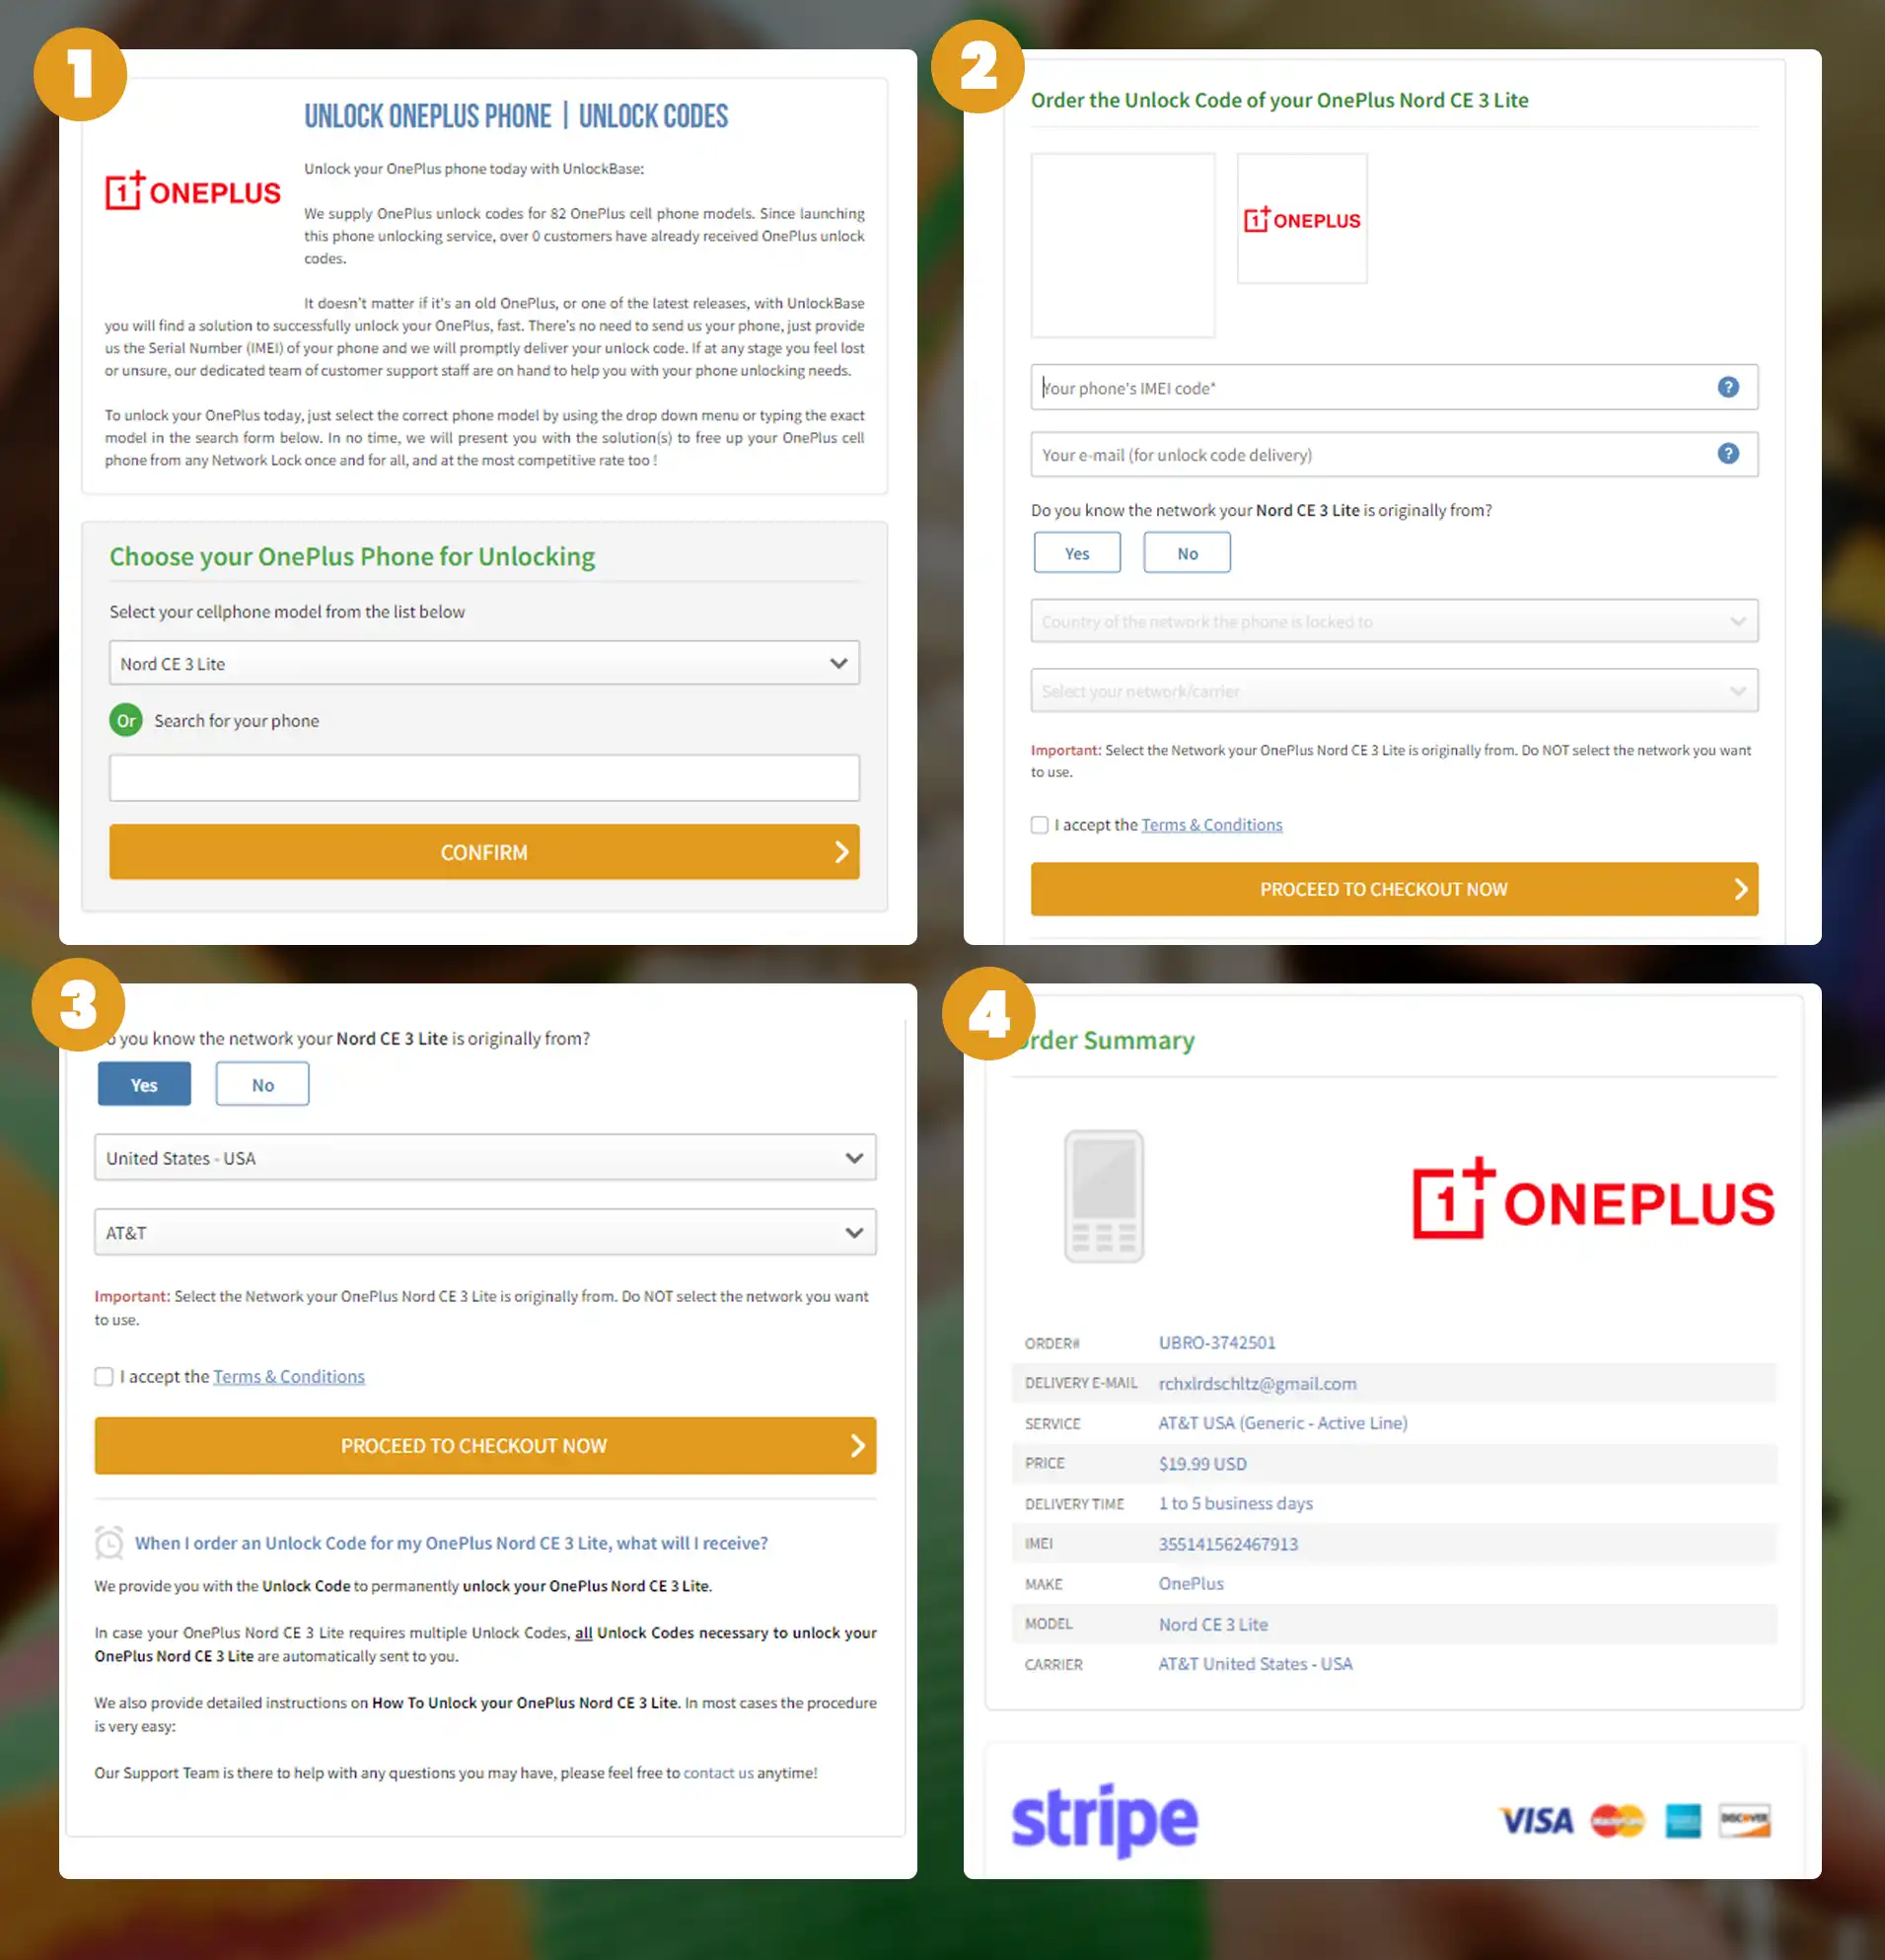
IMEI Number: To find out your phone’s unique 15-digit IMEI number, dial *#06# on your phone. Take note of it; you’ll need it for the unlocking procedure.
SIM Unlock Code: Remember to write down the SIM Unlock Code that will be sent to you by UnlockBase; you’ll need it in order to unlock your phone. UnlockBase is the most dependable tool available for unlocking your mobile device.
Select or search the manufacturer of your phone that you want to get unlocked
Select your cell phone model from the list after getting the right manufacturer for your phone
In the first part of the article, we asked you to write down your IMEI Number, Insert your IMEI on the website
Select your phone’s carrier.
Proceed to Check out and give your Account Information to Confirm your Payment. Once you complete the payment, we will begin processing your order. You can expect to receive an email, confirming the successful unlocking of your phone.
We’ll then send you an email to inform you that your phone is unlocked
If you have received the email, proceed to the procedures that are listed below:
Remove the original SIM card from your phone.
Insert an unaccepted SIM card.
You should now see a box to enter the unlock code.
Congratulations! Your OnePlus Nord CE 3 has been effectively unlocked, liberating it from carrier restrictions. You are now free to select the network that best meets your preferences and requirements. Enjoy the flexibility, convenience, and expanded connectivity options a SIM-unlocked device provides. If you encounter any problems during the unlocking procedure, be sure to contact your carrier or OnePlus support. Unlock the potential of your phone and embrace an unrestricted mobile experience.
All products, and company names, logos, and service marks (collectively the "Trademarks") displayed are registered® and/or unregistered
trademarks™ of their respective owners.
The authors of this web site are not sponsored by or affiliated with any of the third-party trade mark or third-party registered trade mark owners,
and make no representations about them, their owners, their products or services.