Android 15, the upcoming iteration of the Android operating system, is currently in the testing phase with the release of Android 15 Developer Preview 1 for Pixel devices. While intended for developer use, this preview gives us insight into the new features and improvements to expect in Android 15.
Android 15 Features: Name and Release Date
Android 15, internally known as Vanilla Ice Cream, follows Google’s decision to move away from dessert codenames. The stable release is expected around June-July 2024, possibly coinciding with the launch of the Pixel 9 series.
Android 15 Features: New UI Changes and Features
Partial Screen Sharing: Users can now share or record just an app window, a feature first enabled in Android 14 QPR 2 on Pixel devices but now available across the wider Android platform.
Notification Cooldown: A new function in the Notifications section lowers the volume of successive notifications from the same app, preventing users from being overwhelmed.
In-App Camera Controls: Android 15 adds new extensions for more control over the camera hardware on supported devices. Features include low-light enhancements and advanced flash strength adjustments.
Health Connect Updates: Updates to the Health Connect by Android platform add support for new data types across fitness, nutrition, and more.
Android 15 Features: Performance Improvements
Android Dynamic Performance Framework (ADPF): Enhancements to ADPF allow games and performance-intensive apps to interact more directly with device power and thermal systems. New capabilities include a power efficiency mode, improved CPU and GPU frequency adjustments, and new thermal headroom thresholds.
Privacy and Security Features: Privacy Sandbox on Android: Android 15 incorporates the latest version of Privacy Sandbox, introducing more private advertising solutions that limit the sharing of user data with third parties.
File Integrity: Android 15 introduces the FileIntegrityManager API, using “fs-verity” to protect files from tampering or corruption.
Leaked and Upcoming Features
Lockscreen Widgets: Android could bring back lockscreen widgets, a feature supported in Android 4.2 Jelly Bean but removed in Android 5.0 Lollipop.
Battery Health Percentage: Android 15 might show the estimated percentage of charge your phone’s battery can currently hold compared to when it was new.
App Archiving through Settings: Google could integrate a feature that lets users “offload apps” to reclaim storage space, similar to iOS’s feature.
Voice Activation for Digital Assistants: Android 15 could introduce a feature allowing apps like ChatGPT and Amazon Alexa to use wake words, even with the screen off.
Auracast Focus: Improvements to audio sharing to nearby Bluetooth LE Audio streams.
Bluetooth Popup Dialog: Enhancements to Bluetooth management, allowing users to toggle individual connections.
Private Space: A feature similar to Samsung’s Secure Folder for hiding apps and data.
App Pairs: Saving split-screen app combinations for quick access.
Edge-to-Edge Apps by Default: Encouraging developers to use the entire screen for their apps.
Easy Pre-set Mode: Optimizing the Android experience for improved readability and ease of navigation, particularly useful for elderly or less tech-savvy users.
These features, along with others expected to be announced, make Android 15 a significant update to the Android platform, promising improved performance, privacy, and user experience.
Conclusion
Android 15 is shaping up to be a significant update with a range of new features and improvements. From UI changes like partial screen sharing to performance enhancements in the Android Dynamic Performance Framework, the update promises a better user experience. Privacy and security are also getting a boost with the Privacy Sandbox and File IntegrityManager API. With leaked features like lockscreen widgets and battery health percentage tracking, Android 15 looks to offer a compelling package for users and developers alike, setting a high standard for the platform’s future.
All products, and company names, logos, and service marks (collectively the "Trademarks") displayed are registered® and/or unregistered
trademarks™ of their respective owners.
The authors of this web site are not sponsored by or affiliated with any of the third-party trade mark or third-party registered trade mark owners,
and make no representations about them, their owners, their products or services.
Have you ever encountered an issue with your Android phone and wished you could easily solve it? This is where recovery mode comes into play. It’s a unique mode on your Android phone that allows you to troubleshoot issues, upgrade software, and even reset your phone to factory settings.
Android recovery mode is a function available on all Android phones, including the most affordable ones. You can do a simple factory reset, reboot into the bootloader to utilize Fastboot instructions, or install system updates from your local on-device storage when you boot into this mode. In a pinch, you can also perform a quick graphics test to ensure your device’s display functions properly, which can help you double-check your screen. This guide explains how to enter Android recovery mode and its different capabilities.
How to Enter Recovery Mode on Android
Accessing the main menu of Android recovery mode is straightforward once you’re familiar with the steps. Keep in mind that the exact procedure can vary a bit based on the brand of your device, but it’s mostly similar across different models. The most effective way to reach the Android recovery menu is by switching off your device and then holding down a specific combination of buttons for an extended period.
To enter Android recovery mode, perform the following steps:
To start with your Android device turned on, press and hold the power button.
Choose the ‘Power off‘ option.
To enter the bootloader menu, often referred to as Fastboot Mode, simultaneously press and hold the volume down and power buttons. The simplest way to do this is to first long-press the volume down button and then press and hold the power button while still holding the volume down. For Samsung Galaxy users, pressing and holding the volume up and power buttons will lead you directly to the recovery menu’s main screen.
Use the volume buttons to move through the menu and highlight ‘Recovery Mode’.
Press the power button to select this option. You’ll see a ‘No command’ message and an Android icon with a red exclamation mark, which indicates you’re in the right place.
Briefly hold the power button and quickly press the volume up button.
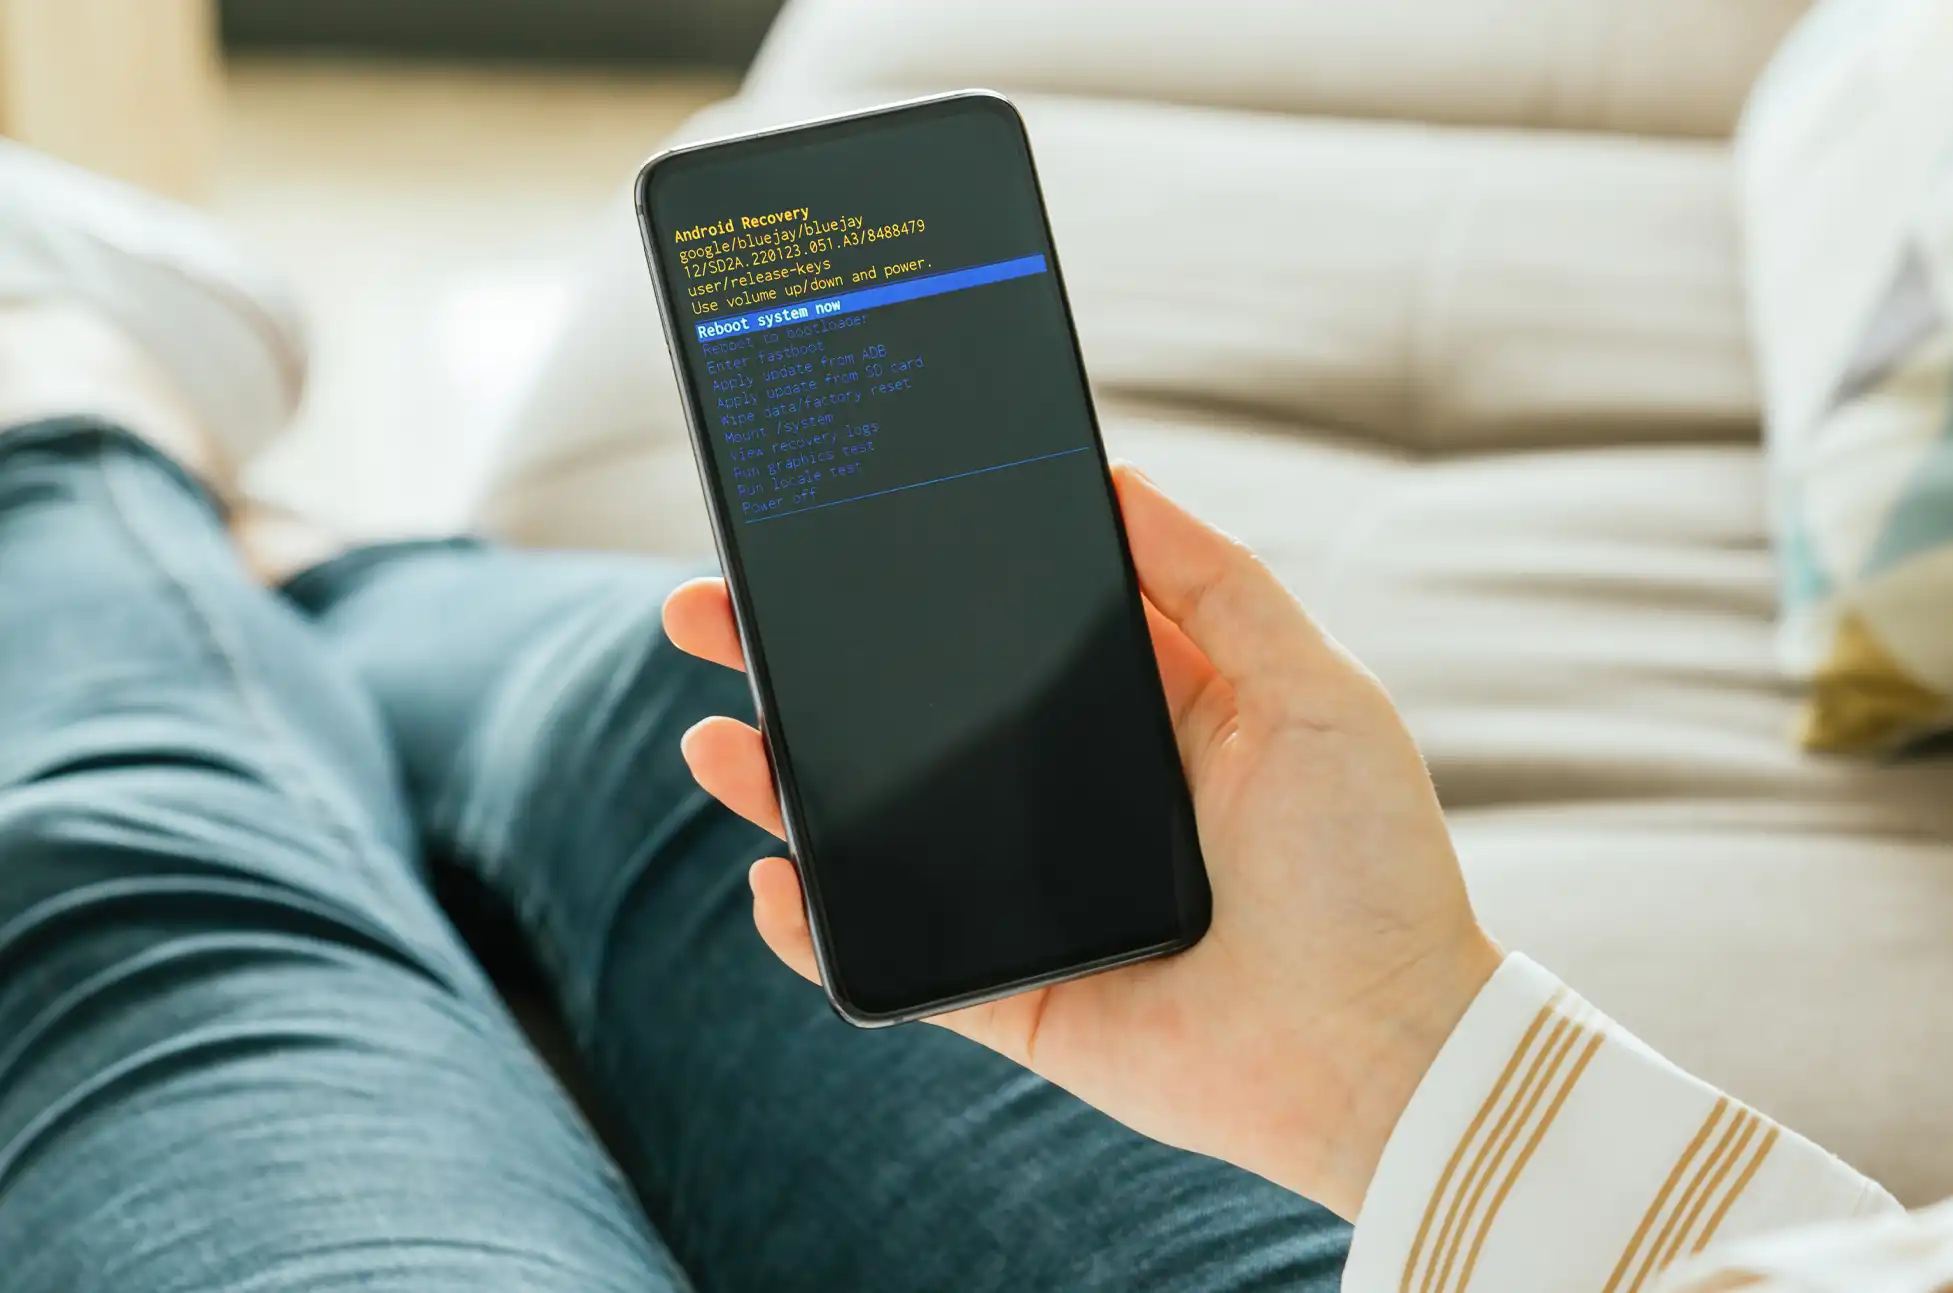
You’re now in the Android recovery menu screen.
To navigate this menu, use the volume keys and select your desired action with the power button.
How to enter recovery mode on android : Features
Now that you’re familiar with how to enter Android recovery mode screen, let’s explore what you can do there. Most features in the Android recovery mode are common across different brands, so you’ll likely find them on any device. However, some specific devices, like Samsung Galaxy phones, might offer additional options, such as ‘Repair apps’. Below, we’ll give you a quick rundown of each feature, so you know what they’re for and how they can help.
How to enter recovery mode on android: Reboot System
This option is for when you’re done in the recovery menu or if you entered it by accident and want to exit. Choosing this will reboot your device normally, and you’ll quickly find yourself back at the lock screen, just like a regular startup.
Enter Fastboot
This option lets you access the fastbootd menu, a special interface for installing custom firmware or ROMs without needing a custom recovery. It’s not something you’ll use often, as this menu typically appears on its own when you’re installing system images through the main bootloader menu. When you select this feature, you’ll have options to restart your device normally, go back to the recovery screen, reboot into the bootloader, or turn off your device again.
This feature comes in handy when your device’s manufacturer allows you to download firmware updates directly. It enables you to manually install these updates, skipping the standard system update process. For those familiar with ADB commands, using this method to sideload an OTA (Over-The-Air) or system update is both quick and easy.
Apply Update from SD Card
This option works like the ‘Apply update from ADB’ feature but allows you to install updates from the storage on your device itself. If you’re not at ease using ADB commands and your device manufacturer permits downloading system update files, this method is an excellent alternative for manually updating your device.
Factory Reset
This is a frequently used feature as it enables you to perform a complete factory reset on your device, similar to how you would do it from the Settings app. If your device isn’t booting into Android but you can get to the recovery menu, a factory reset might be the solution to revive it. Android system files can sometimes become corrupted during an update or in other situations. In cases like these, a factory reset is always an option to consider for restoring your device.
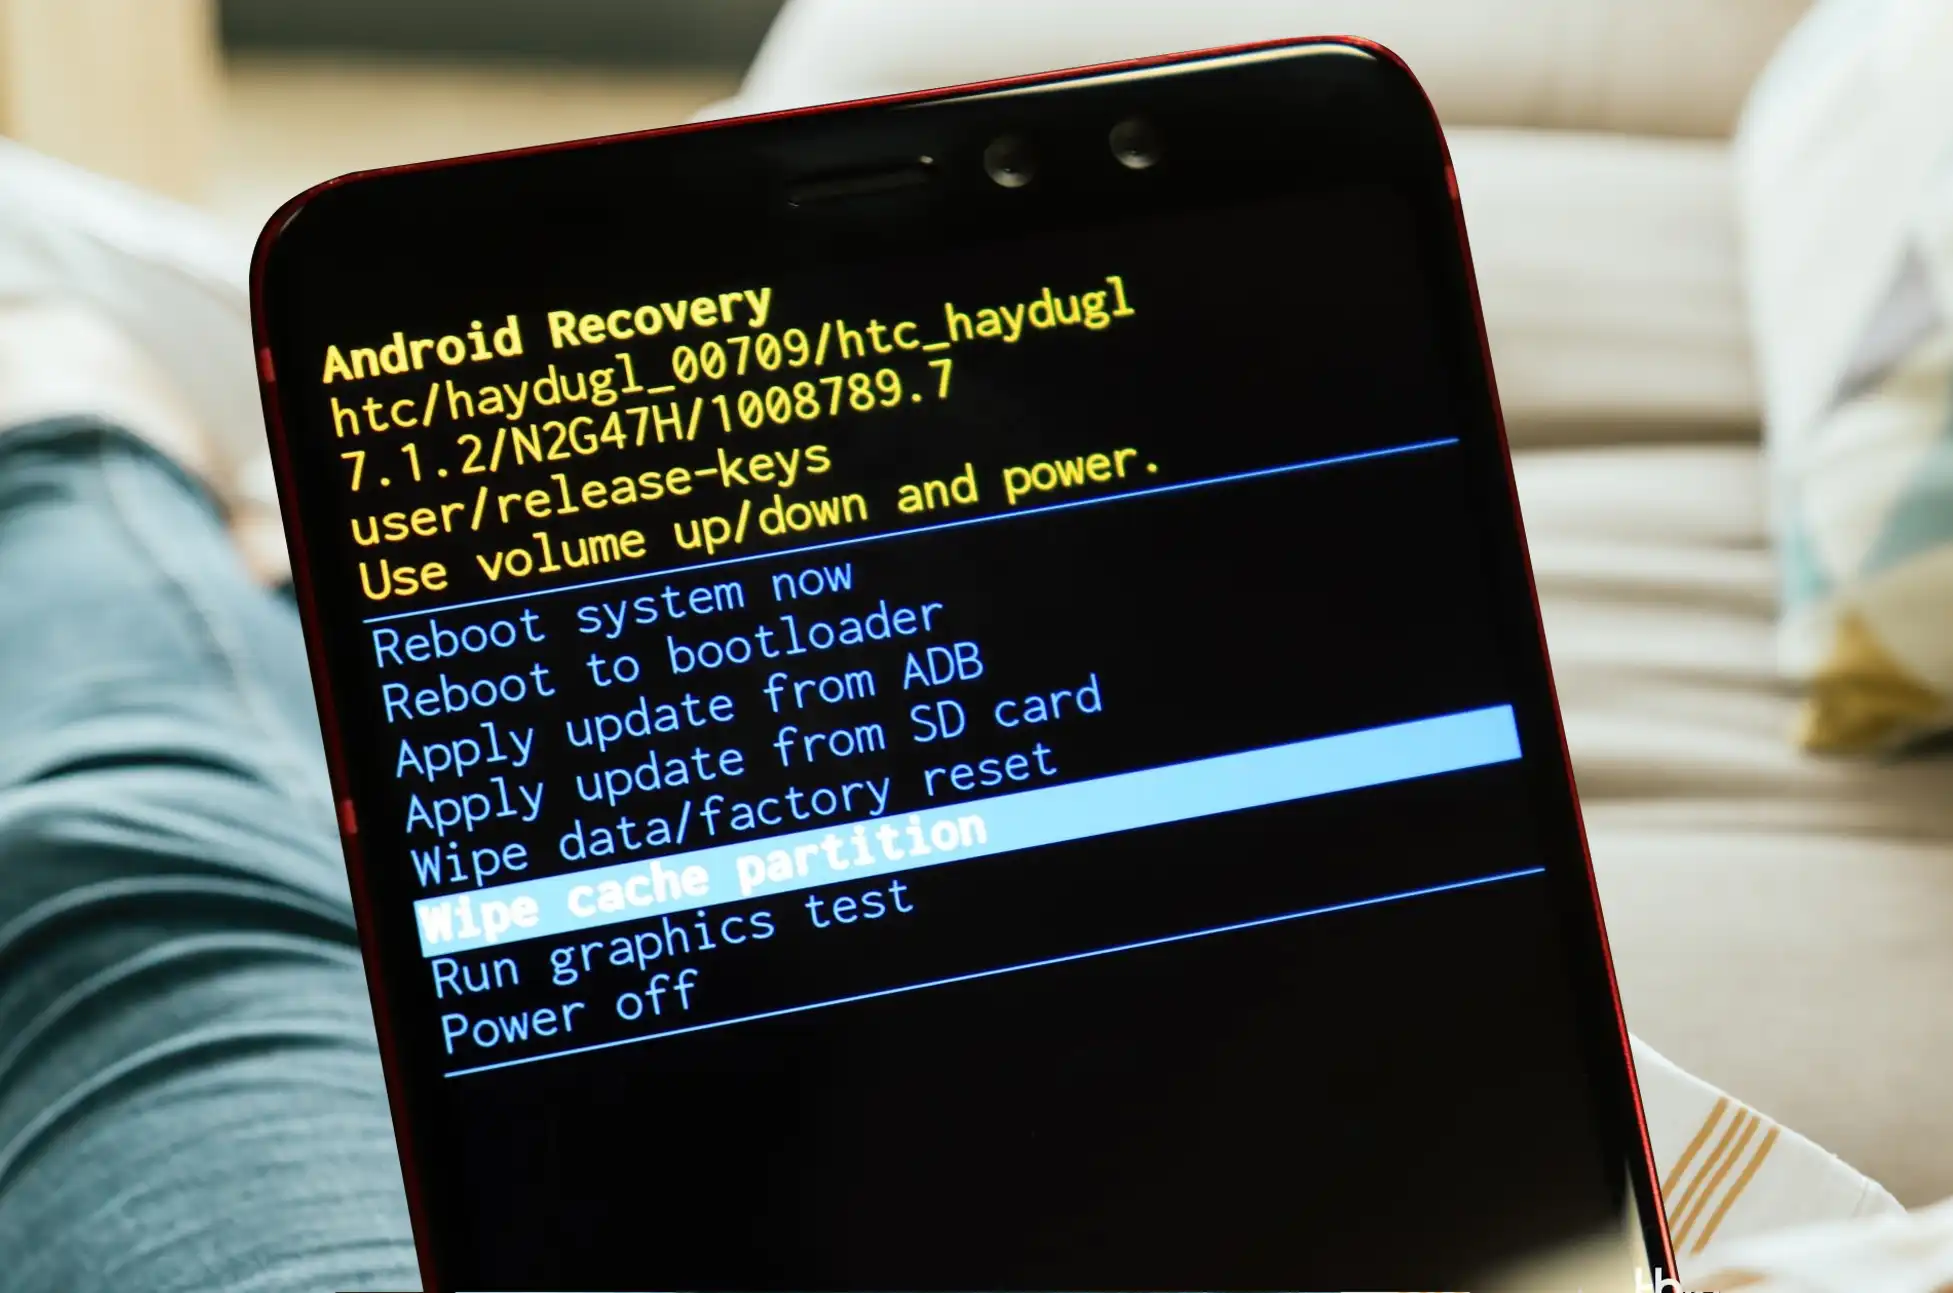
Wipe Cache Partition
This option, found on certain devices like Samsung Galaxy phones, lets you clear your system cache all at once. The system cache, which stores temporary files from your apps, can slow down your device, particularly if you have many apps and haven’t cleared the cache in a while. Choosing this option deletes the cache partition, giving your device a clean slate. This can often resolve issues with apps that you may have been experiencing.
View Recovery Logs
This feature comes in handy if you’ve spent some time in the recovery mode. It allows you to view a temporary log that records and timestamps the actions you’ve taken during the current recovery session. It’s particularly useful for keeping track of the steps you’ve already completed, especially if you need to recall earlier actions.
Run Graphics Test
This feature conducts a swift check to confirm that the graphics and display of your device are working correctly. It performs a series of visual tests related to recovery mode, which only take a few moments to finish. While it might appear as though it’s erasing your device data or installing an update, it’s actually not doing either of those things. It’s simply a quick test to ensure everything is functioning as it should visually.
Run Locale Test
This is another straightforward test available in recovery mode, designed to showcase the additional languages your device is capable of displaying. It acts as an extension to the ‘Run graphics test’ option. This feature enables you to view various default messages displayed in different languages, allowing you to check the language display capabilities of your device.
Repair Applications
This option is commonly available on many Samsung devices. It lets you reoptimize your apps, similar to what happens after a system update. This can be particularly useful if your apps are running slowly or causing other issues. By optimizing your apps through this method, you can often restore them to optimal performance. Additionally, it may resolve any problems you’re experiencing with your installed apps.
How to enter recovery mode on android: Conclusion
If your device isn’t starting up properly, or you need to access advanced options like ADB or Fastboot commands, the recovery mode feature in the Android operating system is your go-to solution. Using recovery mode to perform a factory reset can often revive a device that’s stuck in a boot loop, even when it seems irreparably damaged. For Samsung Galaxy users, the ‘Repair apps’ option is a great tool for maintaining optimal device performance. Regardless of why you need to enter recovery mode, it’s always there to assist you.
Armed with this understanding of Android’s recovery mode and its capabilities, it’s a good idea to learn how to back up your Android phone. This ensures your data remains secure, especially before carrying out a factory reset. We’ve got you covered with essential data recovery techniques, so you don’t risk losing your valuable information.
All products, and company names, logos, and service marks (collectively the "Trademarks") displayed are registered® and/or unregistered
trademarks™ of their respective owners.
The authors of this web site are not sponsored by or affiliated with any of the third-party trade mark or third-party registered trade mark owners,
and make no representations about them, their owners, their products or services.
Have you ever been in a situation where you needed to forward your calls to another number or simply wanted to set up call forwarding for convenience? Whether you’re traveling, switching phones, or just need your calls to go to a different location, this guide is for you. Here’s how you can redirect your calls with the major US carriers.
How to Forward Your Number: Verizon
Using your phone
Open your phone’s dialer app
Dial *72, then enter the 10-digit mobile number to which you want your calls rerouted
Enter the phone number
When you activate call forwarding, Verizon will send you a successful message
Note: You may try call forwarding by calling your number from another phone. The call should be forwarded to the number you specified.
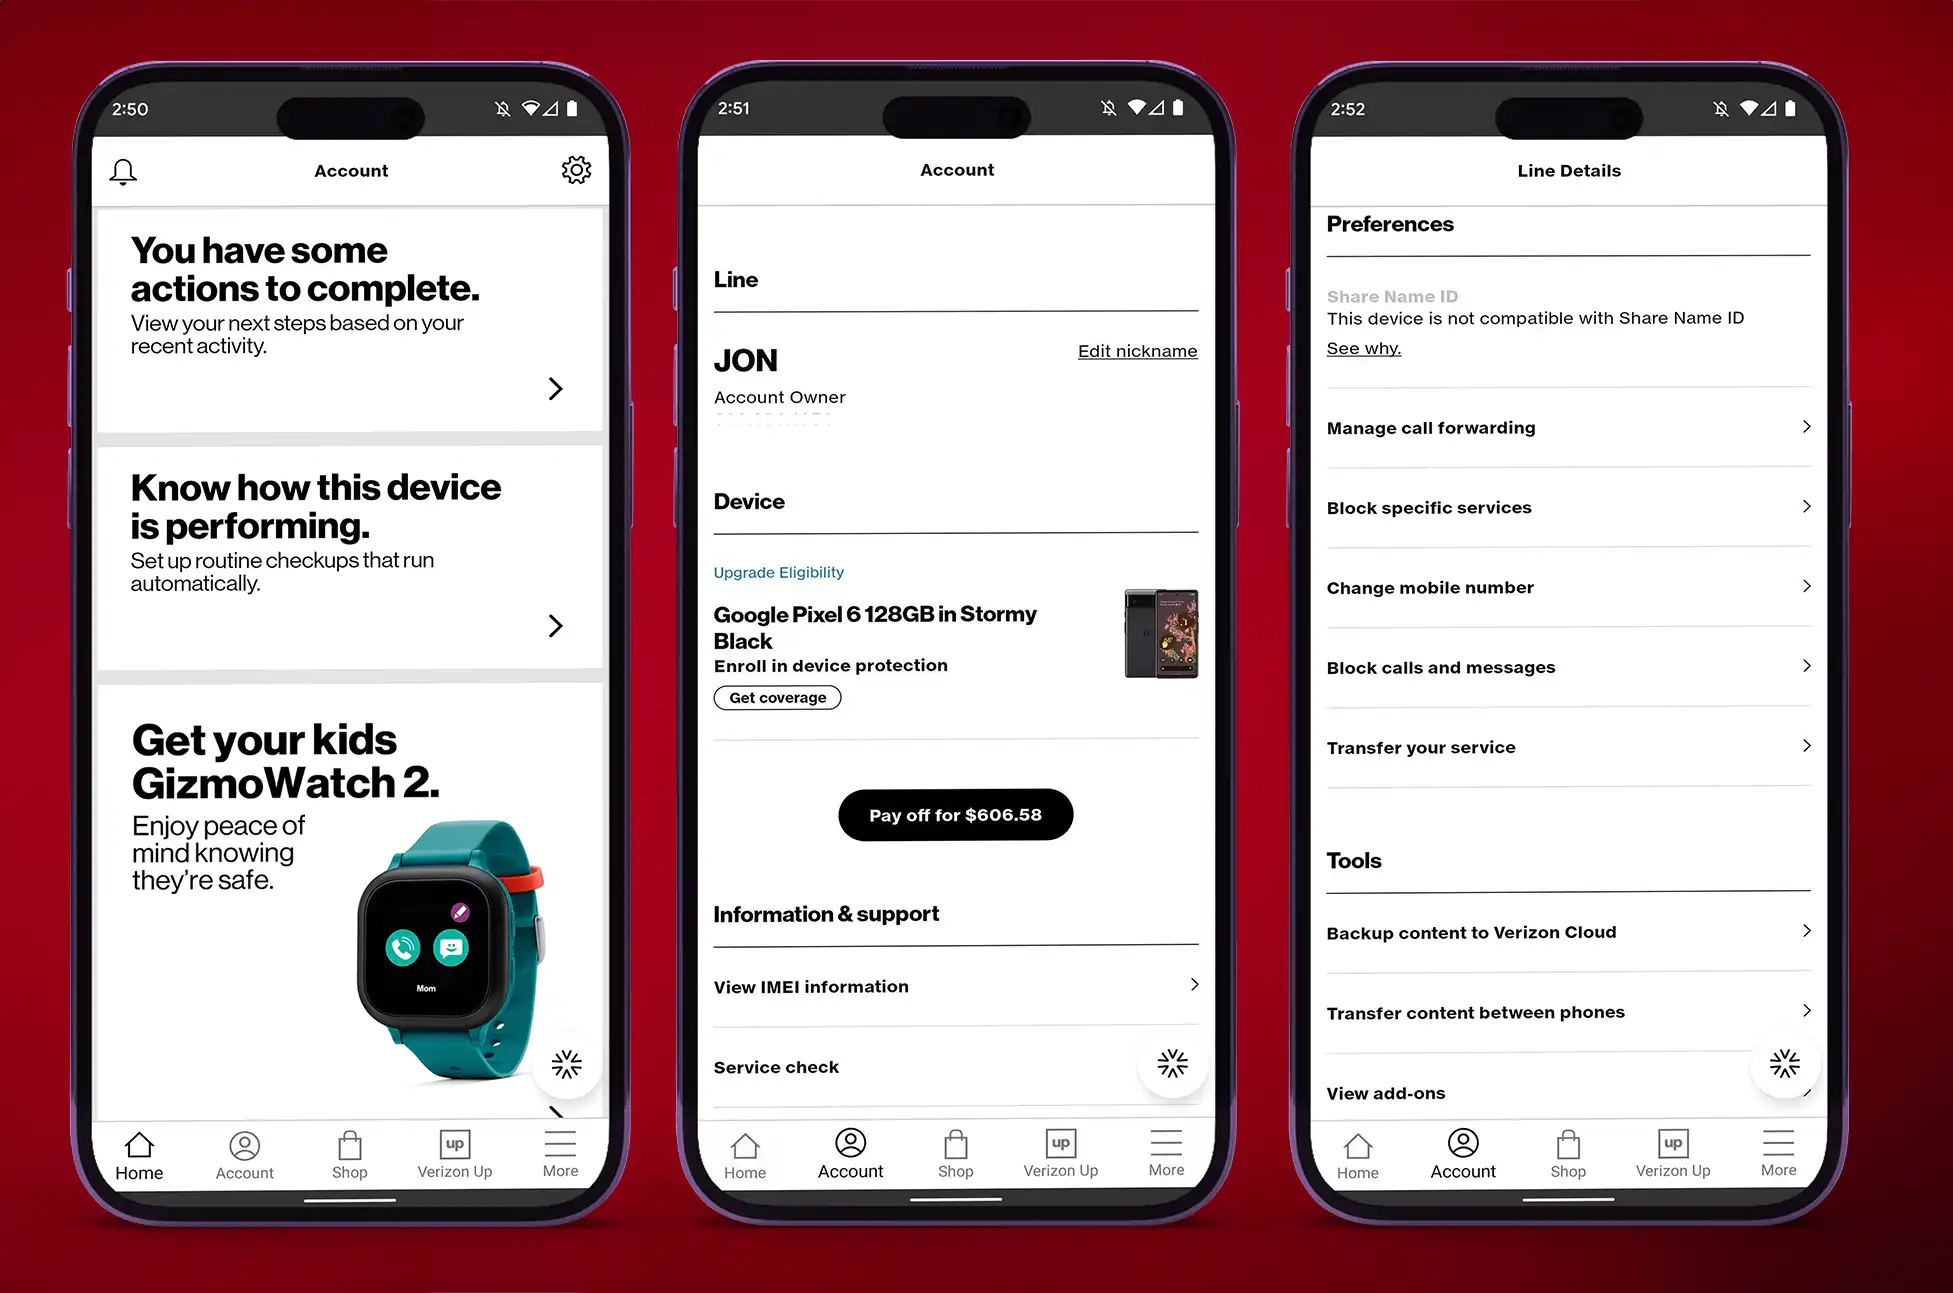
Using your Verizon App
On your phone, launch the My Verizon app
Go to the Account page
If prompted, enter your account information or verify your identity
Scroll all the way down to the Preferences section
Choose Manage call forwarding from the Preferences menu
Enter the 10-digit phone number to which you wish the calls forwarded
To validate your input, tap Add number
Note: The modifications take roughly 10 minutes to take effect, following which call forwarding on your Verizon line is enabled.
Cancel call forwarding on Verizon
Launch the dialer app on your phone
Press the call button after dialing *73
This disables call forwarding on your Verizon phone number
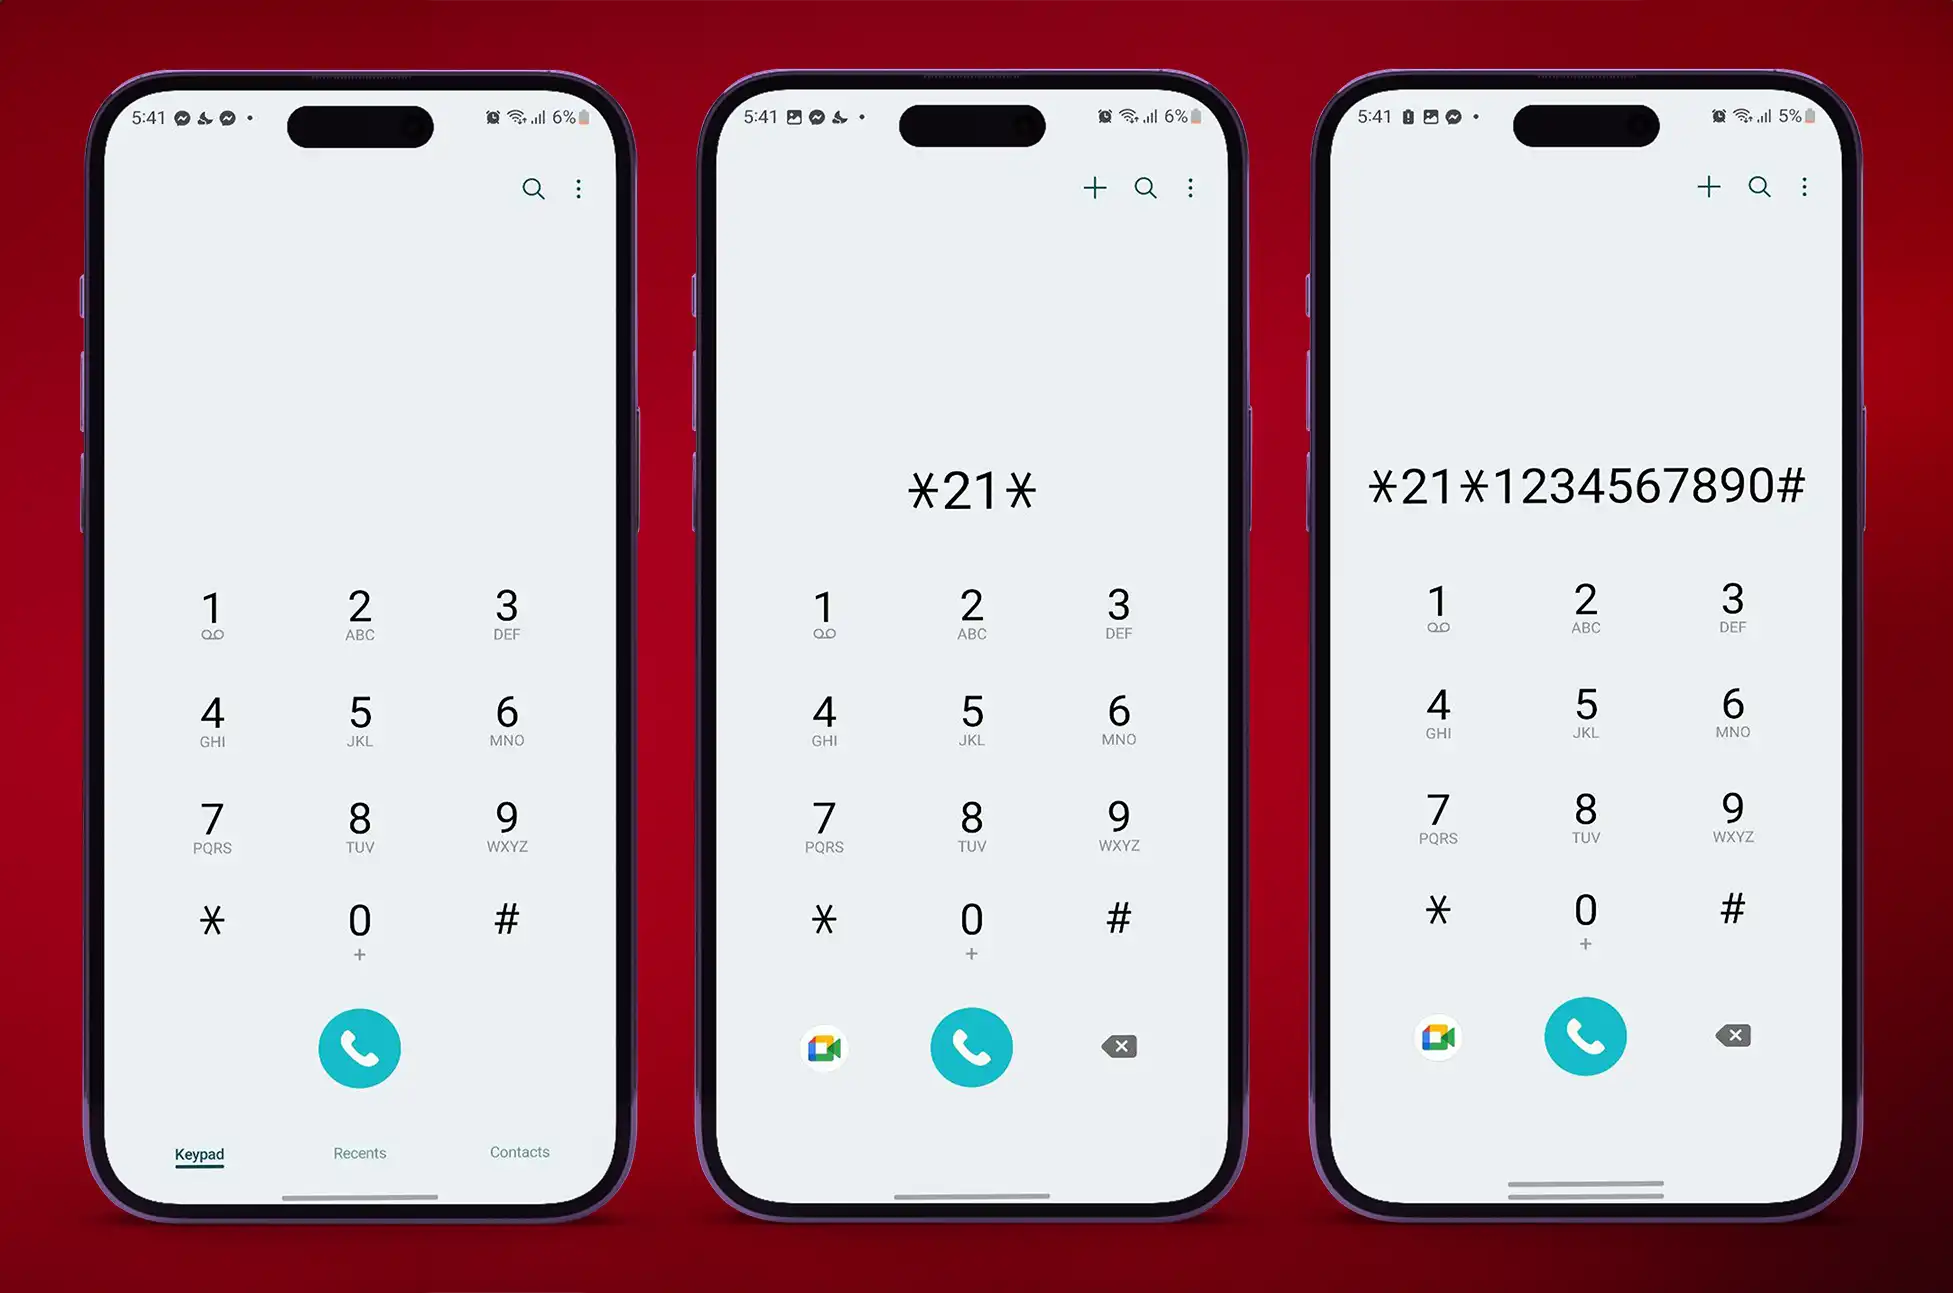
How to Forward Your Number: AT&T and T-Mobile
The AT&T and T-Mobile USSD codes for activating call forwarding are the same.
Open your phone’s dialer app
Enter *21* followed by the phone number to which you want the calls forwarded
After that, enter a #. For instance, *21*1234567890#
Click the call button
Before disconnecting the call, wait until you hear the confirmation tone. This indicates that call forwarding is enabled on your AT&T or T-Mobile phone number
Deactivate call forwarding on AT&T and T-Mobile
Enter #21# into your phone’s dialer app
Press the call button
Wait until you hear a tone confirming that call forwarding has been deactivated on your number
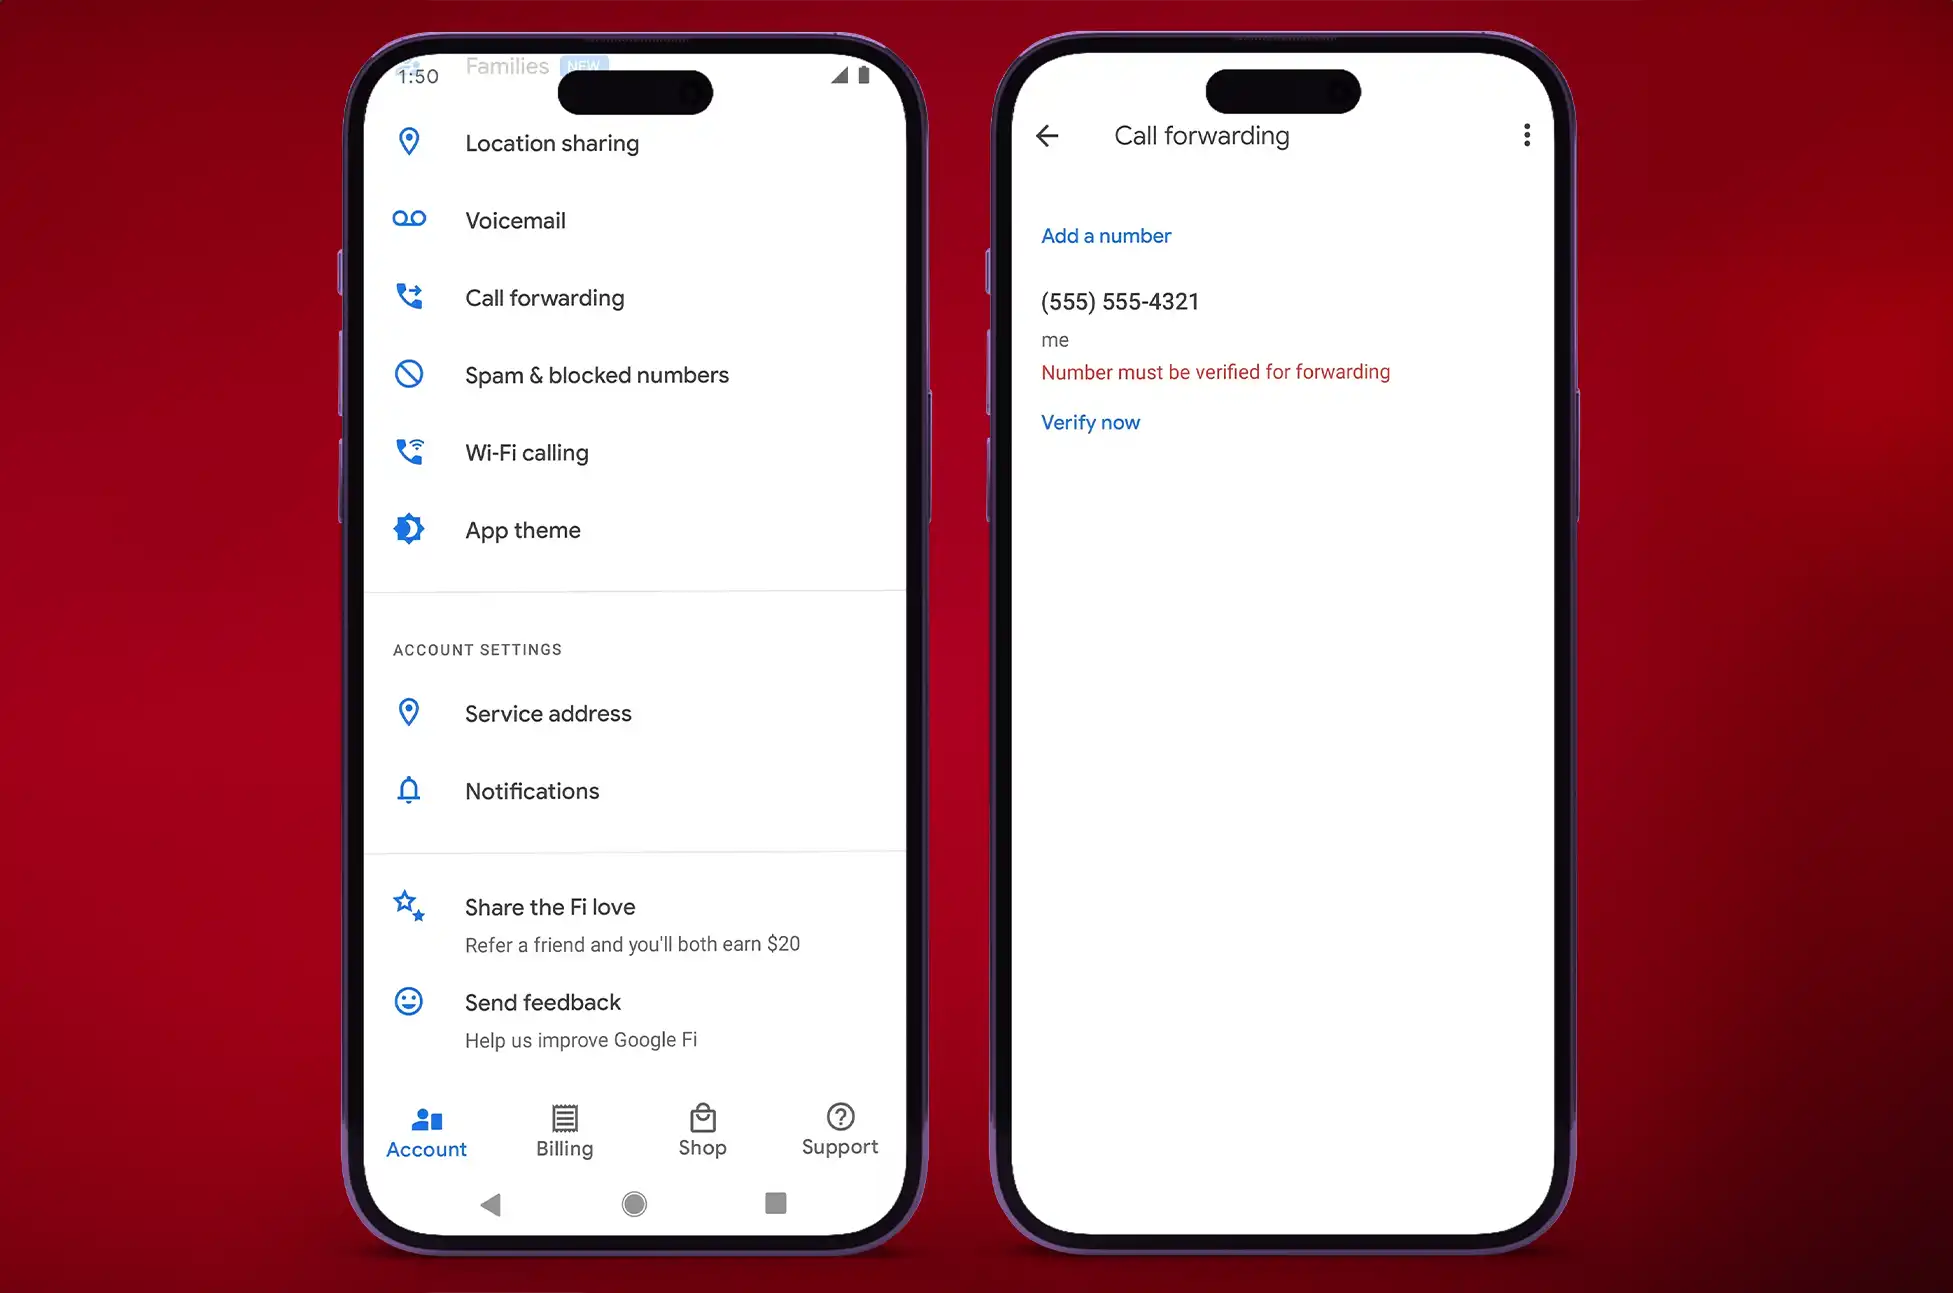
Google Fi
Go to the Google Fi website or the Google Fi app on your phone
Scroll down and select Call forwarding from the Account tab
Enter the 10-digit number to which you wish the calls forwarded
If desired, enter a description for the number
Verify the phone number so that calls can be routed to it.
Select either Verify by text or Verify by phone, depending on your preference.
Enter the 6-digit code from the sent number.
Tap Verify to confirm
Deactivate call forwarding on Google Fi
Unlike other network providers, Google Fi does not allow you to disable call forwarding with a simple code. The Google Fi app or website must be used.
Open the Google Fi app, navigate to the Accounts page, and then click Call forwarding
Toggle the switch next to the number you wish to stop call forwarding to
Tap the number and select Remove to remove it
Confirm your choice by tapping Remove in the dialog box that appears
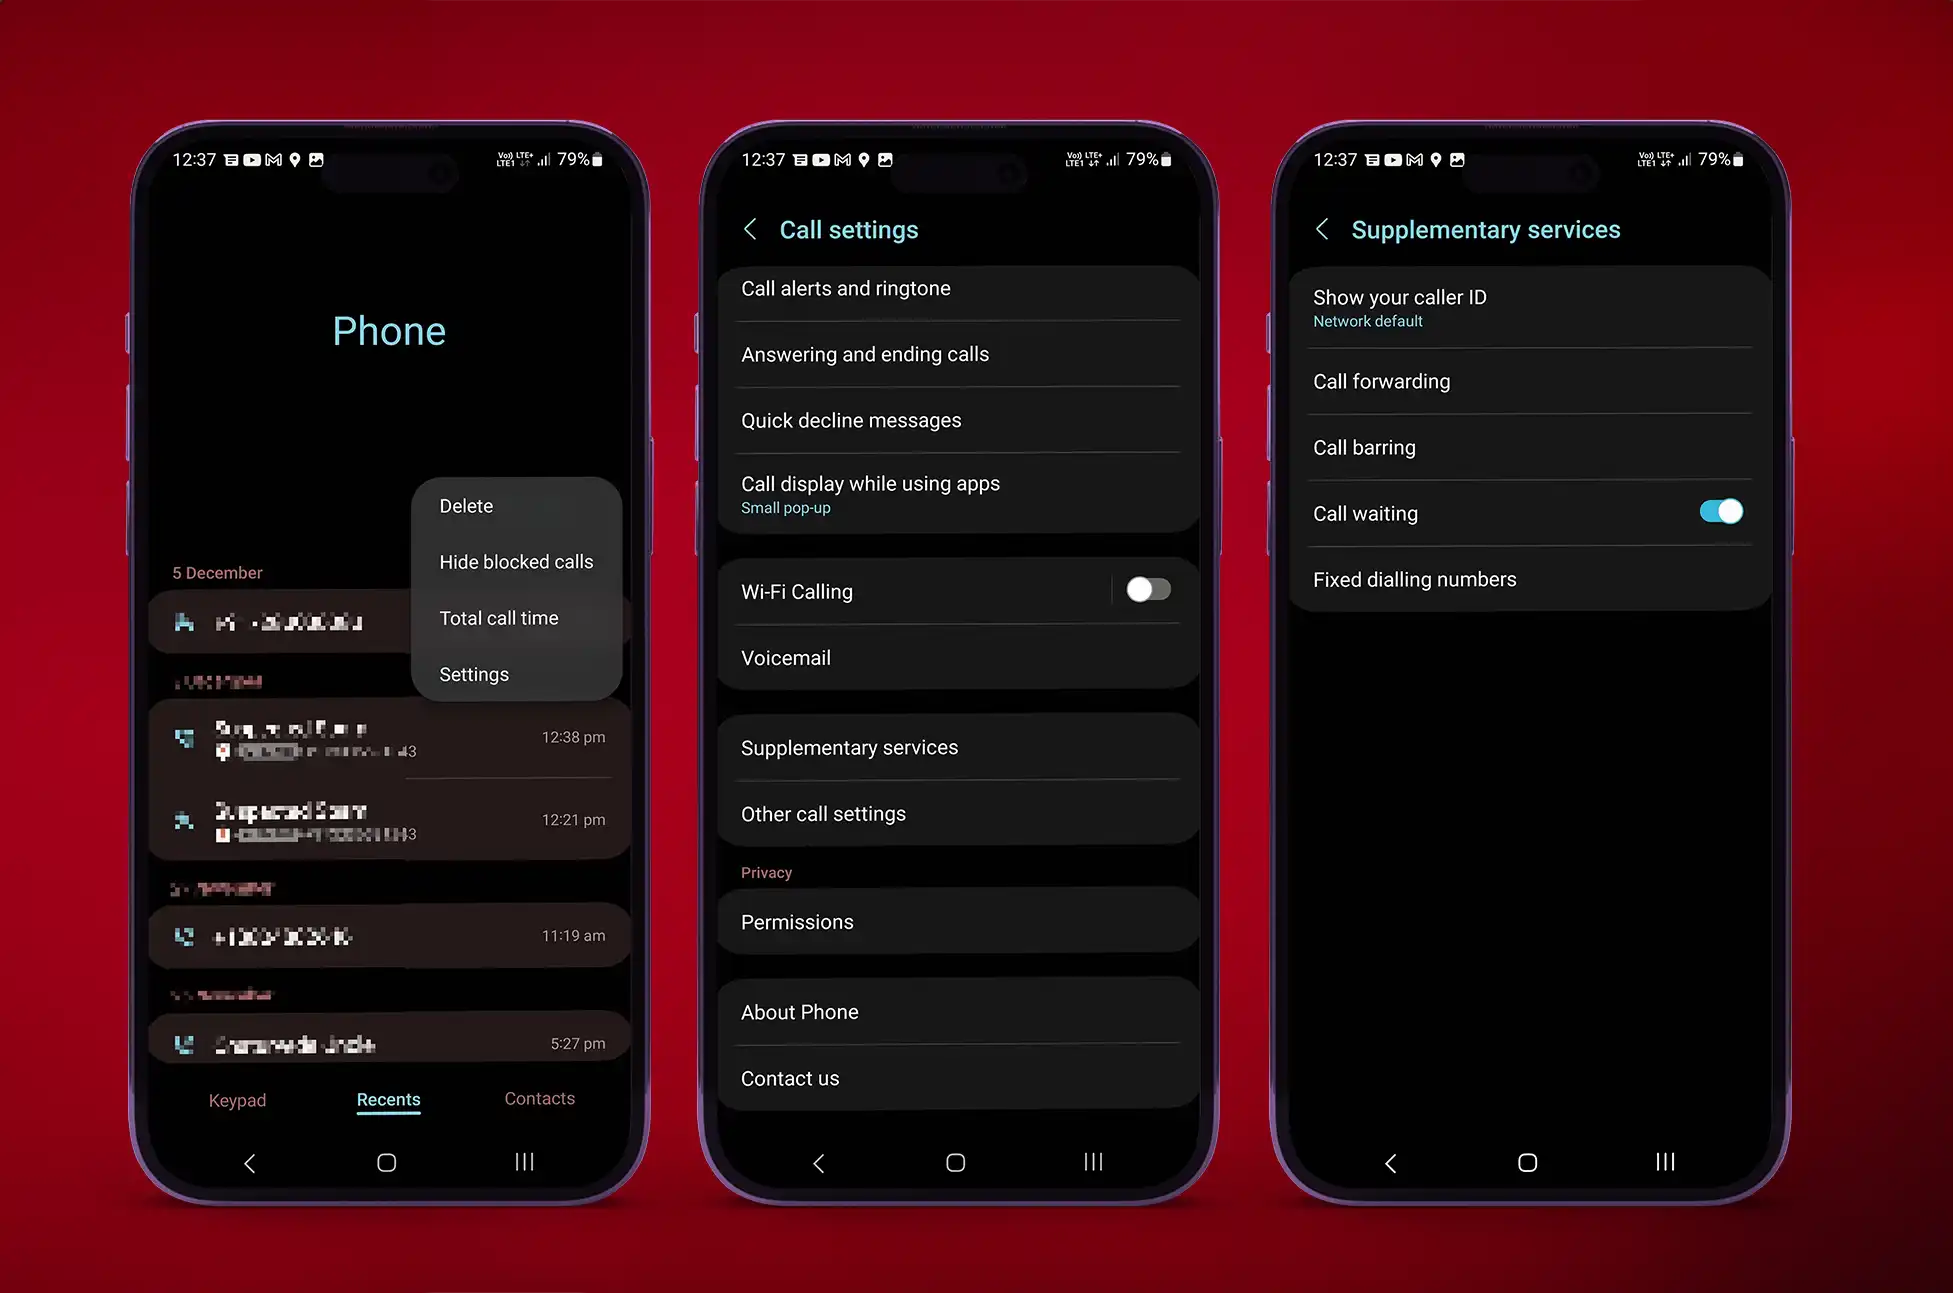
Android
You don’t have to exclusively rely on your carrier’s app or shortcode for call forwarding. Your Android phone’s default dialer application offers the same capability, allowing you to configure call forwarding for situations when your phone is unreachable, busy, or when calls are left unanswered.
Launch Phone app
In the upper-right corner, press the three-dot menubutton
Go to Settings
Tap Call Settings if your phone utilizes the Google Dialer app
Select the Supplementary services option on Samsung phones
Choose Call forwarding
If you are asked what type of calls you want to forward, select Voice calls
Select whether you wish to forward all incoming calls, forward only when your phone is busy or inaccessible, or forward only when the call goes unanswered
Enter the phone-number to which the call should be forwarded
Note: Repeat these steps if you want to turn off call forwarding on your Android phone.
Conclusion
By mastering call forwarding, you can ensure you never miss an important call, even when you’re on the go or unavailable. So, go ahead, explore the possibilities, and streamline your communication with the carrier that best suits your needs. Whether you’re with AT&T, Verizon, T-Mobile, or Android, redirecting your calls has never been easier, allowing you to stay connected in a way that fits your lifestyle
All products, and company names, logos, and service marks (collectively the "Trademarks") displayed are registered® and/or unregistered
trademarks™ of their respective owners.
The authors of this web site are not sponsored by or affiliated with any of the third-party trade mark or third-party registered trade mark owners,
and make no representations about them, their owners, their products or services.
Unlocking your Blu phone can open up a world of possibilities, from using it with different carriers to enjoying more flexibility with your device. In this guide, we will show you how to sim unlock your Blu phone using the trusted service called UnlockBase. Whether you’re traveling, switching carriers, or just want to break free from restrictions, this step-by-step tutorial will help you achieve that.
What Is Sim Unlocking?
Sim unlocking is the process of liberating your phone from the restrictions of a specific carrier. It allows you to use your phone with other carriers or while traveling abroad. But why might you want to unlock your Blu phone? Here are a few reasons:
Switching carriers: Unlocking your phone makes it compatible with other carriers, giving you the freedom to choose the best plan for your needs.
International travel: An unlocked phone can use local SIM cards, saving you on international roaming fees.
Increased resale value: Unlocked phones are more attractive to buyers, potentially fetching a higher price.
Preparing for Sim Unlocking
Before you dive into unlocking your Blu phone, there are a few things you need to ensure:
Check if your phone meets any carrier-specific prerequisites.
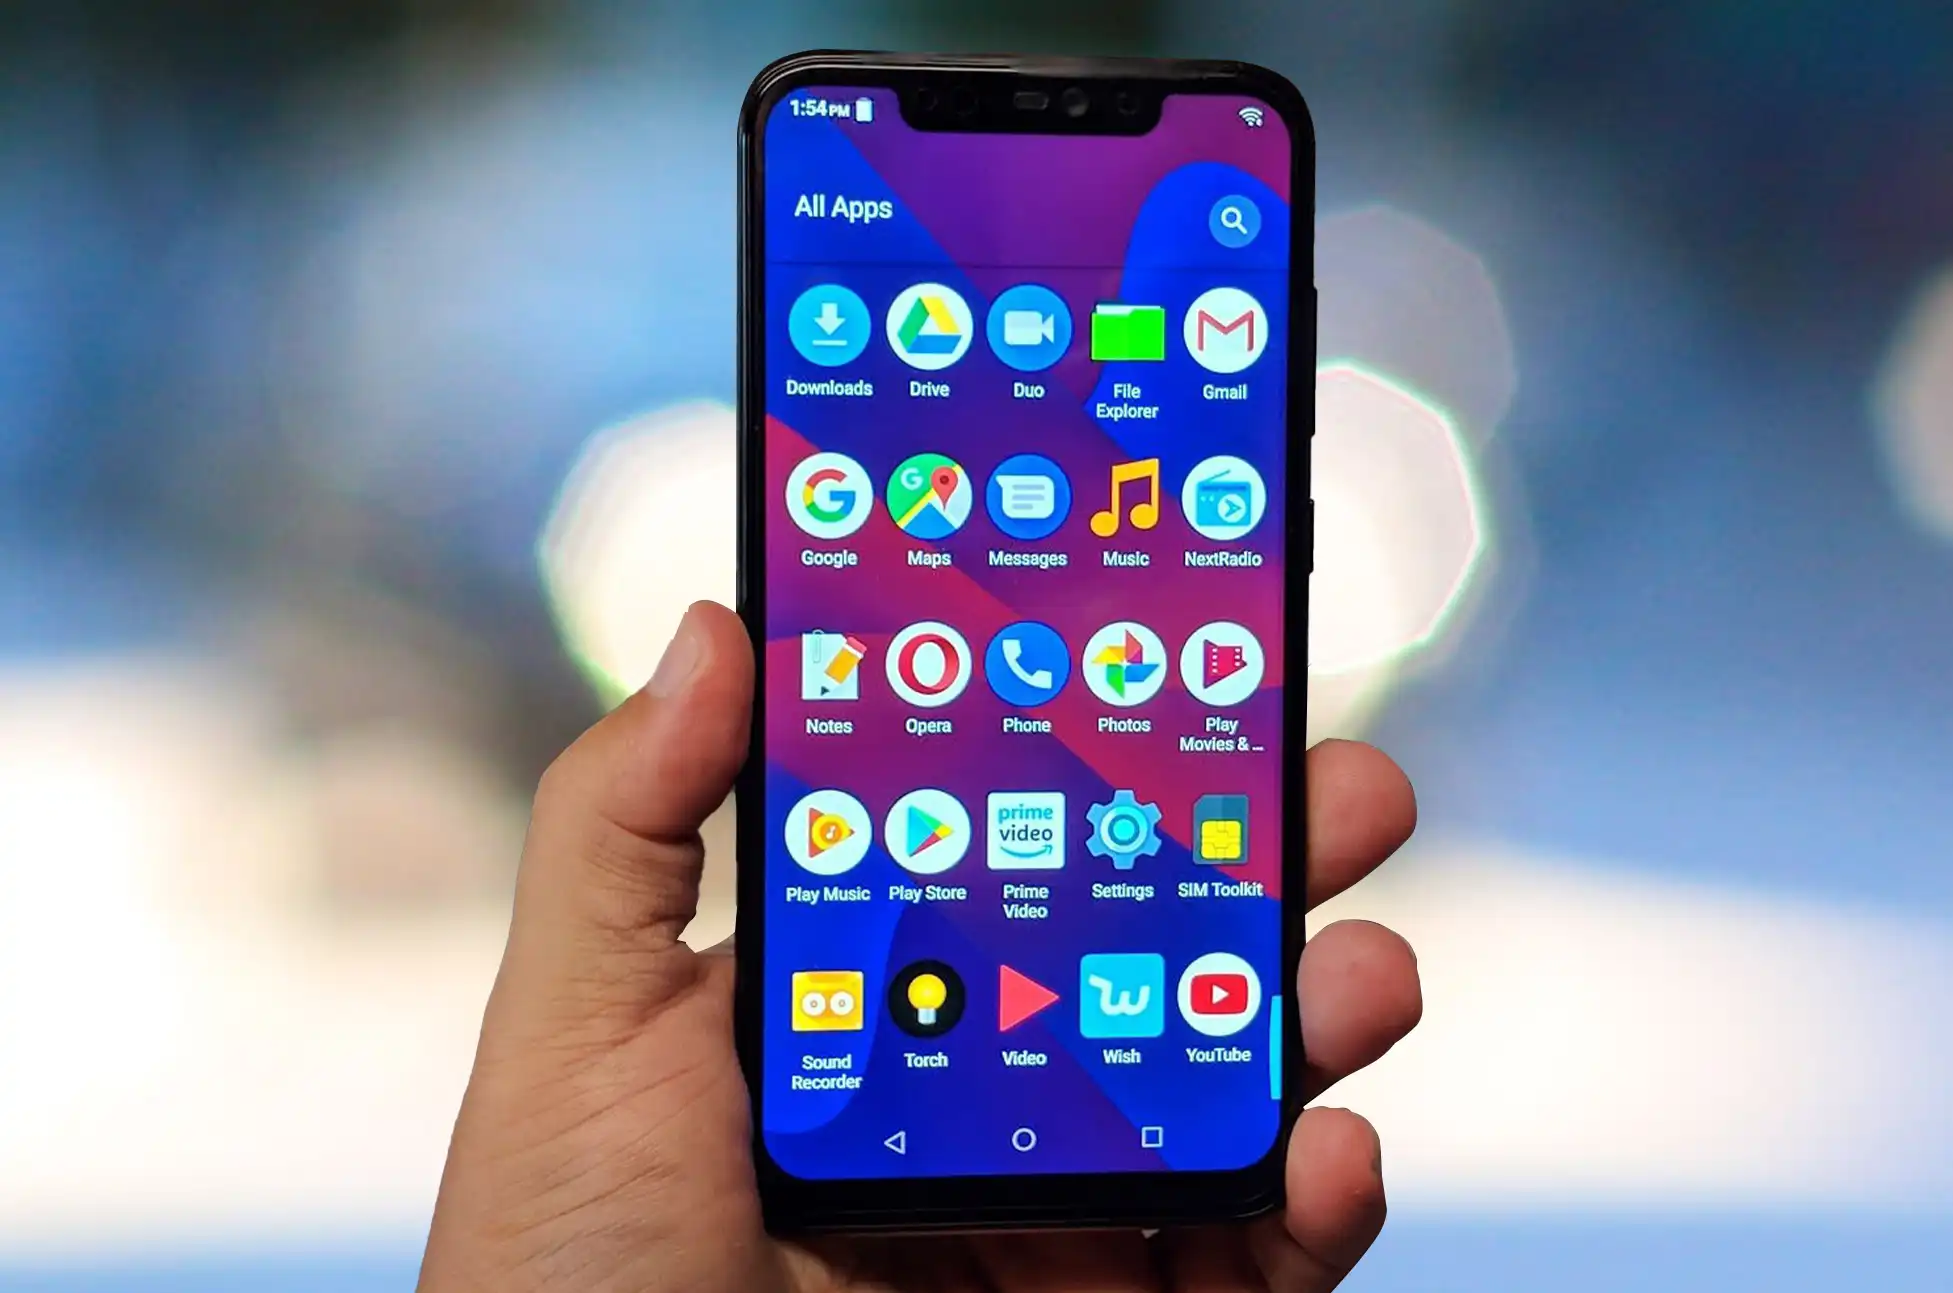
Have your IMEI number handy; you can find it in your phone’s settings or by dialing *#06#.
UnlockBase
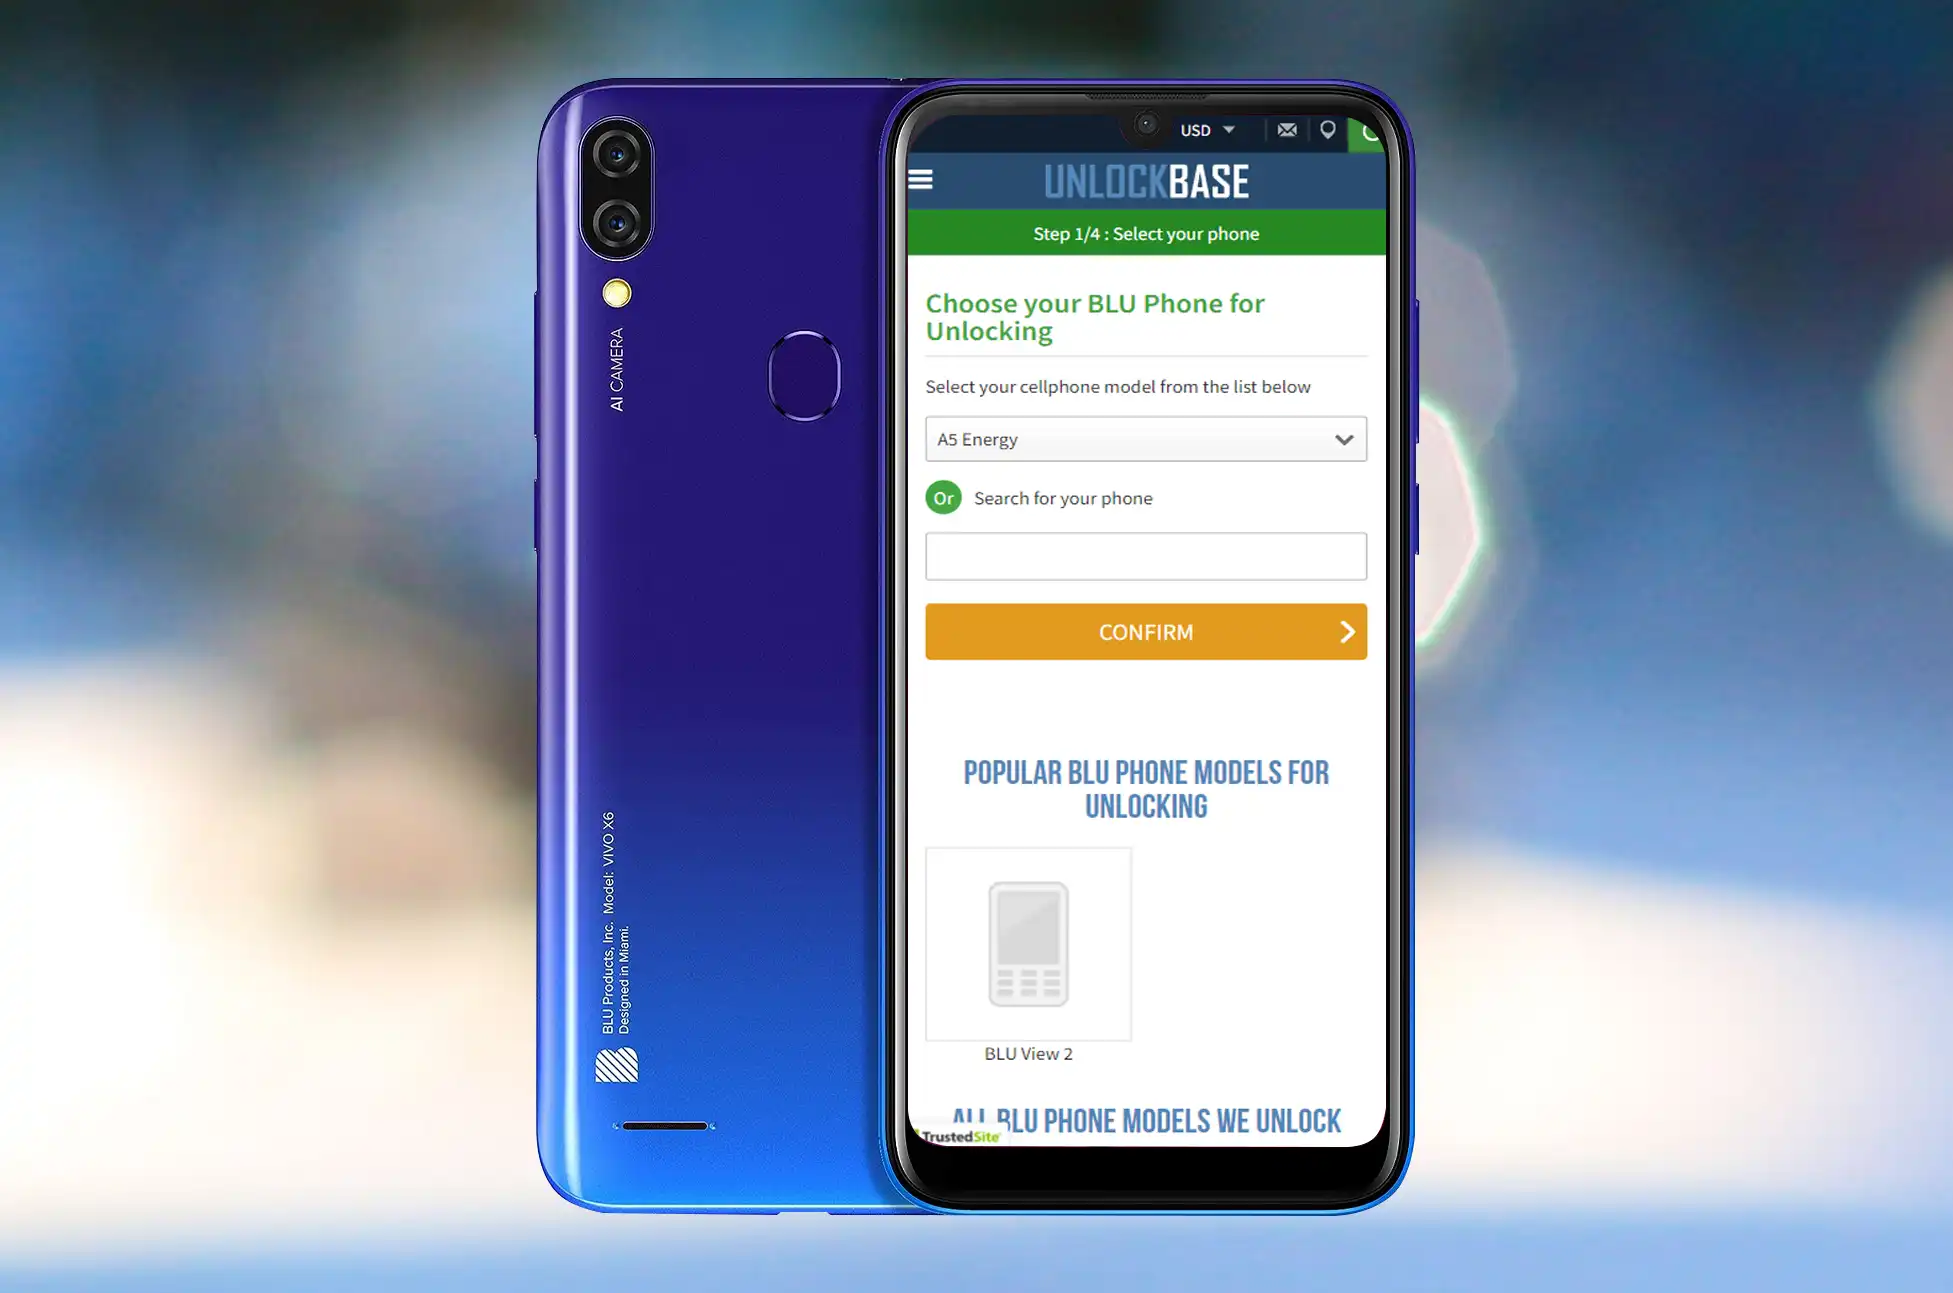
UnlockBase simplifies the sim unlocking process. Here’s a step-by-step guide:
Select the manufacturer of your mobile device: Choose “Blu” from the list.
Enter the IMEI number of your phone: Type in your IMEI number accurately.
Provide your email address: Make sure it’s a valid email address, as this is where you’ll receive important information.
Choose the country where your phone is locked: Select the country where you originally purchased your Blu phone.
Choose your current carrier.
Confirm your payment and wait for an email containing the unlock code: Follow the on-screen instructions to complete the payment process. UnlockBase will then send you an email with the unlock code and instructions.
Please proceed with the procedures below once you have received our confirmation that your Blu phone has been unlocked for use with any network.
Open your Blu phone with an unsupported SIM card inserted. A SIM card is considered “non-accepted” if it is not from the network to which the Blu phone was originally locked. The SIM card can be from any other network provider worldwide; it doesn’t have to be the one you plan to use in the future.
Once you’ve inserted your new SIM card, a pop-up window will appear, prompting you to enter the unlock code provided to you by UnlockBase.
Congratulations! You can now use your Blu phone with any network carrier around the globe.
Alternative Methods
While contacting your carrier is an option for sim unlocking, it may involve more bureaucracy and take longer. UnlockBase is recommended for its reliability, user-friendliness, and quick results.
Potential Risks and Mitigations
Unlocking your Blu phone is generally safe, but it’s essential to be aware of potential risks. To mitigate these risks:
Ensure you use a reputable service like UnlockBase.
Follow the provided instructions carefully.
Avoid unofficial unlocking methods, as they may harm your device or void your warranty.
Conclusion
Unlocking your Blu phone with UnlockBase is a straightforward and effective way to free your device from carrier restrictions. It offers you the flexibility to choose the carrier that suits your needs, save on international roaming fees, and increase your phone’s resale value.
If you’re considering sim unlocking your Blu phone, UnlockBase is a trusted solution that can make the process hassle-free. Don’t let carrier restrictions limit your phone’s potential.
All products, and company names, logos, and service marks (collectively the "Trademarks") displayed are registered® and/or unregistered
trademarks™ of their respective owners.
The authors of this web site are not sponsored by or affiliated with any of the third-party trade mark or third-party registered trade mark owners,
and make no representations about them, their owners, their products or services.
Everyone listen up! What exactly is this Vo5G thing that everyone keeps talking about? Welcoming in the next generation of voice technology is the time to bid farewell to calls that are choppy and interrupted and to say hello to those innovations. The arrival of voice over 5G (Vo5G) technology will usher in a new era of voice communications that is qualitatively and quantitatively superior in terms of speed and dependability. Join me as we venture into the realm of Vo5G!
What is Vo5G? (Voice Over 5G)
The most recent improvement in smartphone voice calling is Voice over 5G (Vo5G), commonly known as Voice over New Radio (VoNR). It’s a communication standard that delivers precisely what it promises, letting you make calls to your loved ones through 5G instead of the more commonplace LTE network. It’s the next phase for voice technology, which even in 2023 when messaging applications are ubiquitous, is still crucial to networks.
Although Voice over NR is still in its early stages, the ability to make phone calls over 5G standalone (5G SA) remains a goal as cell networks prepare for the eventual retirement of 4G LTE networks. This preparation will guarantee that users’ phone calls continue to go through even if LTE suddenly breaks down. Think about how much time passed between the introduction of 4G data networks and the introduction of VoLTE. Nonetheless, once the major U.S. carriers turned off their 3G networks, VoLTE was ready to go. It’s not as simple as asking your carrier to turn it off. You probably haven’t seen VoNR on your smartphone because it requires a great deal of setup.
How is VO5G different from VoLTE?
Voice over LTE and VoNR are equivalent except for their reliance on 5G networks. Vo5G enables smartphones and other supported devices to make phone calls over 5G networks, with the guarantee of superior sound quality compared to older technologies. When paired with a 5G core, thanks to enhancements to the IMS (or IP Multimedia Subsystem), your calls will have better voice quality and lower latency than ever before.
Which carriers offer Vo5G?
The convergence of 5G technology and voice communications has ushered in the VO5G era. As we stand on the precipice of this transformative development, it is crucial to acknowledge the pioneering carriers who are at the forefront. These carriers are heralding in a new communication standard that promises unparalleled clarity and seamless connectivity. Let’s examine the carriers that are proudly delivering the future via VO5G.
T-Mobile
T-Mobile was the first mobile network in the United States to deploy VoNR in the summer of 2022, albeit with strict constraints on their 5G deployment. When the company launched its new voice services in June of last year, it did so in two markets: Salt Lake City and Portland. VoNR all service is available in Cincinnati, Ohio; New Orleans, Louisiana; New York, New York; Portland, Oregon; Salt Lake City, Utah; and Seattle, Washington as of August 2023.
Vo5G has not yet reached the majority of T-Mobile’s coverage areas, but the company is updating its infrastructure to cover more than 100 million people by the end of 2023.
AT&T
AT&T has confirmed that it is currently conducting lab tests of Vo5G and that it plans to commence field validation at some point in the year 2023.
Verizon
Verizon, on the other hand, has not said if or when it will introduce Vo5G service. The carrier has not yet announced when Vo5G service will become available, but it will certainly lag behind T-Mobile and AT&T in the near future. Using the carrier’s new 5G standalone core, tens of thousands of virtual radio access network (vRAN) cell sites, and network software known as Verizon Cloud Platform, Verizon’s VoNR service is able to make real-time, automated changes to network configuration, capacity optimization, and a number of other features to better deliver calls and data.
By 2025, Verizon plans to have installed 20,000 vRAN nodes. The carrier is collaborating with Samsung on the rollout, and as of December 2022, more than 10,000 commercial sites had been set up.
Other carriers
Dish Network, the fourth national carrier formed as a result of T-Mobile’s acquisition of Sprint, has also been implementing Vo5G. As a 5G standalone service, Dish lacks an underlying LTE network for voice conversations, so it (along with its MVNO Boost) relies on T-Mobile and AT&T’s 4G network for phone calls from the majority of its customers. Dish has stated that it is launching 5G standalone in more markets each week via its Boost Infinite network, although it is significantly behind its initial nationwide launch schedule.
Which mobile phones support Voice Over 5G?
The Global Mobile Suppliers Association has announced that dozens of mobile platforms and discrete modems support Vo5G. The United States lacks a wealth of information regarding phones that support Vo5G. We anticipate smartphone manufacturers to release firmware updates to add the feature as carriers expand the feature’s availability. Currently, however, we know that the following devices support Vo5G:
Samsung Galaxy 21 series
Samsung Galaxy S22 series
Samsung Galaxy S23 series
Google Pixel 7 series
Conclusion
Vo5G is more than just an upgrade to voice calls; it is a demonstration of how technology is continually evolving to make our lives better. Accept the era of clear, quick, and dependable voice communication and say goodbye to the annoyances of poor call quality. The future is beckoning, sounding better than ever!
All products, and company names, logos, and service marks (collectively the "Trademarks") displayed are registered® and/or unregistered
trademarks™ of their respective owners.
The authors of this web site are not sponsored by or affiliated with any of the third-party trade mark or third-party registered trade mark owners,
and make no representations about them, their owners, their products or services.
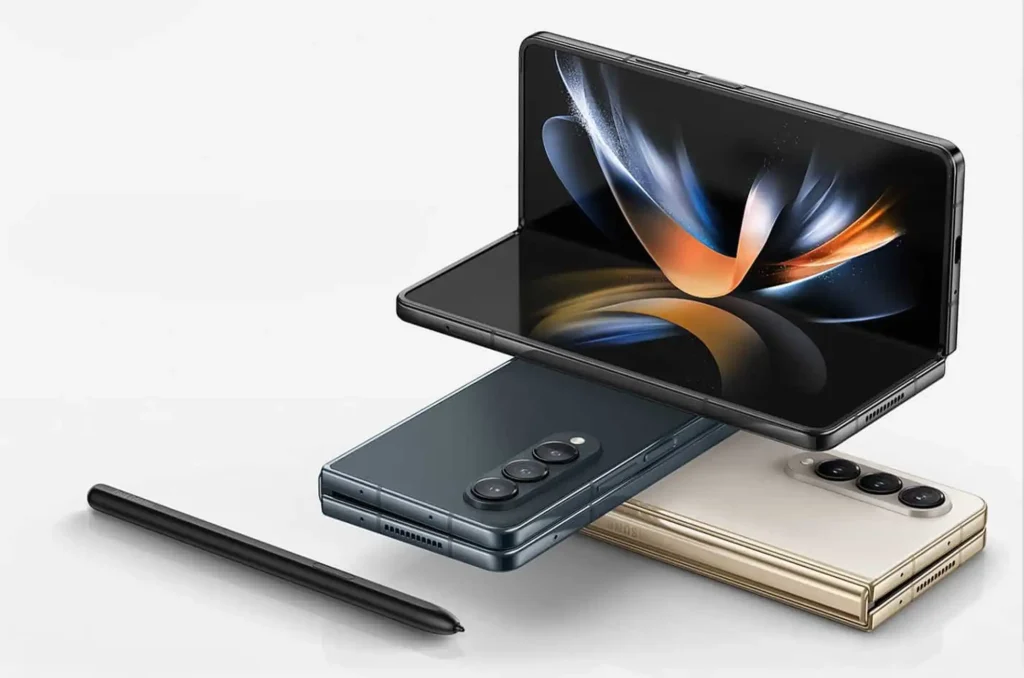
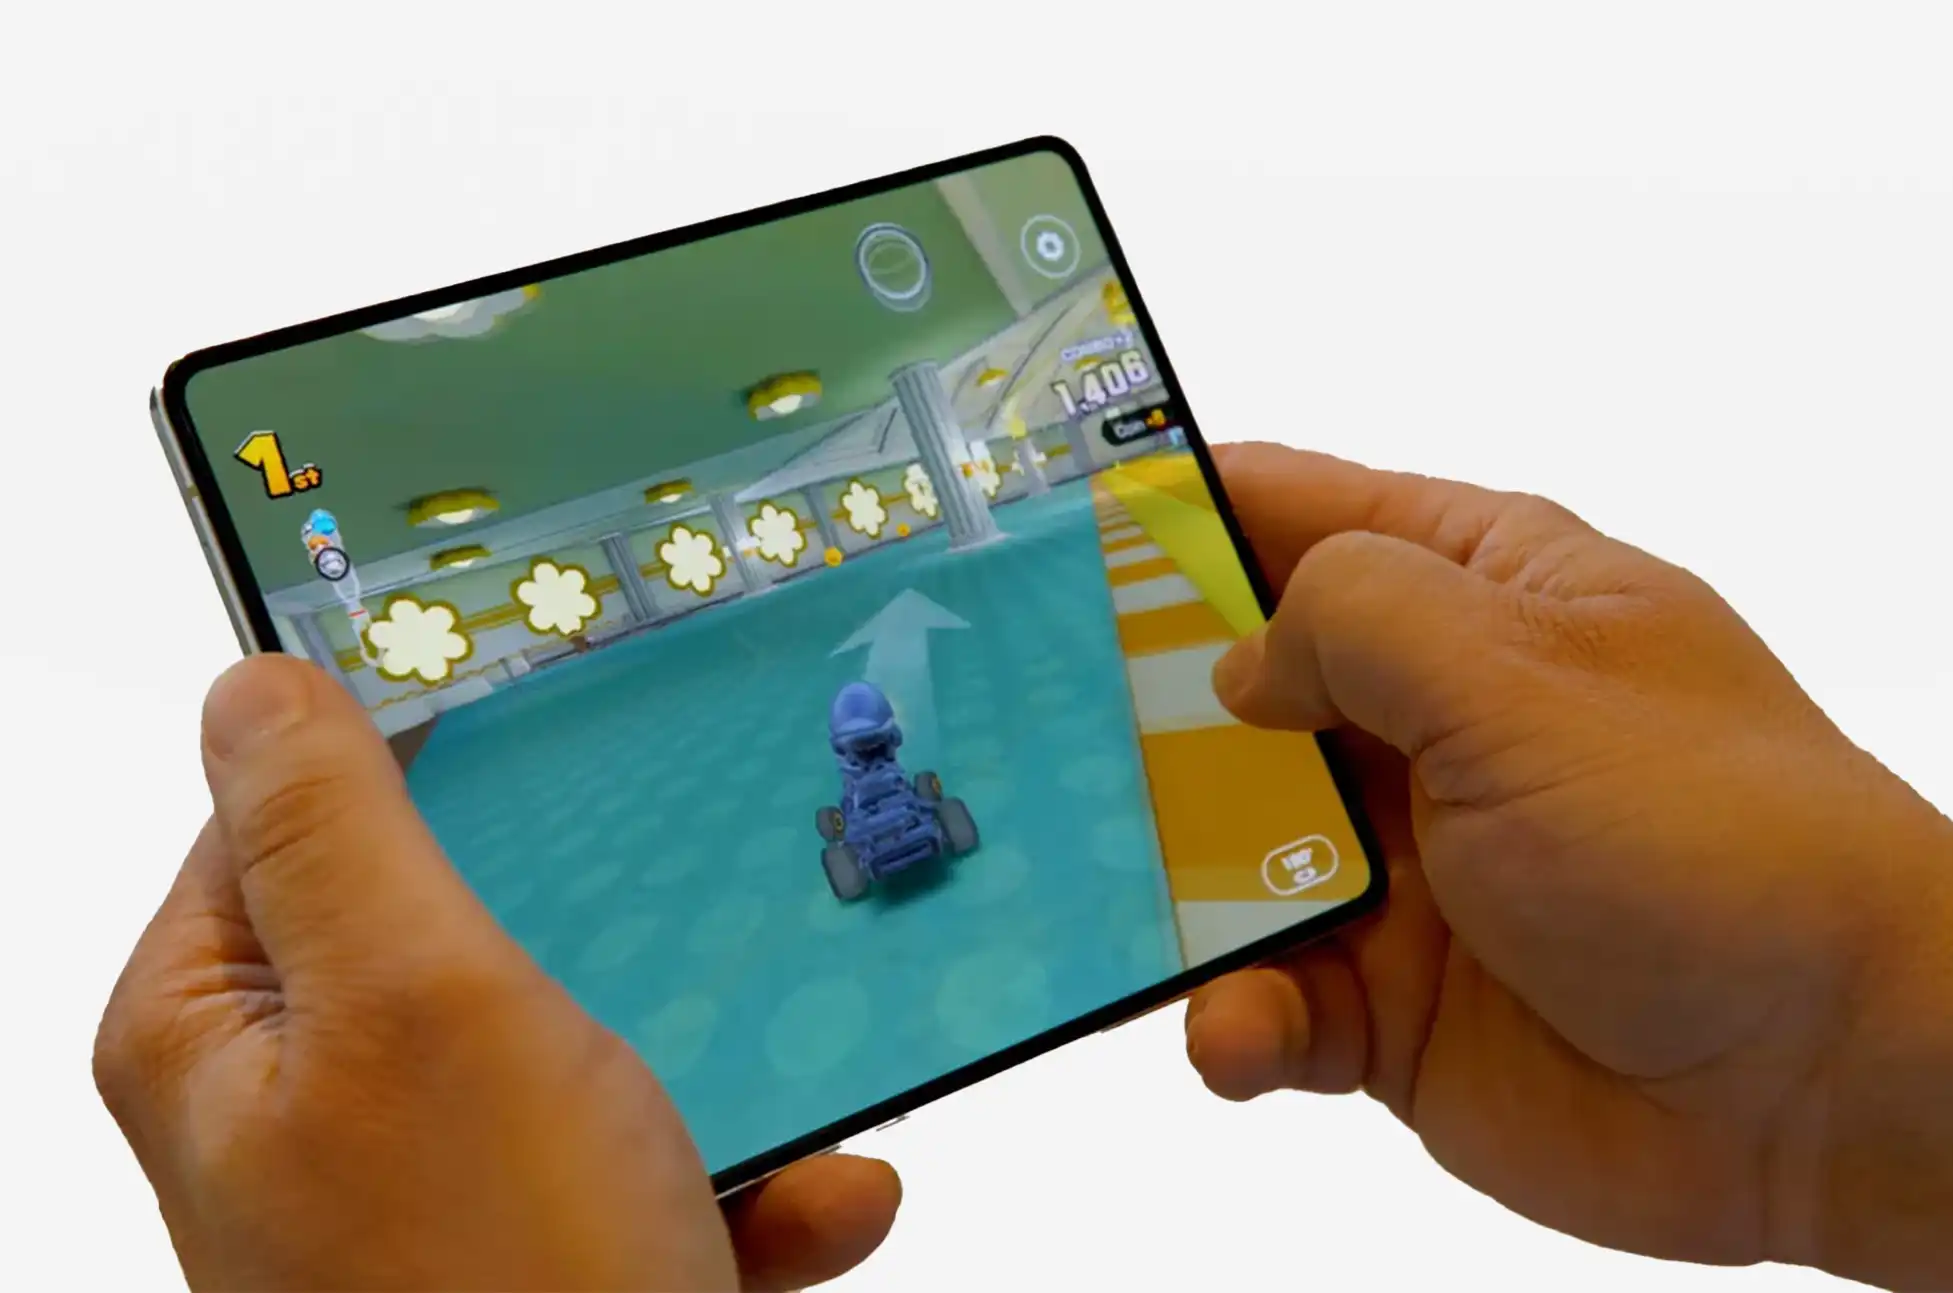
Want to Give your Samsung Z Fold 5 Unlock Today? Hey there, proud owners of the stunning Galaxy Z Fold 5! If you’ve been itching to explore the endless possibilities of your foldable marvel, you’re in for a treat. Dive into the world of SIM unlocking your Samsung Galaxy Z Fold 5 as we break down the “what,” “why,” and “how” in this comprehensive guide. Let’s jump right in!
Understanding the Z Fold 5 SIM Unlock
Picture this: you’re opening up your Galaxy Z Fold 5 to unfold not just a device, but a gateway to connectivity across the globe. That’s precisely what a SIM unlock achieves – liberating your phone to work with SIM cards from any network provider, regardless of your location. Think of it as granting your phone a universal passport to function seamlessly anywhere.
Safety First: Z Fold 5 SIM Unlock
Worried about the safety of the process? Relax, there’s zero risk involved in unlocking your Z Fold 5. This isn’t a venture that will void your warranty or tamper with your existing contract. Consider it a hassle-free upgrade that broadens your device’s horizons without any drawbacks.
Why Bother with a Z Fold 5 SIM Unlock?
Now, onto the “why” before we delve into the “how.” You might be wondering, “Why bother unlocking my Z Fold 5 in the first place?”
Embrace Freedom – Planning an international escapade? With a SIM-unlocked Z Fold 5, you can bid farewell to those dreaded roaming charges. Just pop in a local SIM card and stay connected without breaking the bank.
Flexibility Matters – Seeking better plans or contemplating a carrier switch? Your phone needs to be unlocked to truly exercise your options. It’s your device, your call.
Boost Resale Value – Someday, if you decide to part with your Z Fold 5, an unlocked device will fetch a premium price. Potential buyers will appreciate the liberty to choose their preferred carrier.
Step-by-Step Guide: Unlocking Your Galaxy Z Fold 5
Check Your Eligibility
Ensure that you meet the eligibility criteria for unlocking your Samsung Galaxy Z Fold 5. Most carriers have specific requirements, such as completing the contract period or paying off the device in full.
Check Your Carrier
Contact your current carrier’s customer support to initiate the unlocking process and receive the required instructions. Prepare to furnish your device’s IMEI number, which is typically accessible in the device settings or by dialing *#06#.
If you find that you’re ineligible to unlock your phone through your carrier, don’t fret—simply proceed with the following steps:
Unlock your Samsung Galaxy Z Fold 5
Unlock new avenues of connectivity, follow these simple steps:
Head to the UnlockBase website.
Select the brand of your phone and enter your IMEI.
Provide your email for confirmation.
Choose the country and carrier your phone is locked to.
Complete the payment and await email confirmation.
Power Down Your Device
Before proceeding, ensure that your Galaxy Z Fold 5 is powered off.
Insert a Different SIM Card
Insert a SIM card from a different carrier into your device.
Enter the Unlock Code
Power on your device and enter the unlock code when prompted. This code will vary based on your carrier and device IMEI.
Enjoy Your Unlocked Galaxy Z Fold 5
Once the correct unlock code is entered, your Samsung Galaxy Z Fold 5 will be successfully unlocked. You can now use SIM cards from various carriers and enjoy the freedom to switch networks as needed.
Conclusion
Unlocking your Samsung Galaxy Z Fold 5 is like adding another layer to its already impressive arsenal of features. Whether you’re after independence, versatility, or just unbeatable value, a Z Fold 5 SIM unlock opens up a world of opportunities.
So, fellow tech enthusiast, here’s to you uncovering the full potential of your device! Remember, in a world where limits exist, don’t let your phone be one of them. Embrace the freedom to connect, explore, and experience without boundaries.
All products, and company names, logos, and service marks (collectively the "Trademarks") displayed are registered® and/or unregistered
trademarks™ of their respective owners.
The authors of this web site are not sponsored by or affiliated with any of the third-party trade mark or third-party registered trade mark owners,
and make no representations about them, their owners, their products or services.
Every update promises improved user experiences and innovative new features. Android 14 One UI 6 is the most recent version of Android’s operating system, combined with Samsung’s One UI interface. Join us as we delve into the dynamic world of Android 14 One UI 6, looking into its cutting-edge features and the ways it will change the way we interact with our devices.
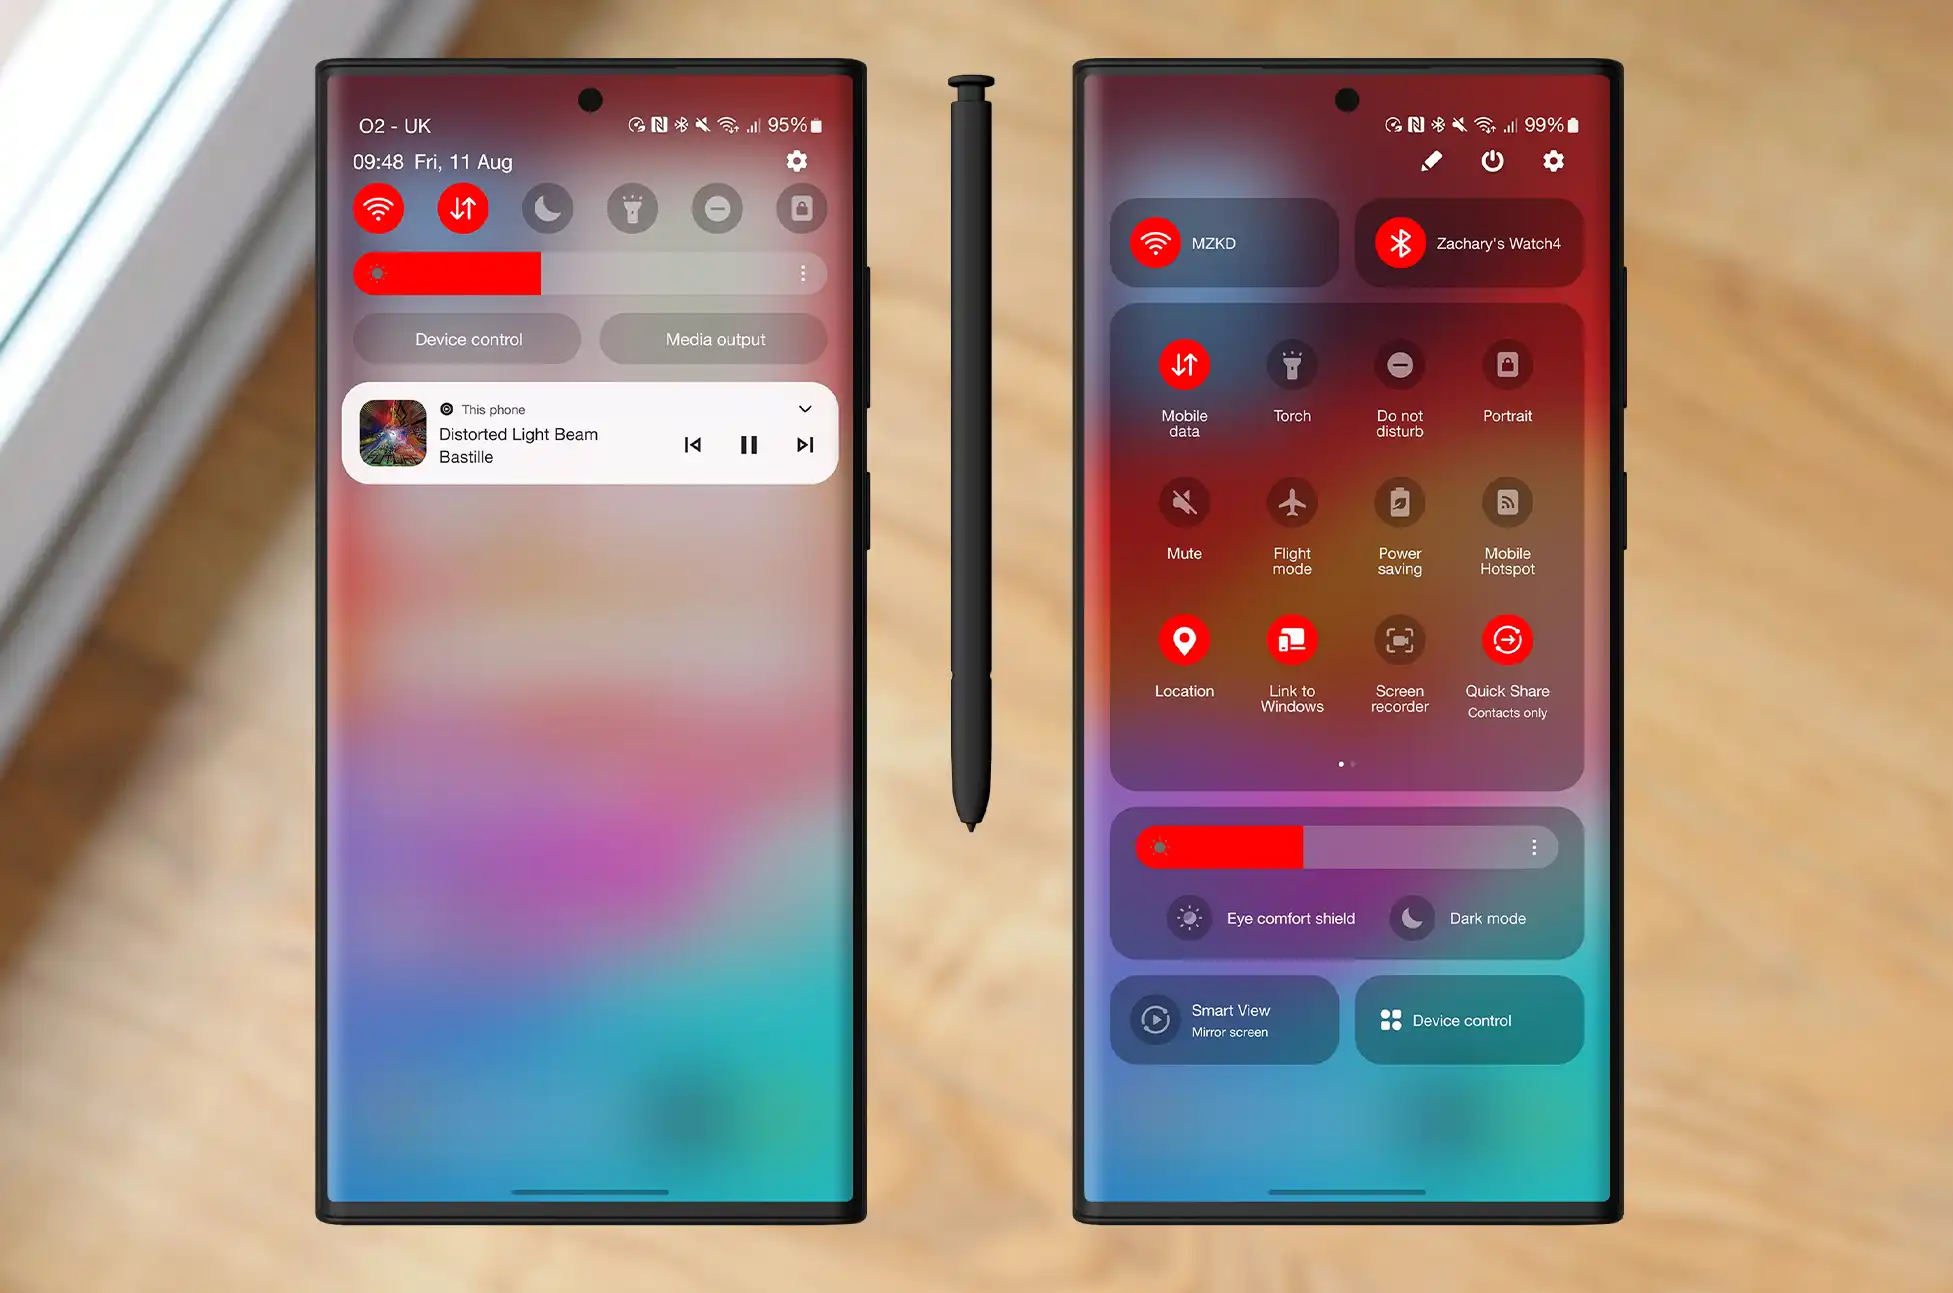
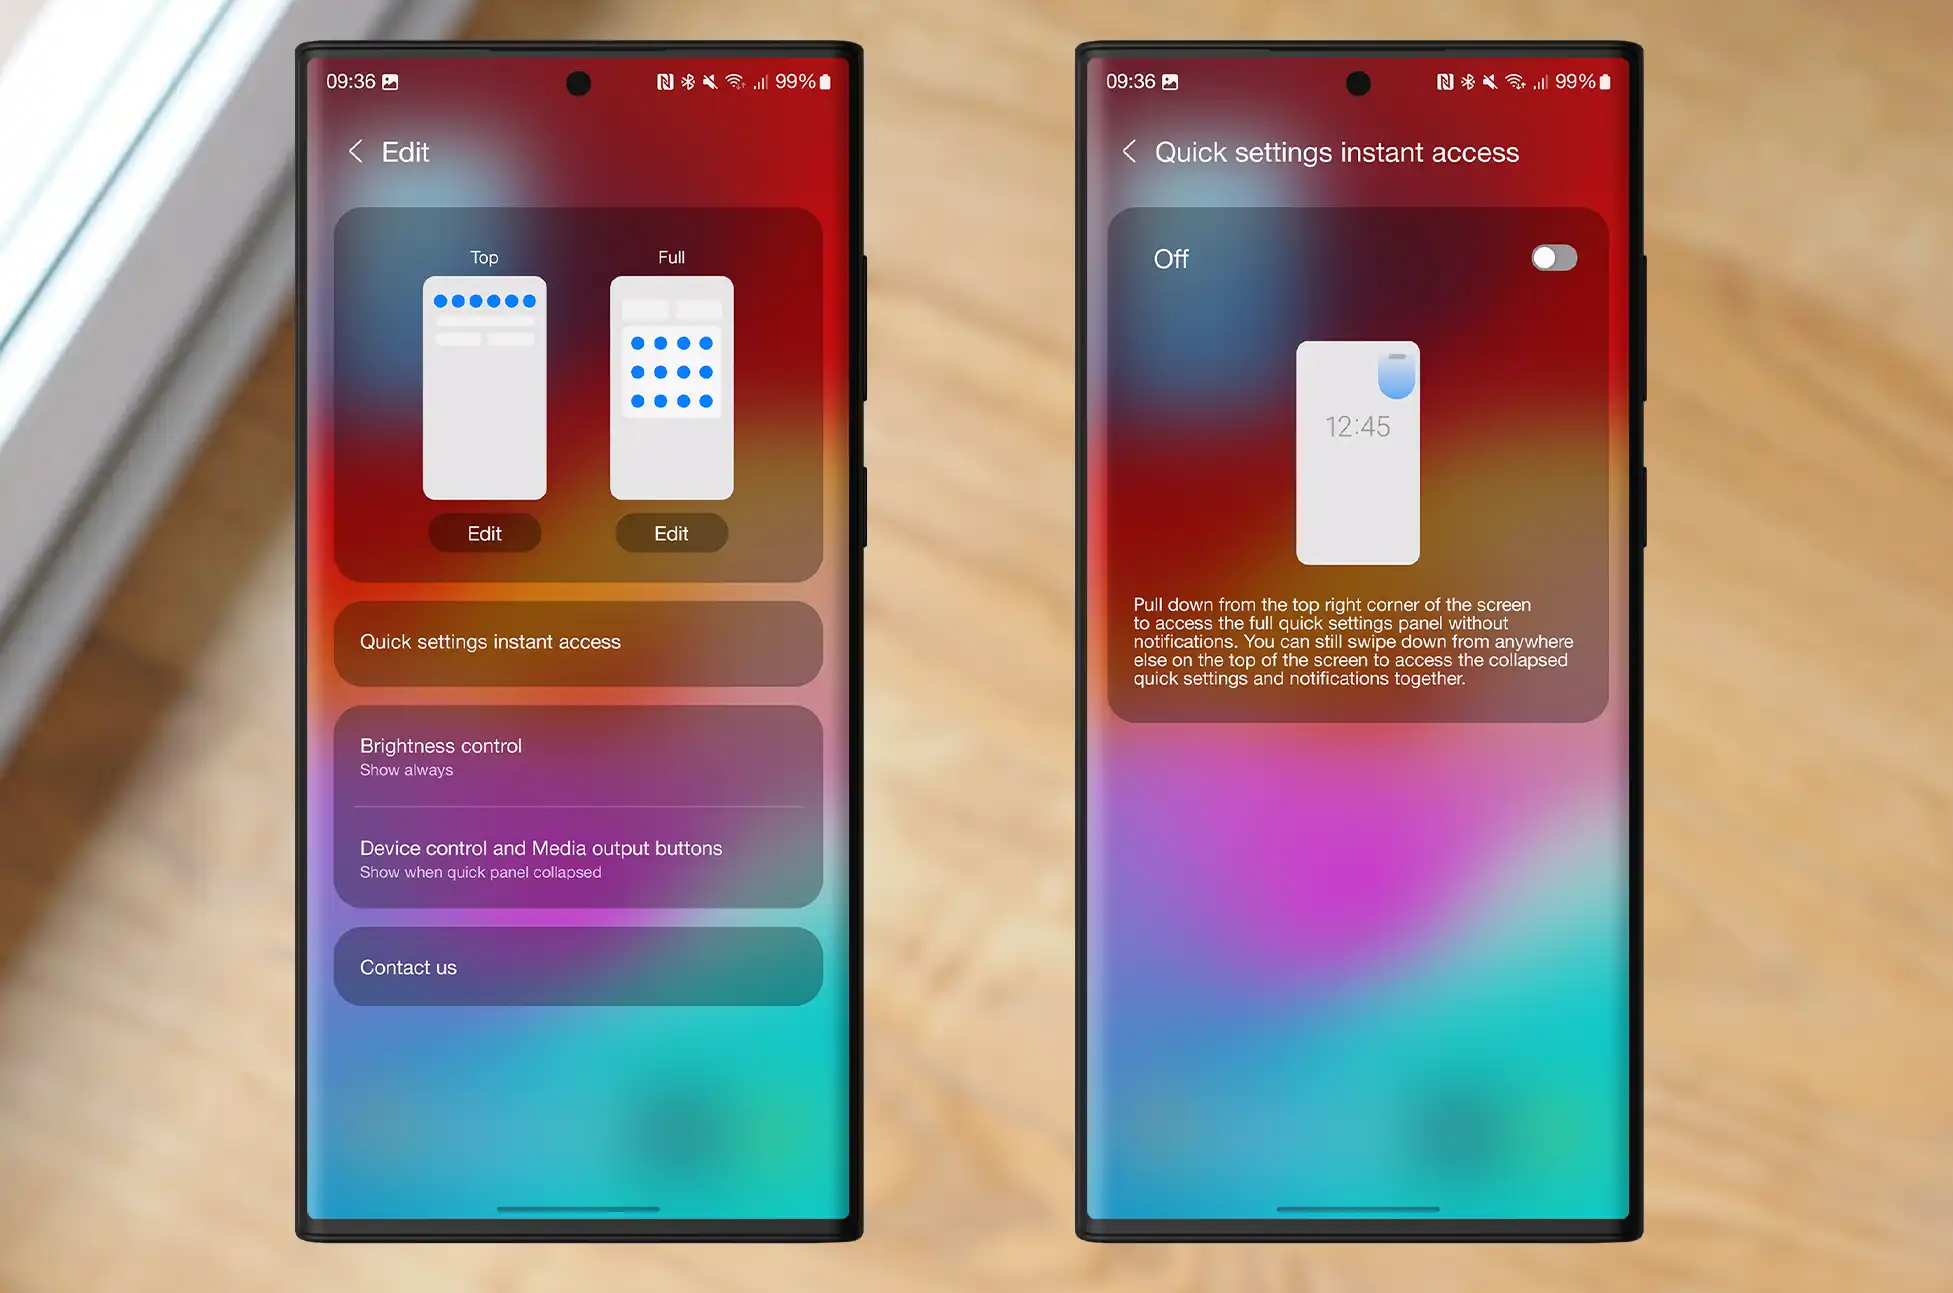
Android 14 One UI 6: Modified quick settings
In One UI 6, the quick settings panel has been given a complete makeover. Both the interface for customizing your quick settings toggles and the enlarged settings panel have been updated. In addition, the Control Center menu may now be fully expanded by swiping down from the top right of the screen, just like on the iPhone and iPad.
Android 14 One UI 6: New font styles and emojis
Samsung is modernizing the look of the entire user interface by upgrading the system font used in One UI 6. Samsung’s old emoji style, while unique, had a look that many Android lovers didn’t care for, and this new set, included in Samsung phones running One UI 6, is a significant upgrade. The new emojis are trendy and colorful, with subtle gradients added for depth.
Android 14 One UI 6: Additional modifications
One UI 6 also includes a number of other modifications that are more general in nature, such as aesthetic updates, a brand-new widget, and several usability enhancements.
A stylish new media notification
One UI eventually receives a fun, squiggly media player notification, long after Pixel phones received one. One UI 6’s media notification has a similar feel to Google’s implementation, with undulating waves swirling on top of the playback bar.
Additional fonts for the lock screen clock
Android 14 brought to Pixel phones the lock screen design customization that has been available in One UI. However, even on Galaxy devices, the new Android version offers more clock designs to choose from.
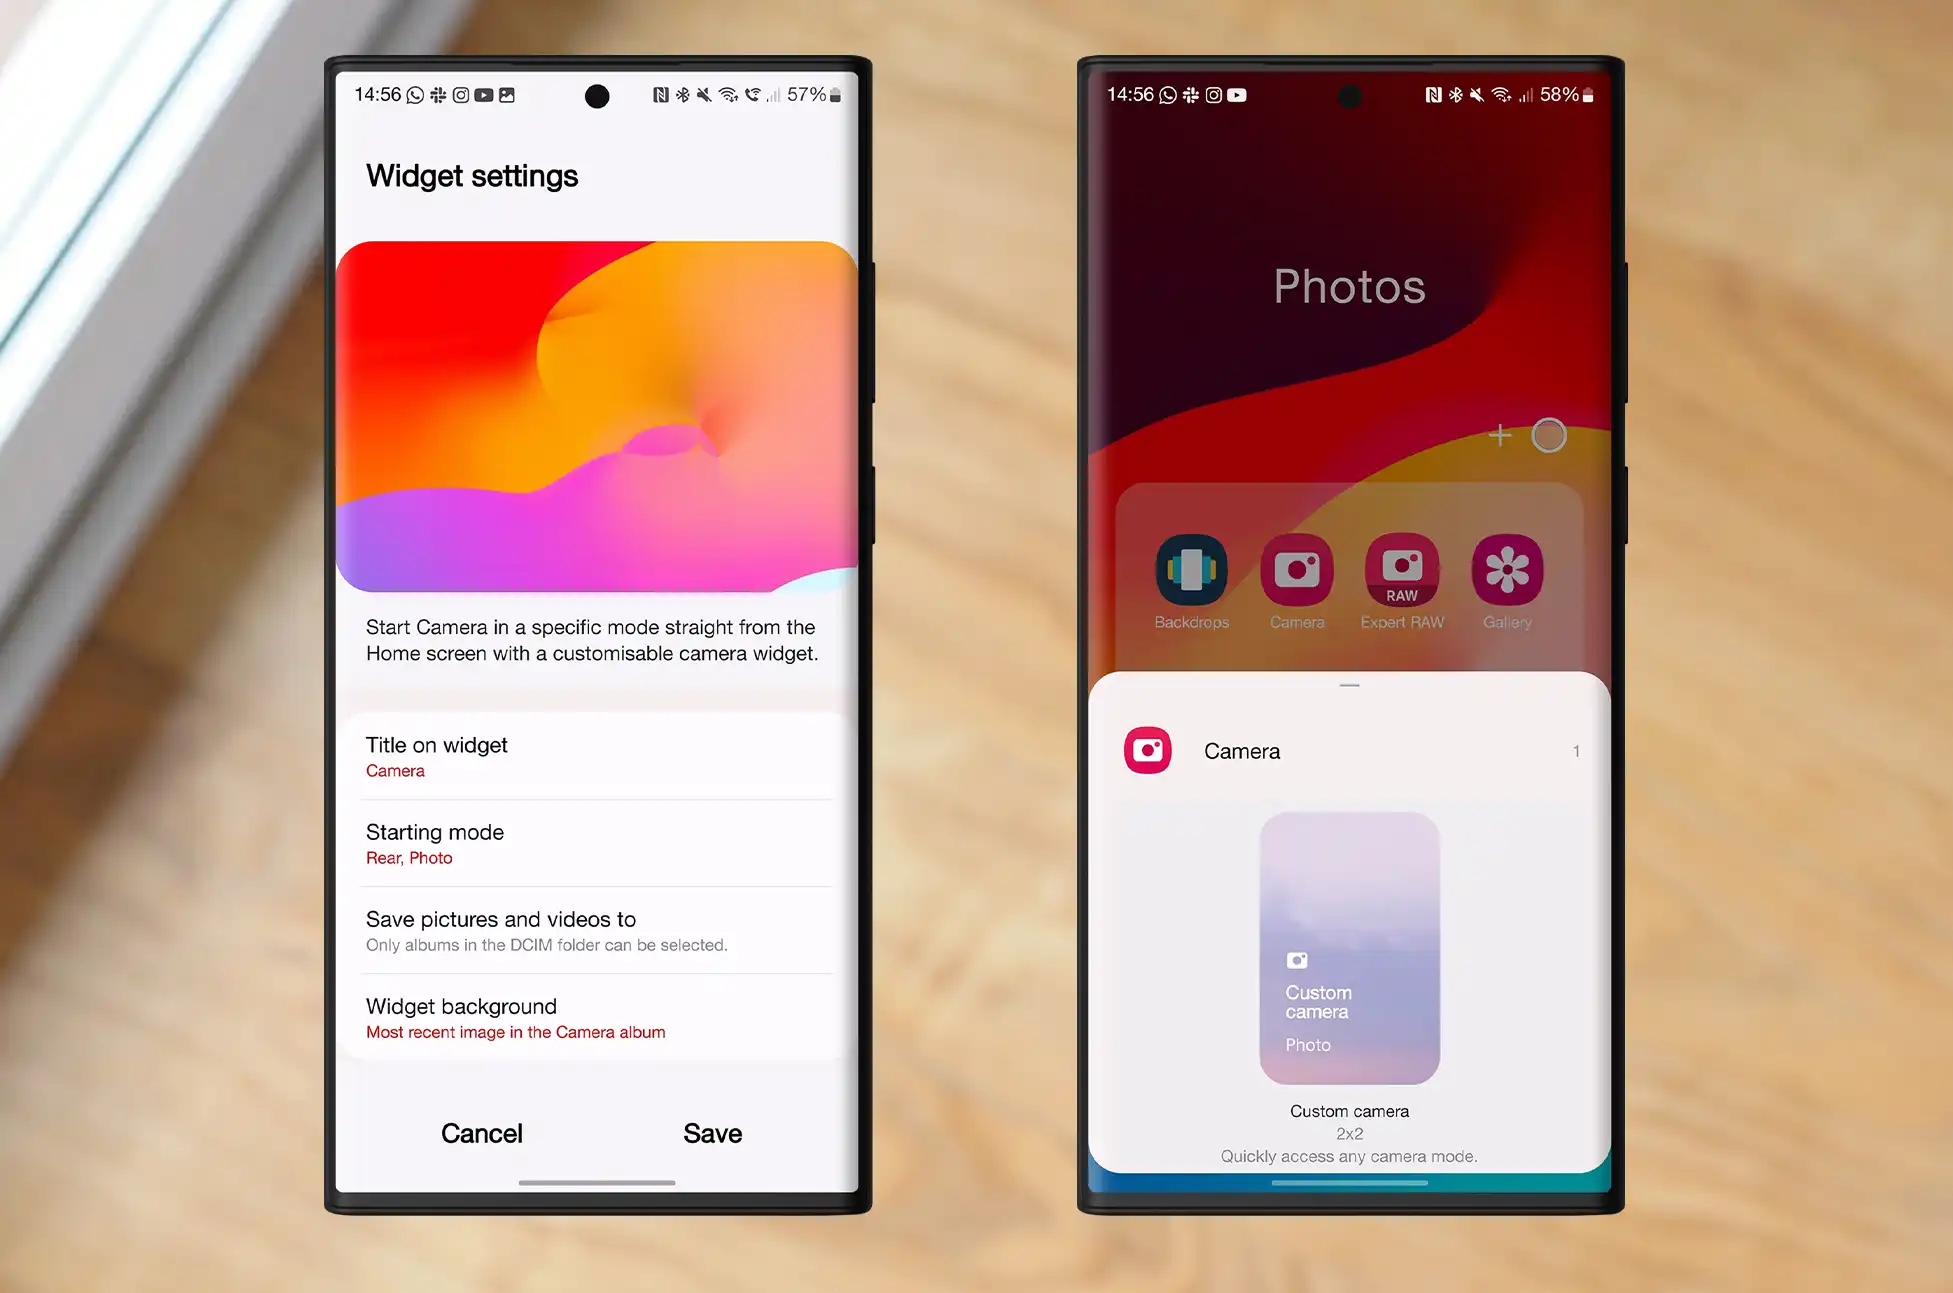
A fresh camera widget
A newly created camera widget allows you to place a shortcut to any camera mode on your home screen. You can also modify the widget’s displayed text and image.
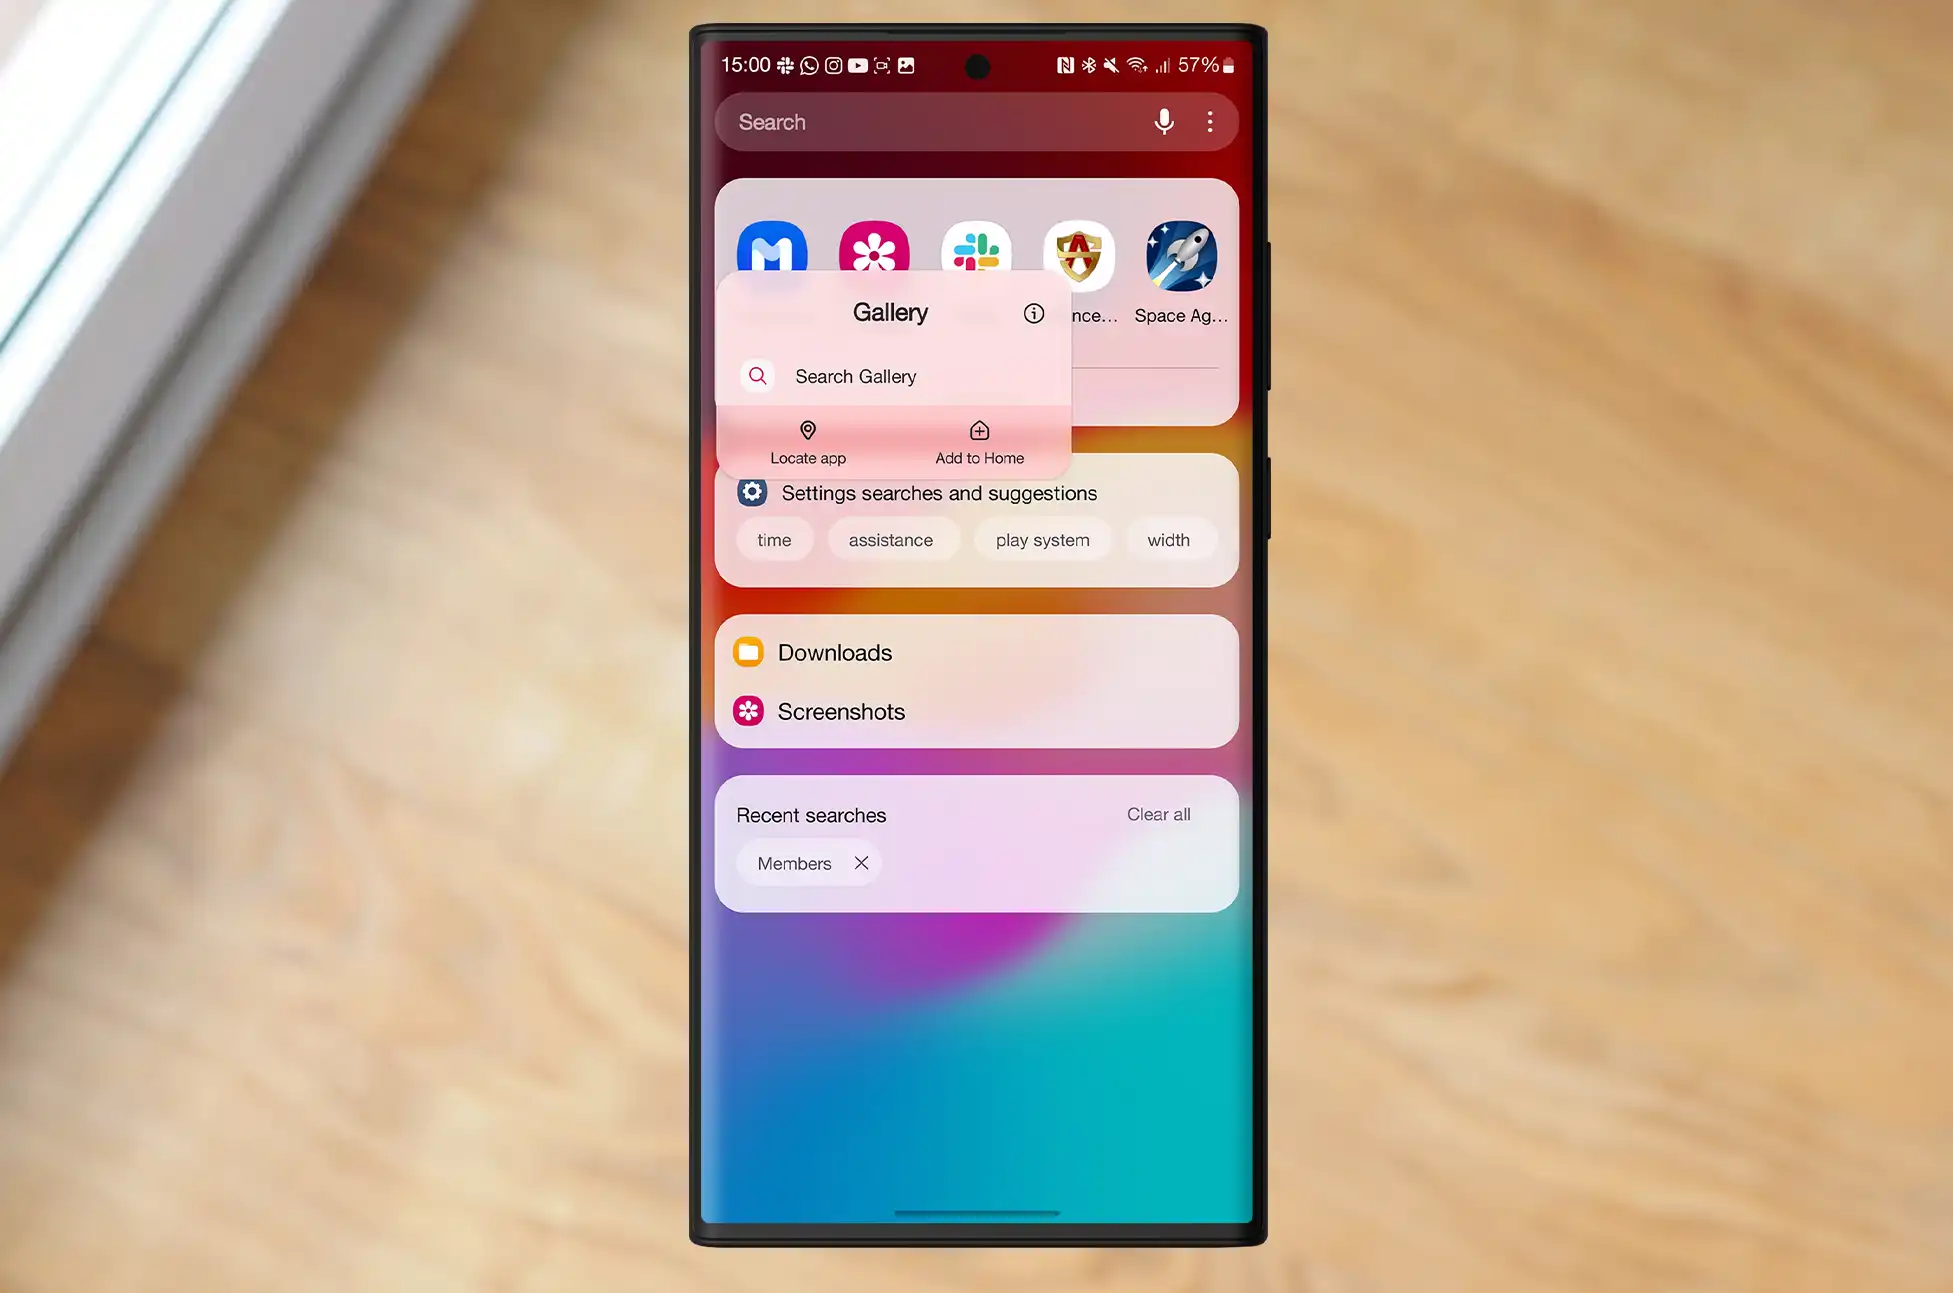
Quick actions for App search
You can now activate app fast actions from the app search bar. By pressing and holding on a search result brings up the same options as on the home screen or app drawer.
One UI 6 Beta is now accessible on Galaxy S23 smartphones
One UI 6 beta is currently available for Galaxy S23, S23+, and S23 Ultra users in China, Germany, India, Korea, Poland, the UK, and the US. If you use one of those phones in one of those countries, you can test-drive the software through Samsung Members. As the beta continues, Samsung may include other devices, such as the Galaxy Z Fold 5 and Z Flip 5.
Conclusion
If you’re a casual user or a dedicated gadget lover, Android 14 One UI 6 has something interesting in store for you. In fact, it has something amazing in store for everyone. Consequently, you should embrace the future, investigate the features, and personally experience the next stage in the evolution of mobile technology.
All products, and company names, logos, and service marks (collectively the "Trademarks") displayed are registered® and/or unregistered
trademarks™ of their respective owners.
The authors of this web site are not sponsored by or affiliated with any of the third-party trade mark or third-party registered trade mark owners,
and make no representations about them, their owners, their products or services.
Spam calls can be incredibly frustrating and intrusive. They waste our time, invade our privacy, and can even lead to scams or identity theft.
Fortunately, there are several effective measures you can take to protect yourself from spam calls on your Android device. In this blog post, we will explore some practical steps you can follow to prevent spam calls and enjoy a more peaceful mobile experience.
Prevent Spam Calls by Switching on the spam filter
Using Android’s built-in spam filter is the simplest approach to block spam calls. Although the procedure varies slightly depending on the phone and carrier, your phone’s dialer program should have a spam filter by default. For some Android phones with the built-in Phone by Google app, follow these instructions.
Open your Phone app.
In the top-right corner, tap the three dots symbol.
Select “Settings.”
Click “Caller ID & spam”
Activate “Filter spam calls.” If you discover that you’re missing important calls, you can activate “See call and spam ID”. If the program just offers the “See call and spam ID” option, then just turn that on if that’s the case.
Prevent Spam Calls using Manually Block Spam
On Android, blocking a certain number might be less complicated if you’re fortunate and only sometimes receive spam calls. Depending on your phone model and carrier, the procedure will once more differ slightly. Manually blocking a number can be done in two ways that are most frequently used:
To display recent calls, open the Phone dialer app and select “Recent”.
Long-press the phone number, then select “Block.”
If you long-press a number and don’t see “Block” appear, tap the number you wish to block. Just tap the number; don’t tap the phone icon.
Choose “Block number” from the three dots in the top right corner of the screen.
This obviously only blocks one number. In order to avoid being permanently blocked by you, spammers frequently alter their phone numbers.
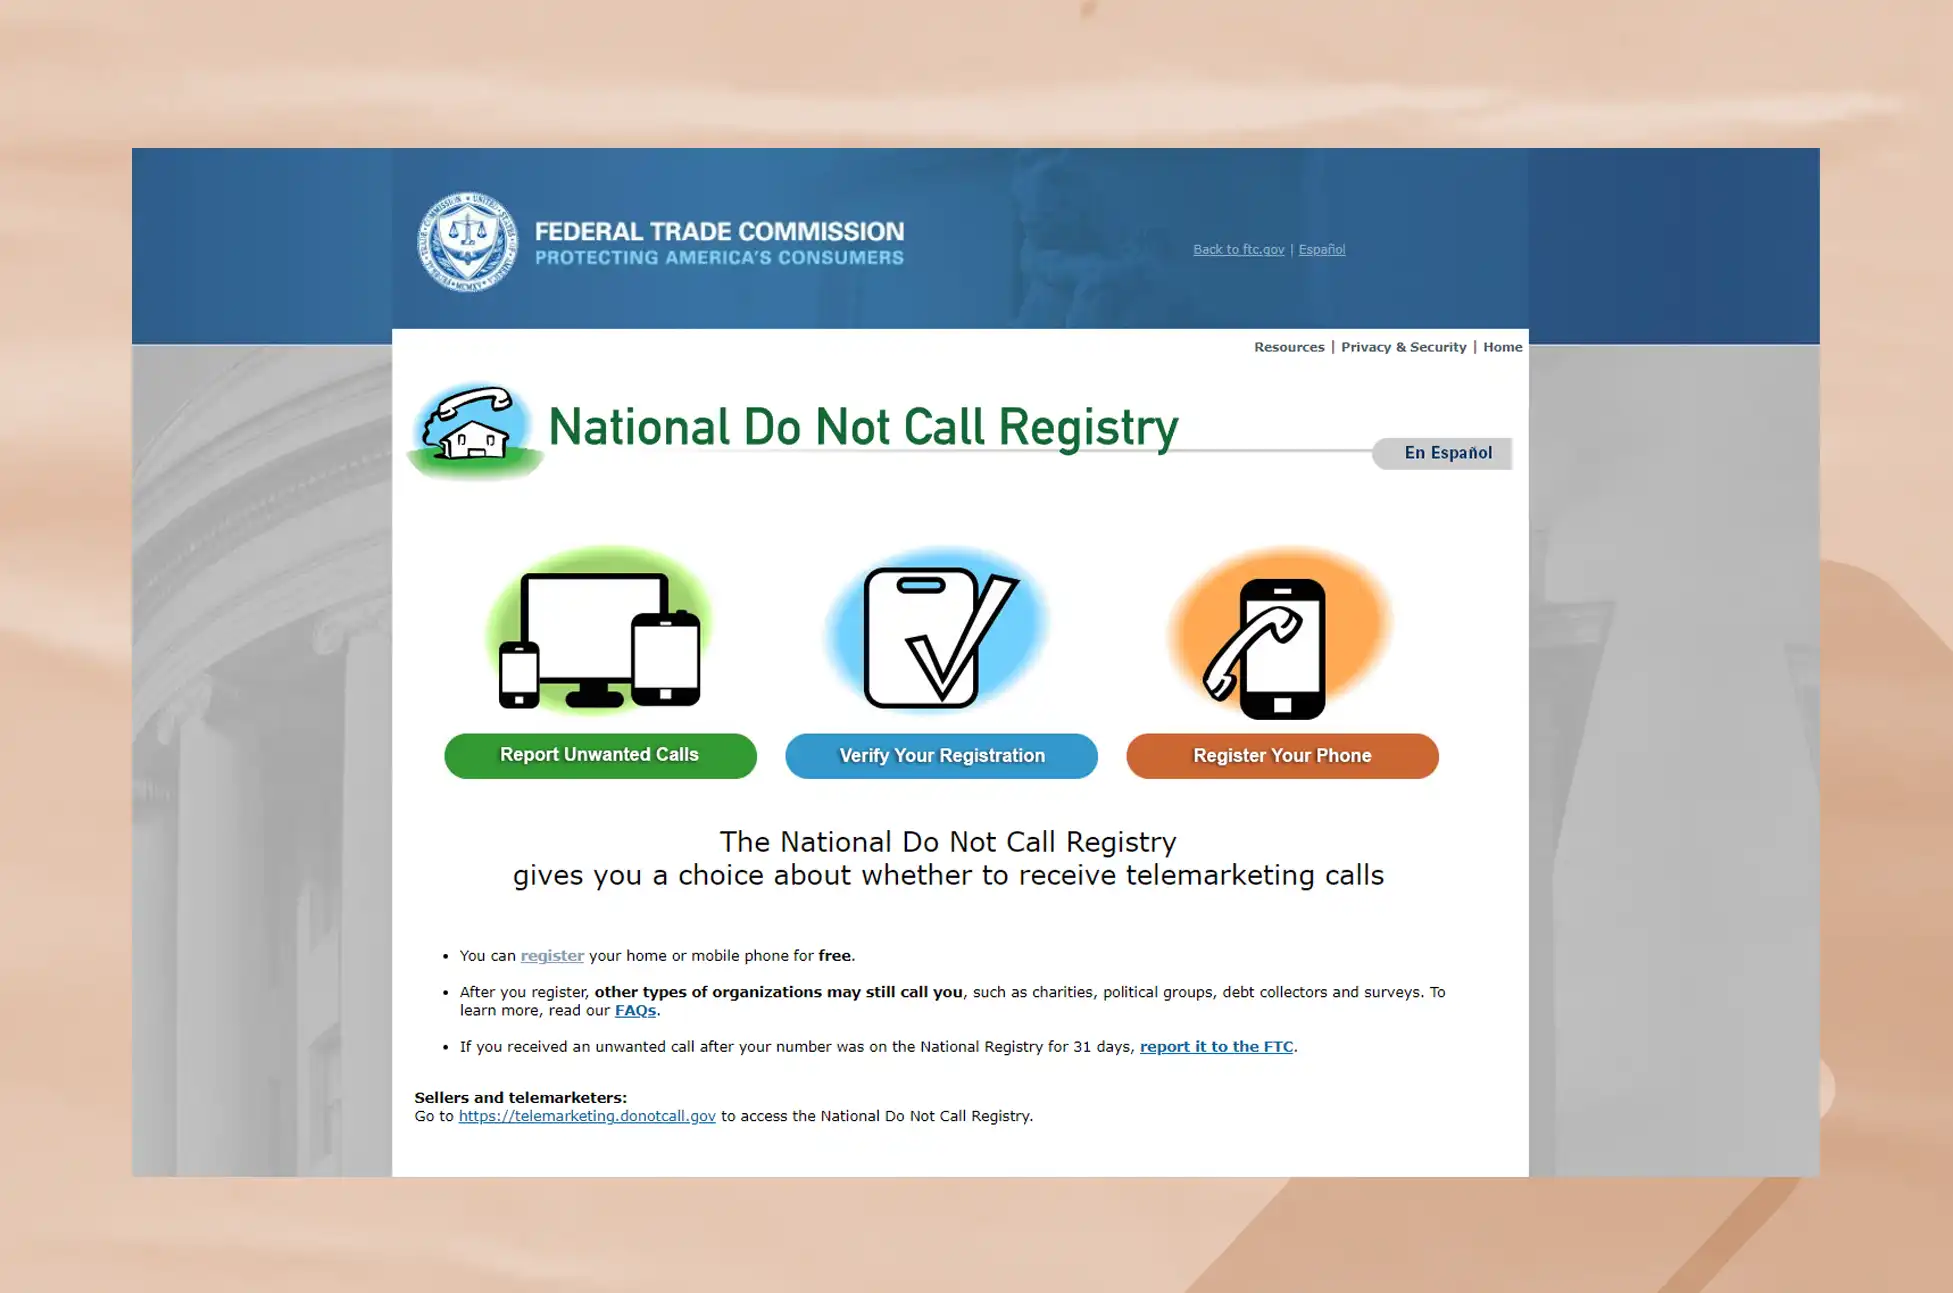
Register your number on the Do Not Call List
Adding your phone number to the national Do Not Call List is another action you can do to stop spam calls. This registry aids in reducing telemarketing calls that aren’t necessary. In order to register your phone number and decrease the number of legitimate marketing calls you receive, go to the Do Not Call official website or dial the toll-free number.
Install a call-blocking app
Numerous call-blocking apps are readily available on the Google Play Store and offer advanced spam call prevention in addition to the built-in functions. These apps automatically detect and reject spam calls using crowdsourcing databases and artificial intelligence. Truecaller, Hiya, and RoboKiller are a few well-known call-blocking applications. Install one of these programs, then adjust the parameters to your taste.
Be cautious with sharing your number
Refrain from giving it to unreliable websites or online platforms, especially those that seem suspect. Spammers frequently gain phone numbers through website scraping or data breaches. When completing online forms, doing surveys, or signing up for services, use caution. If you want to reduce the likelihood of getting spam calls, think hard before disclosing your phone number.
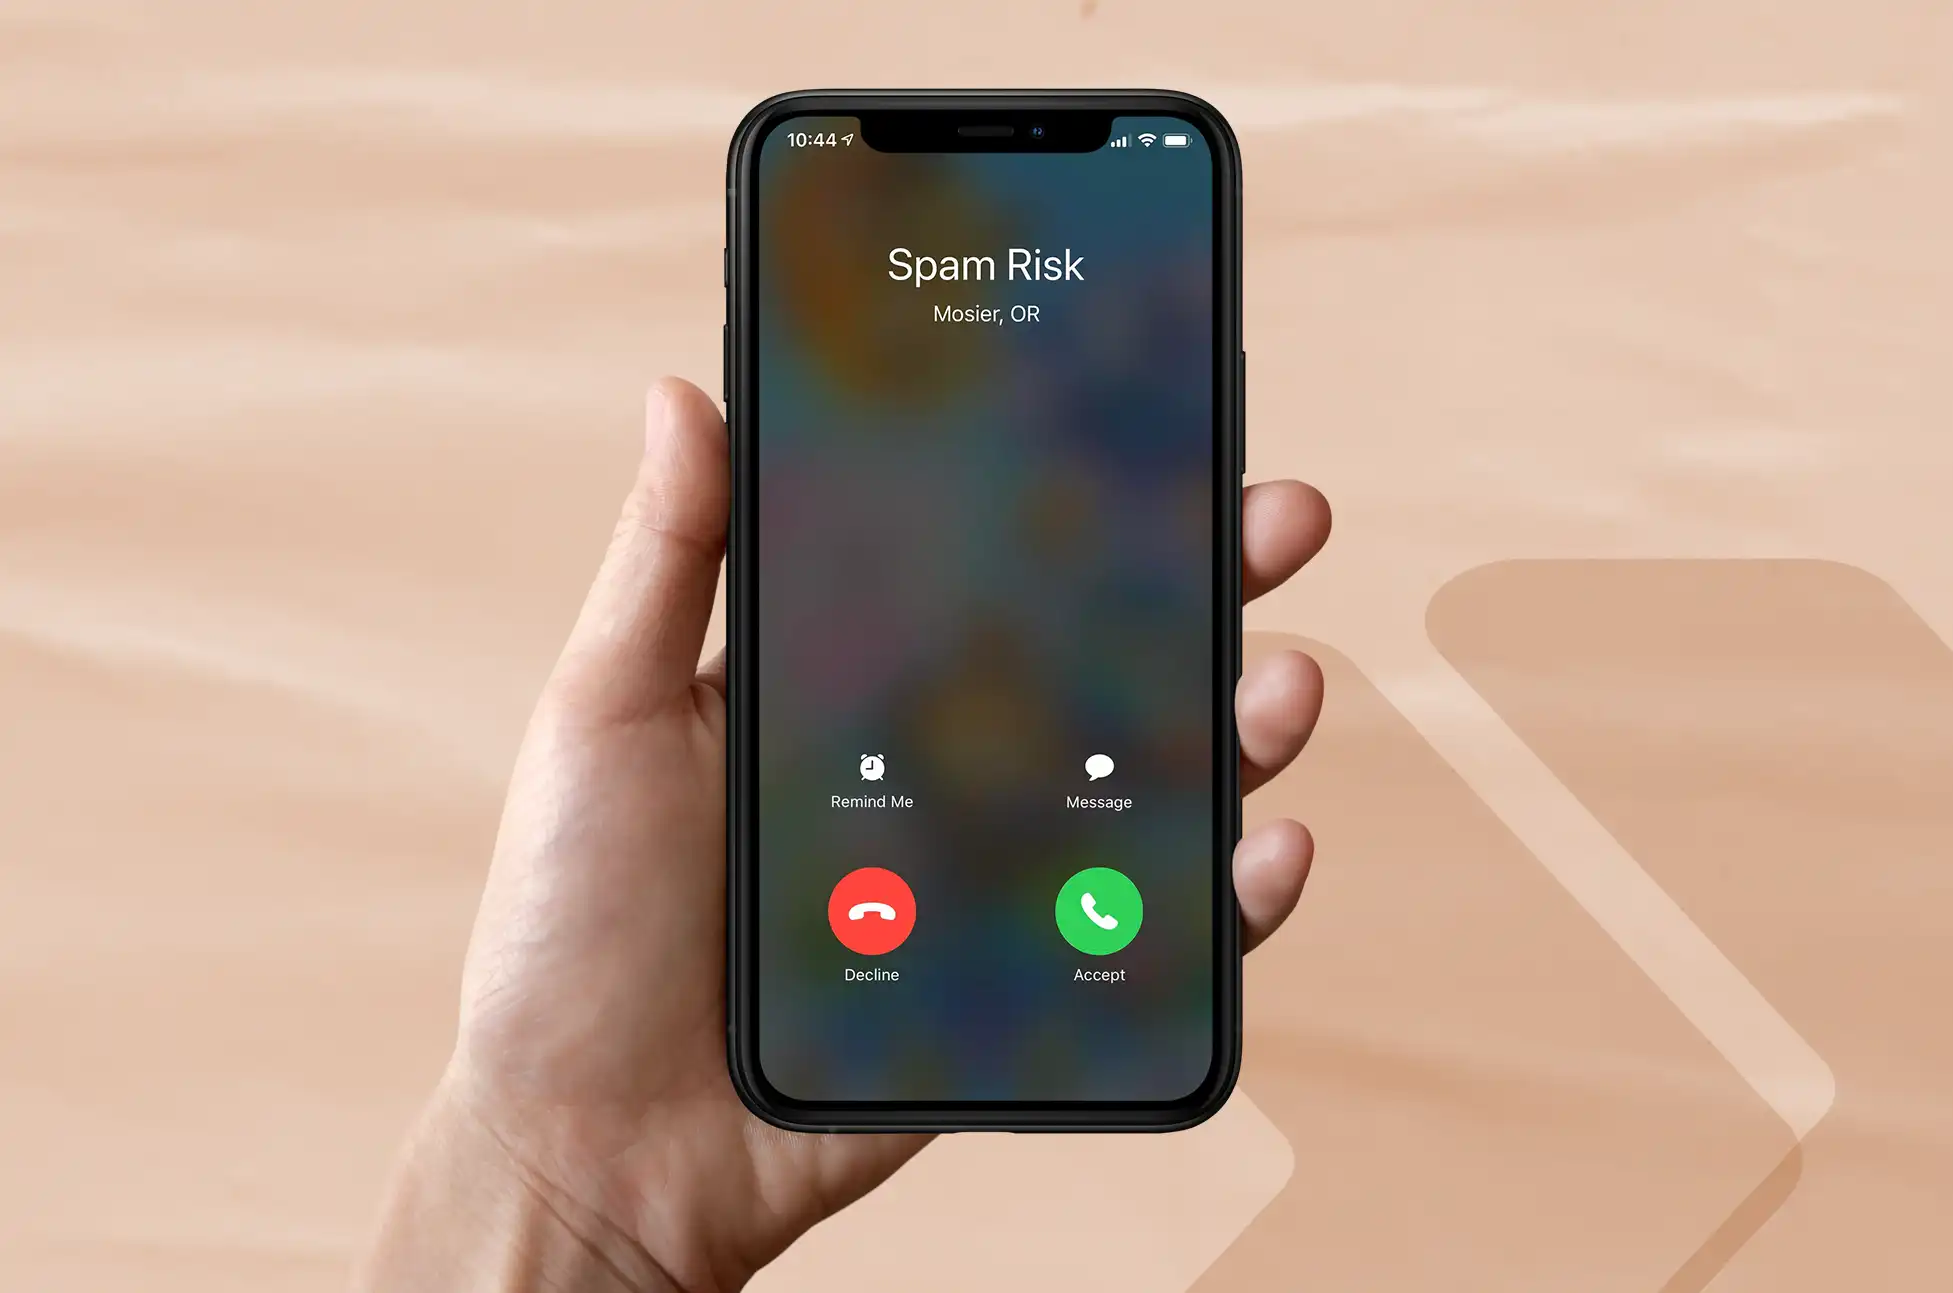
Avoid responding to or engaging with unknown callers
It’s preferable to let a call from an unknown number go to voicemail if you receive one. Answering or conversing with obtrusive callers can reveal that your number is live and bring on other spam calls. A voicemail will probably be left if it’s an important call from a reliable source. If you choose to return the call, use your discretion.
Report spam calls
Be proactive in the fight against spam calls by filing a report on them. The call log or Caller ID screen on Android devices frequently allows you to report spam calls directly. Informing authorities and service providers about spam calls enables them to take action against spammers and enhance call-blocking technology.
Conclusion
You may drastically cut down on the number of spam calls that your Android device receives by taking these proactive measures. Always be on the lookout for spam calls, and report any you receive. You can have a more tranquil and trouble-free mobile experience with these preventive measures in place.
All products, and company names, logos, and service marks (collectively the "Trademarks") displayed are registered® and/or unregistered
trademarks™ of their respective owners.
The authors of this web site are not sponsored by or affiliated with any of the third-party trade mark or third-party registered trade mark owners,
and make no representations about them, their owners, their products or services.
How to unlock phone without password? Smartphones have become indispensable in the modern world, where we must perform several tasks quickly and frequently. The password or pattern we choose to keep our gadget secure is easily forgotten, though. Don’t worry if you accidentally lock yourself out of your phone. In this guide, we will go over a number of options for bypassing a locked phone that you can try. Before we go any further, it’s important to remember that these techniques should only be used on devices that you own.
How to unlock phone without password
No longer do we need to remember tedious passwords and patterns to access our beloved smartphones! If you’ve ever been shut out of your phone, don’t worry, because we have the perfect guide to help you unlock it without breaking a sweat.
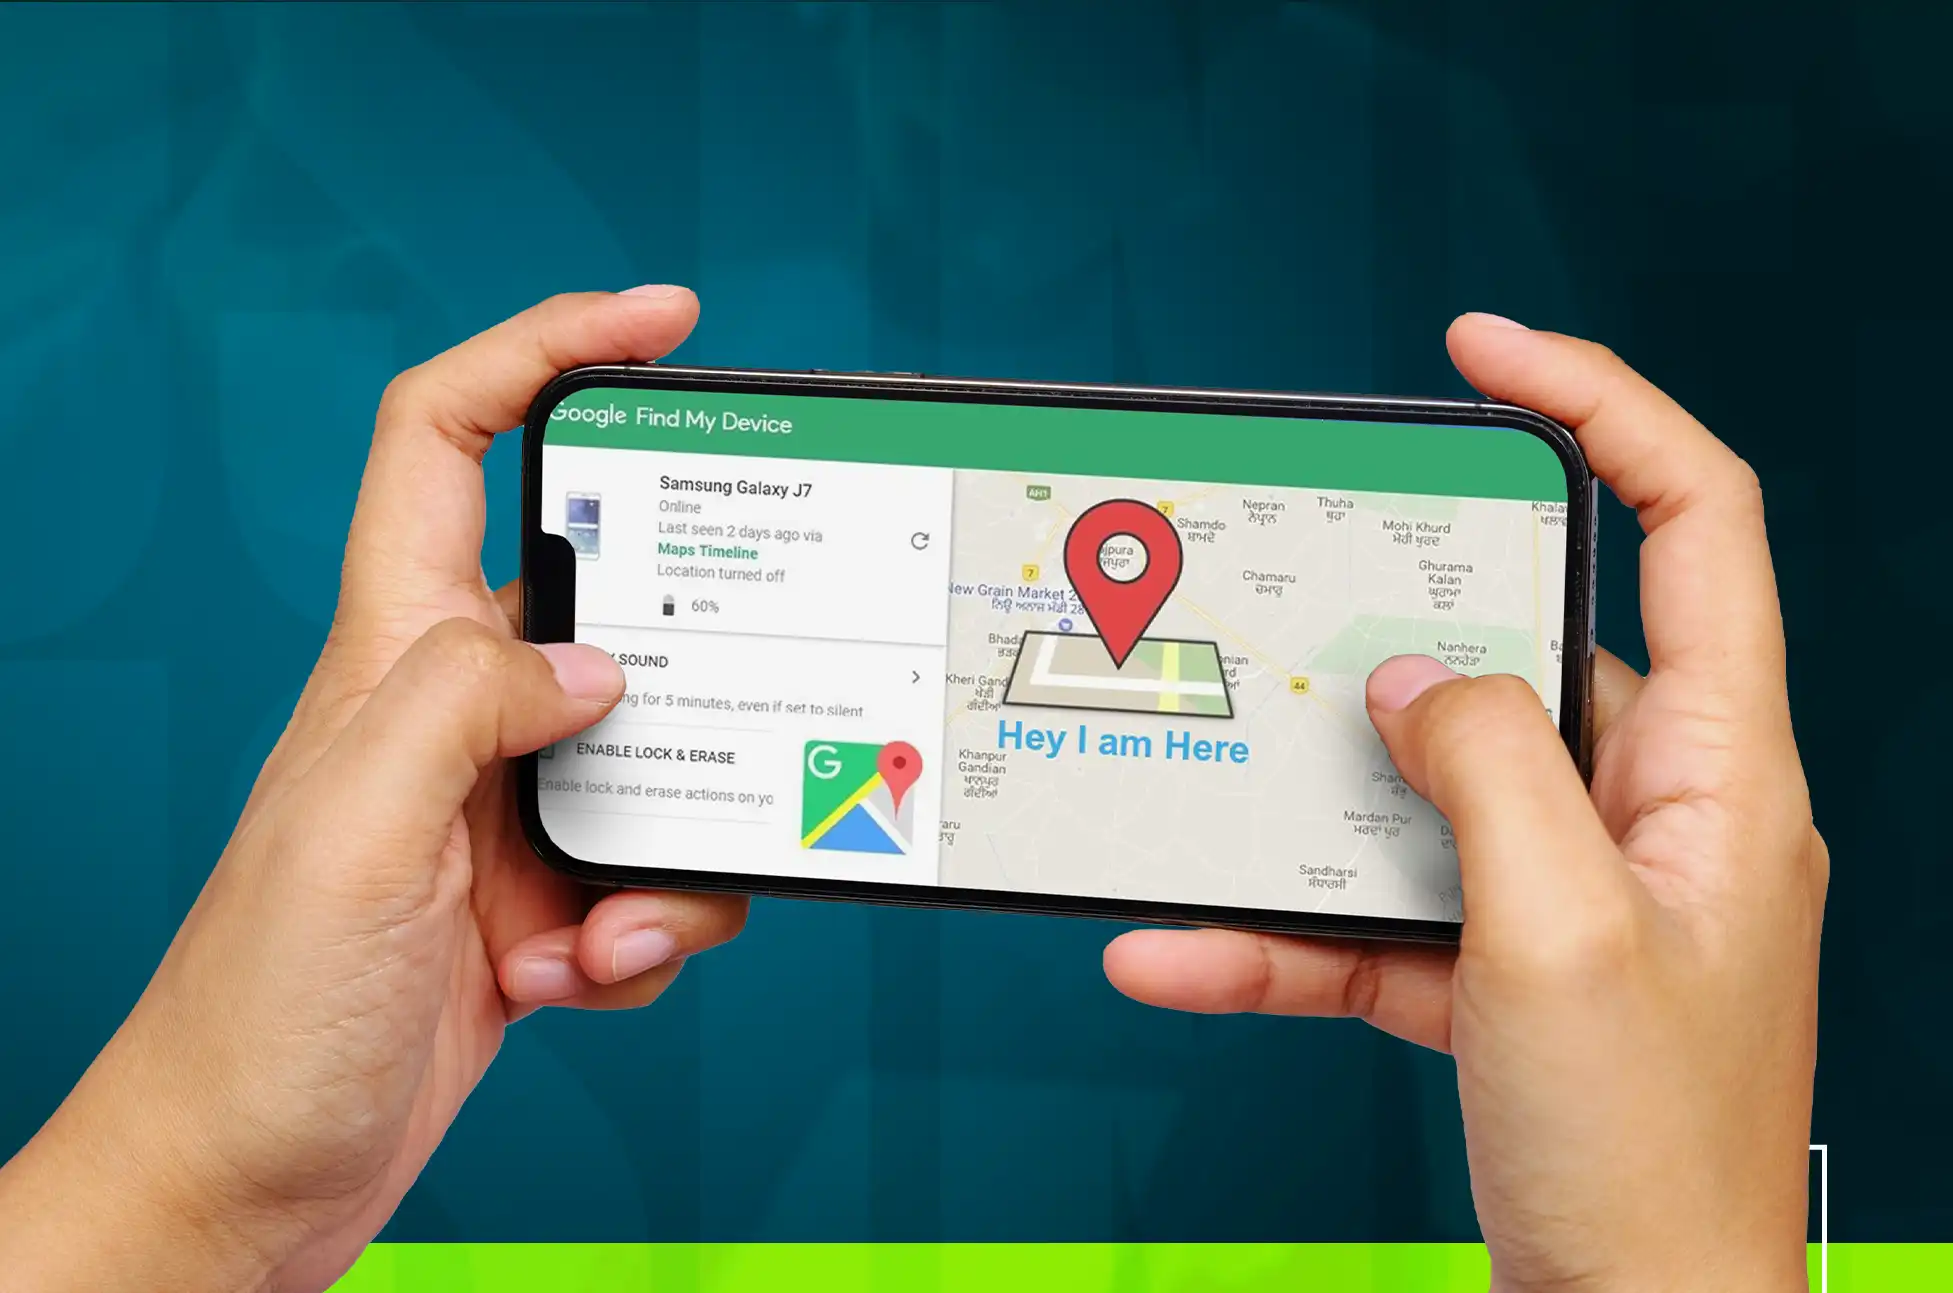
Google Find My Device
Phone go missing? Don’t fret! Both the Android and iOS versions of Find My Device (developed by Google) and Find My iPhone (developed by Apple) have your back. Log in to your account through a web browser on your computer, and then use the phone locator feature. You can release your tension by unlocking your phone from afar. It’s like having a personal angel watch over your mobile device.
Select Secure Device from the menu. Select Erase Device once you have successfully locked the phone. Your phone will be untraceable when you wipe it, but you can protect it with a new passcode. Once you’ve signed into your Google account again, you can restore your applications and photos.
Android Smart Lock
Sometimes all it takes to get your phone unlocked is to put it in your pocket or bring it indoors. Because a feature called Smart Lock has been standard on Android devices ever roughly version 5. The lock screen’s proximity condition allows the phone to remain unlocked in one of the following circumstances:
On your person (such as in your pocket or hand), for example.
At the location that you specify
In close proximity to another Android device that you specify
Smart Lock has a single flaw, which you’ve undoubtedly guessed: it cannot be activated after the phone has been locked. You must put it up in advance. Open the Settings app on your Android device and select Security & lock screen, followed by Smart Lock, if you wish to implement this feature. If a screen lock is not enabled, this control will not be displayed.
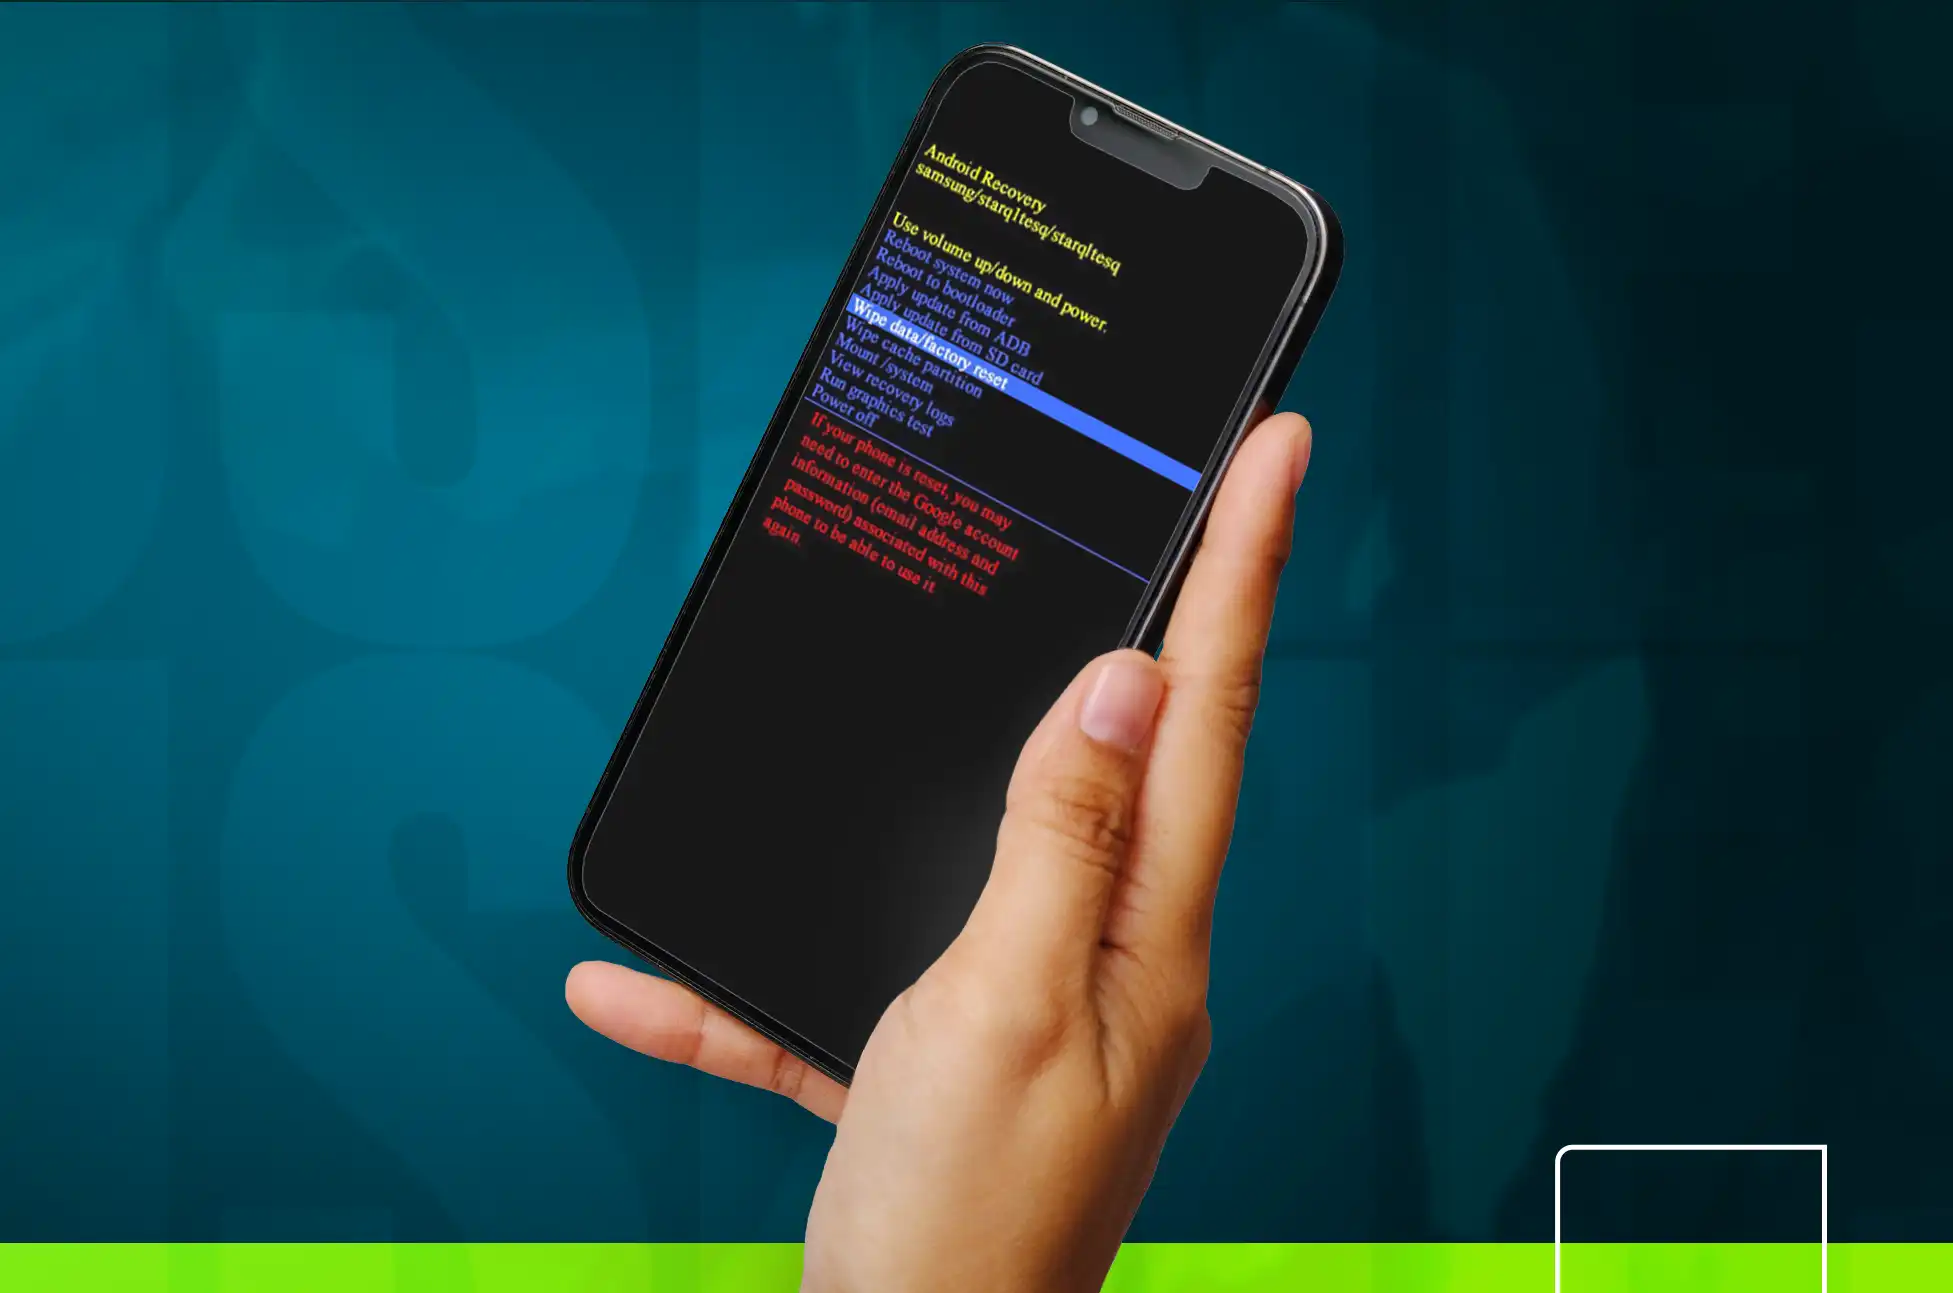
Factory Reset: The Last Resort:
Android phones can be reset from a locked state by simultaneously tapping and holding the power button and volume down button. Make sure your phone is connected to a charger during this procedure, as it requires a lot of power.
A menu should appear following the Android logo. Press the power button again after using the volume controls to navigate down to Recovery. You’ve reached the reset menu. Press the power button after using the volume controls to navigate to the Wipe data/factory reset option. You will be prompted to validate the reset; press the power button once more to do so. Resetting will begin. The phone should be turned off when the task is complete. Turn the phone back on and reinstall your apps or download your backup from Google, if you have one.
Some mobile devices have a tangible home button. Press the home button in addition to the power and volume up buttons at the outset of the process if your phone has this configuration.
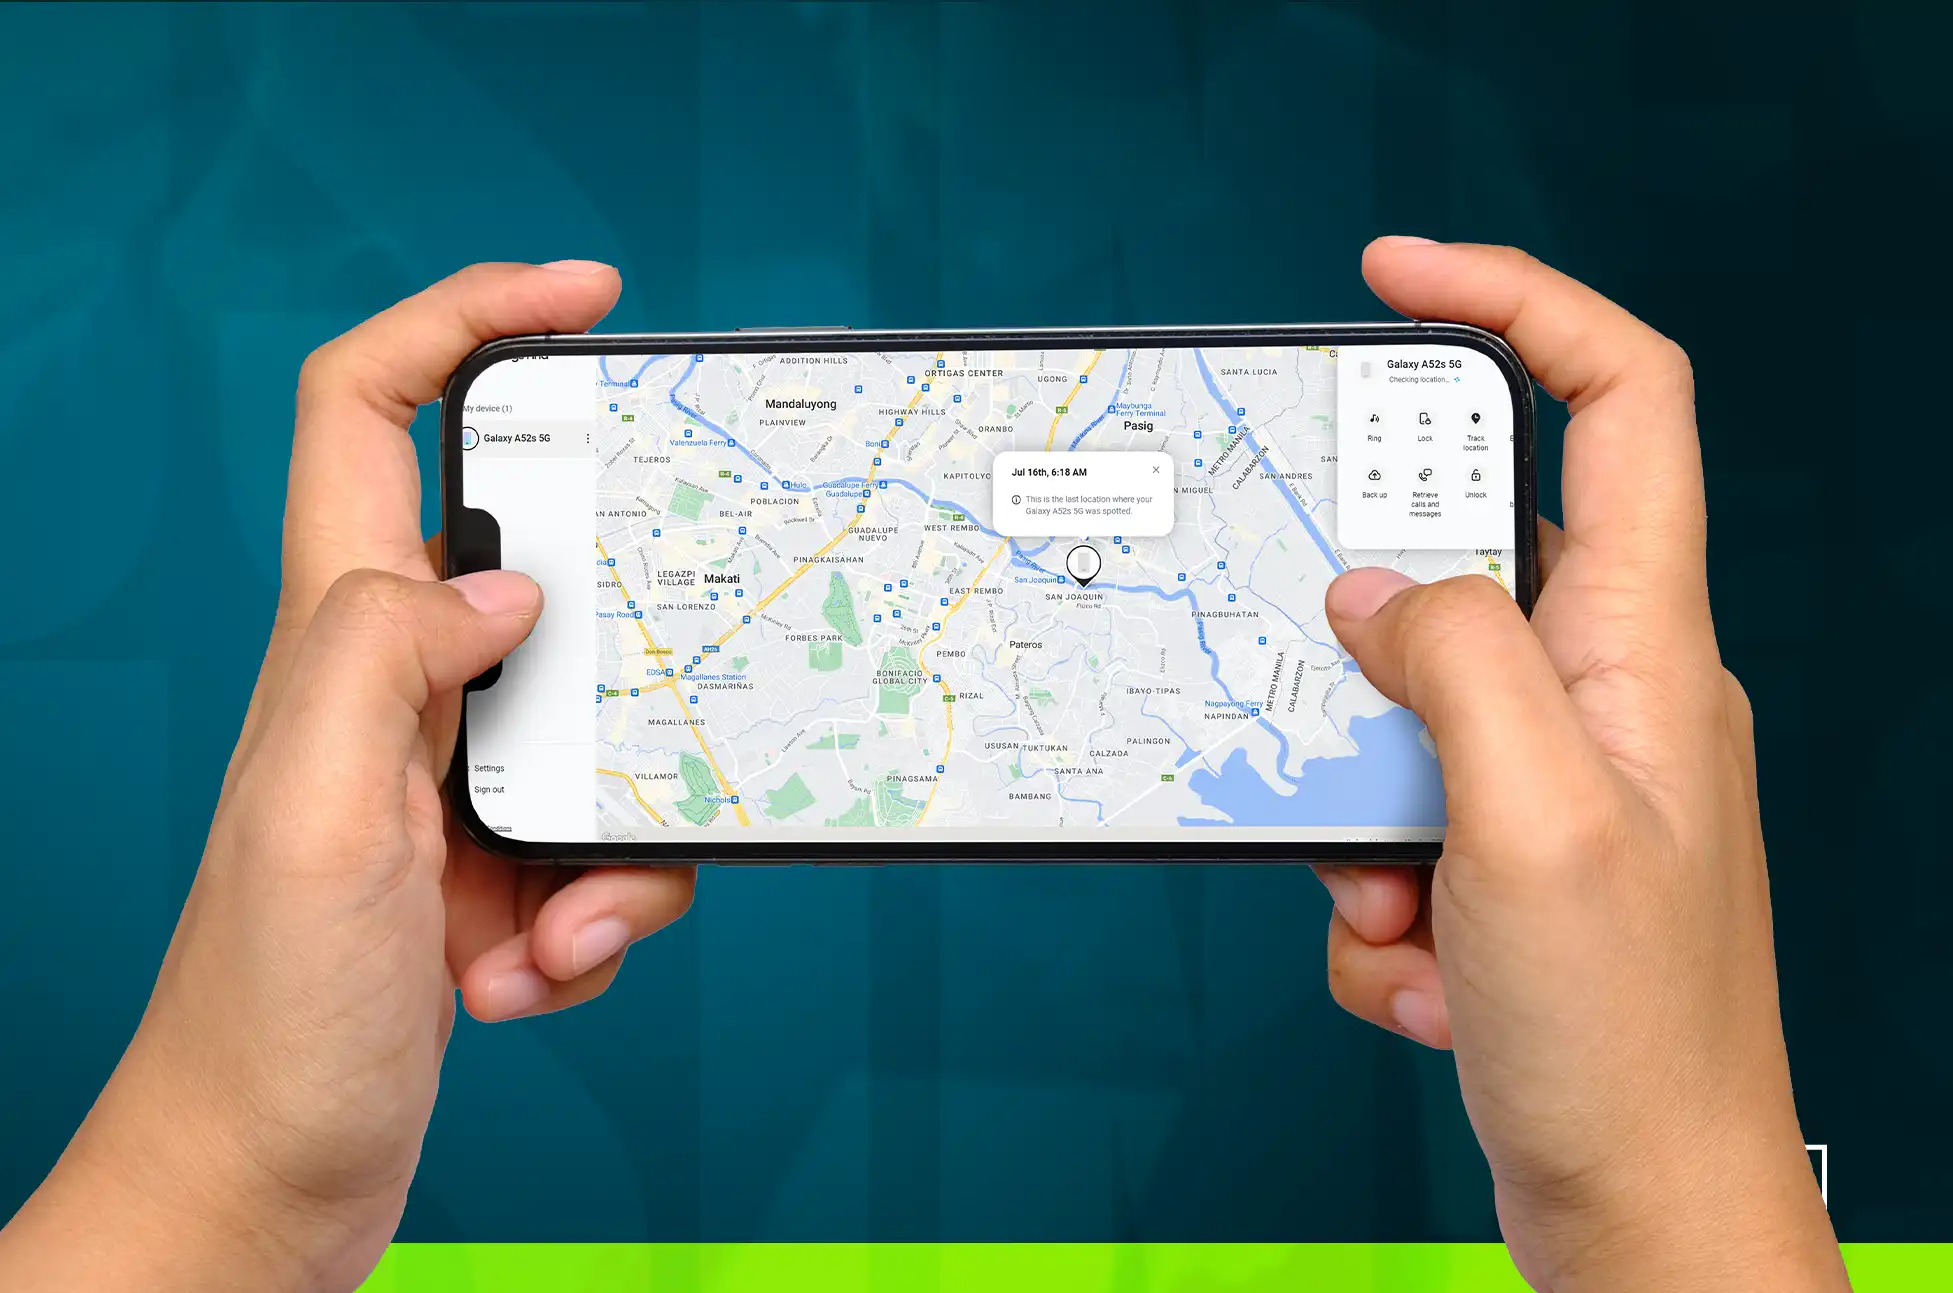
How to unlock phone without password ( Samsung )
About 25% of all mobile phones sold today are Samsung products. You can see that Samsung has placed its own stamp on certain parts of Android if you own a Samsung phone and compare it to the pure Android experience offered by the Pixel. Because of this, you may find some duplicate software or slightly altered settings menus. Samsung’s SmartThings Find is similar to Google’s Find My Device.
To access the site, you must first sign in with your Samsung account. When you do, a map and list of all of your Samsung devices that are on, connected to Wi-Fi or cellular, and have Remote Unlock enabled will be displayed on the left. When you click on the locked device, a menu will appear on the right. The Unlock option is available. Just click it and say yes when prompted. In just a few seconds, your phone will be free of its lock. Remote Unlock, like Android Smart Lock, requires setup before it can be used.
Conclusion
There has never been a time when bypassing the need for a password on a mobile device was simpler or more fun. The options are practically limitless, ranging from the charmingly futuristic appeal of the personalized ease of Smart Lock to the powerful remote capabilities of Find My Device or Find My iPhone. Always put the safety and confidentiality of your phone first when using these methods, and don’t forget to act properly.
All products, and company names, logos, and service marks (collectively the "Trademarks") displayed are registered® and/or unregistered
trademarks™ of their respective owners.
The authors of this web site are not sponsored by or affiliated with any of the third-party trade mark or third-party registered trade mark owners,
and make no representations about them, their owners, their products or services.
how to remove virus on android ? In a world when our cellphones have become extensions of our own beings, keeping them in top condition is important. Imagine this: you’re attempting to master the latest mobile game, watch your favorite shows, or simply keep connected with loved ones, but your Android device is infected with viruses, impeding its functionality. Fear not, for we are here to reveal the methods to eradicating those annoying intruders from your Android, allowing it to reach its full potential! Buckle up, my friends, as we go on a journey for peak performance!
How to remove virus on android : Understanding the Enemy Within
Android users now confront the painful reality of dealing with malware in this technological age. They sneak onto our devices and damage performance, introduce bugs, and even compromise security.
Phones and malware
The vulnerability of phones to viruses depends on the operating system (OS) they use. Popular OSes with security vulnerabilities are targeted by malware. For instance, Android phones, which have an open-source OS, can obtain apps from third-party sources if enabled. This poses risks but can be done with caution. On the other hand, Apple’s closed ecosystem prevents running third-party apps, making it less susceptible to viruses.
Types of malware
Mobile devices can be infected with various malicious software, including Trojan horses, spyware, and worms. These differ from viruses in their behavior and propagation methods. Viruses attach to files and spread when those files are opened, while worms can cause harm without user interaction. Trojan horses do not replicate but serve as gateways for data theft. Just as you should be cautious when playing on a wheel of fortune online casino, it’s important to stay vigilant about mobile security to avoid falling victim to these threats.
Mobile malware examples
Though rare, instances of mobile malware exist. Cabir was the first mobile worm, discovered in 2004, but it wasn’t dangerous. Android/Filecoder.C is ransomware that locks files until a payment is made. Loki Bot spyware steals login credentials, while OpFake is a Trojan horse that sends hidden text messages and requests administrative access.
Common signs that your phone has virus
Battery drain: Infected apps running in the background can rapidly drain your battery.
Unknown apps: New apps appear on your phone without your knowledge or recollection of installing them.
App crashes: If multiple apps crash frequently or behave unexpectedly, malware may be the cause.
Overheating: Infected background apps can overload your device’s RAM, leading to overheating.
Increased data usage: Infected apps using data in the background can result in higher data consumption.
Ad flooding and browser hijacking: Adware may take control of your browser, redirecting you to different websites and bombarding you with ads.
Google account sign-out: Google may sign you out of your accounts and display an alert if malware is detected, providing instructions for account restoration.
Unusual spam texts: Malware can send links to your contacts via emails or text messages, potentially leading to unauthorized purchases or unusual transactions.
Remember to stay vigilant and take appropriate action if you suspect malware on your phone.
How to remove virus on android
How to remove virus on android ? The latest Samsung smartphones are powered by McAfee protection, and you can check for viruses using the built-in scan application. Google Play Protect is also available for other smartphones. Later in this essay, we’ll go through how to use it. You may also get free scanners and antivirus software from the Google Play Store. While “free” may be appealing, they provide less security features than commercial versions and can report false positives when checking for malware.
As an alternative, you can start your phone in Safe mode. Safe mode boots your phone into a version that only runs system apps. This manner, you can utilize it as if it were a factory reset to see if the problem is caused by the device or by the apps you recently installed. After you’ve made a diagnosis, delete the programs and exit Safe mode. The methods to launch it may differ based on the model and operating system of your device.
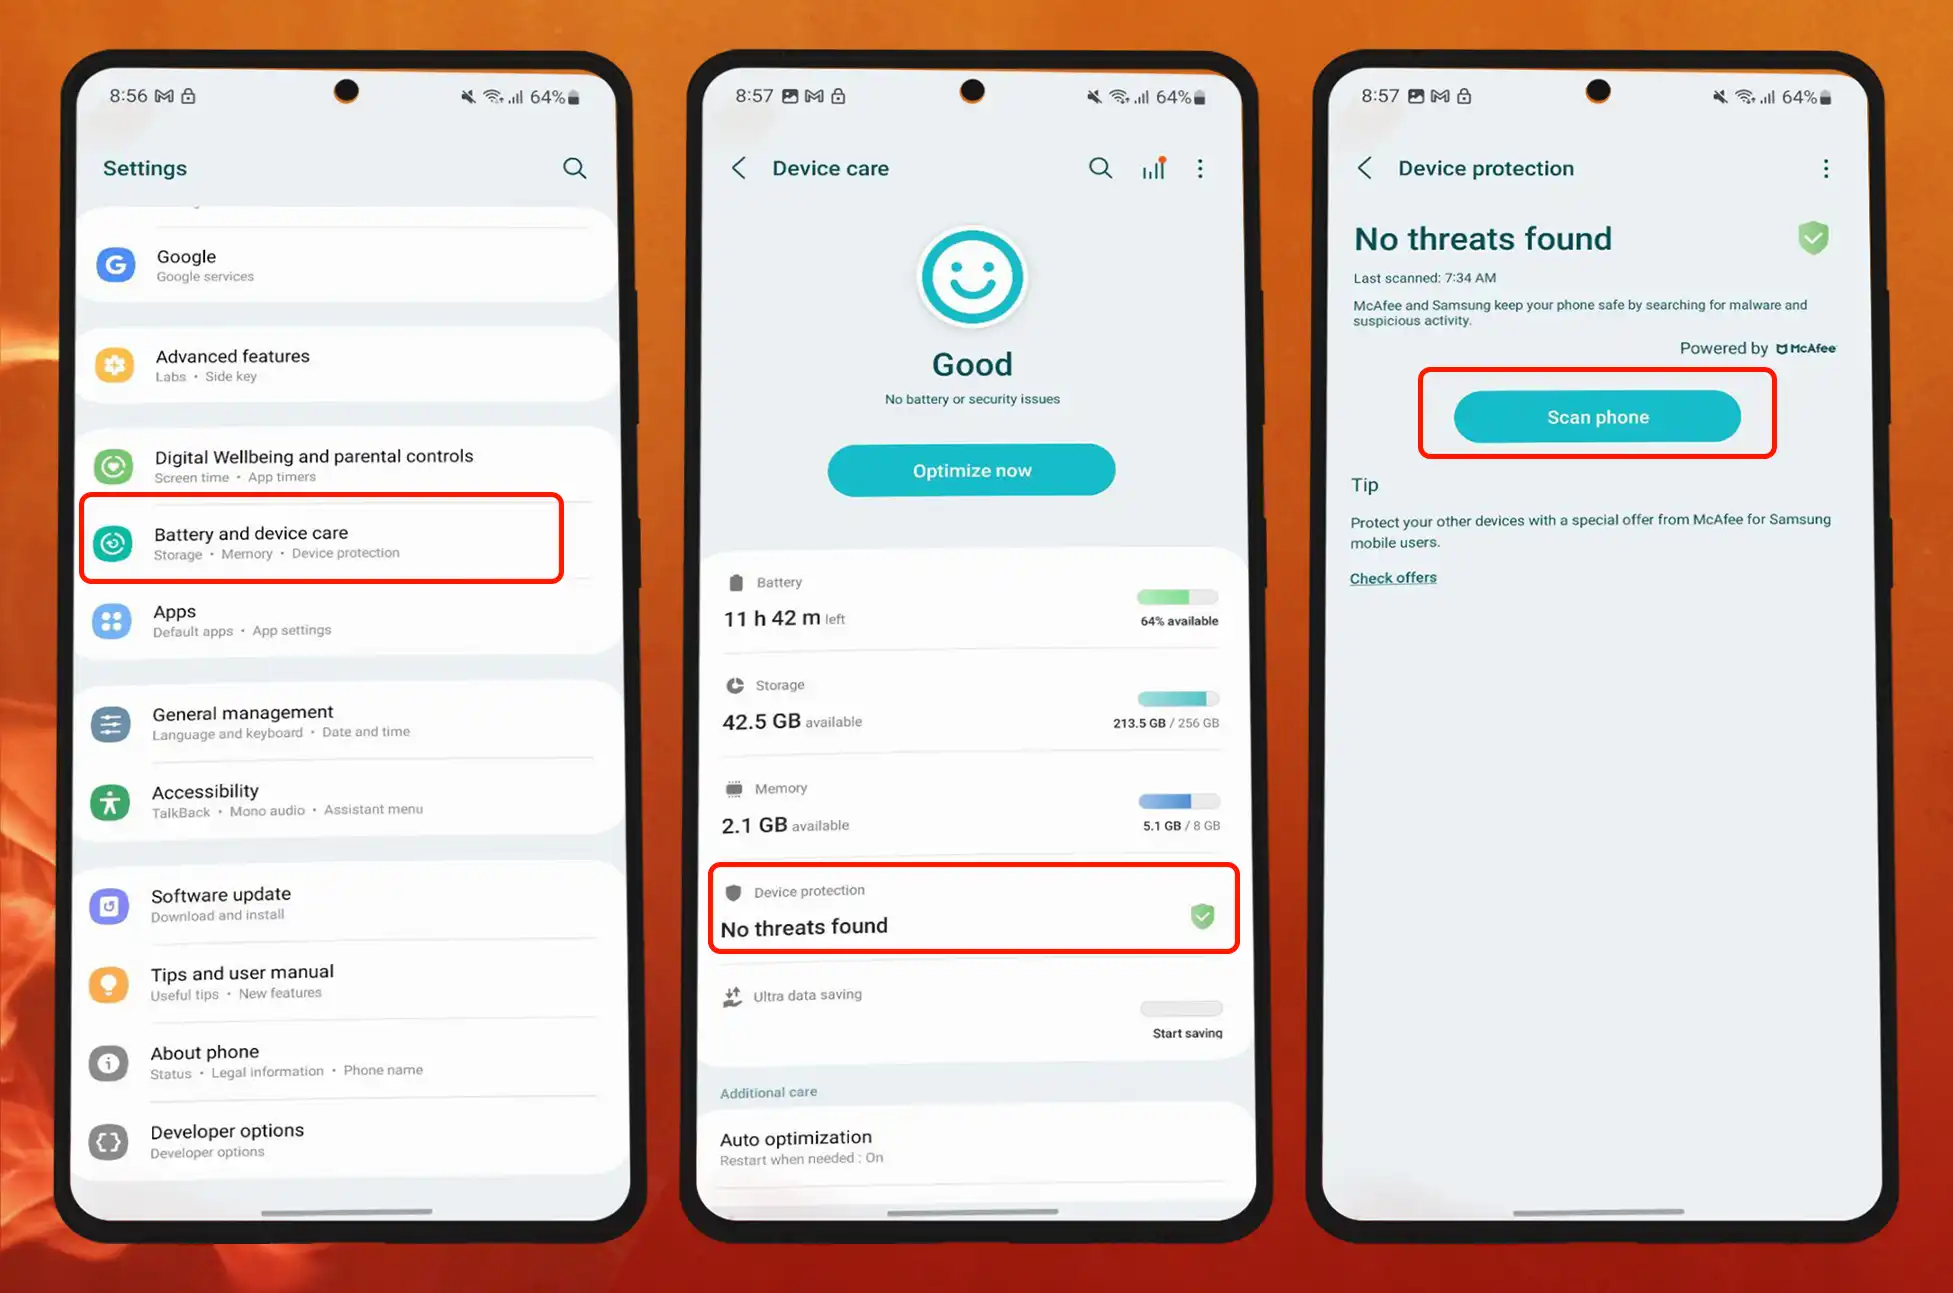
Scan and remove viruses from Samsung phones
Go to Settings > Battery and device care
Choose Device protection
Tap Scan device. McAfee scans all apps for hazards. If discovered, follow the removal instructions.
How to remove virus on Android Safe Mode
Hold the phone’s power or lock button on the side. Alternatively, swipe down with two fingertips on your phone’s display. Tap the power icon then.
Press and hold Power off. Tap Safe mode then. Your device will restart
Observe your device. If it functions ordinarily, delete the suspect applications. Press and hold their gray icons, then select Uninstall
Drag down from the top of the display. Then tap Safe mode is on to disable it, and restore your phone to return to normal operation.
Remove infected applications
In addition to safe mode, you can uninstall applications normally to eliminate malware. This procedure deletes all data associated with the application, including caches and stored login credentials. For optimal results, delete applications one by one and restart your device after each deletion. Thus, you can determine which app caused the malfunction and avoid uninstalling unnecessary apps.
It may be challenging to deactivate certain infected applications. When you attempt to install the application, your phone notifies you that it is a device administrator. Admin apps can, among other things, delete data, lock the device, and alter the lock type. Not all applications have this permission setting, but you should verify that you haven’t enabled one by accident. Follow the instructions below to permanently uninstall device administrators.
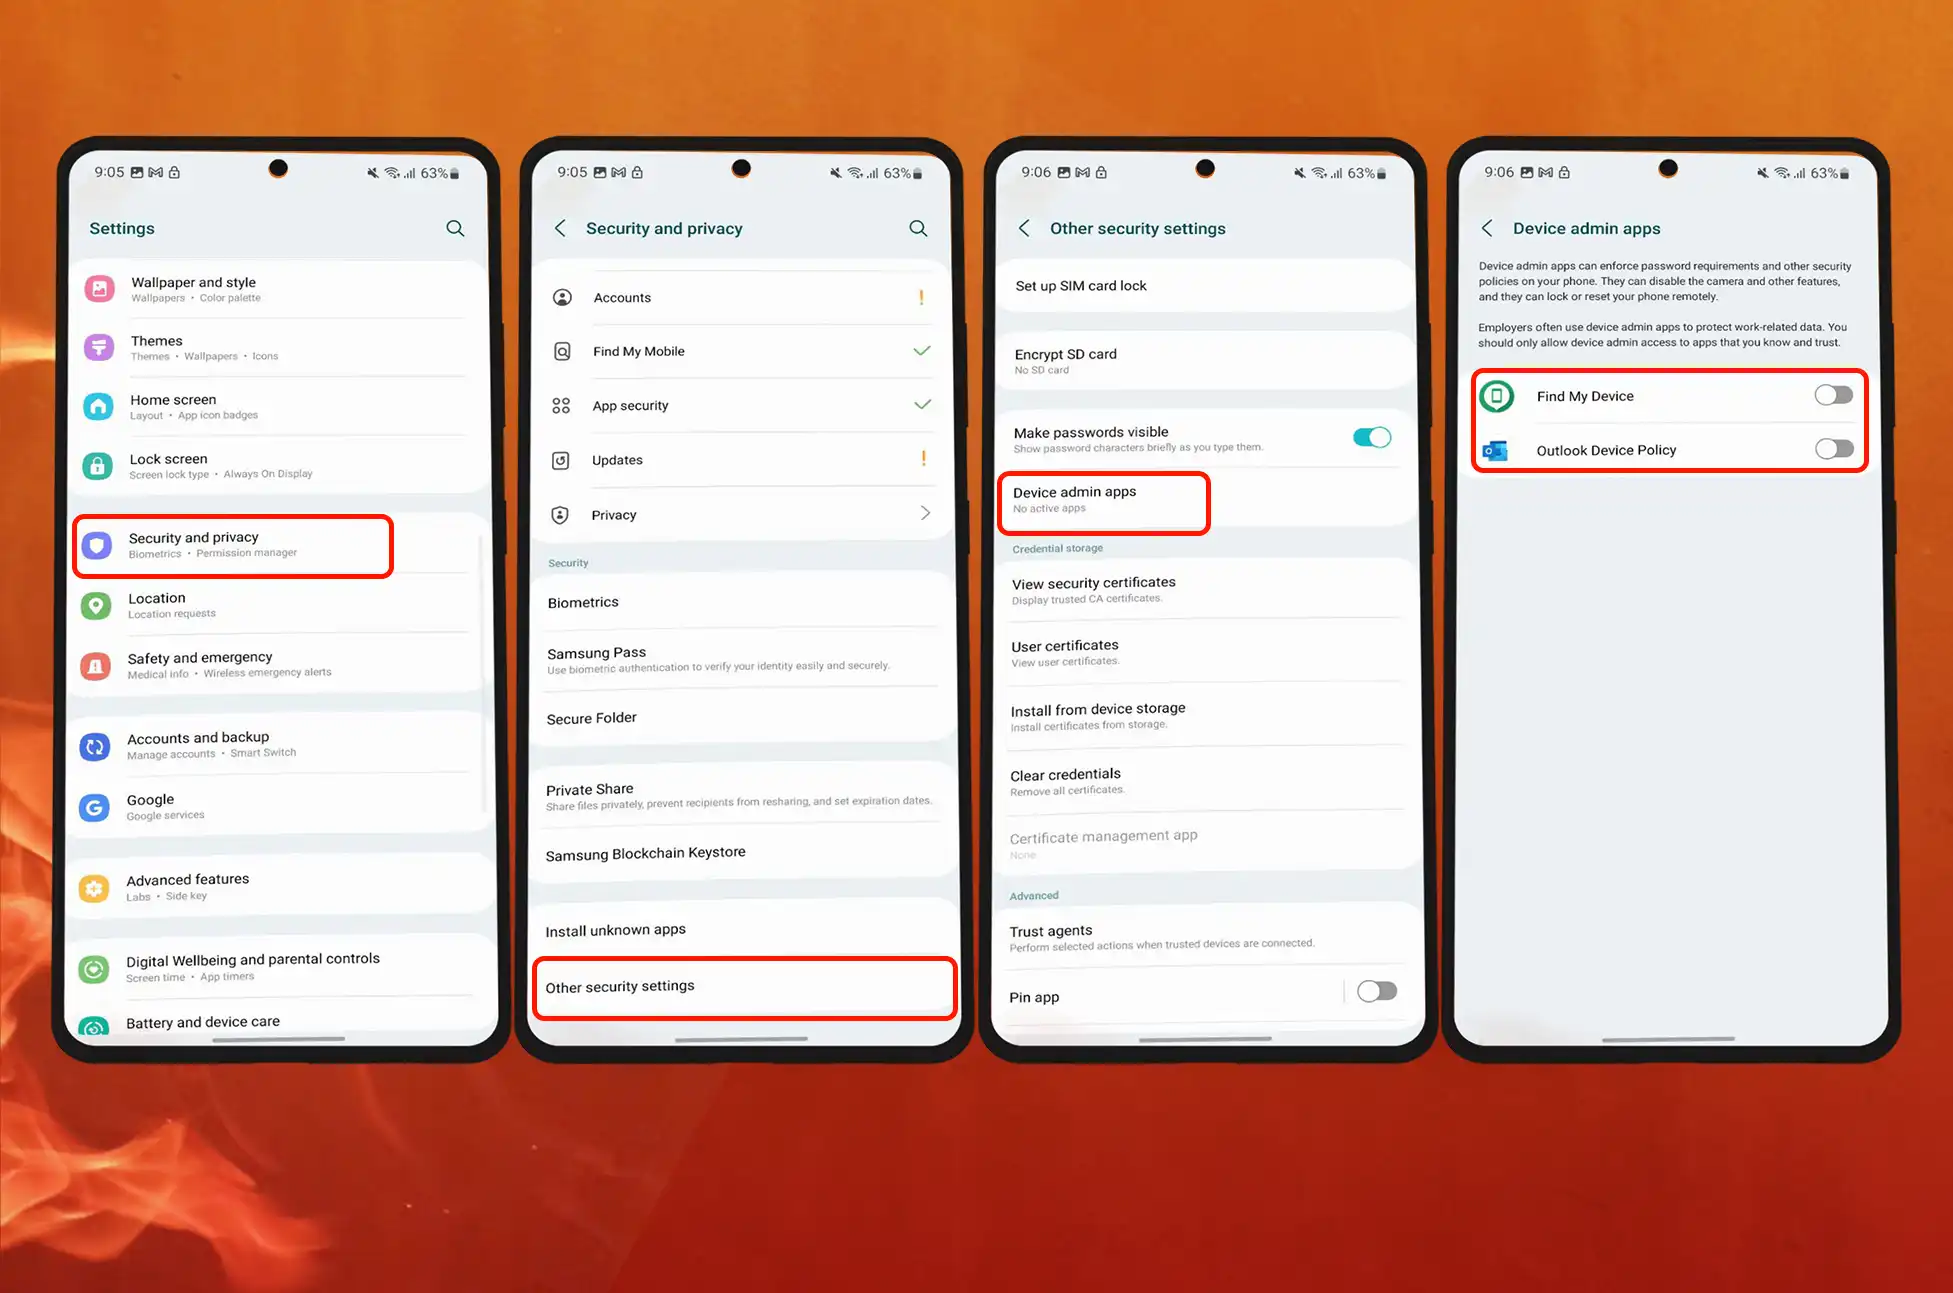
Remove programs as Administrator
Go to Settings > Privacy and security
Select Other security settings
Select Device admin apps
Tap an app. Then choose Deactivate.
Uninstall an application once its admin privileges have been removed.
Uninstall apps on Android phones
Long-pressing an application from the home screen or program menu
Choose Uninstall
To confirmthe action, tap OK
Restart your device\
Clear Browser’s Cache and Data
Applications store website caches so that they appear faster on subsequent visits. Clearing them has no effect on existing problems, but it is a good idea after removing a virus. You must ensure that all links between your phone and malicious websites have been eliminated. Either the program cache or cached data within the app can be cleared. Do both precautionary measures.
After that, clear your browser’s cache. If you agree, websites will store cookies on your device in order to track your online activity and remember information such as your login credentials. If you do not delete them, hackers may use them to access your account as you and pilfer sensitive information. Delete the browser app’s storage data for a more severe solution. This option deletes caches and cookies concurrently, but it also deletes your browsing history, download history, and shortcuts.
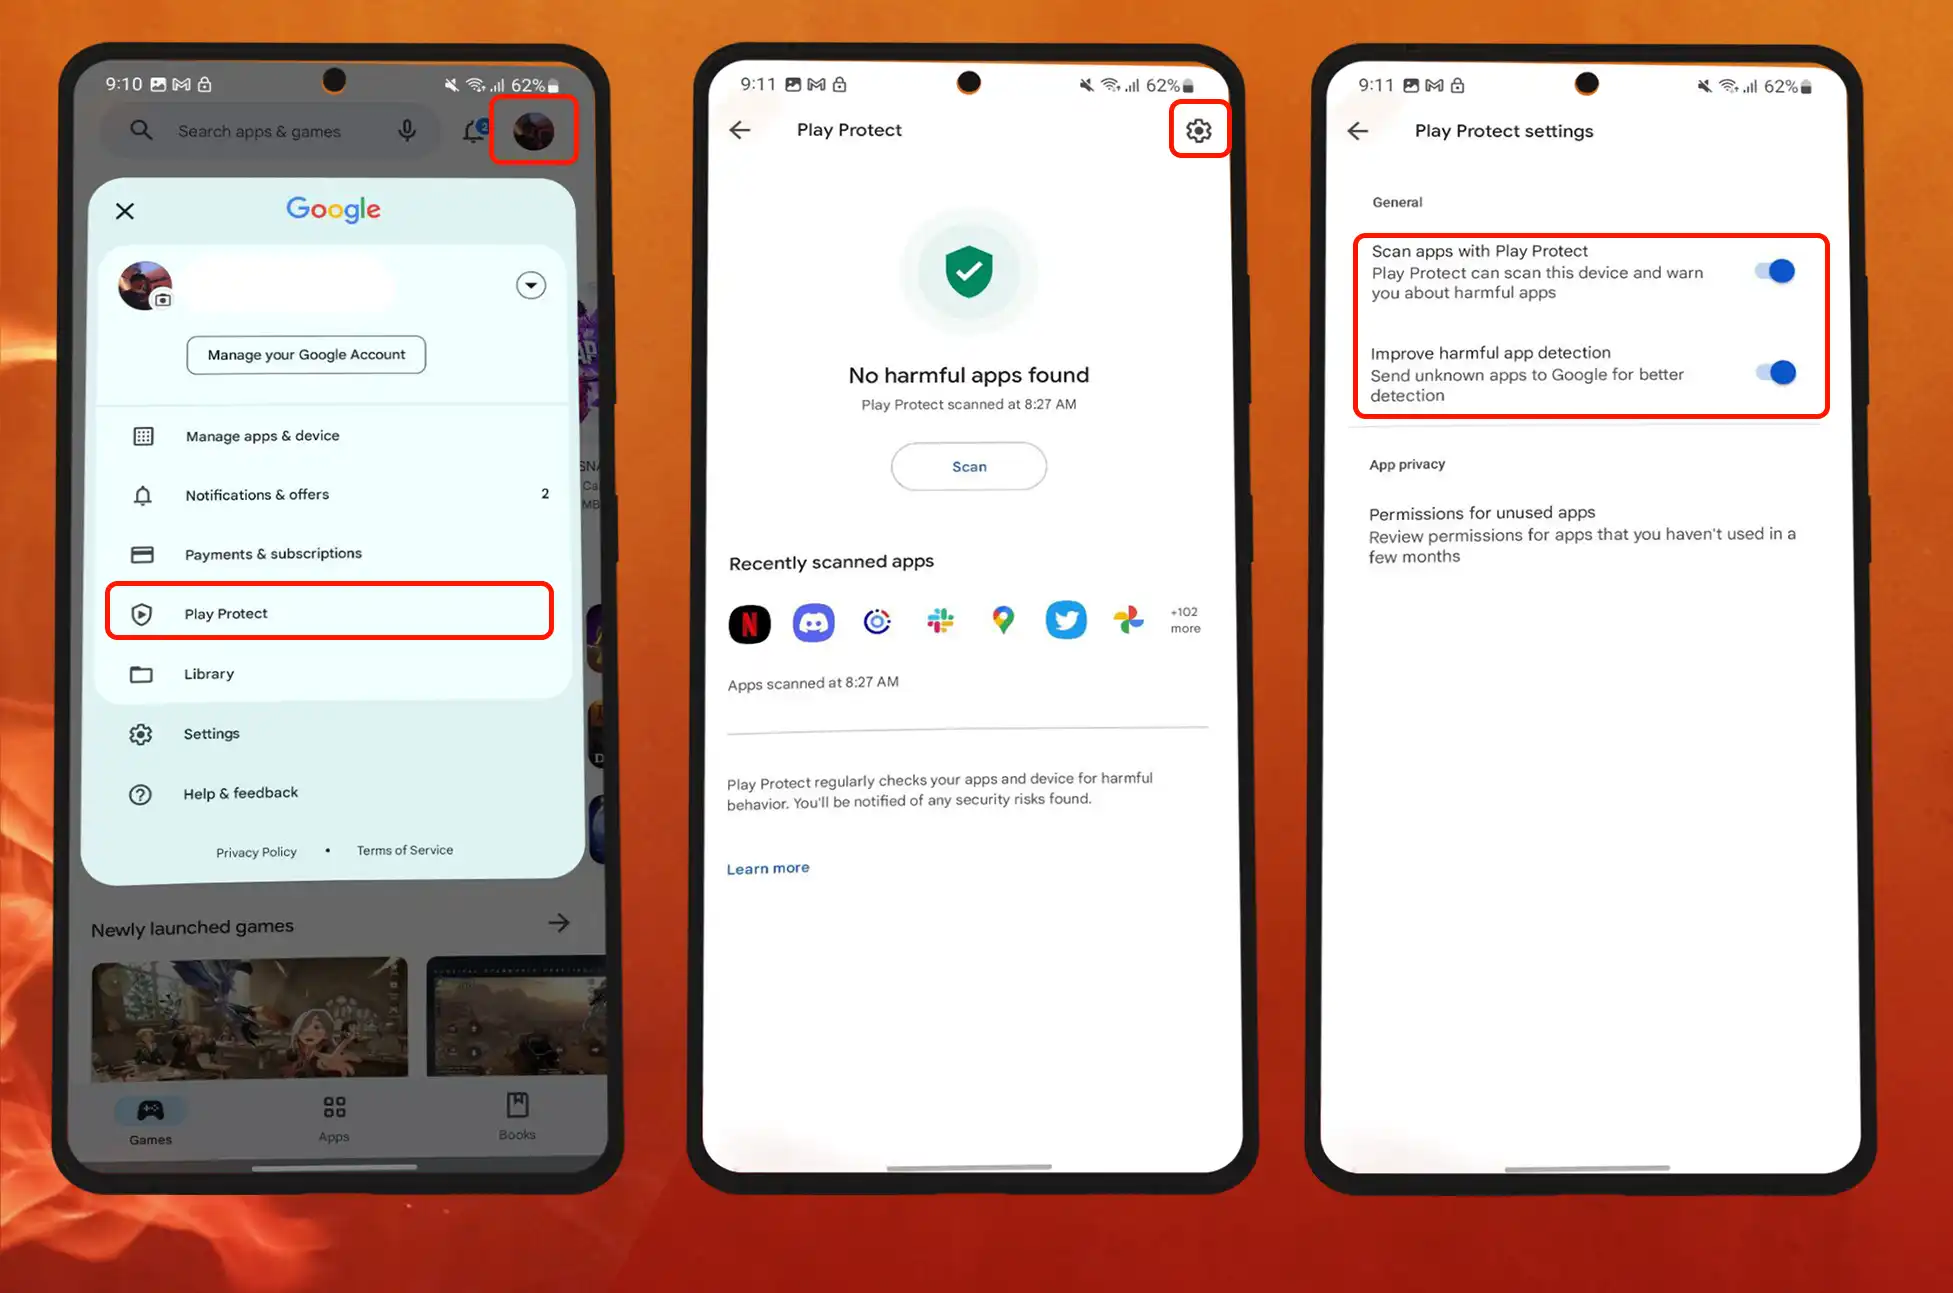
Enable Google Play Protect
Google Play Protect scans every app you install, independent of the source from which it was downloaded. It also performs periodic security tests on your phone. Play Protect either notifies you to uninstall malicious applications or removes them automatically, informing you afterwards. To activate the function, please follow the steps below:
Open the Play Store
Tap the profile icon in the upper-right quadrant.
Choose Play Protect from the available menu options
Tap Turn on to activate the function and initiate a scan.
Update your phone’s OS
Updating your phone’s operating system to the most recent version enhances its compatibility with apps and other devices. Additionally, you’ll fix bugs that cause it to malfunction and acquire new features. You may void your warranty and lose access to future updates and security features if you root your device. According to Google’s support page, you can recover them by reinstalling the device’s original Android operating system.
Normally, you will be notified when an update is available. Check for software updates in the settings menu if you do not.
Perform a Factory Reset
Remember that a factory reset will erase all of your device’s data, so be sure to back up any essential files.
Access the device’s Settings menu.
Select System or General Management
Choose either Reset or “Reset Options
Select Factory Data Reset or Erase All Data
Follow the instructions on-screen to conduct a factory reset.
Protect your mobile device with the finest antivirus measures.
Eliminating a virus from your phone permanently is a success. If you continue to engage in harmful habits that put your phone at risk, it will be brief. Avoid malicious websites, applications, and links from unreliable sources moving forward. Some websites may use keystroke logging to capture sensitive information when you type without requiring you to download anything. If you suspect that your privacy has been compromised, here are some strategies for protecting your smartphone.
Change your passwords
Reset your network settings
Avoid suspicious apps and platforms
Manage permissions and access
Backup your data
Conclusion
Remember, prevention is key! Install apps only from trusted sources, keep your device’s operating system and apps up to date, and exercise caution while browsing the internet and opening email attachments. Stay vigilant to protect your Android phone from viruses and malware.
All products, and company names, logos, and service marks (collectively the "Trademarks") displayed are registered® and/or unregistered
trademarks™ of their respective owners.
The authors of this web site are not sponsored by or affiliated with any of the third-party trade mark or third-party registered trade mark owners,
and make no representations about them, their owners, their products or services.