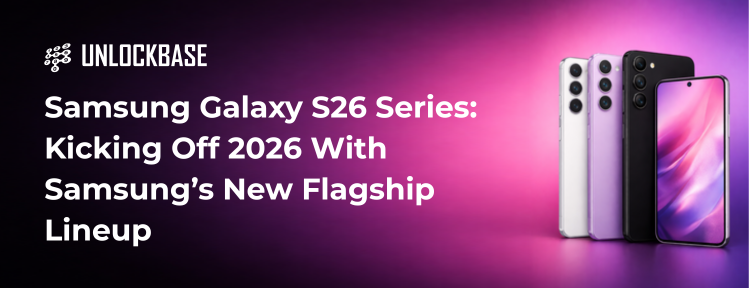
The Samsung Galaxy S26 series marks one of the first major smartphone launches of 2026, setting the tone for what users can expect from flagship devices this year. As many users reassess their tech needs after the holiday season, Samsung’s newest lineup arrives at a moment when long-term performance, flexibility, and global usability matter more than ever.
Building on the success of its predecessor, Samsung positions the Galaxy S26 series as a refined, future-ready evolution rather than a radical reinvention. For users considering an upgrade early in 2026, this launch carries important implications—not only for features, but also for longevity and device freedom.
A New Year, A New Samsung Flagship
Samsung has traditionally used early-year flagship launches to signal its priorities for the months ahead, and the Samsung Galaxy S26 series continues that trend.
Rather than focusing on flashy changes alone, Samsung appears to emphasize polish, consistency, and practical improvements. This approach reflects a market where users hold onto devices longer and expect premium phones to remain relevant across multiple years, regions, and networks.
For those starting 2026 with fresh device plans—whether upgrading, traveling, or reselling later—the Galaxy S26 lineup enters the market with high expectations already attached.
What’s New in the Galaxy S26 Series
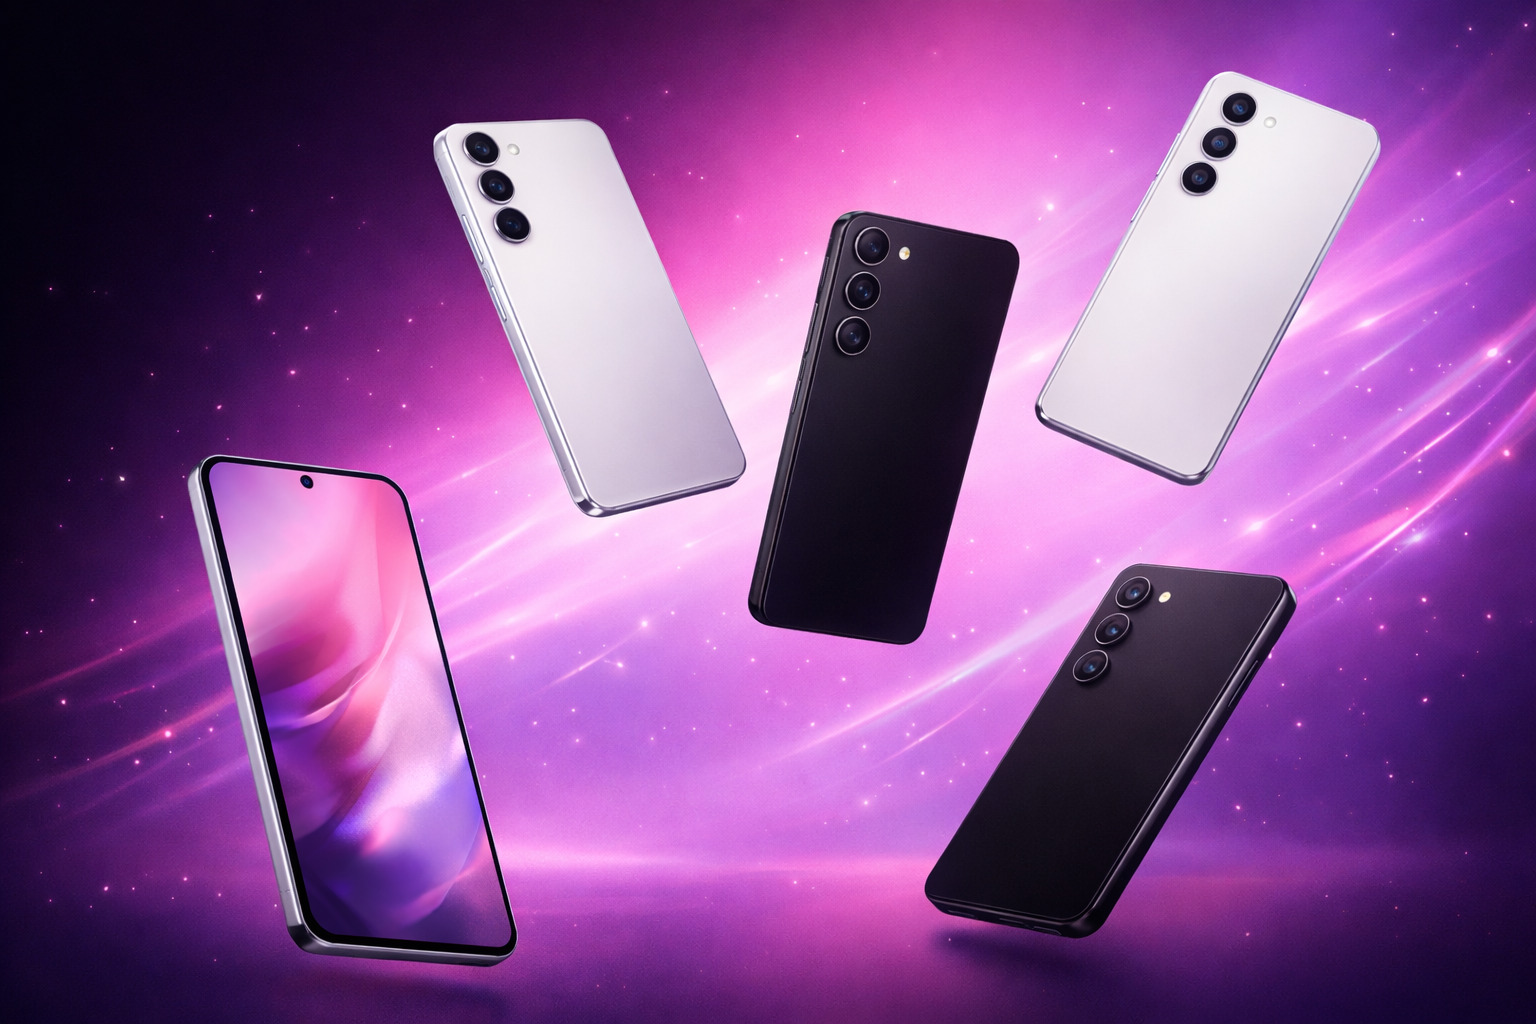
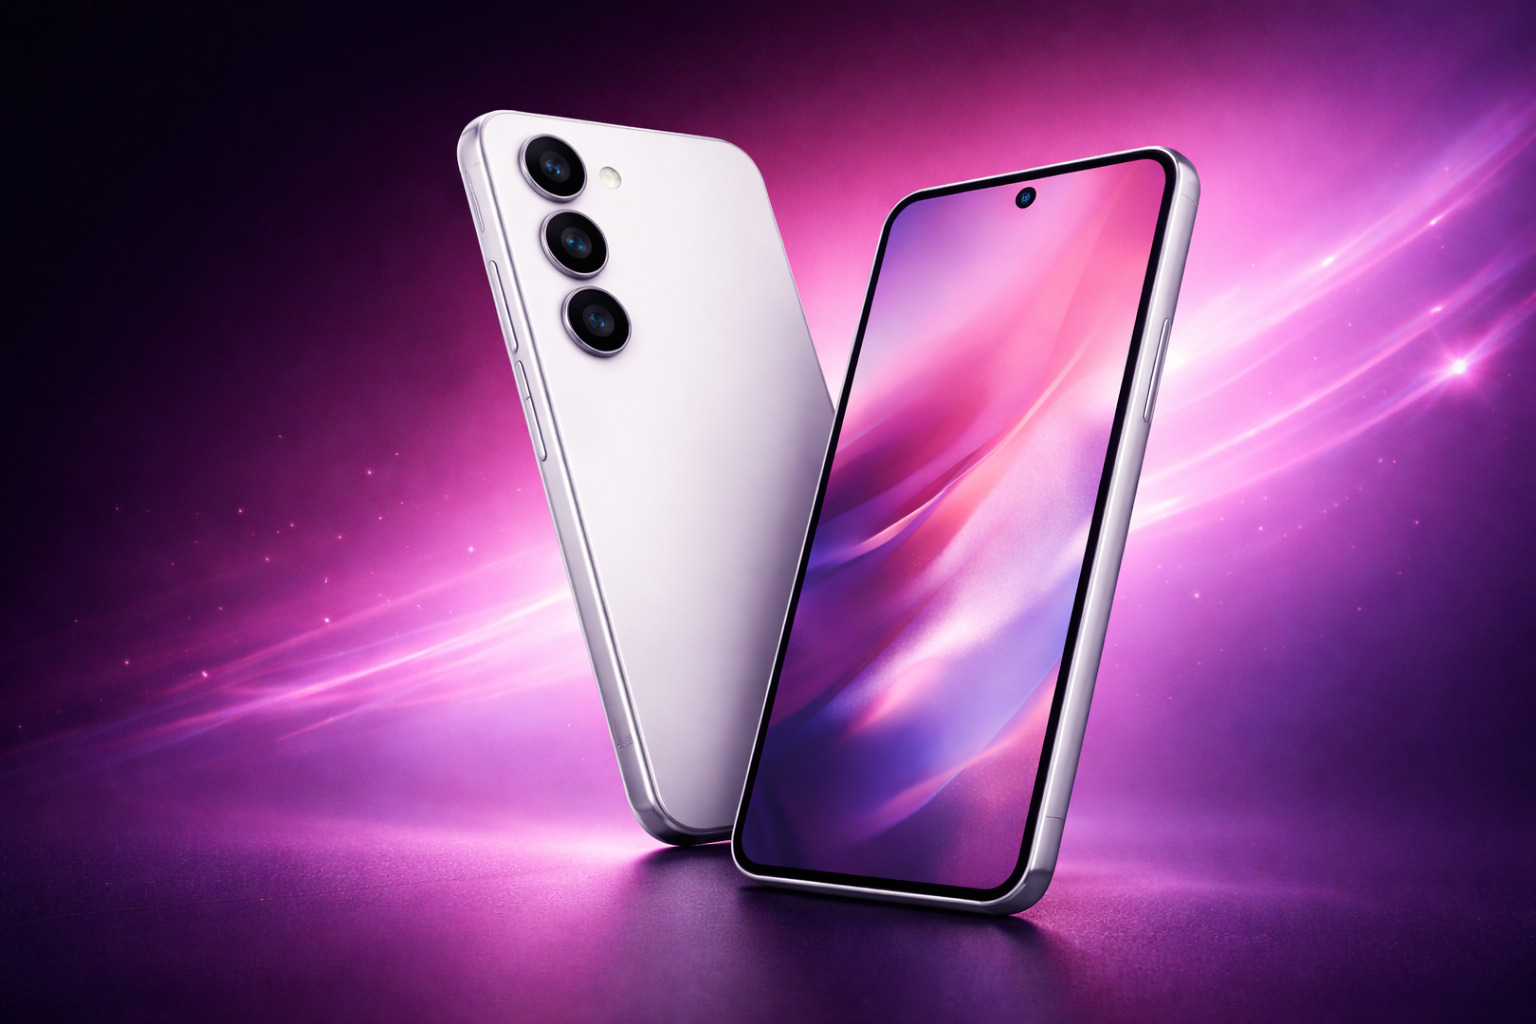
Refined Design & Display for 2026
Samsung’s design language for 2026 leans toward subtle refinement. Early reports suggest that the Galaxy S26 models feature slimmer profiles, improved materials, and more durable finishes.
Display improvements remain a core strength across the lineup:
Brighter AMOLED panels with enhanced outdoor visibility
Smoother adaptive refresh rates for everyday use
Reduced bezels for a more immersive viewing experience
These changes may not feel dramatic at first glance, but they contribute to better usability over long ownership periods.
Performance, AI & Next-Gen Chipset
Performance upgrades in the Samsung Galaxy S26 series focus on efficiency as much as raw power. Samsung’s latest chipset—paired with expanded on-device AI processing—aims to deliver faster everyday tasks while reducing battery drain.
Key improvements users are likely to notice include:
Smarter AI-assisted multitasking
Faster app launches and background processing
Improved thermal management during intensive use
This generation reflects Samsung’s broader strategy for 2026: make AI useful in daily interactions, not just a marketing label.
Camera Upgrades for Everyday and Travel Use
The Galaxy S26 Ultra features headline Samsung’s camera advancements this year. Rather than chasing extreme specs, Samsung focuses on consistency across lighting conditions.
Expected camera refinements include:
Enhanced low-light photography
Faster shutter response for moving subjects
Improved stabilization for video and travel footage
These upgrades appeal to users who rely on their phone as a primary camera, especially those who travel or document daily life on the go.
Battery Life, Charging & Connectivity
Battery performance remains a critical factor for flagship buyers in 2026. The Samsung Galaxy S26 series benefits from efficiency gains rather than major capacity jumps.
Users can expect:
Longer screen-on time under mixed usage
Faster wired and wireless charging optimization
Improved 5G and global band support
Connectivity enhancements also reflect Samsung’s global user base, ensuring better compatibility across regions.
Galaxy S26 vs Galaxy S25: Year-Over-Year Improvements
When comparing Galaxy S26 vs S25, the differences may appear incremental on paper, but they translate into noticeable daily improvements.
Practical upgrades include:
More responsive AI features
Better sustained performance under load
Camera consistency rather than isolated spec boosts
Improved long-term software optimization
For Galaxy S25 owners, the decision to upgrade depends on priorities. For users coming from older models, the S26 represents a more substantial leap forward.
How the Galaxy S26 Fits Into Samsung’s 2026 Lineup
The Samsung Galaxy 2026 ecosystem revolves around integration. The S26 series sits at the center, connecting seamlessly with Samsung tablets, wearables, and smart services.
Early market expectations position the S26 lineup as:
A premium option for long-term Android users
A reliable flagship for international use
A strong candidate for resale value retention
Samsung’s approach suggests confidence in extended device lifespans rather than rapid replacement cycles.
Before committing to any new flagship, it’s worth confirming your device’s carrier status and global compatibility. Checking lock status early helps ensure flexibility if you plan to travel, switch networks, or resell later.
Long-Term Ownership & Global Usability Considerations
The Samsung Galaxy S26 series is designed with longevity in mind, but ownership experience depends on more than hardware alone.
International Use
Samsung continues to prioritize wide band support across its flagship devices. This makes the S26 series suitable for frequent travelers and users who move between regions.
However, carrier restrictions can still affect usability if a device remains locked to a specific network.
Resale Outlook
Unlocked flagship phones generally retain higher resale value. Buyers on the secondary market prefer devices that work across multiple carriers and countries.
As the new Samsung flagship phone of 2026, the S26 series is likely to perform well in resale markets—especially if maintained in good condition and kept carrier-unlocked.
Flexibility Over Time
Long-term flexibility includes:
Ability to switch carriers
Compatibility with international SIM cards
Freedom to sell or gift the device later
Understanding these factors early helps users make smarter purchase decisions that extend beyond launch excitement.
Starting 2026 With the Right Device Choices
The Samsung Galaxy S26 series opens 2026 with a clear message: refinement, efficiency, and long-term usability matter more than ever. Samsung’s latest flagship lineup focuses on real-world improvements that support users across years—not just months.
For buyers considering a new device early in 2026, the Galaxy S26 offers strong performance, thoughtful upgrades, and a place within Samsung’s broader ecosystem. Yet true value also depends on flexibility—how well the device adapts to future needs, travel plans, and ownership changes.
While the Samsung Galaxy S26 series is not yet officially available, questions around compatibility, carrier locking, and long-term usability already matter. The UnlockBase team is ready to answer those questions and, once devices are in users’ hands, to assist with checking lock status, compatibility, and future unlocking options. Don’t hesitate to contact UnlockBase.com for transparent guidance and trusted support—before and after your next Samsung upgrade.
All products, and company names, logos, and service marks (collectively the "Trademarks") displayed are registered® and/or unregistered
trademarks™ of their respective owners.
The authors of this web site are not sponsored by or affiliated with any of the third-party trade mark or third-party registered trade mark owners,
and make no representations about them, their owners, their products or services.
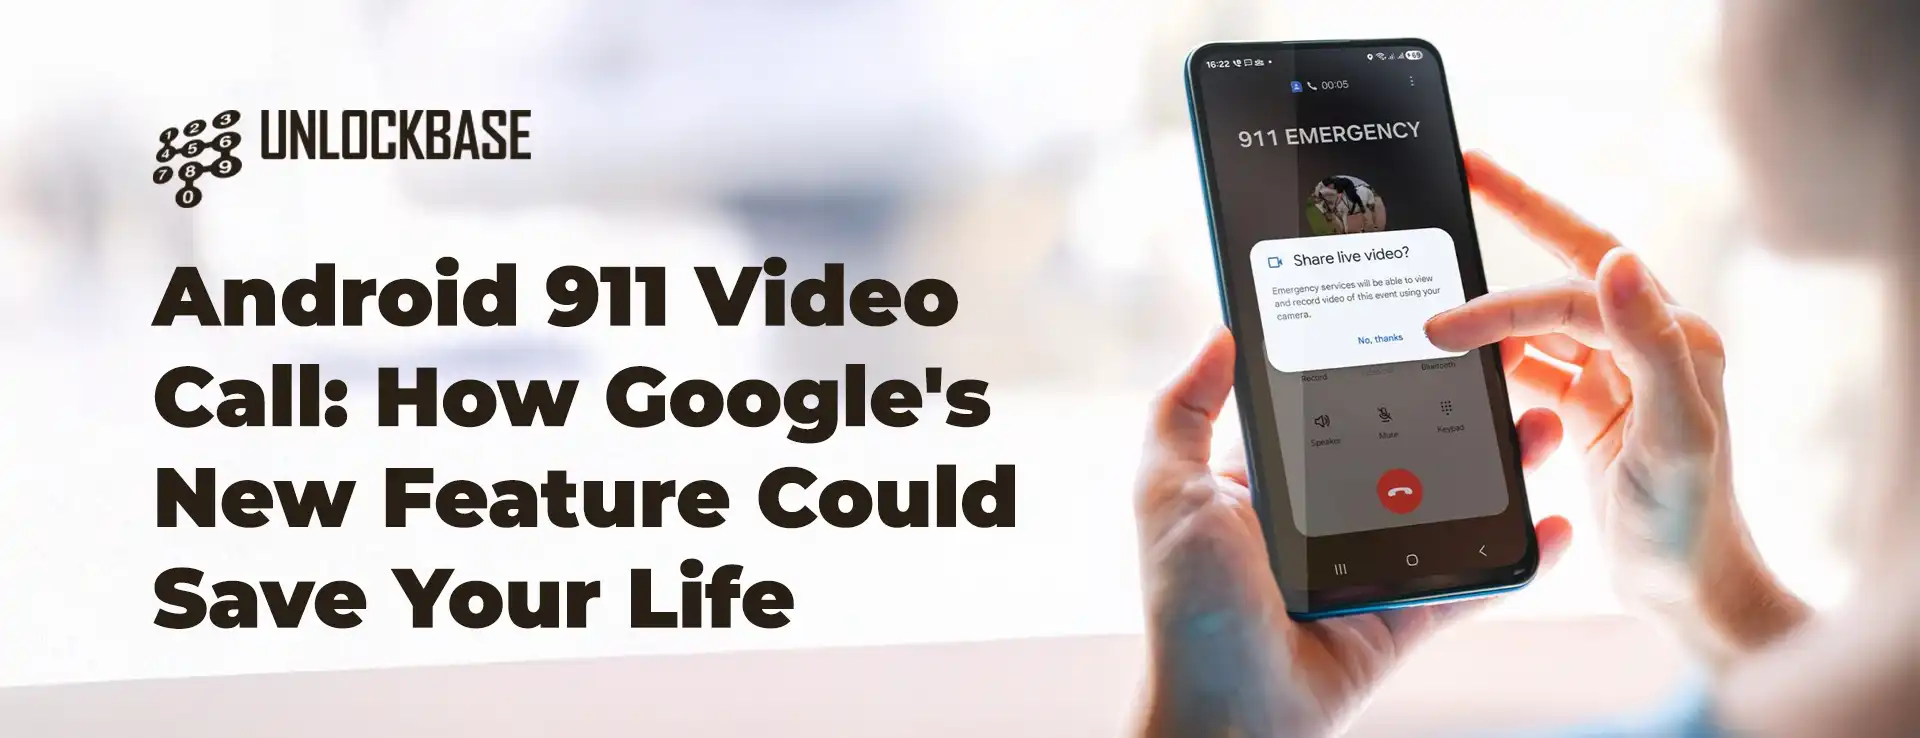
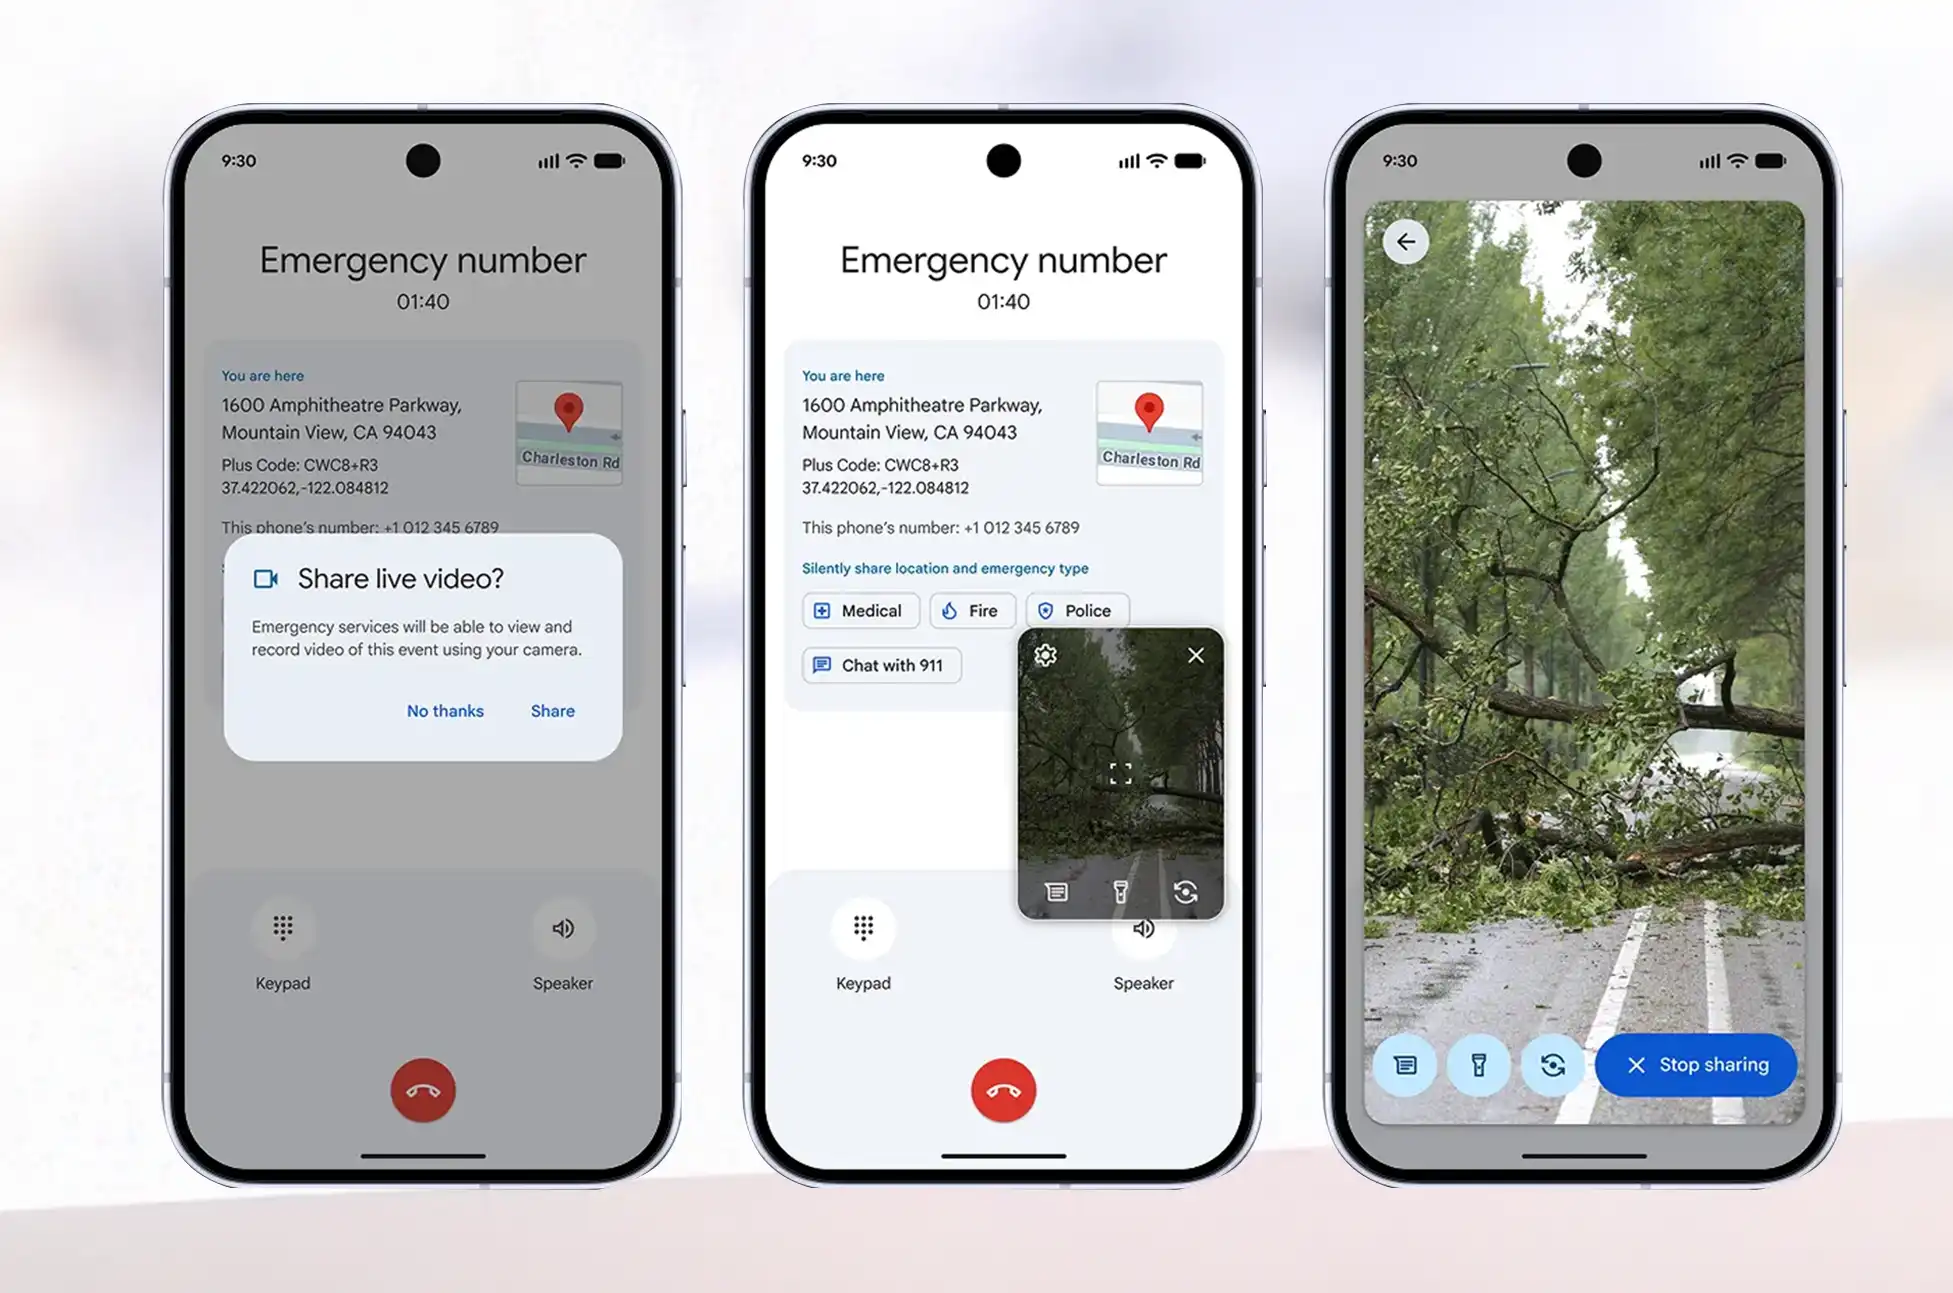
When emergencies strike, every second counts. Google just rolled out a feature that could make the difference between life and death: Android 911 video call capability that lets you share live footage with emergency dispatchers directly from your phone.
What Is Android 911 Video Call?
Think of it as FaceTime for emergencies, but smarter. This new safety tool, officially called Android Emergency Live Video, lets emergency dispatchers request access to your phone’s camera during a crisis call. Instead of trying to explain what’s happening while panicking, you can simply show them.
The Android 911 video call technology addresses a critical gap in emergency response. When you’re injured, hiding from danger, or witnessing an accident, describing the scene accurately can be nearly impossible. A live video feed gives first responders the full picture instantly.
How Does the Android 911 Video Call Work?
Here’s the breakdown: when you dial 911, the dispatcher can send a request to access your camera. You maintain full control—nothing happens without your permission. Once you accept, they can see what you’re seeing in real-time through your phone’s camera.
This isn’t just about convenience. Emergency dispatchers can assess medical conditions, identify hazards, verify locations, and send the right resources before responders even arrive on scene.
Device Requirements and Availability
Good news for most Android users: if your phone runs Android 8 or later with Google Play Services installed, you’re covered. That includes devices released since 2017, which means this video call feature reaches hundreds of millions of phones.
The catch? Geography matters right now. Google is launching the feature in the United States first, with limited rollout in specific areas of Germany and Mexico. The company is working with public safety organizations worldwide to expand availability, but there’s no timeline yet for other regions.
Android 911 Video Call : The Road to Launch
Google first hinted at this feature through code spotted in an APK teardown earlier in 2025. They officially confirmed it as part of the November 2025 Play Services update, though details remained scarce. Now the 911 video call capability is actually going live for users who need it most.
Why This Matters
Emergency services have remained surprisingly low-tech compared to other aspects of our digital lives. While we can video chat with anyone across the globe instantly, calling 911 has remained largely voice-only. This feature brings emergency response into the modern era.
For people with speech difficulties, language barriers, or hearing impairments, visual communication can be transformative. The Android 911 video call feature also helps in situations where speaking might put you in danger—domestic violence situations, active shooter scenarios, or medical emergencies where the caller is incapacitated.
Privacy and Security Considerations
Google hasn’t detailed the security protocols yet, but emergency communication systems typically encrypt data and restrict access to authorized personnel only. The opt-in nature of the feature means you decide whether to share video during each emergency call.
Android 911 Video Call : What’s Next?
As Android 911 video call technology expands globally, we’ll likely see it become standard protocol for emergency dispatchers. The technology exists. Now it’s about training, infrastructure, and rolling it out region by region.
If you’re in the US, Germany, or Mexico and run Android 8 or newer, check your Google Play Services to make sure you’re updated. This isn’t a feature you’ll hopefully need—but if you do, it could save your life or someone else’s.
Emergency technology rarely gets this kind of attention, but when it comes to crisis situations, any innovation that helps first responders reach people faster deserves recognition. The Android 911 video call feature represents a genuine step forward in public safety, using technology most of us already carry in our pockets.
All products, and company names, logos, and service marks (collectively the "Trademarks") displayed are registered® and/or unregistered
trademarks™ of their respective owners.
The authors of this web site are not sponsored by or affiliated with any of the third-party trade mark or third-party registered trade mark owners,
and make no representations about them, their owners, their products or services.
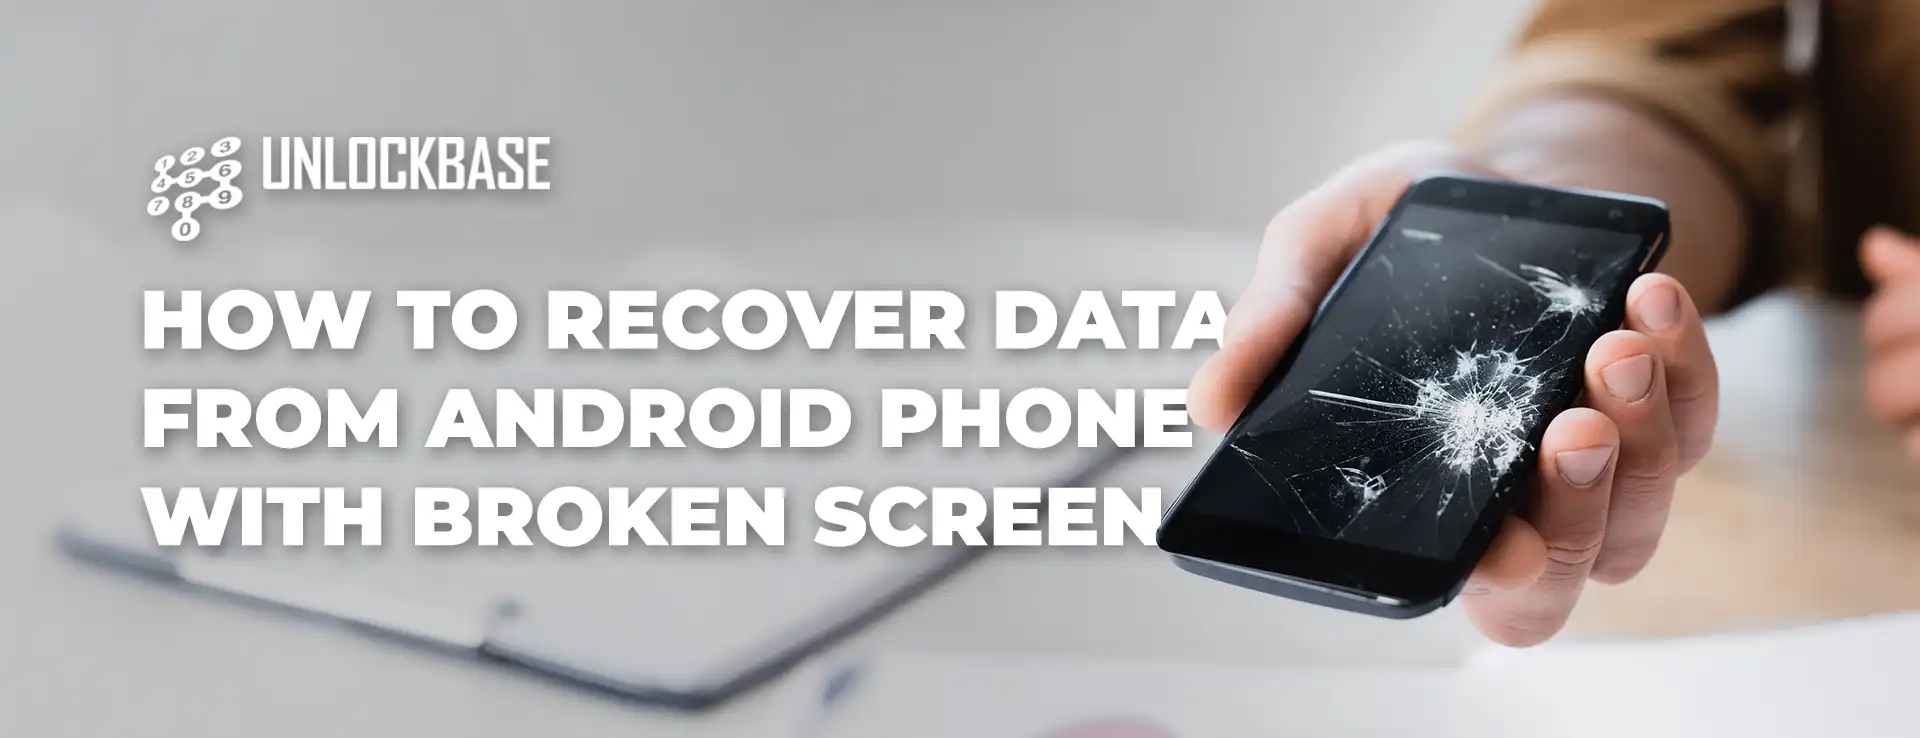
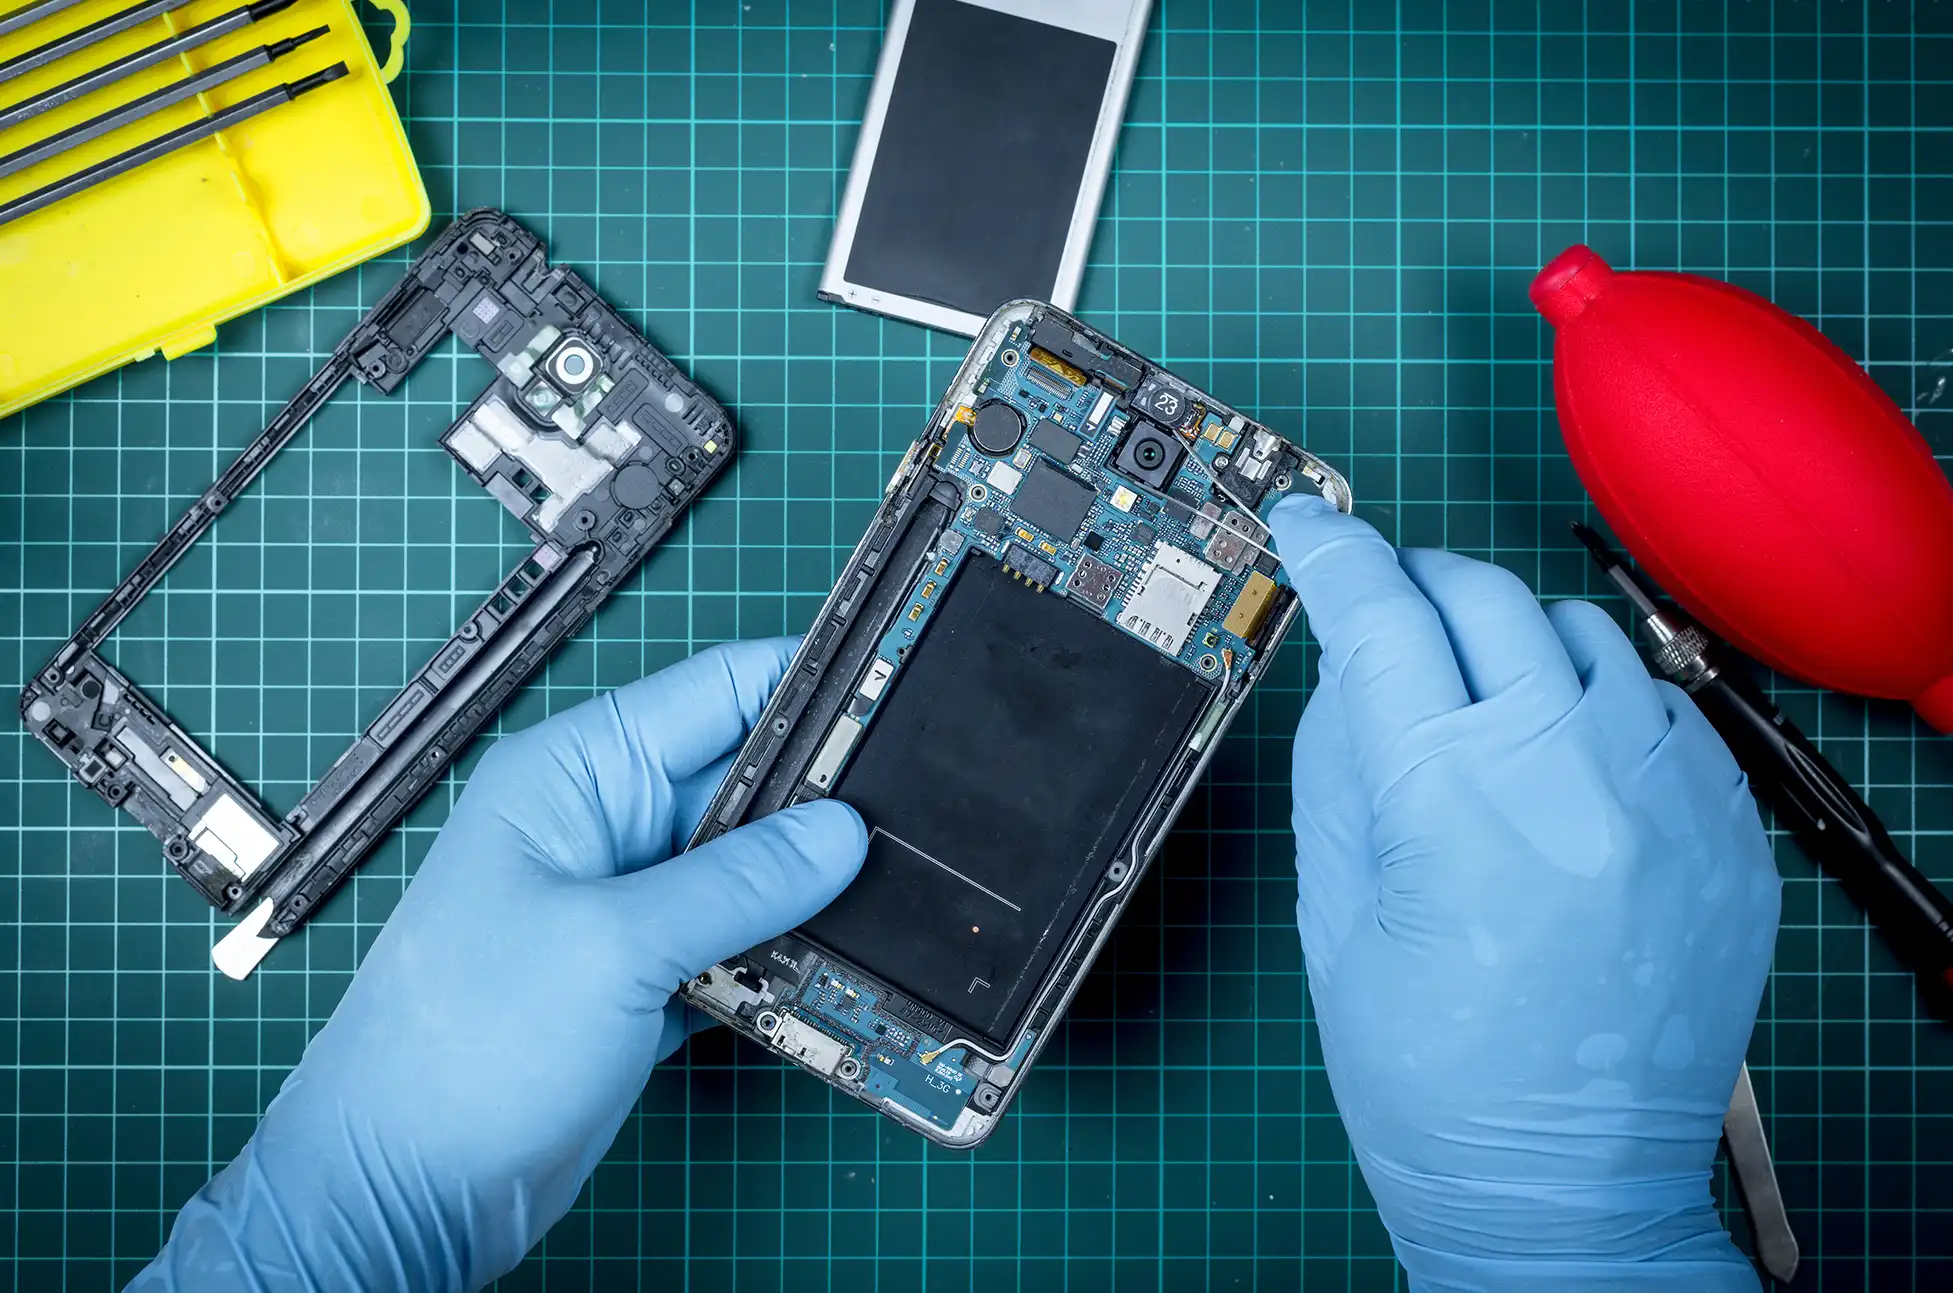
Recover Data from Android? That sinking feeling when your phone slips from your hands and hits the pavement? We’ve all been there. Whether it’s a shattered display, water damage, or a screen that simply refuses to light up, the real anxiety isn’t about the phone hardware itself. It’s about everything stored inside: your photos, messages, contacts, and years of digital memories.
The good news? If your phone’s internal components are still functioning, there’s a solid chance you can rescue your data even with a completely unresponsive screen.
Recover Data from Android : The SD Card Solution (If You Have One)
Got an SD card in your device? You’re in luck. Pop it out and plug it into your computer using a card reader. Done.
The catch? Modern flagship phones have largely abandoned expandable storage. Plus, Android keeps most critical information on internal storage anyway—things like contacts, text messages, call history, app data, and media files all live on the device itself. That means you’ll need a different approach to access your phone’s interface when the screen goes dark.
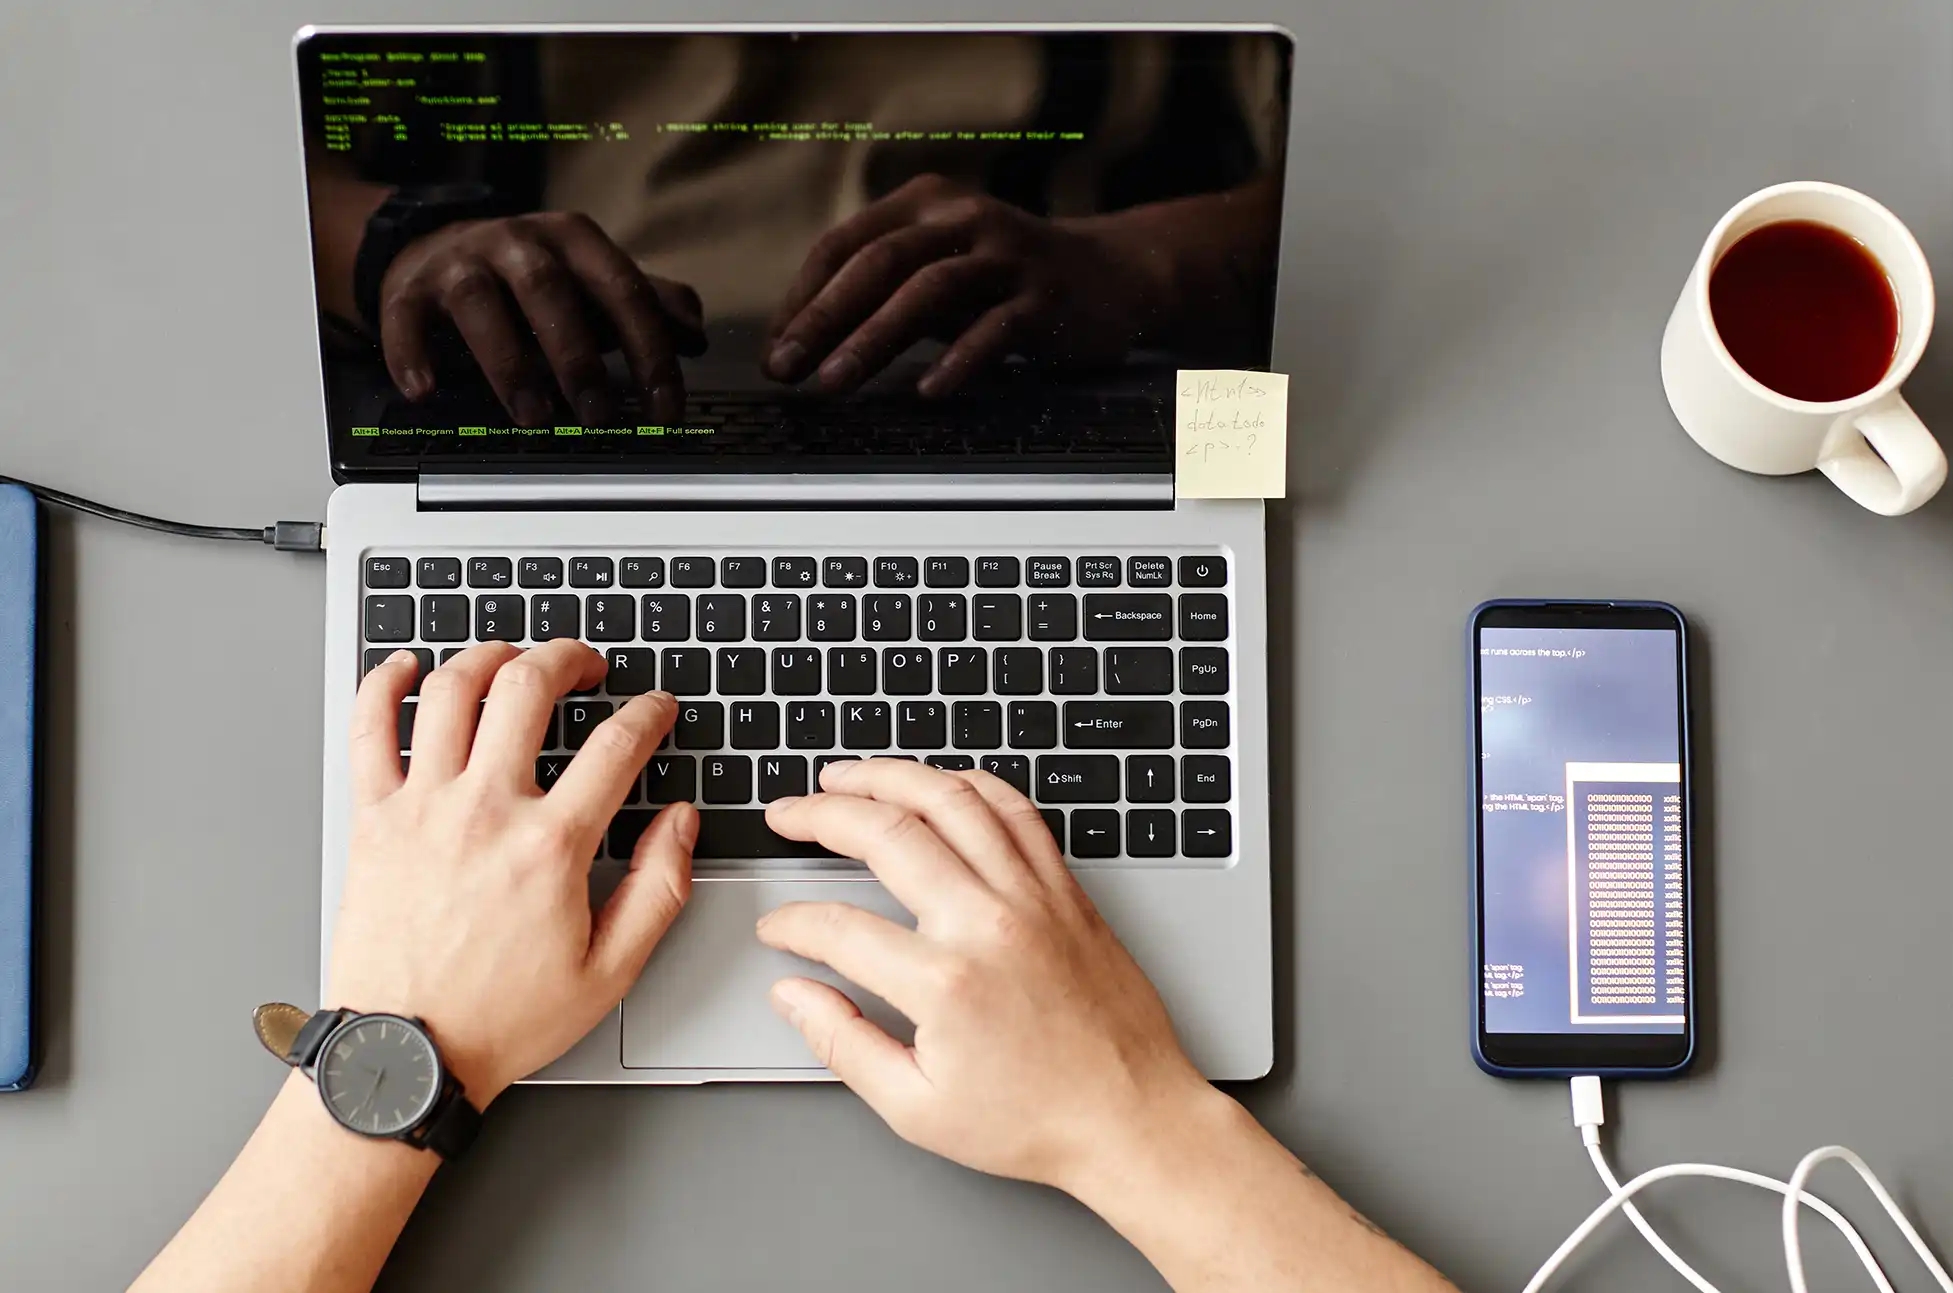
Recover Data from Android : Using an External Display to Bypass a Broken Screen
Here’s the workaround that works for many Android users: connect your phone to an external monitor or TV. This lets you completely sidestep the broken display and interact with your device as if nothing happened.
Before you get too excited, there’s a compatibility caveat. Budget smartphones often use USB 2.1, which lacks the bandwidth needed for video transmission. But if you’re using a mid-range or flagship device from recent years, chances are good that it supports USB-C video output.
Samsung, Google, and Motorola devices even offer desktop modes that transform your phone into a full computer experience when connected to a larger screen. Other manufacturers might simply mirror your phone’s display to the external monitor—which is all you need for data recovery anyway.
What You’ll Need
To pull this off, gather these items:
A USB-C to HDMI adapter or dongle
An HDMI cable
If your touchscreen is also broken: a USB keyboard and mouse
For the latter scenario, grab a multi-port USB-C hub with both HDMI and USB-A ports
Step-by-Step Process
Plug the USB-C adapter into your damaged phone
Connect your HDMI cable between the adapter and your external display (monitor or TV). Your phone’s interface should appear on screen immediately.
Attach peripherals like a keyboard, mouse, or USB flash drive to the adapter’s USB ports if needed.
Unlock your device and start transferring files to external storage or uploading them to Google Drive or another cloud service.
Samsung-Specific Quirk
Samsung users might encounter a gray padlock icon when connecting to an external display. This security feature blocks pattern input on the external screen. Here’s how to work around it:
For PIN users: Connect a keyboard, hit the spacebar, type your PIN, and press Enter.
For pattern users: Double-press the power button to launch the camera app. Swipe down the notification panel and tap the Settings icon. This should trigger a pattern prompt on the external display that you can complete using your connected mouse.
When External Display Won’t Work
If your device doesn’t support USB-C video output, your options narrow considerably. You’ll likely need to have the screen professionally repaired before you can access your data. Yes, it’s an expense, but it’s typically cheaper than specialized data recovery services—assuming the phone still powers on and functions normally aside from the display.
Recover Data from Android : Prevention Is Better Than Recovery
To avoid this headache in the future, set up automatic backups on your Android device. Google’s built-in backup covers most essentials, but consider using additional cloud services for photos and important documents. That way, if disaster strikes, your data is already safe in the cloud before you need to scramble for recovery solutions.
The key takeaway? A broken screen doesn’t mean your data is gone forever. With the right adapter and a bit of patience, you can often rescue everything that matters without spending hundreds on professional recovery services.
All products, and company names, logos, and service marks (collectively the "Trademarks") displayed are registered® and/or unregistered
trademarks™ of their respective owners.
The authors of this web site are not sponsored by or affiliated with any of the third-party trade mark or third-party registered trade mark owners,
and make no representations about them, their owners, their products or services.
Android Battery Health? Is your Android phone dying too fast? Unfortunately, this happens to all phones over time. Moreover, your battery gets weaker as you use it more.
However, the good news is that checking your battery health is easy. Additionally, you can find out if you need a new battery or just better settings.
Android Battery Health : Why Check Your Android Battery Health?
First, your battery health shows important info about your phone. Furthermore, here’s what you can learn:
• How much power your battery has lost • If your phone gets too hot • Which apps drain your battery most • How many times you’ve charged your phone
Meanwhile, most Android phones show basic battery info. However, some methods give you more details.
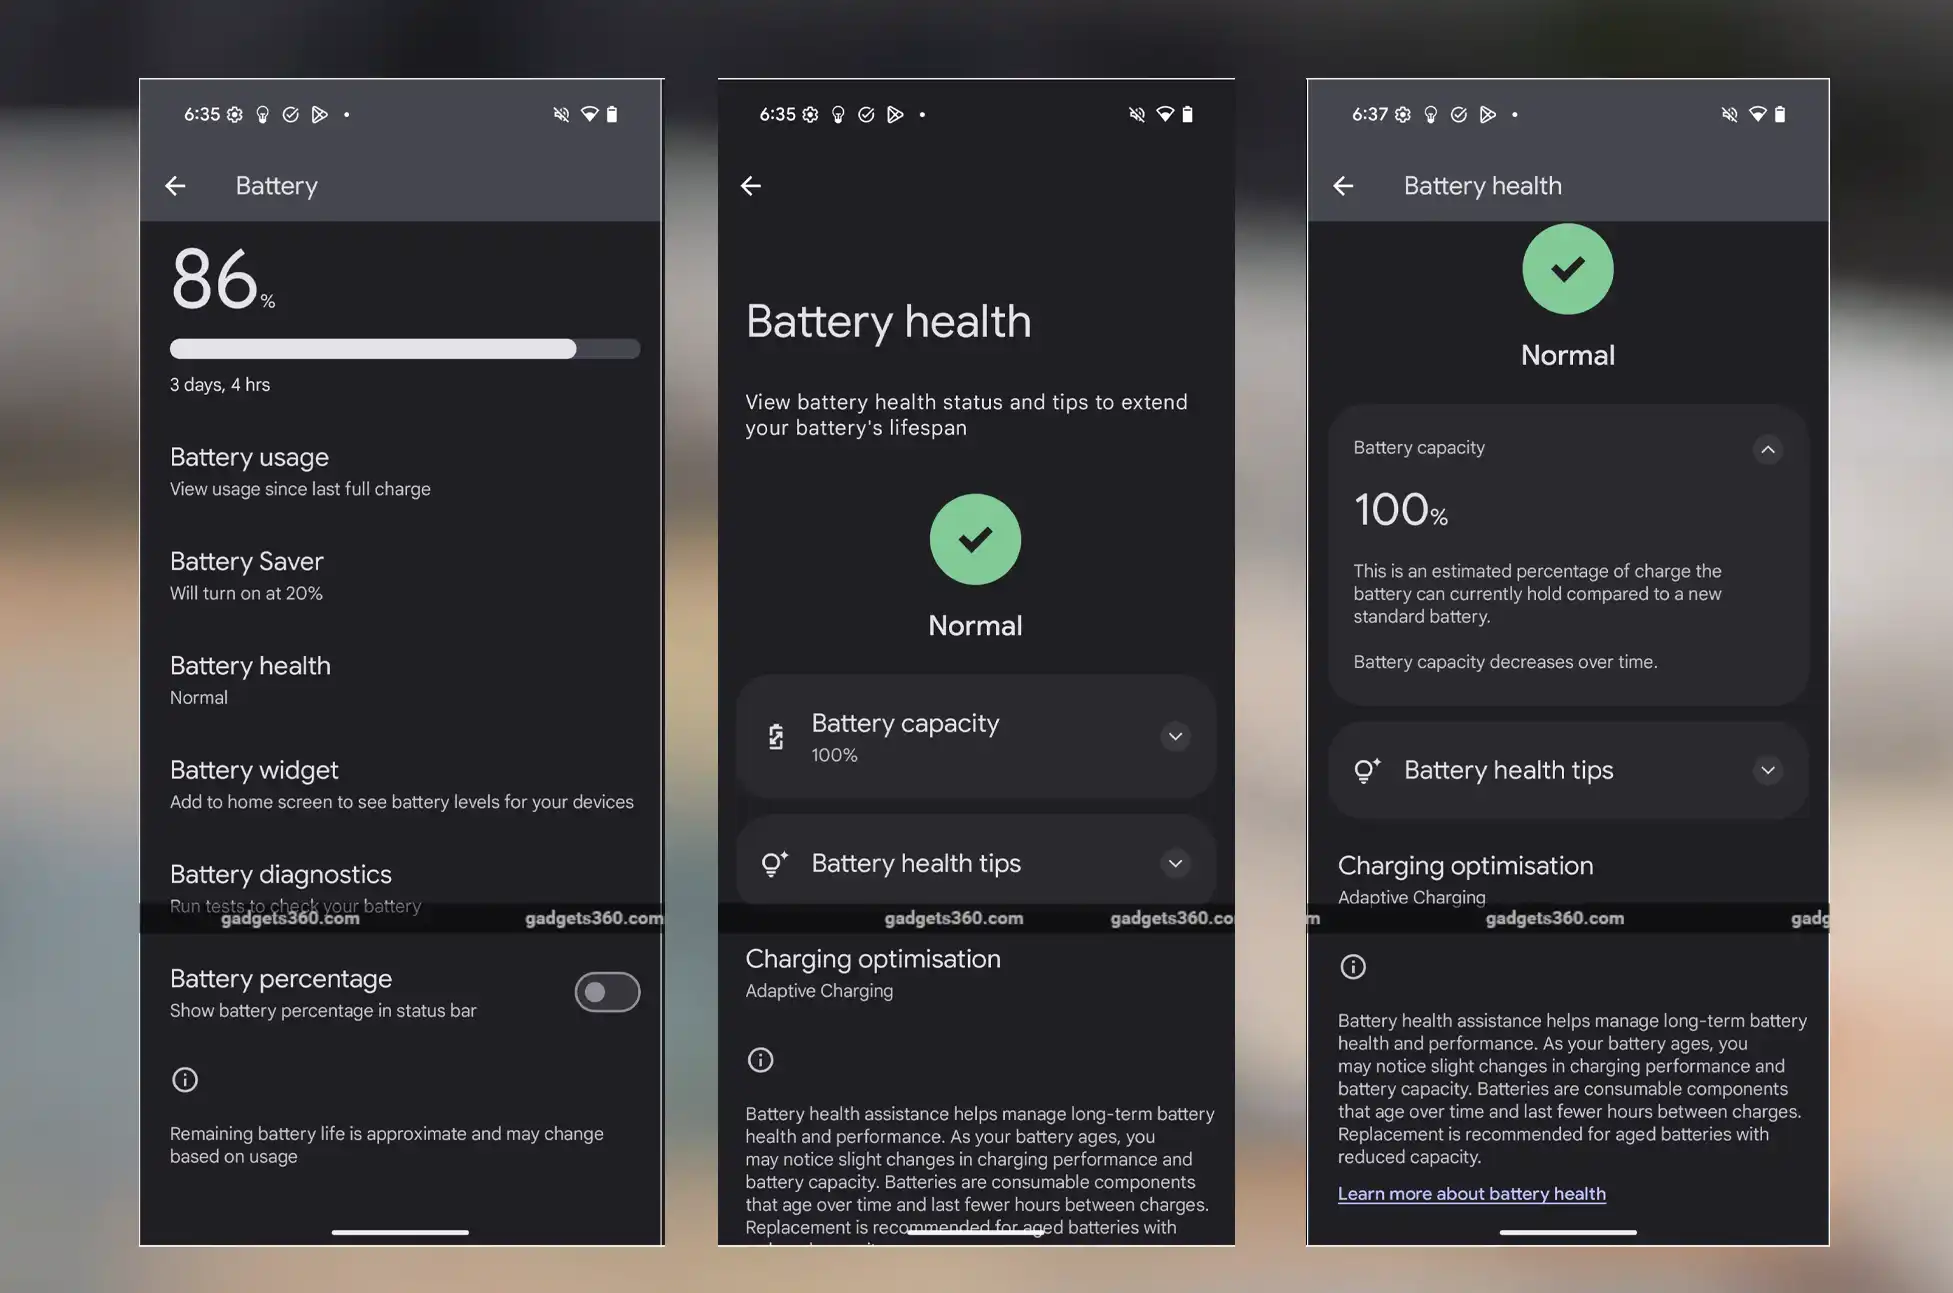
Method 1: Check Through Phone Settings
Initially, this is the easiest way to see your battery info. In fact, every Android phone has this feature.
Here’s how to do it:
First, open Settings on your phone
Next, tap Battery
Then, choose Battery usage
After that, tap any app to see how much power it uses
Finally, look at usage since your last charge
Quick tip: Similarly, apps that use lots of power in the background might mean battery problems.
Method 2: Use Android’s Secret Menu
Alternatively, Android has a hidden menu with battery details. However, this doesn’t work on all phones.
Try these steps:
First, open your Phone app
Next, type *#*#4636#*#*
Then, look for Battery information
Finally, check your battery health and temperature
Note: On the other hand, if you don’t see battery info, try the next method instead.
Method 3: Samsung Phone Users Only
Meanwhile, Samsung phones have a special app for checking battery health. Additionally, this app comes with most Samsung phones.
Steps for Samsung phones:
First, open Samsung Members app
Next, tap Diagnostics
Then, choose Phone diagnostics
After that, tap Battery status
Finally, see your battery health details
What to look for: In contrast, your battery should say “Normal.” However, if it says “Bad” or “Weak,” you need a new battery.
Method 4: Use Special Apps
On the other hand, some apps give you the best battery info. Furthermore, they show details that your phone’s built-in tools might miss.
AccuBattery – Best Overall
First of all, AccuBattery is the most popular battery app. Moreover, it tracks your battery over time.
What it does: • Shows real-time charging info • Tracks how fast your battery drains • Shows battery wear and health • Keeps history of your charging
Cost: Initially free with ads, but paid version removes ads.
CPU-Z – Shows Everything
Similarly, CPU-Z shows battery info plus other phone details. Therefore, it’s great for tech lovers.
Features: • Battery level and health • Temperature tracking • Full phone specifications • Free to use
Battery Guru – Advanced Tracking
Likewise, Battery Guru is great for watching battery patterns. Additionally, it sends helpful alerts.
What you get: • Charts of charging and draining • 24-hour usage stats • Alerts for low battery • Warnings for high temperature
Remember: However, these apps need permissions to work. Therefore, only download from Google Play Store.
Android Battery Health : When to Replace Your Phone Battery
Unfortunately, all phone batteries wear out over time. However, here are signs you need a new one:
Replace your battery if: • Phone turns off suddenly • Phone runs very slowly • Battery dies in just a few hours • Phone gets very hot during normal use
Consequently, if these happen often, get a new battery or upgrade your phone.
How to Make Your Battery Last Longer
Although you can’t stop battery aging, you can slow it down a lot.
Always Use Your Phone’s Charger
First, only use the charger that came with your phone. Otherwise, other chargers can hurt your battery. Furthermore, your original charger works best and safest.
Keep Your Phone Cool
Similarly, heat damages batteries fast. Therefore: • Don’t leave phone in hot cars • Avoid using phone while charging • Keep phone out of direct sunlight
Don’t Let Battery Die Completely
Instead, never let your phone reach 0% battery. Rather, charge it at 10-20%. As a result, this helps your battery last much longer.
Delete Apps You Don’t Use
Meanwhile, too many apps drain your battery all the time. Therefore: • Remove apps you never use • Turn off apps running in background • Check which apps use most power
Android Battery Health : Make Your Current Battery Work Better
Furthermore, even old batteries can work better with simple changes:
Easy battery tips: • Turn down screen brightness • Use dark mode • Turn off apps you’re not using • Use battery saver mode • Let screen turn off faster
Consequently, these small changes help your phone last all day.
Android Battery Health : Final Thoughts
Checking your Android battery health is important. Moreover, it helps you know when to get a new battery or phone. Additionally, all batteries get worse over time. However, that’s normal. Still, with good care and regular checks, your battery will last longer. Therefore, try these methods today. Then, see how healthy your battery is. Finally, use our tips to keep it working well.
All products, and company names, logos, and service marks (collectively the "Trademarks") displayed are registered® and/or unregistered
trademarks™ of their respective owners.
The authors of this web site are not sponsored by or affiliated with any of the third-party trade mark or third-party registered trade mark owners,
and make no representations about them, their owners, their products or services.
Android security updates? Keeping your Android phone updated isn’t just about scoring the latest features—it’s your first line of defense against digital threats. Security updates patch vulnerabilities, squash bugs, and keep your digital life secure. But here’s the catch: not all phones receive the same update treatment. Some manufacturers are update champions, while others… not so much.
Update frequency typically depends on your phone’s:
Age
Model
Region
Why You Should Care About Security Patches
If your phone hasn’t received a security update in months, you might be walking around with a vulnerable device. This is especially true for older phones that manufacturers have placed on the back burner.
Regular security checks help you:
Shield yourself against known vulnerabilities
Minimize risks from outdated software
Make informed decisions about upgrading to a newer device
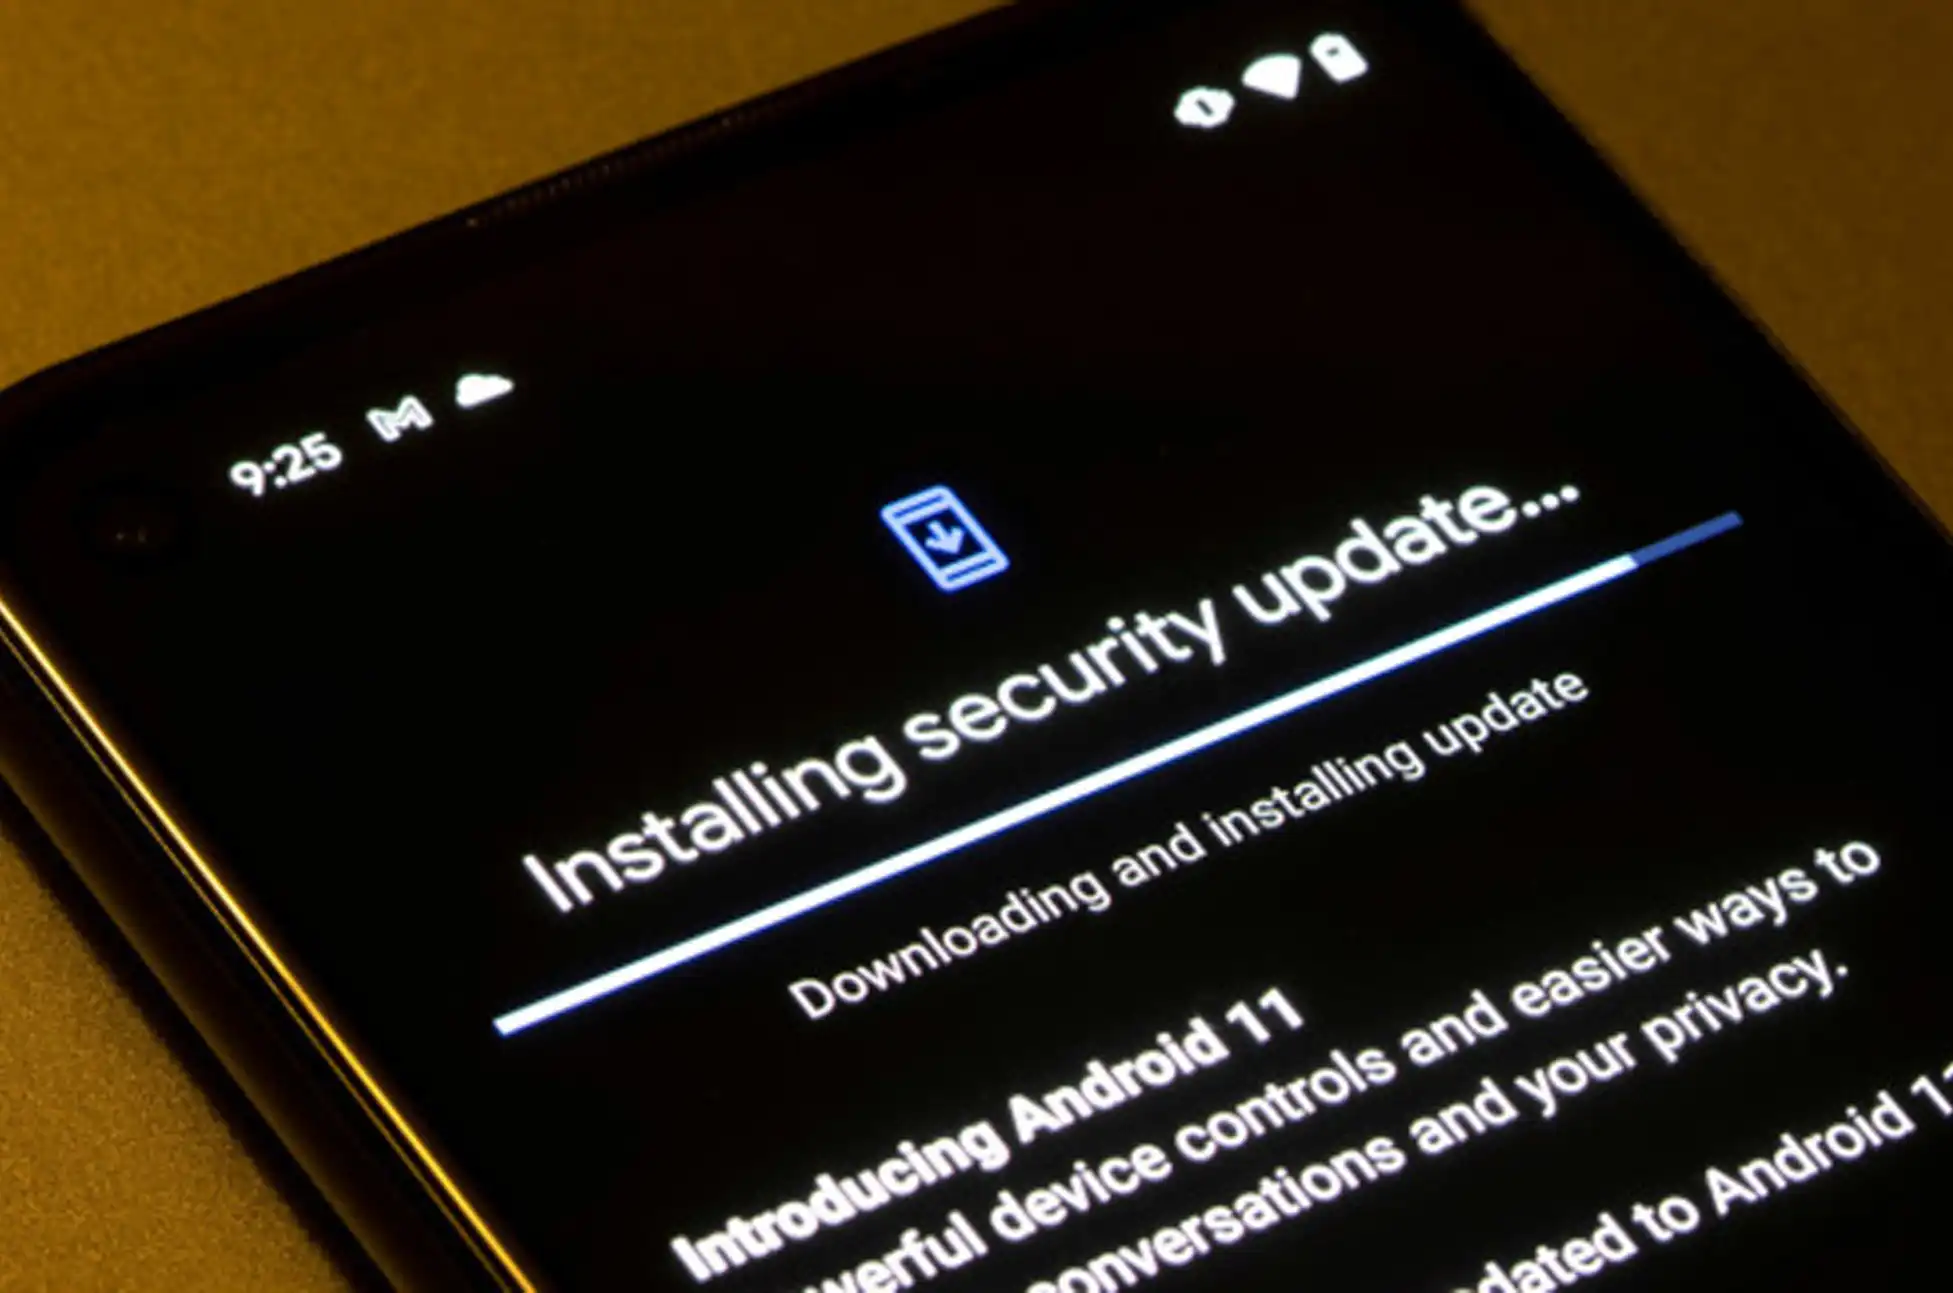
How to Check Your Phone’s Security Status
Unlike major Android upgrades that transform your phone’s look and feel, security updates work behind the scenes. They’re focused on fixing security flaws without changing your daily experience—but they’re crucial for protecting against serious threats like malware and remote attacks.
Want to know if your device is still protected? Here’s how to check when it last received a security update:
Open your Settings app
Scroll down and tap “About phone” or “System” (varies by device)
Tap “Android version” or “Software information”
Look for the date under “Android security update”
This date reveals when your phone last received protective care. For instance, a date of “May 5, 2025” indicates your most recent patch. Since Google typically releases security updates monthly, anything older than 3-4 months could signal that your phone is no longer supported.
Android security updates : How to Manually Check for Available Updates
Even if automatic updates haven’t appeared recently, your phone might have an update waiting in the wings. Here’s how to check manually:
Open Settings
Navigate to System
Tap “Software update” or “System update”
Select “Check for updates” and install if available
Remember that update policies vary by manufacturer. To learn about your specific phone’s update promise, search “[Your phone model] update policy” or visit the manufacturer’s website.
The Android Security Bulletin: Your Update Reference Point
Google publishes a monthly Android Security Bulletin outlining the latest patches and fixes. You can compare your device’s patch level to the most recent bulletin on Google’s official page. If your phone is lagging behind by two or three bulletins with no updates in sight, it might have reached the end of its supported lifecycle.
Warning Signs Your Phone Has Reached Update Retirement
Beyond just checking the security patch date, watch for these telltale signs that your phone may no longer receive updates:
No system updates in the past 6-12 months
You’re stuck on an outdated Android version (like Android 11 or 12)
Newer models in your phone’s series have launched, and your device is 2-3 years old
The manufacturer’s website lists your device as “end-of-life”
Your Options When Updates Stop Coming
If your device has stopped receiving updates, you’ll need to take precautionary measures:
Avoid installing apps from unknown sources
Use a secure browser for all web activities
Minimize sensitive tasks like banking on your device
Android security updates : Conclusion
Your smartphone holds your digital life—photos, conversations, passwords, and personal data. Staying on top of security updates is one of the simplest yet most effective ways to protect yourself in today’s connected world. Whether you choose to extend your current phone’s life through careful usage habits, explore custom ROMs, or upgrade to a newer model with better support, taking action now prevents headaches later. Remember: in the world of digital security, prevention is always easier than cure!
All products, and company names, logos, and service marks (collectively the "Trademarks") displayed are registered® and/or unregistered
trademarks™ of their respective owners.
The authors of this web site are not sponsored by or affiliated with any of the third-party trade mark or third-party registered trade mark owners,
and make no representations about them, their owners, their products or services.
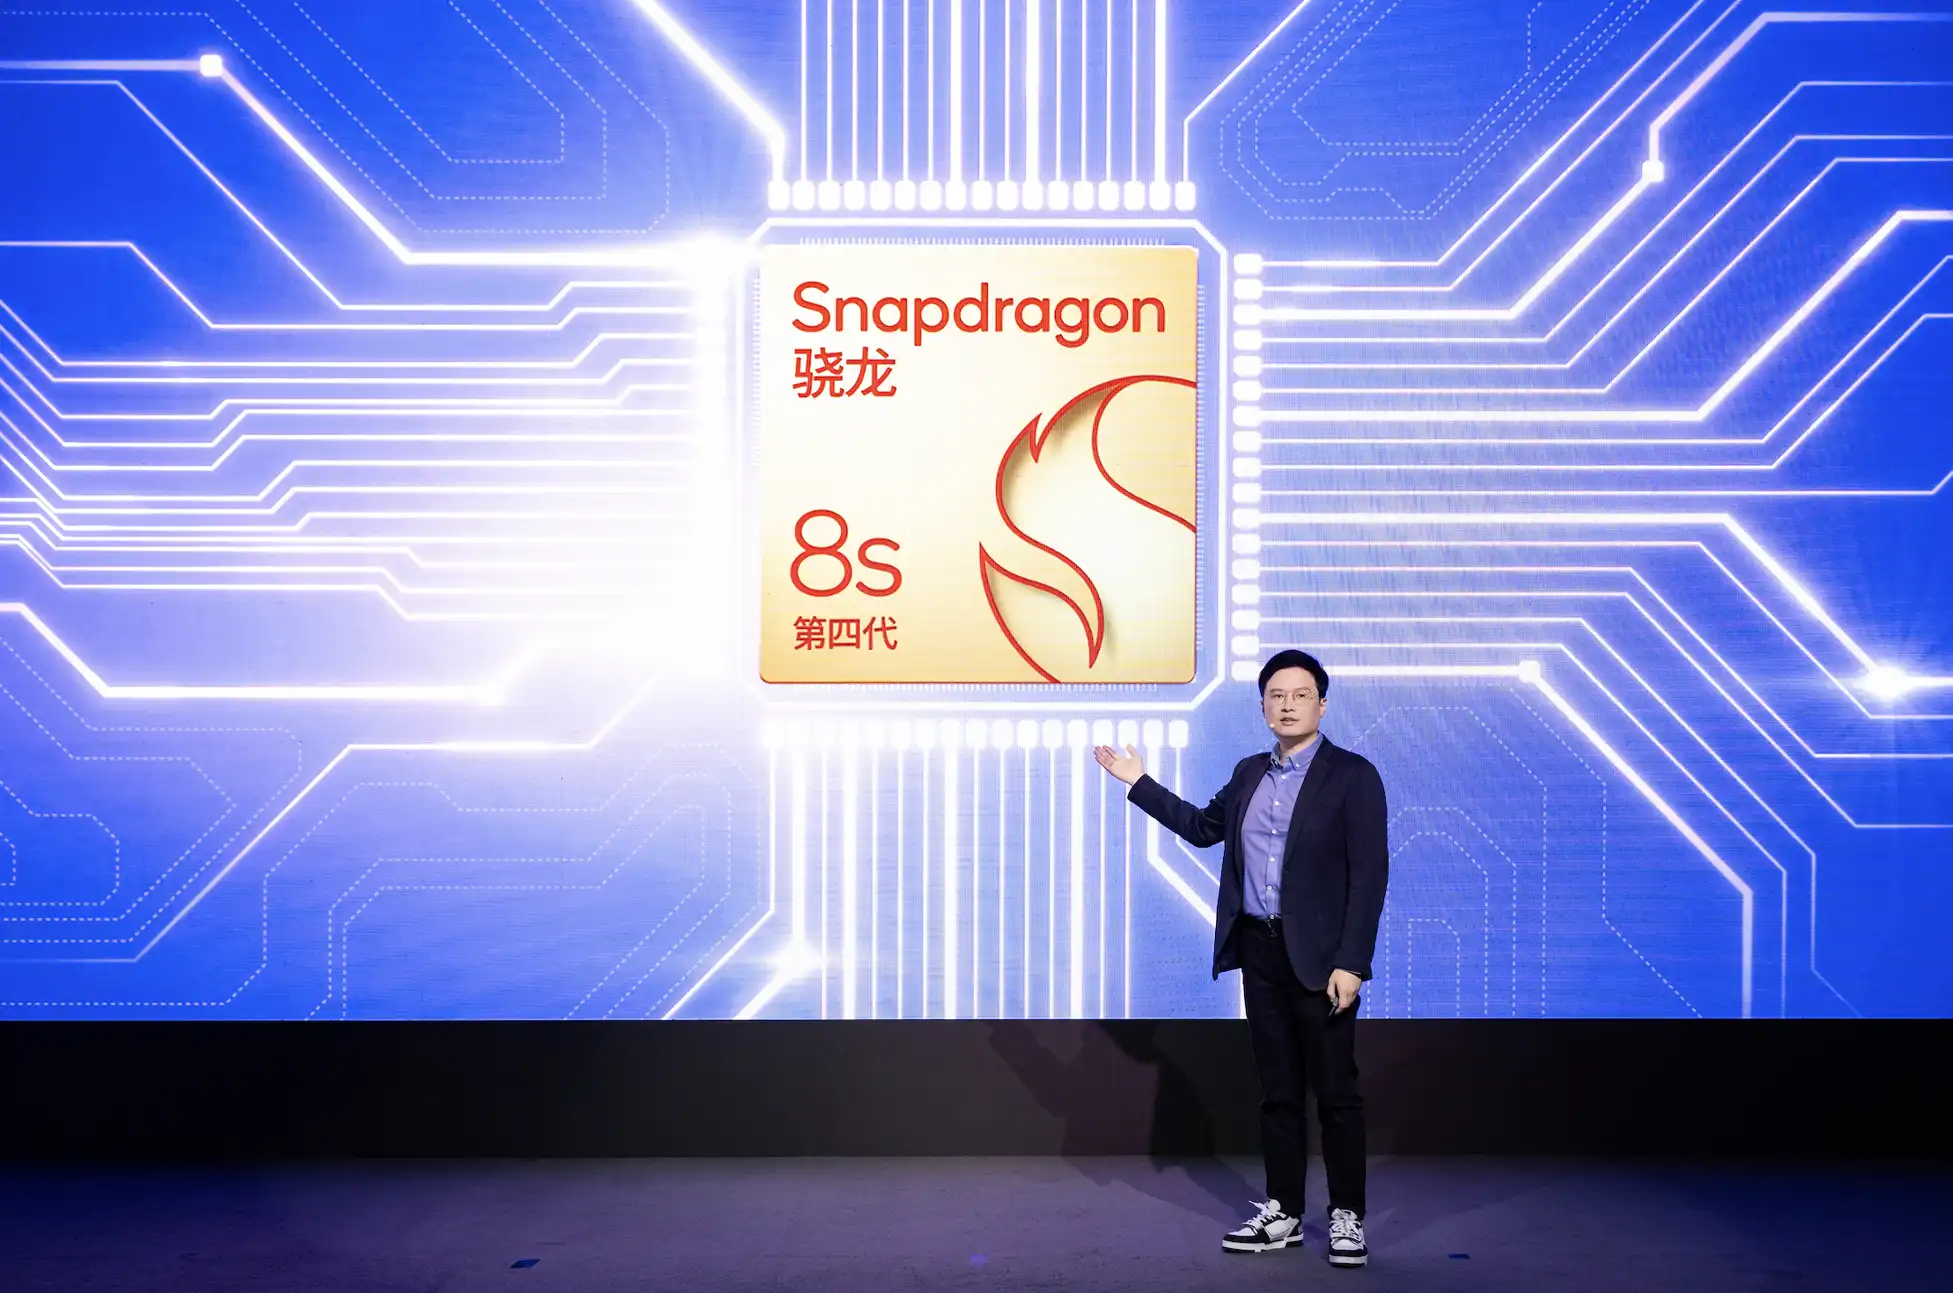
Qualcomm has officially unveiled its latest chipset, the Snapdragon 8s Gen 4, positioning it as a compelling option for premium smartphones that won’t break the bank. This new processor brings several notable improvements over its predecessor while introducing an intriguing CPU configuration that could deliver impressive multi-threaded performance.
Snapdragon 8s Gen 4 : A Surprising Name and Architecture
Despite earlier rumors suggesting it would be called the “Snapdragon 8s Elite,” Qualcomm opted for the Snapdragon 8s Gen 4 moniker for this China-launched processor. This naming decision likely stems from the chipset’s use of standard Arm Cortex CPU cores rather than Qualcomm’s custom Oryon technology found in the flagship Snapdragon 8 Elite.
The CPU configuration represents a significant departure from traditional smartphone processor designs. The Snapdragon 8s Gen 4 features:
One Cortex-X4 core at 3.2GHz
Three Cortex-A720 cores at 3GHz
Two Cortex-A720 cores at 2.8GHz
Two Cortex-A720 cores at 2GHz
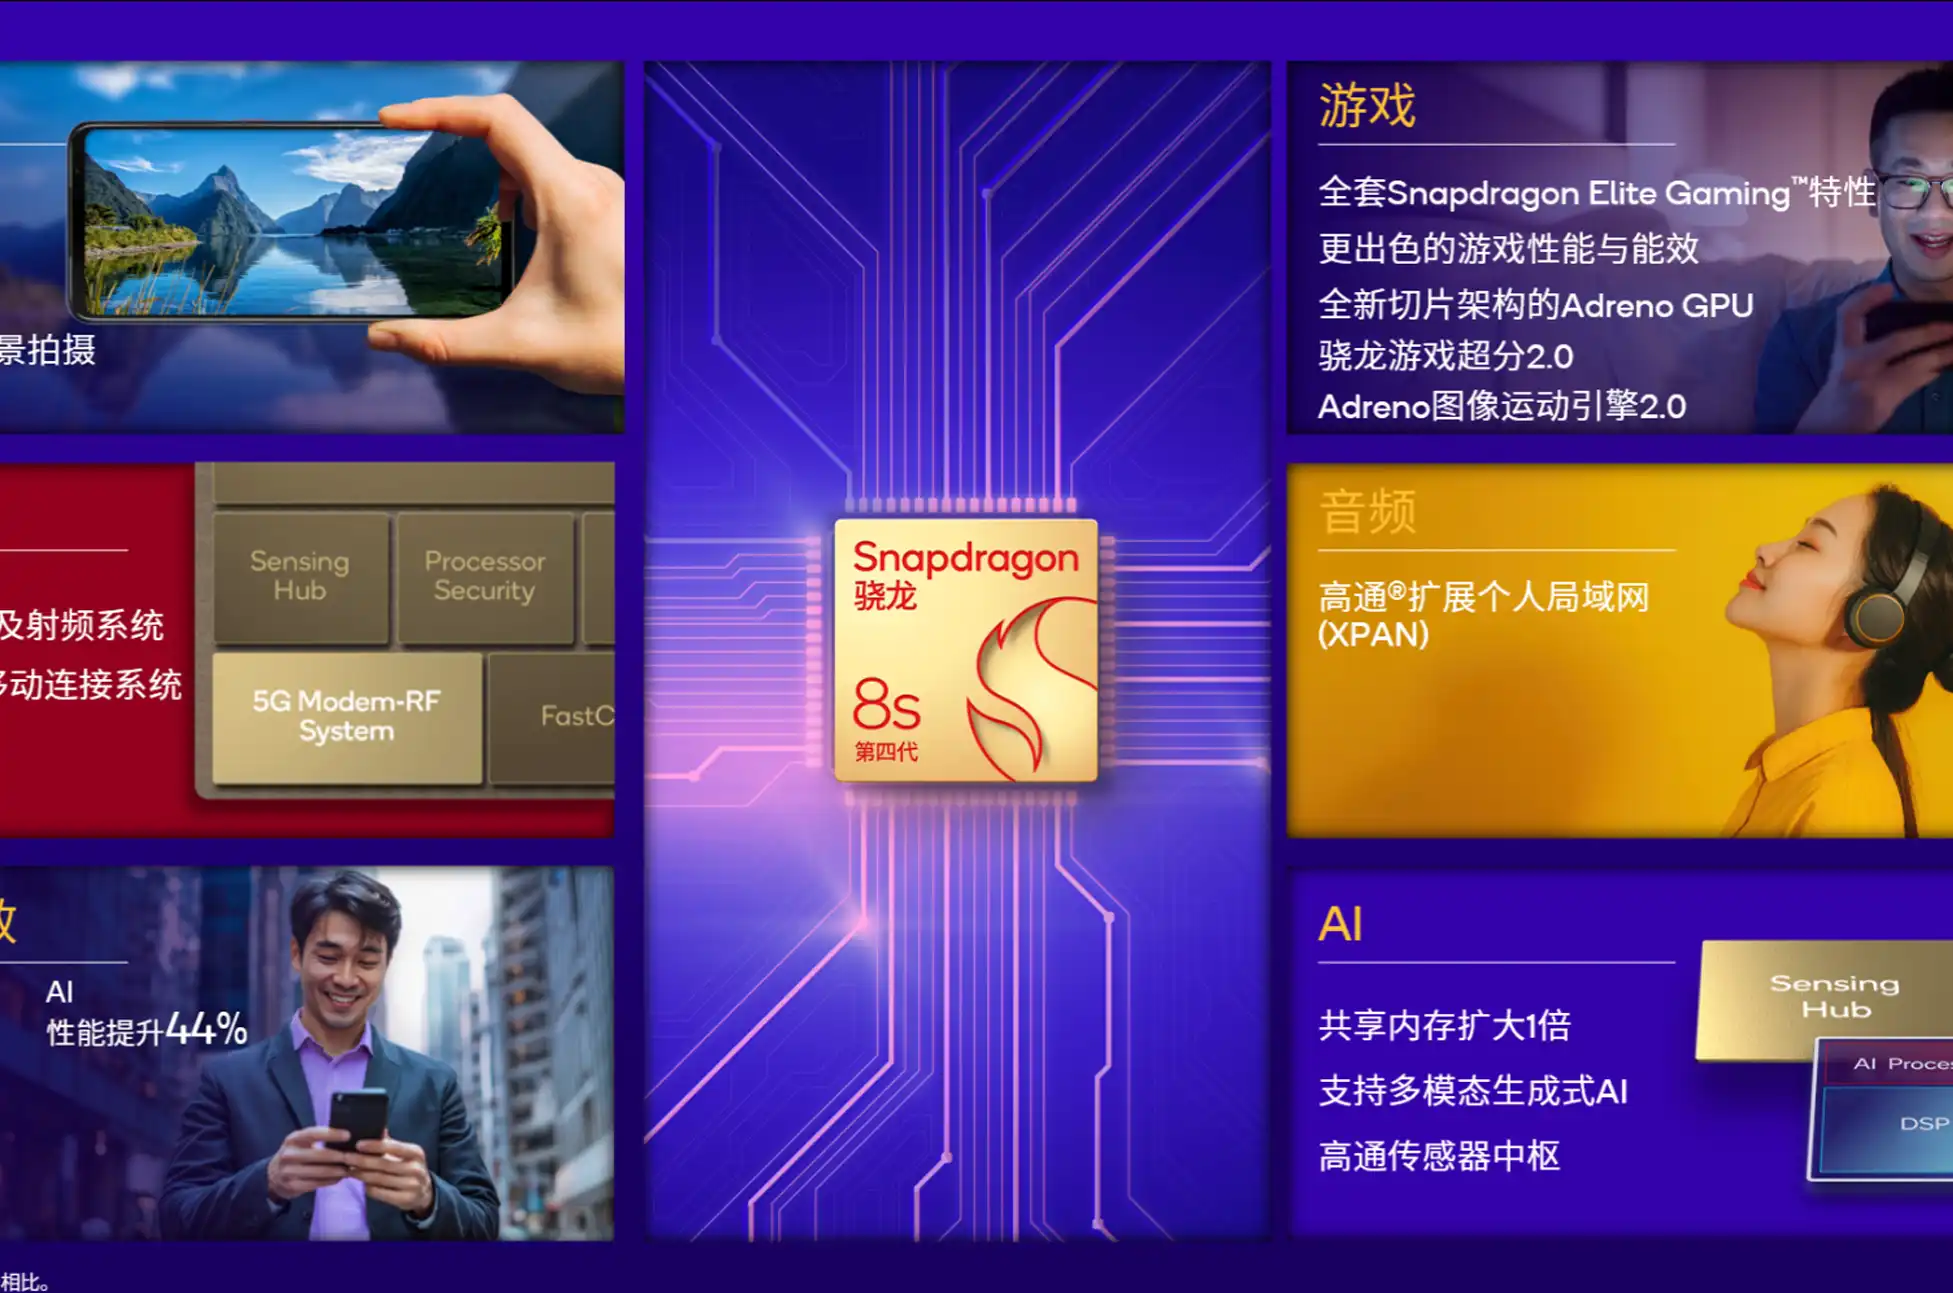
Most notably, Qualcomm has eliminated the efficiency-focused “little” cores entirely, opting instead for an all-medium-and-big-core approach. While the processor shares the same big and medium cores as the 8s Gen 3, this architectural shift suggests we can expect substantially improved multi-core performance. Qualcomm claims a 31% CPU performance boost over last year’s model, though it hasn’t specified whether this refers to single or multi-core benchmarks.
Snapdragon 8s Gen 4 : Graphics and Gaming Upgrades
The Snapdragon incorporates an Adreno GPU featuring the same sliced architecture that debuted in the flagship Snapdragon 8 Elite. According to materials from Qualcomm China, this GPU includes two slices (compared to the Elite’s three) and 12MB of dedicated memory.
Gamers will appreciate the substantial 49% graphical performance improvement over the previous generation. The chip also supports advanced features like ray tracing and Qualcomm’s Game Super Resolution 2.0 technology, bringing flagship-level gaming capabilities to more affordable devices.
AI and Computational Photography Advancements
The new processor doesn’t skimp on AI capabilities either. With an enhanced NPU and twice the shared memory of its predecessor, the Snapdragon delivers 44% faster AI performance according to Qualcomm’s benchmarks.
Photography enthusiasts will benefit from several camera upgrades, including:
Support for 320MP snapshots (up from 200MP)
108MP single-camera capability with multi-frame processing
Triple 36MP camera configurations
4K/30fps low-light video recording
Up to 250 layers of real-time segmentation in photos and videos
Real-time skin and sky tone correction
Truepic authentication for verifying image authenticity
However, the chip does make some video compromises compared to Qualcomm’s top-tier offerings. The Snapdragon 8s Gen 4 forgoes 8K/30fps, 4K/120fps, and 720p/960fps capabilities, instead focusing on 4K/60fps and 1080p/480fps recording options.
While Qualcomm hasn’t yet announced which smartphones will feature the new Snapdragon, this chipset is positioned to power the next generation of premium mid-range devices that deliver flagship-like performance at more accessible price points.
All products, and company names, logos, and service marks (collectively the "Trademarks") displayed are registered® and/or unregistered
trademarks™ of their respective owners.
The authors of this web site are not sponsored by or affiliated with any of the third-party trade mark or third-party registered trade mark owners,
and make no representations about them, their owners, their products or services.
Unlock Any Latest Android Phones? Are you tired of being locked into a single carrier with your brand-new Android smartphone? Whether you’ve just purchased a cutting-edge device or inherited an older model, unlocking your phone can provide unprecedented freedom and flexibility. In this comprehensive guide, we’ll walk you through the process of unlocking your Android phone using UnlockBase, the most reliable unlocking service in the market.
Why Unlock Your Android Phone?
Unlocking your Android phone offers several compelling advantages:
Travel Freedom: Use local SIM cards when traveling internationally
Network Flexibility: Switch carriers without buying a new device
Complete Device Control: Customize your smartphone experience
The core advantage is simple: liberation from carrier restrictions. By unlocking, you transform your device from a carrier-controlled tool to a truly personal technology companion.
Verifying Your Android Phone Unlocked Status
To determine if your Android Phone is carrier-unlocked, perform this quick network test:
Obtain a SIM card from a carrier different from your current one
Insert the new SIM into your phone
Check if the phone:
Displays the new carrier’s network name
Successfully makes calls and connects to mobile data
If both conditions are met, your device is confirmed unlocked
Pro tip: This method provides a simple, practical way to verify your phone’s network flexibility without contacting your carrier or navigating complex settings.
Is Unlocking Android Phone Legal?
While phone unlocking is legal in most jurisdictions, it’s paramount to approach the process responsibly. Respect your carrier’s terms of service and understand local regulations. Unlocking should be viewed as a means of enhancing your device’s functionality.
Potential Challenges and Solutions
Unlocking isn’t without potential hurdles:
Contractual Restrictions: Some carriers require full device payment
Warranty Concerns: Choose reputable services
Technical Complexity: Professional services simplify the process
Professional services like UnlockBase navigate these challenges seamlessly, ensuring a smooth unlocking experience.
Why use UnlockBase in Unlocking Any Android Phones?
In the complex world of phone unlocking, UnlockBase emerges as a beacon of reliability and efficiency. The service offers a comprehensive solution for users seeking network independence. UnlockBase approach combines cutting-edge technology with user-friendly processes, ensuring a smooth unlocking experience. Competitive pricing, rapid service, and exceptional customer support make UnlockBase the go-to choice for Android phone unlocking.
Choose the country and network your phone is locked to.
Confirm your payment and wait for an email with the unlock code.
How to Use the Unlock Code
After receiving the unlock code, follow these steps:
Insert a SIM card from a different carrier.
Enter the SIM unlock pin.
Enter the unlock code provided by UnlockBase.
Unlock Any Latest Android Phones : Conclusion
Unlocking your Android phone with UnlockBase is a game-changing move. Embrace device freedom, explore new network possibilities, and take complete control of your smartphone experience. Ready to unlock your potential? Visit UnlockBase today and transform your Android experience!
All products, and company names, logos, and service marks (collectively the "Trademarks") displayed are registered® and/or unregistered
trademarks™ of their respective owners.
The authors of this web site are not sponsored by or affiliated with any of the third-party trade mark or third-party registered trade mark owners,
and make no representations about them, their owners, their products or services.
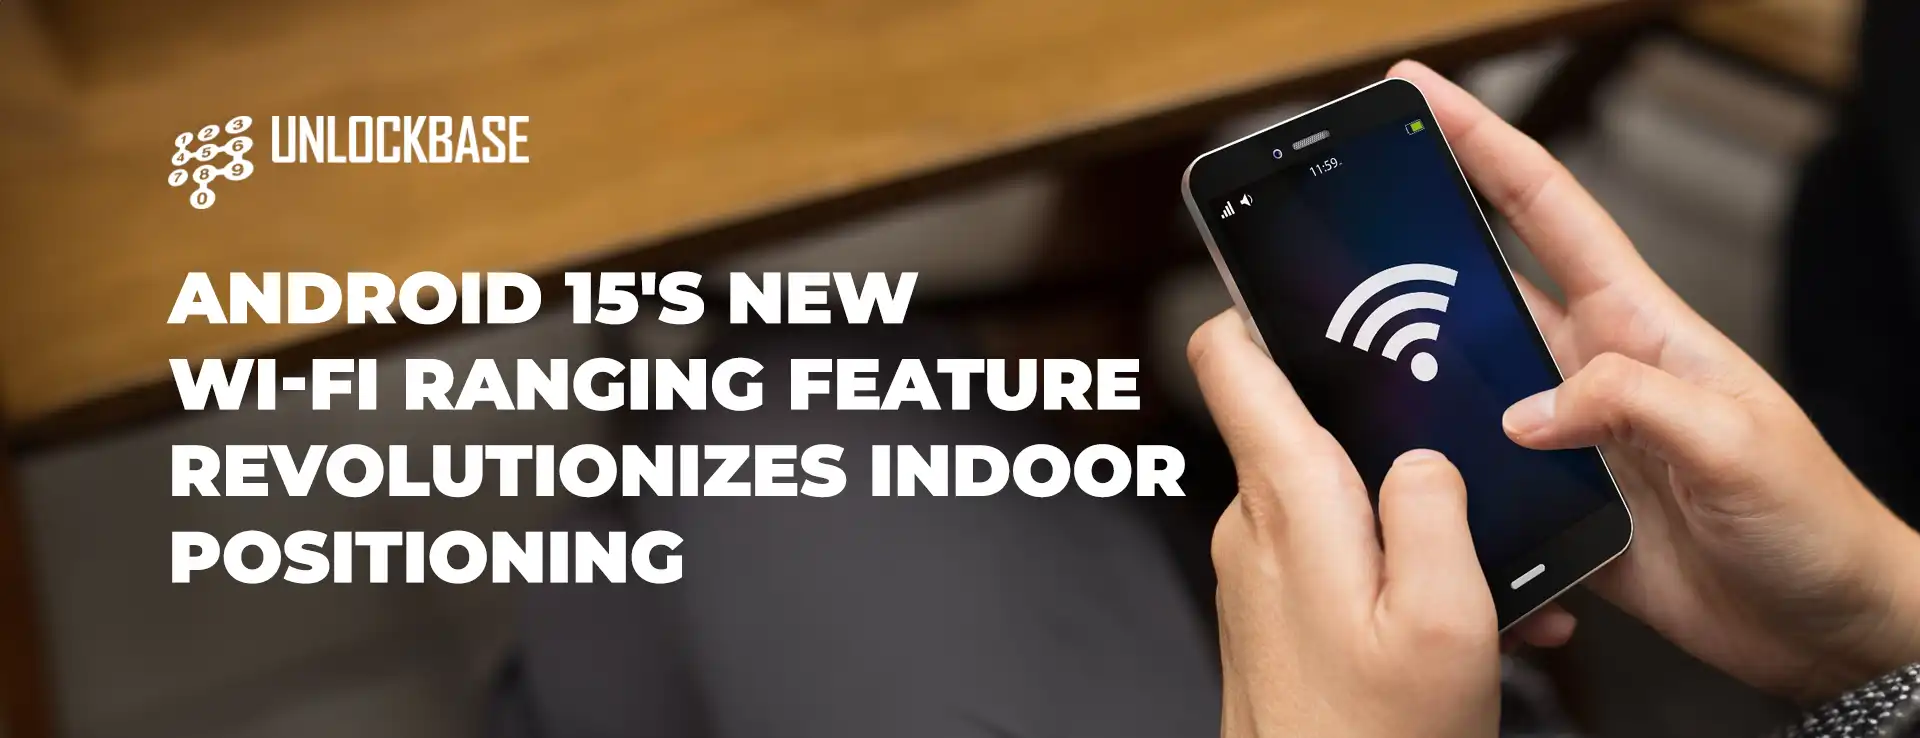
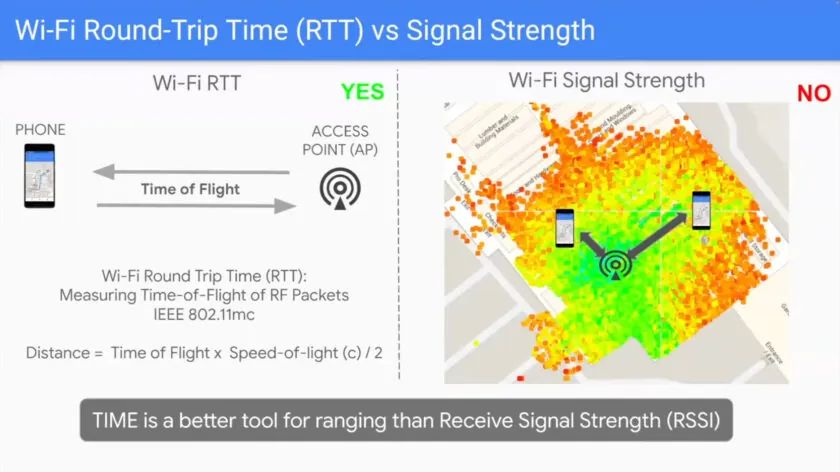
GPS often struggles with accuracy indoors due to blocked signals. Android 15’s new Wi-Fi Ranging feature is set to change that, offering a more precise way to track location inside buildings. Wi-Fi access points (APs) are key to this, as they allow for more accurate positioning than GPS when used with modern technology.
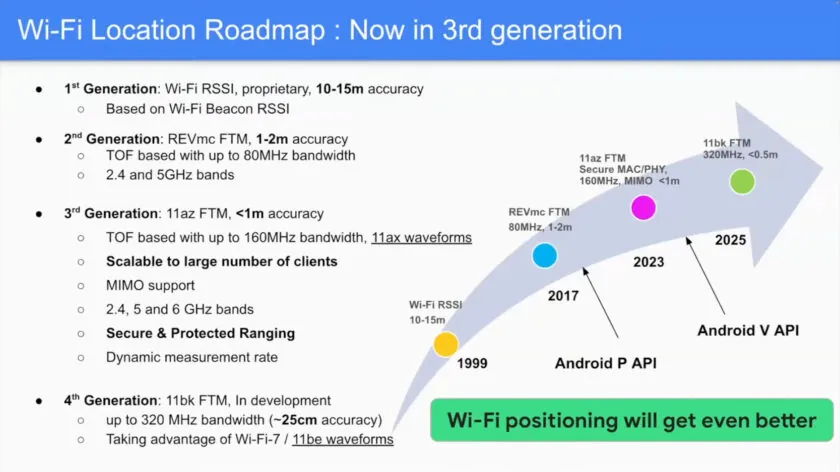
The Evolution of Wi-Fi Positioning
Early Wi-Fi positioning was based on signal strength, which could only provide 10-15 meter accuracy—far from ideal for indoor navigation.
The introduction of Wi-Fi Round Trip Time (RTT) improved accuracy to 1-2 meters by measuring signal travel time between devices and nearby APs. While Android has supported Wi-Fi RTT since version 9, it hasn’t been widely implemented.
Now, Wi-Fi Ranging (802.11az) takes accuracy to the next level, achieving precision within less than 1 meter. It doubles the bandwidth, works on the 6GHz band, and is scalable to many devices, making it ideal for crowded areas like malls or convention centers.
Android 15 fully supports Wi-Fi Ranging, allowing devices to switch between older Wi-Fi standards (802.11mc) and the new 802.11az for better indoor location tracking.
Why Wi-Fi Ranging Feature Stands Out
While Ultra-Wideband (UWB) and Bluetooth 6.0 with Channel Sounding are also emerging for precise location tracking, Wi-Fi Ranging holds its own due to better range, scalability, and cost efficiency. It’s compatible with previous Wi-Fi generations, and with the huge spectrum available, it meets the growing demand for more precise indoor navigation. Although slightly less accurate than UWB, it’s more practical for large-scale use cases.
Wi-Fi Ranging: What’s Coming Next?
Google sees many possibilities for Wi-Fi Ranging.
It could revolutionize retail, helping customers find products in stores or enhancing smart home automation by allowing devices to know exactly where you are.
While most phones don’t yet support Wi-Fi Ranging, new chips like Qualcomm’s FastConnect 7900 will bring this feature to future devices.
However, many Wi-Fi 6 access points will need firmware updates to support this new standard.
Wi-Fi Ranging Feature : Conclusion
Wi-Fi Ranging in Android 15 is a leap forward in indoor positioning technology, offering accurate, scalable, and secure tracking. While it may take a bit of time for devices and infrastructure to catch up, this innovation is set to transform how we navigate indoor spaces.
All products, and company names, logos, and service marks (collectively the "Trademarks") displayed are registered® and/or unregistered
trademarks™ of their respective owners.
The authors of this web site are not sponsored by or affiliated with any of the third-party trade mark or third-party registered trade mark owners,
and make no representations about them, their owners, their products or services.
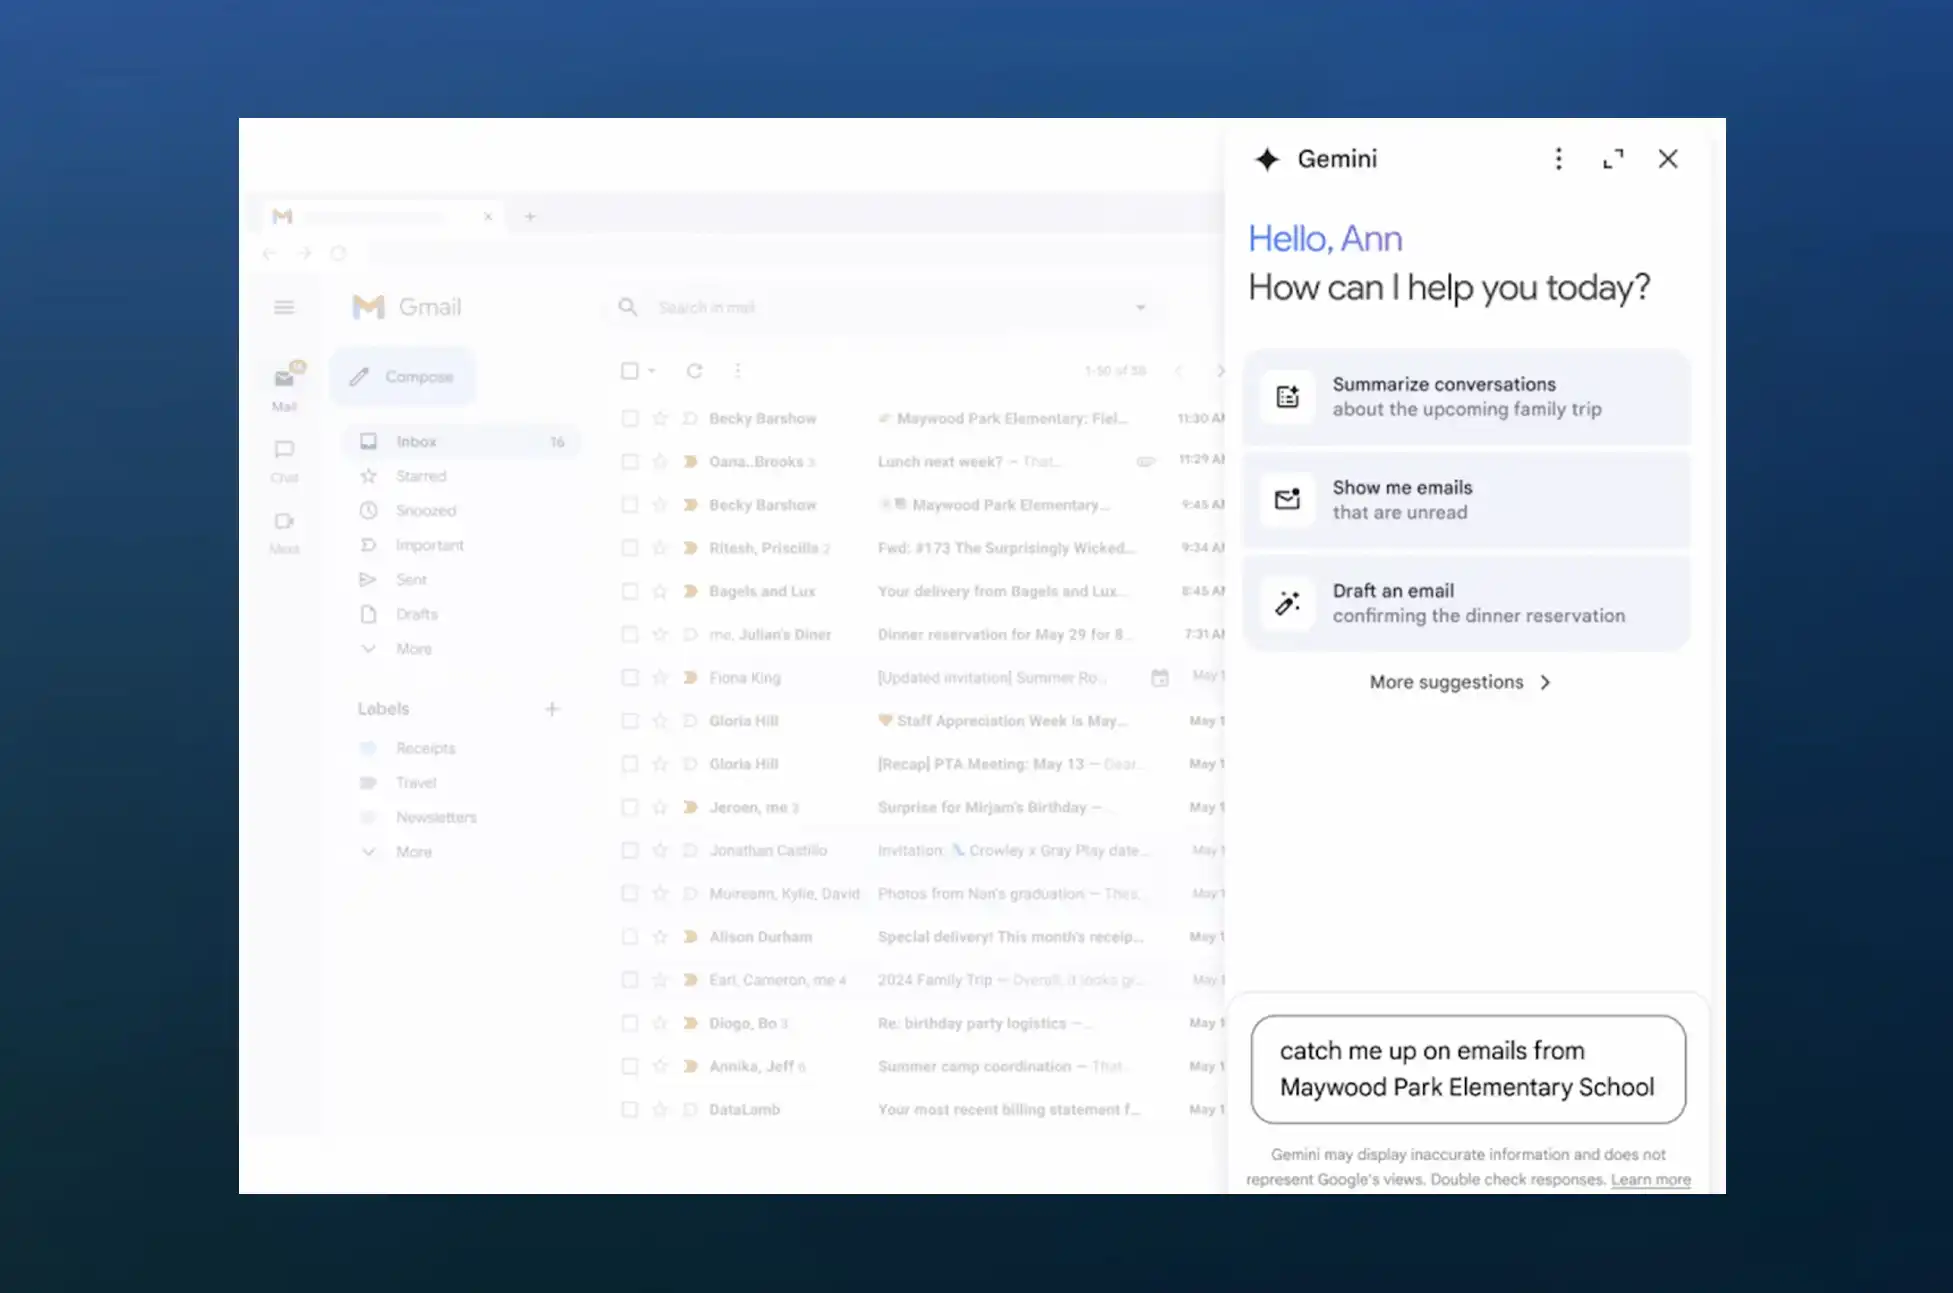
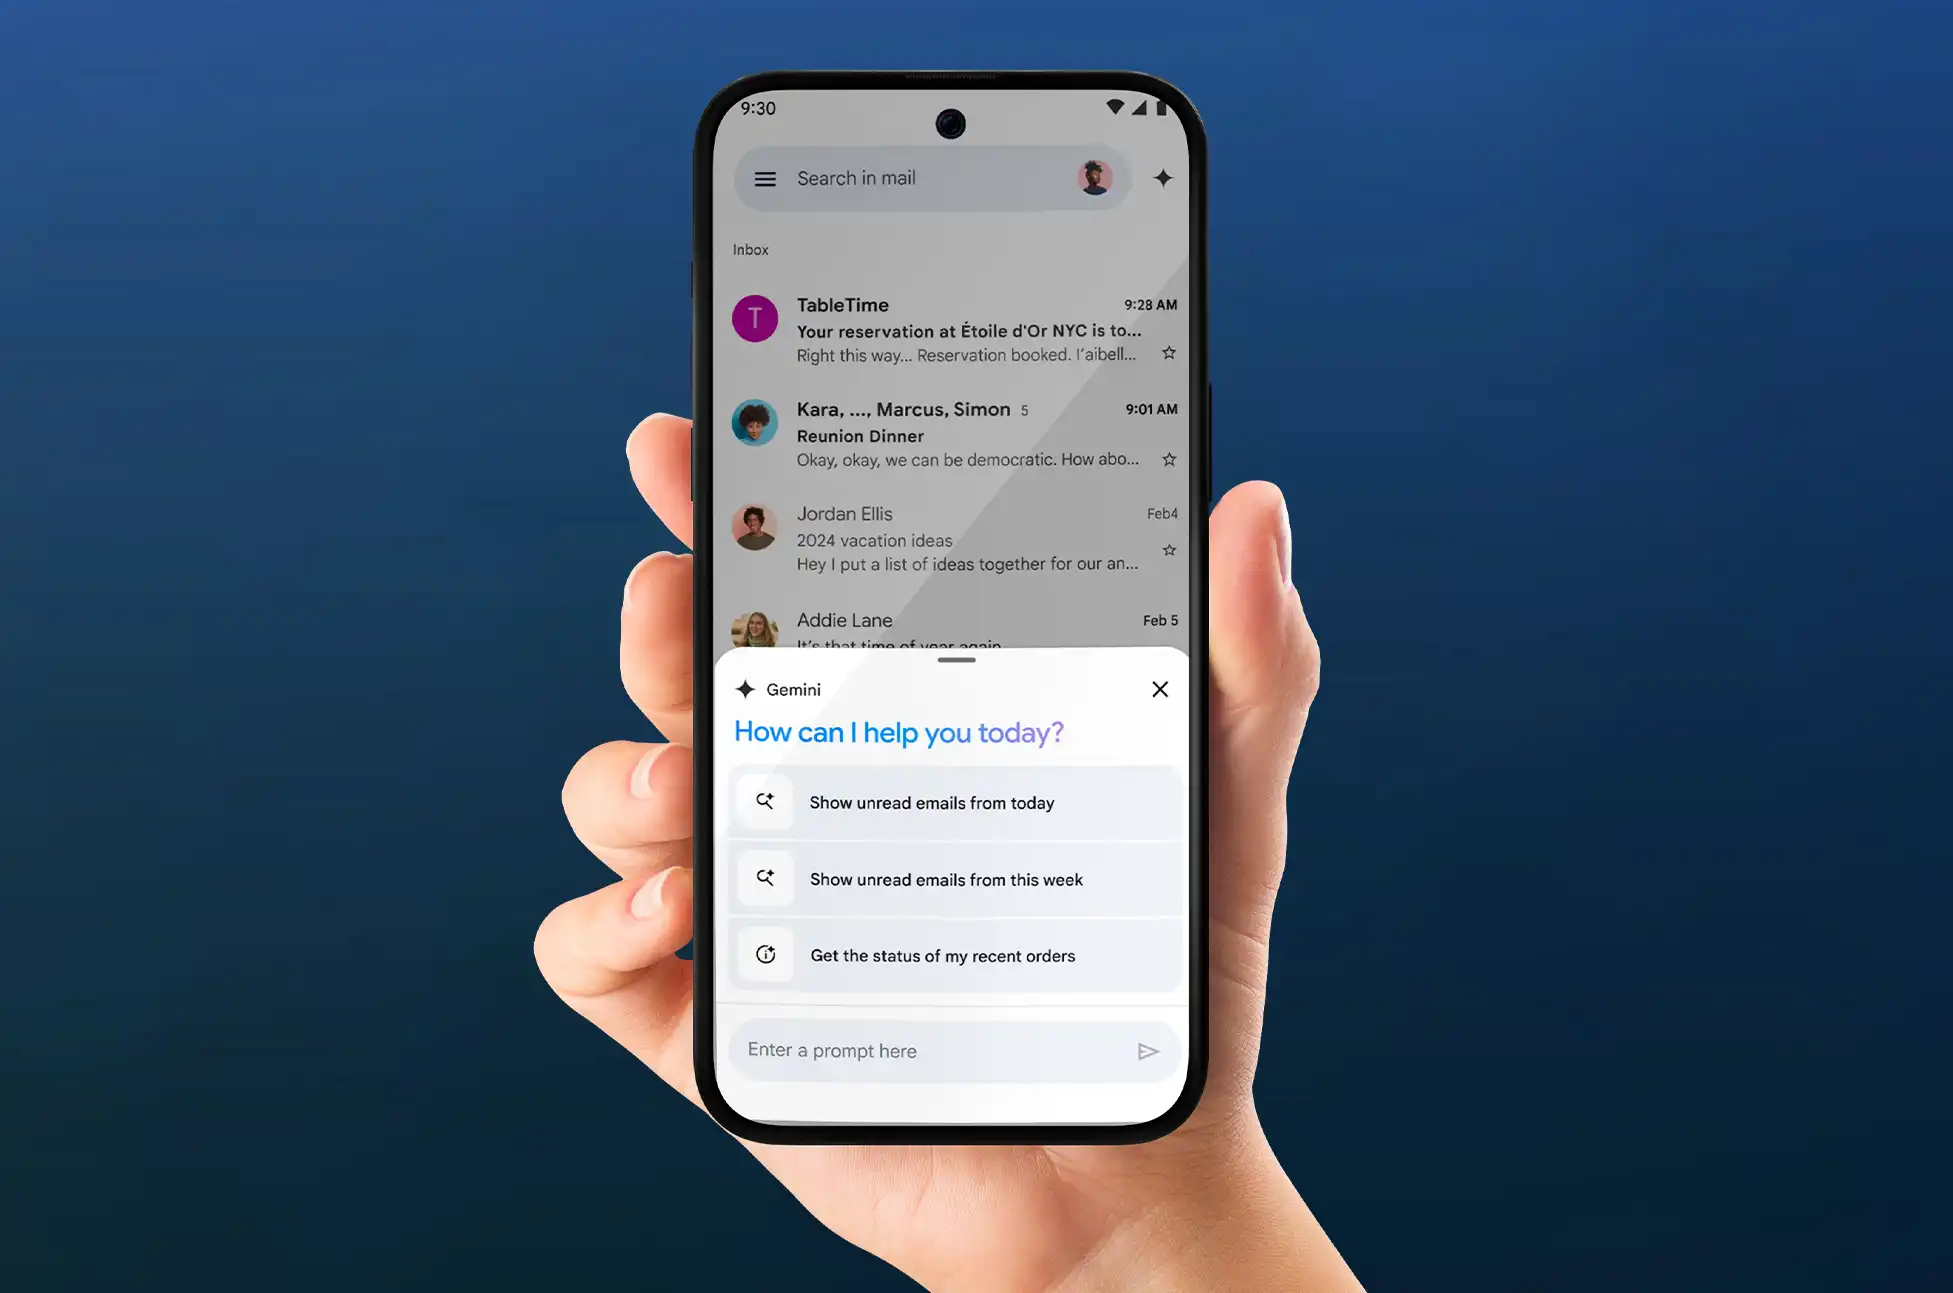
Remember that feeling when you got your first smartphone? That rush of “Wow, I can do so much more now!” Well, get ready for that feeling again, because Gmail’s about to become your new favorite AI-powered personal assistant!
Gemini on Android : The Big News
Google’s been on an AI roll lately, and now they’re bringing the magic of Gemini to your Android Gmail app. iOS users, don’t worry – your turn is coming soon!
What’s Gemini, and Why Should You Care?
Imagine having a super-smart intern who’s read every email in your inbox and can answer any question about them in seconds. That’s essentially what Gemini is for Gmail. This AI-powered side panel is like having a search function on steroids, mixed with the world’s most efficient personal assistant.
So, What Can This AI Whiz Do?
Email Archaeologist: “Hey Gemini, what was that thing Bob said about the project timeline last month?” Boom! No more endless scrolling.
Inbox Summarizer: “Catch me up on the quarterly planning emails.” Consider yourself caught up!
Draft Wizard: Need help crafting the perfect response? Gemini’s got your back.
Data Detective: It can even help you track down specific information hidden in your mountain of emails.
From Web to Pocket
Until now, this AI magic was trapped on the web version of Gmail. But Google’s breaking it free! The Gemini side panel is rolling out to Android devices as we speak. (iOS friends, hang tight – you’re next on the list!)
When Can You Get Your Hands on It?
The rollout has begun, but patience is a virtue. Google says it could take up to 15 days for everyone to see the update. So keep your eyes peeled!
Who Gets Invited to the Party?
Now, before you get too excited, there’s a bit of a VIP list:
Gemini Business users
Enterprise account holders
Education and Education Premium subscribers
Google One AI Premium plan members
If you’re on this list, congratulations! You’re about to level up your email game.
Gemini on Android : Why This is a Big Deal
For the work-from-home warriors, busy professionals, and students drowning in assignment emails, this is like throwing a life preserver into a sea of information. No more losing important details or spending hours searching for that one crucial email.
Gemini on Android : What’s Next?
While we don’t have an exact date for the iOS release, it’s on the horizon. And knowing Google, they’re probably cooking up even more AI-powered features as we speak.
So, Android users, get ready to welcome your new AI email buddy. And remember, the next time you’re staring at your inbox feeling overwhelmed, Gemini’s got your back. Happy emailing, and may your inbox always be at inbox zero (or at least feel like it)!
All products, and company names, logos, and service marks (collectively the "Trademarks") displayed are registered® and/or unregistered
trademarks™ of their respective owners.
The authors of this web site are not sponsored by or affiliated with any of the third-party trade mark or third-party registered trade mark owners,
and make no representations about them, their owners, their products or services.
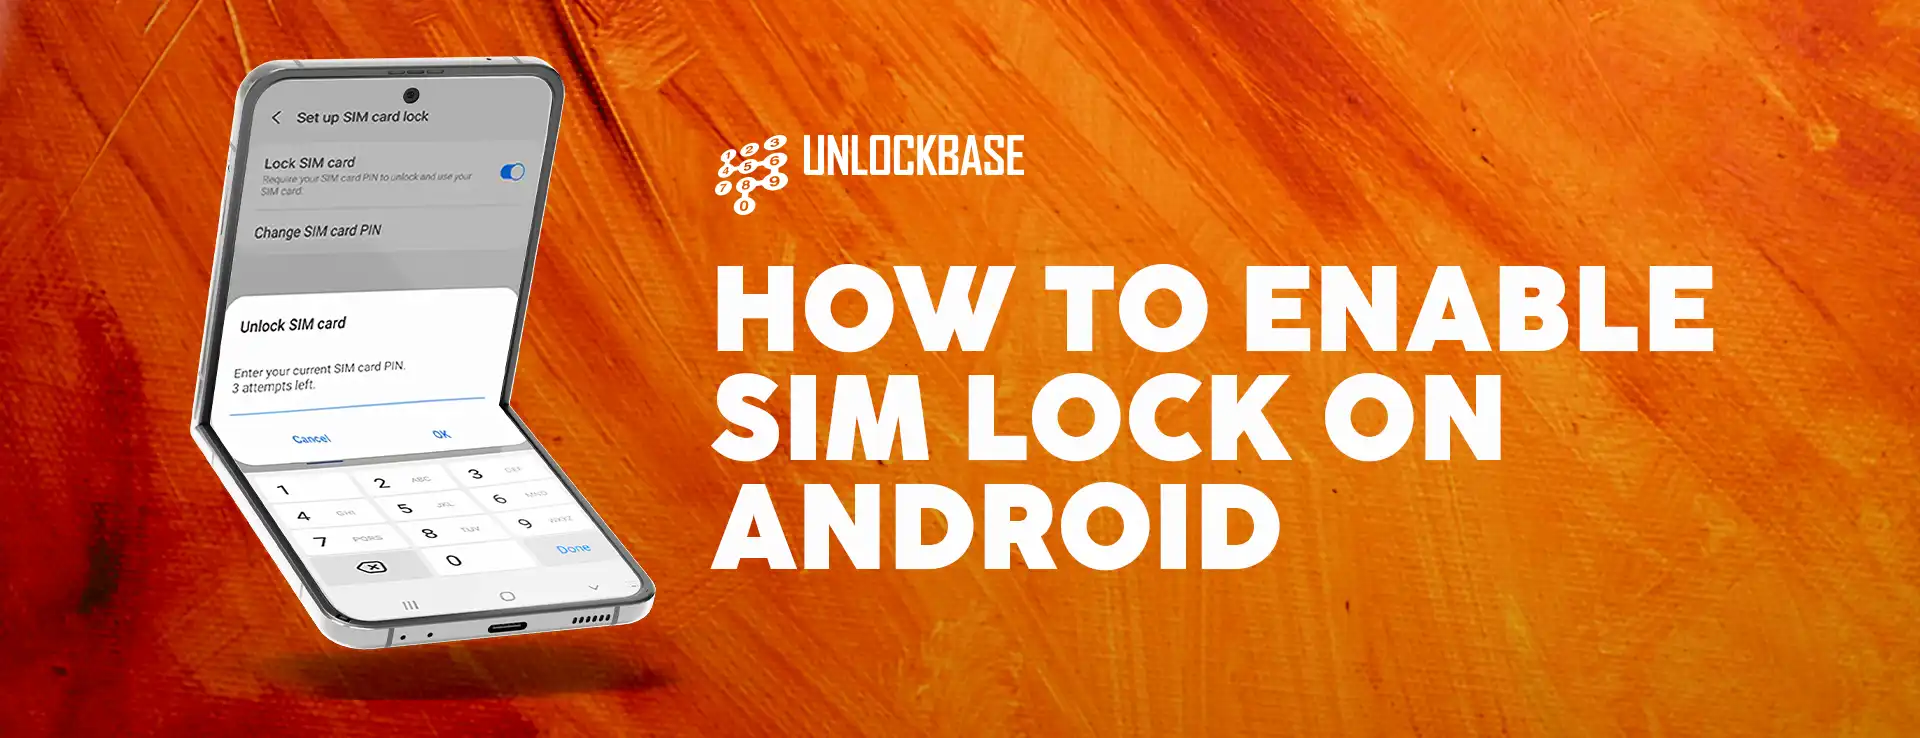
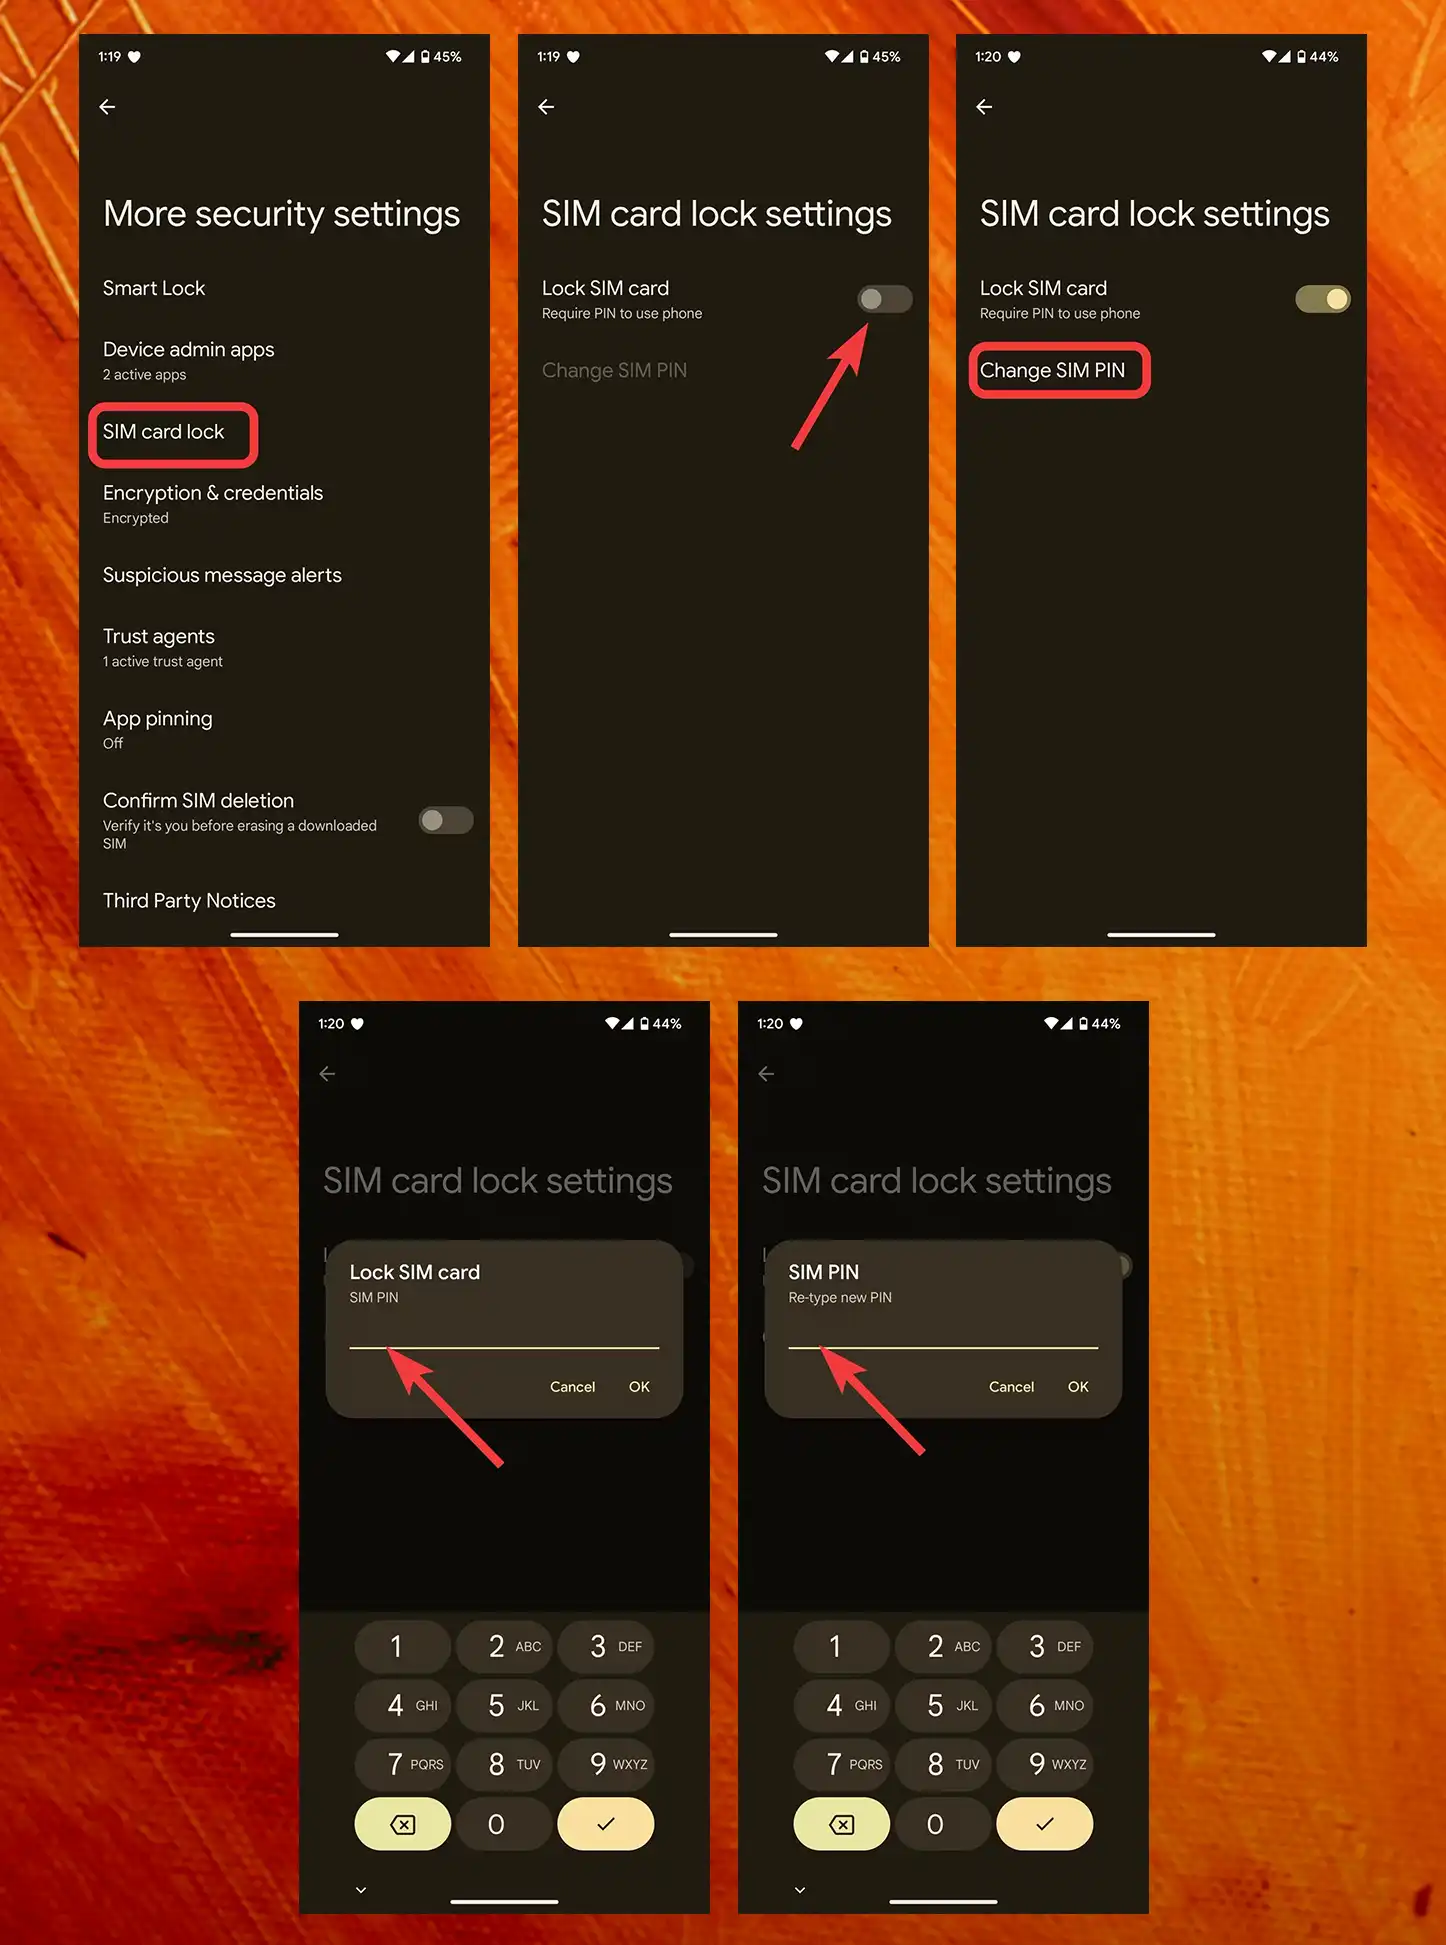
How to Enable SIM Lock on Android? Your phone’s SIM card plays a crucial role in making calls, sending texts, and connecting to mobile networks. Therefore, securing it is essential to protect your personal data and prevent unauthorized access. In this guide, we’ll explain SIM card locks and provide easy steps to enable this important security feature on your Android device.
What is a SIM Card Lock?
A SIM card lock serves as an additional security layer that requires a PIN to access carrier services. However, this differs from a carrier-locked phone, which can only use SIM cards from a specific carrier. You must enter the SIM lock PIN each time you turn on the phone, even if you move the SIM to a different device.
Why Use a SIM Lock?
SIM locks protect against SIM phishing (also known as SIM swapping), where scammers try to gain control of your mobile device by transferring your number to their SIM card. Consequently, by activating a SIM lock, you prevent unauthorized access to your carrier’s network through your SIM.
How to Enable SIM Lock on Android:
First, open the Settings app
Next, scroll to and select Security & Privacy
Then, tap More security settings
After that, select SIM card lock
Now, toggle on Lock SIM card
Subsequently, enter the default PIN (usually found on SIM packaging)
Finally, tap Change SIM PIN to create a new, secure PIN
For Samsung Devices:
Start by opening the Settings app
Then, tap Security and privacy
Next, select Other security settings
After that, tap Set up SIM card lock
Lastly, follow steps 5-7 above
How to Enable SIM Lock on Android : Important Tips
Before setting up the lock, make sure you know the default PIN set by your carrier
Additionally, store your new SIM PIN in a secure password manager
Moreover, if you get locked out after three incorrect attempts, use the Personal Unlock Key (PUK) from your SIM packaging or contact your carrier
Furthermore, you can protect eSIMs with a SIM lock using the same process
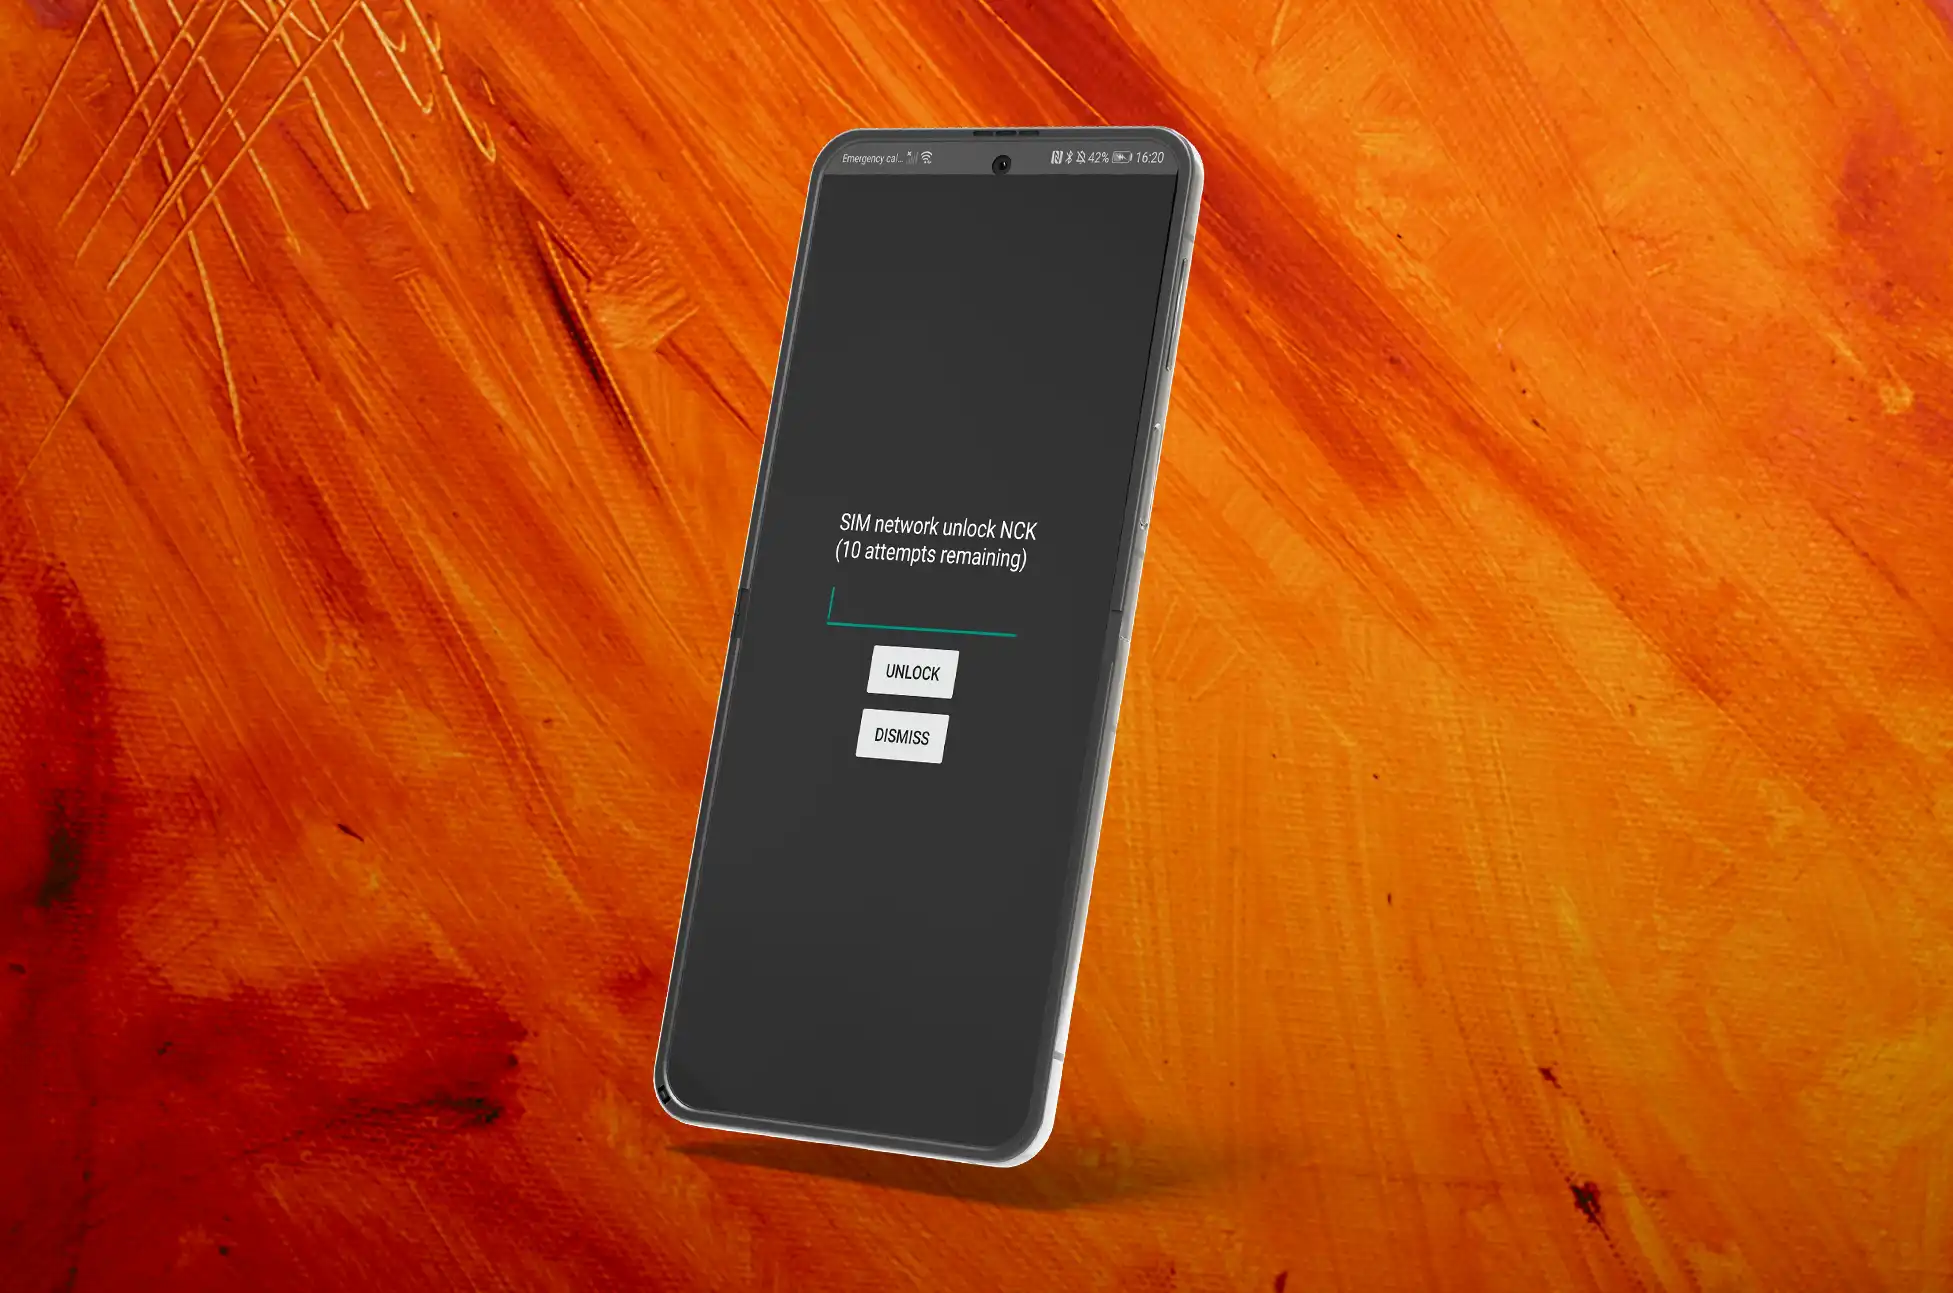
What If You’re Locked Out?
If you enter an incorrect PIN three times, you’ll need to enter a Personal Unlock Key (PUK). You can usually find this 8-digit number on your SIM packaging. However, if you don’t have it, contact your carrier to obtain the PUK after verifying your identity.
eSIM Security
Even if you use an eSIM, you can still activate a SIM card lock. In fact, eSIMs offer enhanced security as you can’t physically remove them from your phone, thus making unauthorized access even more difficult.
How to Enable SIM Lock on Android : Conclusion
Enabling SIM lock is a simple yet effective way to enhance your Android phone’s security. When combined with other best practices like strong passwords, spam blocking, and regular software updates, it helps safeguard your personal information from potential threats. Therefore, take this important step today to protect your mobile data and communications.
All products, and company names, logos, and service marks (collectively the "Trademarks") displayed are registered® and/or unregistered
trademarks™ of their respective owners.
The authors of this web site are not sponsored by or affiliated with any of the third-party trade mark or third-party registered trade mark owners,
and make no representations about them, their owners, their products or services.