
How to enter recovery mode on android?
Have you ever encountered an issue with your Android phone and wished you could easily solve it? This is where recovery mode comes into play. It’s a unique mode on your Android phone that allows you to troubleshoot issues, upgrade software, and even reset your phone to factory settings.
Android recovery mode is a function available on all Android phones, including the most affordable ones. You can do a simple factory reset, reboot into the bootloader to utilize Fastboot instructions, or install system updates from your local on-device storage when you boot into this mode. In a pinch, you can also perform a quick graphics test to ensure your device’s display functions properly, which can help you double-check your screen. This guide explains how to enter Android recovery mode and its different capabilities.
How to Enter Recovery Mode on Android
Accessing the main menu of Android recovery mode is straightforward once you’re familiar with the steps. Keep in mind that the exact procedure can vary a bit based on the brand of your device, but it’s mostly similar across different models. The most effective way to reach the Android recovery menu is by switching off your device and then holding down a specific combination of buttons for an extended period.
To enter Android recovery mode, perform the following steps:
- To start with your Android device turned on, press and hold the power button.
- Choose the ‘Power off‘ option.
- To enter the bootloader menu, often referred to as Fastboot Mode, simultaneously press and hold the volume down and power buttons. The simplest way to do this is to first long-press the volume down button and then press and hold the power button while still holding the volume down. For Samsung Galaxy users, pressing and holding the volume up and power buttons will lead you directly to the recovery menu’s main screen.
- Use the volume buttons to move through the menu and highlight ‘Recovery Mode’.
- Press the power button to select this option. You’ll see a ‘No command’ message and an Android icon with a red exclamation mark, which indicates you’re in the right place.
- Briefly hold the power button and quickly press the volume up button.
- You’re now in the Android recovery menu screen.
- To navigate this menu, use the volume keys and select your desired action with the power button.

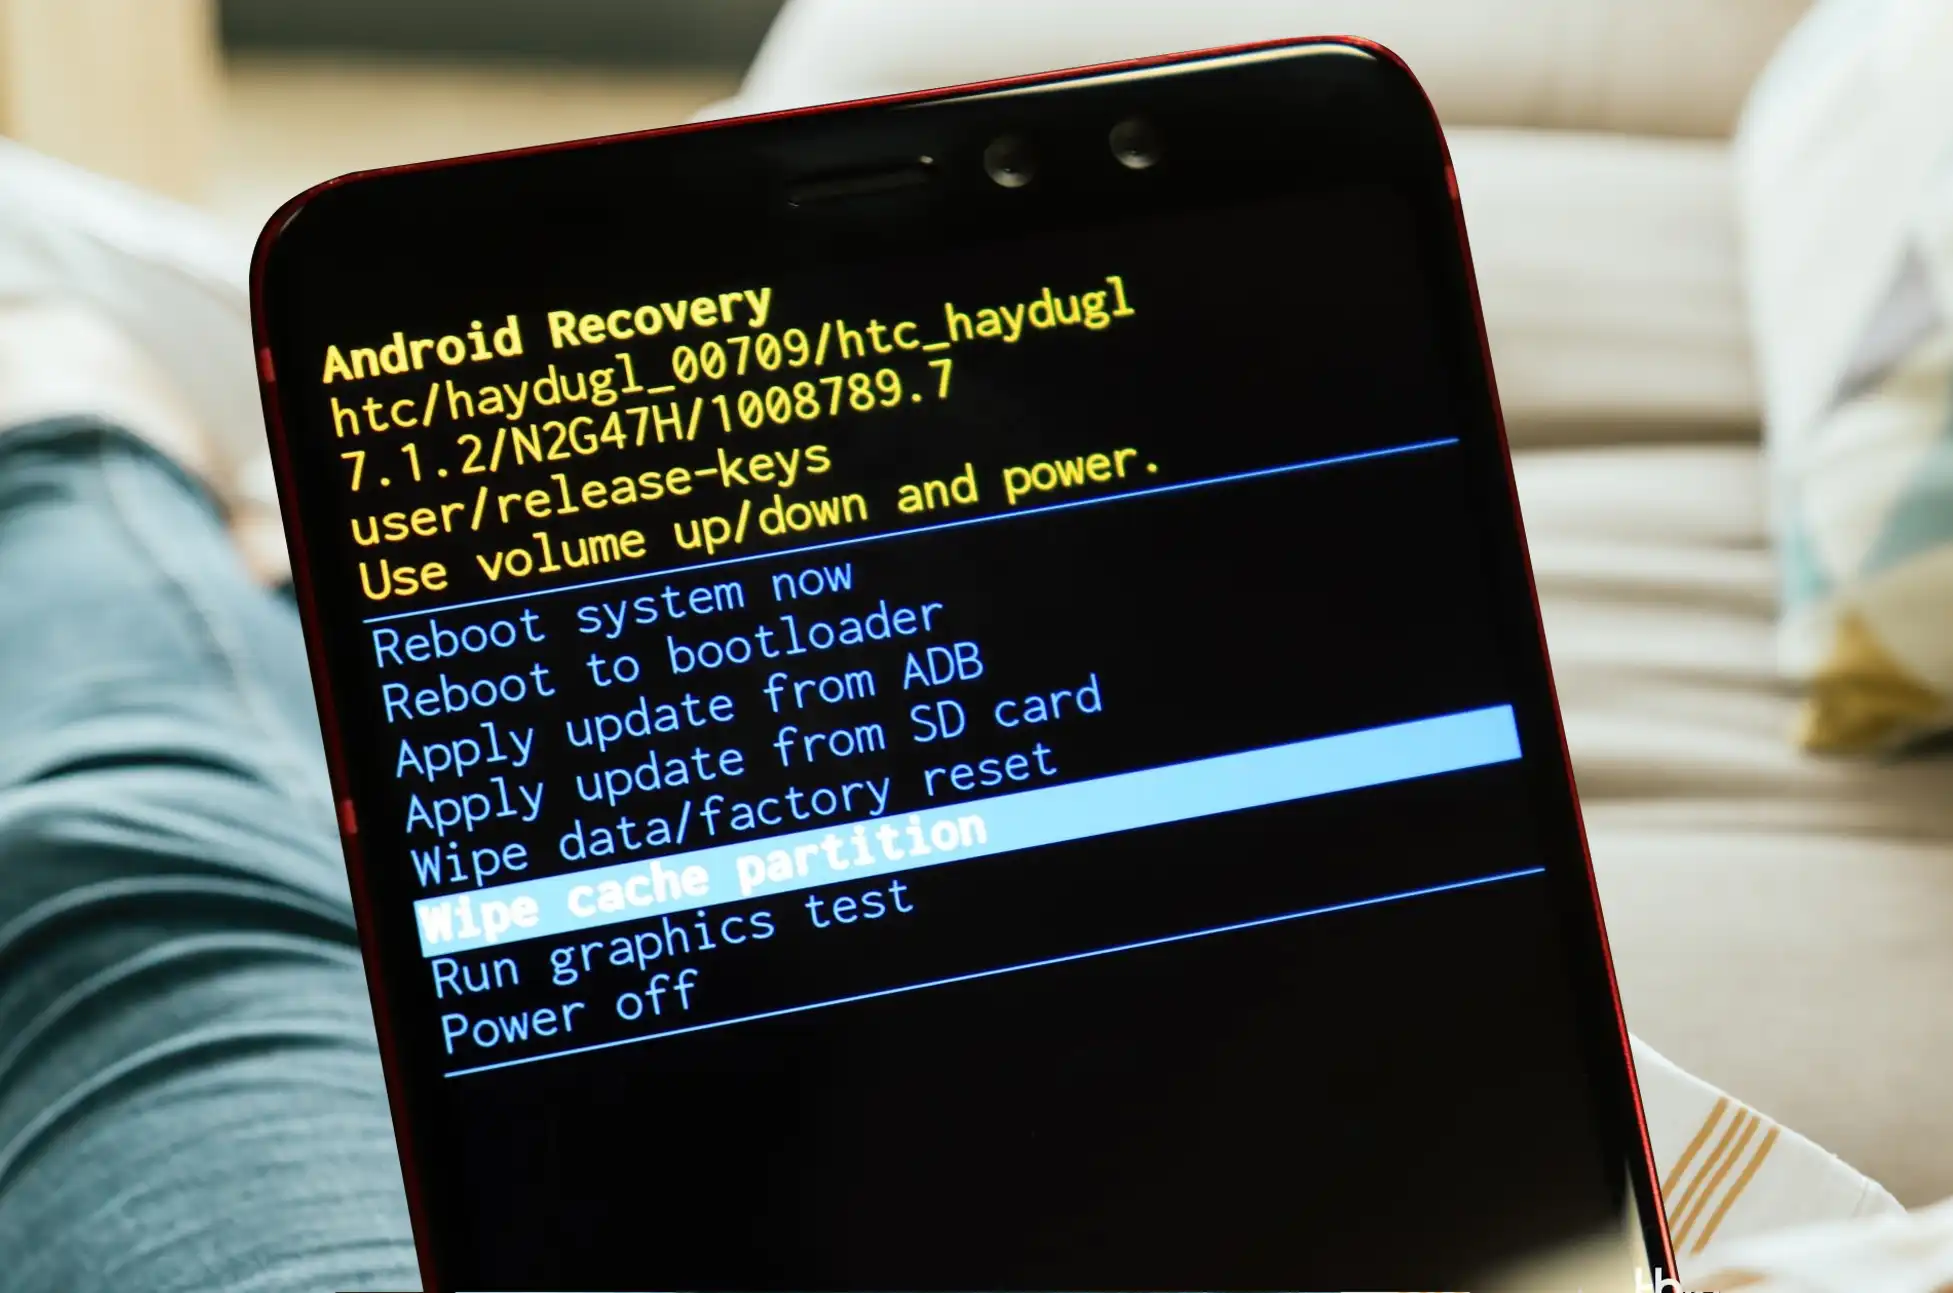
How to enter recovery mode on android : Features
Now that you’re familiar with how to enter Android recovery mode screen, let’s explore what you can do there. Most features in the Android recovery mode are common across different brands, so you’ll likely find them on any device. However, some specific devices, like Samsung Galaxy phones, might offer additional options, such as ‘Repair apps’. Below, we’ll give you a quick rundown of each feature, so you know what they’re for and how they can help.
How to enter recovery mode on android: Reboot System
This option is for when you’re done in the recovery menu or if you entered it by accident and want to exit. Choosing this will reboot your device normally, and you’ll quickly find yourself back at the lock screen, just like a regular startup.
Enter Fastboot
This option lets you access the fastbootd menu, a special interface for installing custom firmware or ROMs without needing a custom recovery. It’s not something you’ll use often, as this menu typically appears on its own when you’re installing system images through the main bootloader menu. When you select this feature, you’ll have options to restart your device normally, go back to the recovery screen, reboot into the bootloader, or turn off your device again.
You can also visit another article here: https://www.unlockbase.com/blog/android-recovery-mode/
Apply Update from ADB
This feature comes in handy when your device’s manufacturer allows you to download firmware updates directly. It enables you to manually install these updates, skipping the standard system update process. For those familiar with ADB commands, using this method to sideload an OTA (Over-The-Air) or system update is both quick and easy.
Apply Update from SD Card
This option works like the ‘Apply update from ADB’ feature but allows you to install updates from the storage on your device itself. If you’re not at ease using ADB commands and your device manufacturer permits downloading system update files, this method is an excellent alternative for manually updating your device.
Factory Reset
This is a frequently used feature as it enables you to perform a complete factory reset on your device, similar to how you would do it from the Settings app. If your device isn’t booting into Android but you can get to the recovery menu, a factory reset might be the solution to revive it. Android system files can sometimes become corrupted during an update or in other situations. In cases like these, a factory reset is always an option to consider for restoring your device.
Wipe Cache Partition
This option, found on certain devices like Samsung Galaxy phones, lets you clear your system cache all at once. The system cache, which stores temporary files from your apps, can slow down your device, particularly if you have many apps and haven’t cleared the cache in a while. Choosing this option deletes the cache partition, giving your device a clean slate. This can often resolve issues with apps that you may have been experiencing.
View Recovery Logs
This feature comes in handy if you’ve spent some time in the recovery mode. It allows you to view a temporary log that records and timestamps the actions you’ve taken during the current recovery session. It’s particularly useful for keeping track of the steps you’ve already completed, especially if you need to recall earlier actions.
Run Graphics Test
This feature conducts a swift check to confirm that the graphics and display of your device are working correctly. It performs a series of visual tests related to recovery mode, which only take a few moments to finish. While it might appear as though it’s erasing your device data or installing an update, it’s actually not doing either of those things. It’s simply a quick test to ensure everything is functioning as it should visually.
Run Locale Test
This is another straightforward test available in recovery mode, designed to showcase the additional languages your device is capable of displaying. It acts as an extension to the ‘Run graphics test’ option. This feature enables you to view various default messages displayed in different languages, allowing you to check the language display capabilities of your device.
Repair Applications
This option is commonly available on many Samsung devices. It lets you reoptimize your apps, similar to what happens after a system update. This can be particularly useful if your apps are running slowly or causing other issues. By optimizing your apps through this method, you can often restore them to optimal performance. Additionally, it may resolve any problems you’re experiencing with your installed apps.
How to enter recovery mode on android: Conclusion
If your device isn’t starting up properly, or you need to access advanced options like ADB or Fastboot commands, the recovery mode feature in the Android operating system is your go-to solution. Using recovery mode to perform a factory reset can often revive a device that’s stuck in a boot loop, even when it seems irreparably damaged. For Samsung Galaxy users, the ‘Repair apps’ option is a great tool for maintaining optimal device performance. Regardless of why you need to enter recovery mode, it’s always there to assist you.
Armed with this understanding of Android’s recovery mode and its capabilities, it’s a good idea to learn how to back up your Android phone. This ensures your data remains secure, especially before carrying out a factory reset. We’ve got you covered with essential data recovery techniques, so you don’t risk losing your valuable information.
All products, and company names, logos, and service marks (collectively the "Trademarks") displayed are registered® and/or unregistered trademarks™ of their respective owners. The authors of this web site are not sponsored by or affiliated with any of the third-party trade mark or third-party registered trade mark owners, and make no representations about them, their owners, their products or services.
Comments are closed.