
Welcome to the convenient world of the Google Pixel eSIM, specifically for your new Google Pixel 8! This blog post is dedicated to helping you smoothly set up your eSIM on the Pixel 8, ensuring you make the most out of this innovative feature.
What is an eSIM?
An eSIM (embedded SIM) is a digital SIM that allows you to activate a cellular plan without the need for a physical SIM card. The Pixel 8’s Google Pixel eSIM function provides a simple way to stay connected.
Benefits of Using eSim on your Google Pixel 8
- Hassle-free carrier switching
- No need for physical SIM cards
- Perfect for international travel
- Manage multiple numbers on one device
How to Activate your Google Pixel 8 eSIM?
Activate your Google Pixel eSIM during your Pixel 8 setup process. You don’t need to reset your Pixel 8 if you wish to activate it later or if there was a problem. After setup, follow the instructions for activating an eSim.
Activate an eSim during the set up process
After connecting your phone to Wi-Fi, you’ll be prompted to connect to your carrier’s network if you purchased an eSim from them along with the phone. It takes roughly five minutes to get an eSIM profile in this method.
If your Google Pixel eSIM does not appear at this point, you can manually locate it by following the instructions below.
Activate an eSim after your phone is set up
This approach may be used to activate Google Pixel eSIM at any time, whether you recently purchased a Pixel 8 or are converting from a standard SIM card to an eSIM. Your only requirement is the QR code issued by your carrier. If you don’t have a QR code, contact your carrier’s customer service.
Note: Most of these procedures can be skipped by scanning the QR code with your Pixel phone’s camera app. This opens the download confirmation screen.
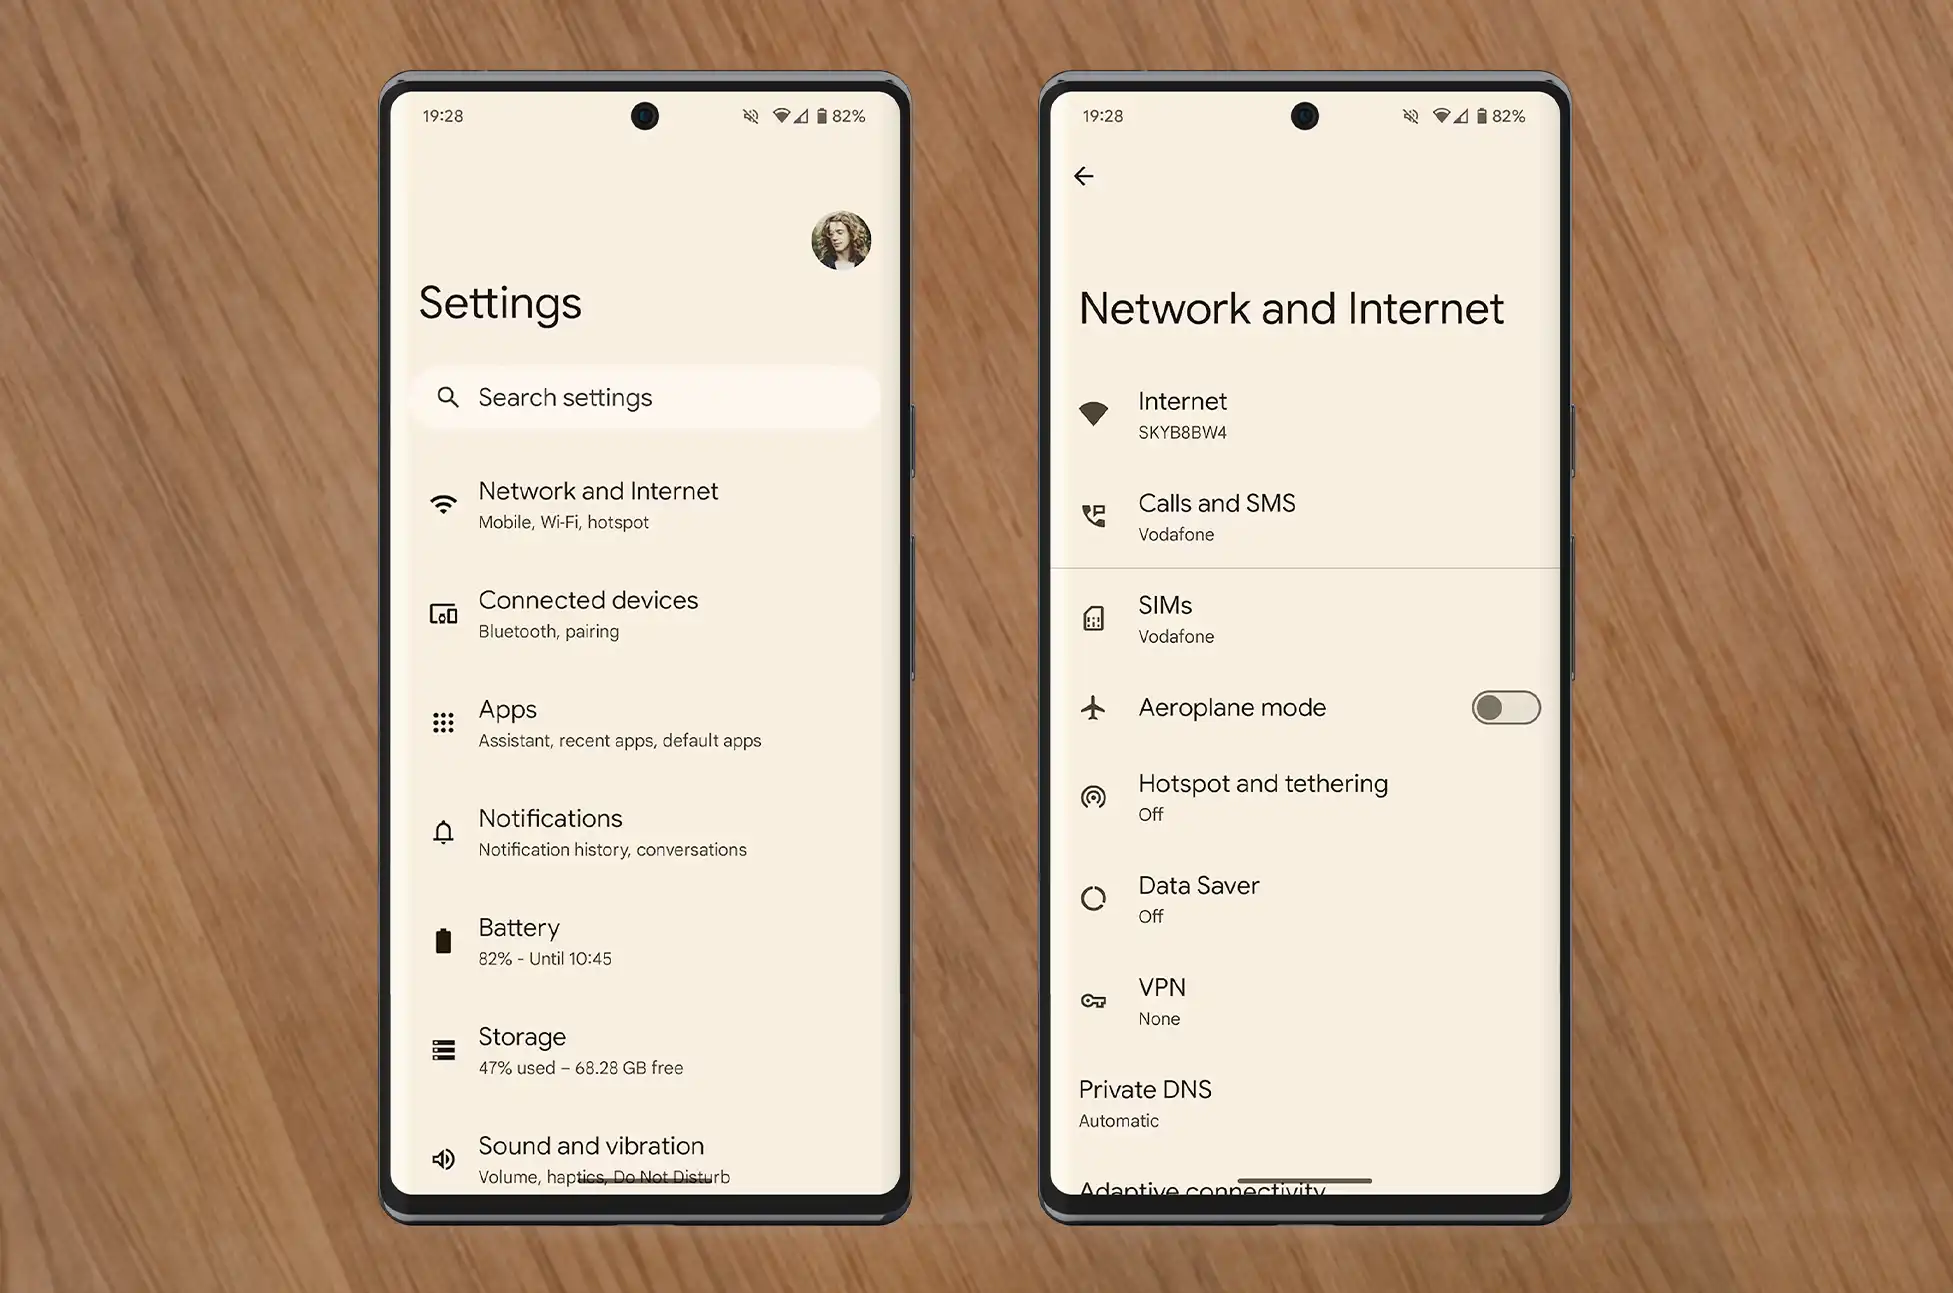
- Open the Settings app on your Pixel 8
- Select Network & Internet
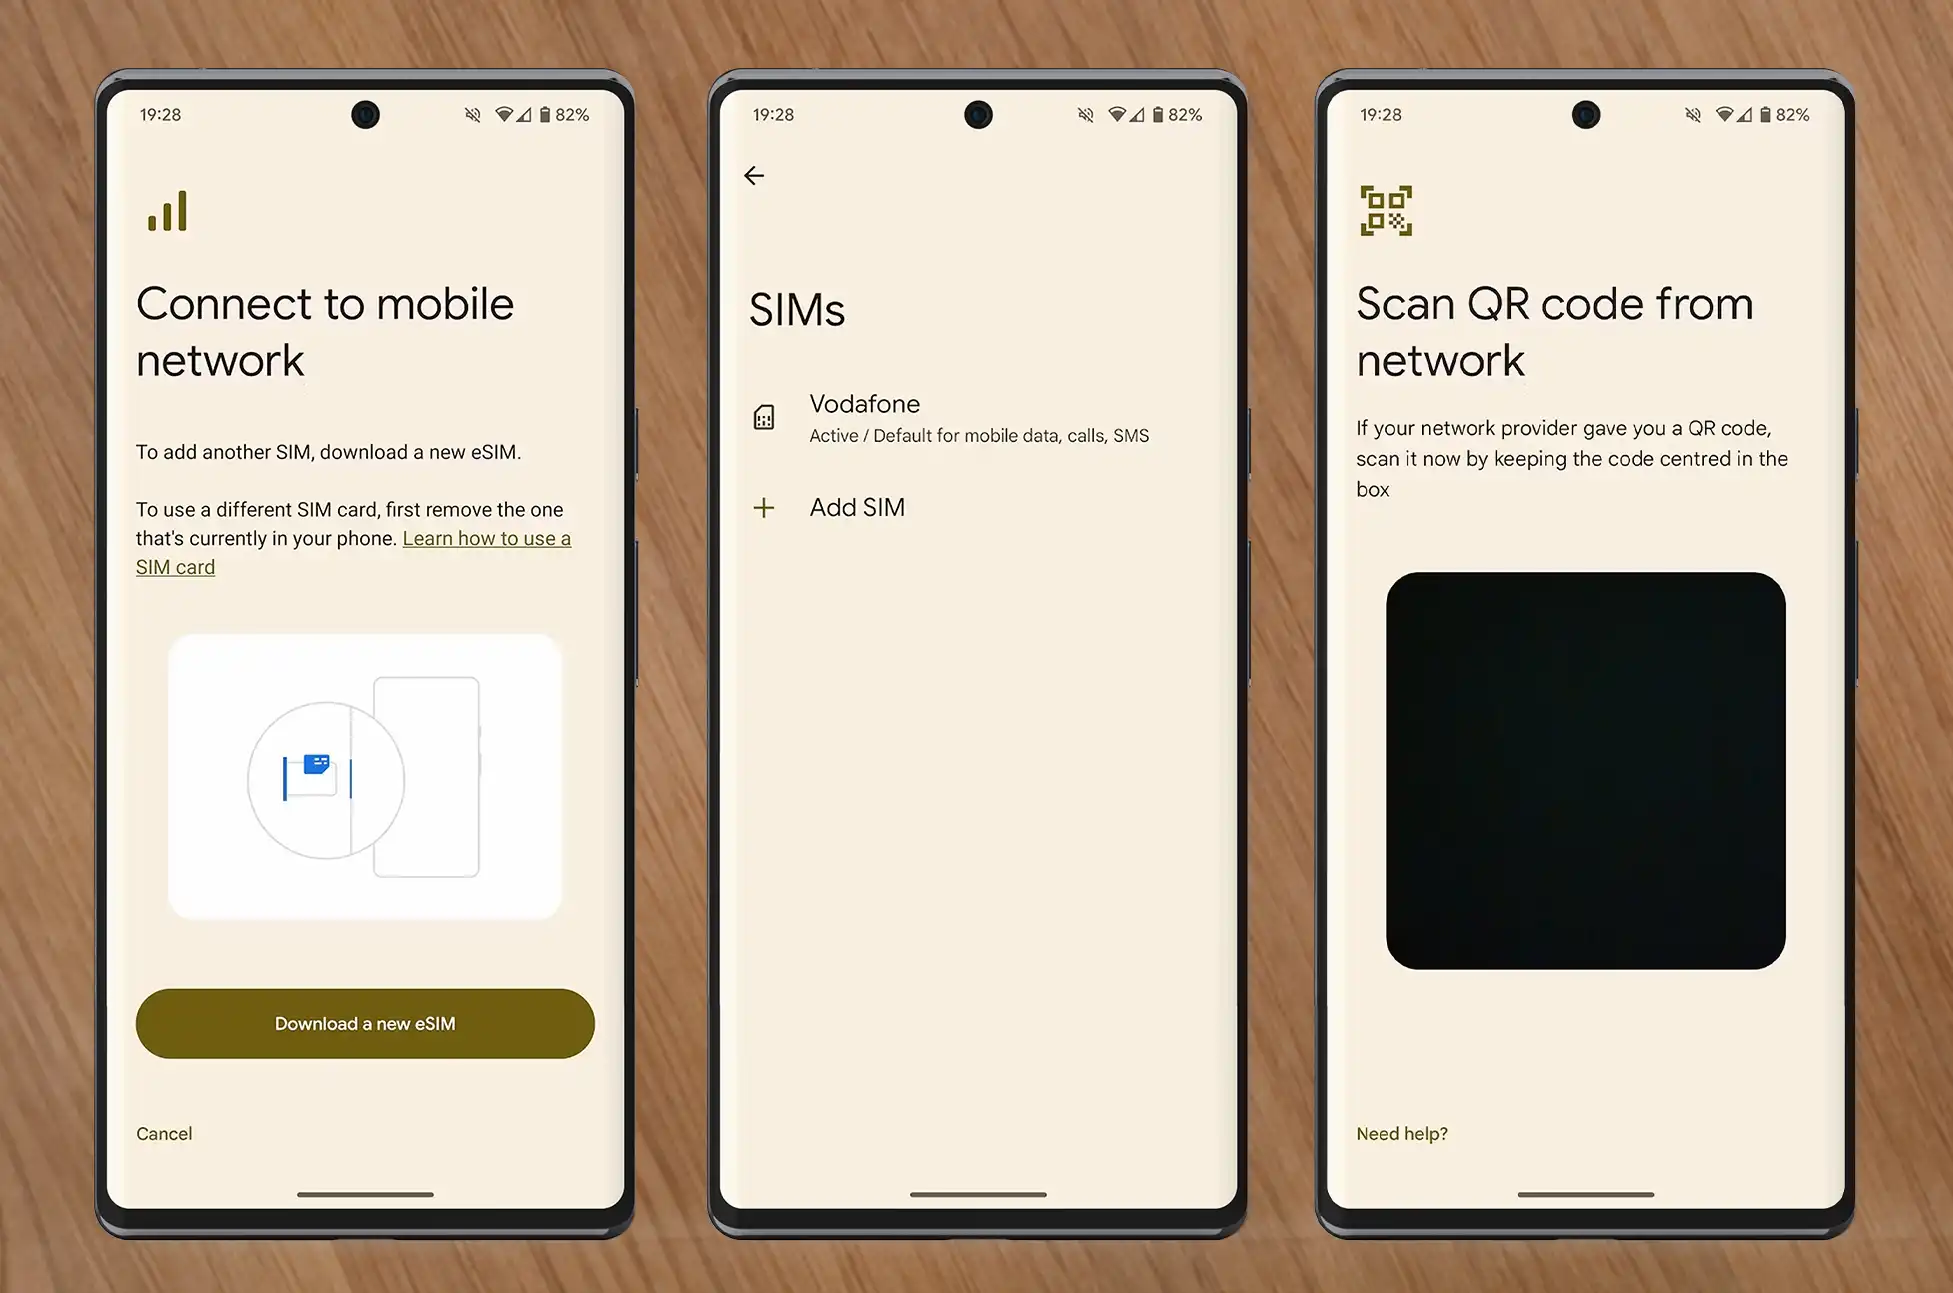
- Click SIMs
- Click Add SIM
- Click Download a new eSIM
- Scan the QR code provided by your service provider
- Tap Download in the lower-right corner of your screen to confirm your eSIM
It takes roughly five minutes to download your eSIM. Your Pixel 8 phone will automatically connect to your carrier’s network once it has been downloaded.
How to Transfer an Existing eSIM to a Pixel 8
When switching from a previous Pixel phone to a Pixel 8, you can transfer your eSIM without manually deactivating and reactivating it. While you can only transfer eSIMs to a Pixel 8, you may transfer from any Pixel phone that supports eSIM.
This option arises throughout the Pixel 8 phone setup process. Transfer your eSIM after setting up your Pixel 8 by deactivating it on your previous phone and following the procedures above to activate a new eSIM. This may entail contacting your carrier.
Troubleshooting
- Restart your Pixel 8 if you face any setup issues.
- Reach out to your carrier for help with the Google Pixel eSIM activation.
- Keep your device updated for the best performance.
Conclusion
The Google Pixel eSIM on your Pixel 8 brings a new level of ease and flexibility to your mobile experience. Ideal for travelers or those who prefer digital solutions, the eSIM feature is a significant advantage of the Pixel 8. Enjoy staying connected with minimal fuss and maximum efficiency!
All products, and company names, logos, and service marks (collectively the "Trademarks") displayed are registered® and/or unregistered trademarks™ of their respective owners. The authors of this web site are not sponsored by or affiliated with any of the third-party trade mark or third-party registered trade mark owners, and make no representations about them, their owners, their products or services.
Comments are closed.